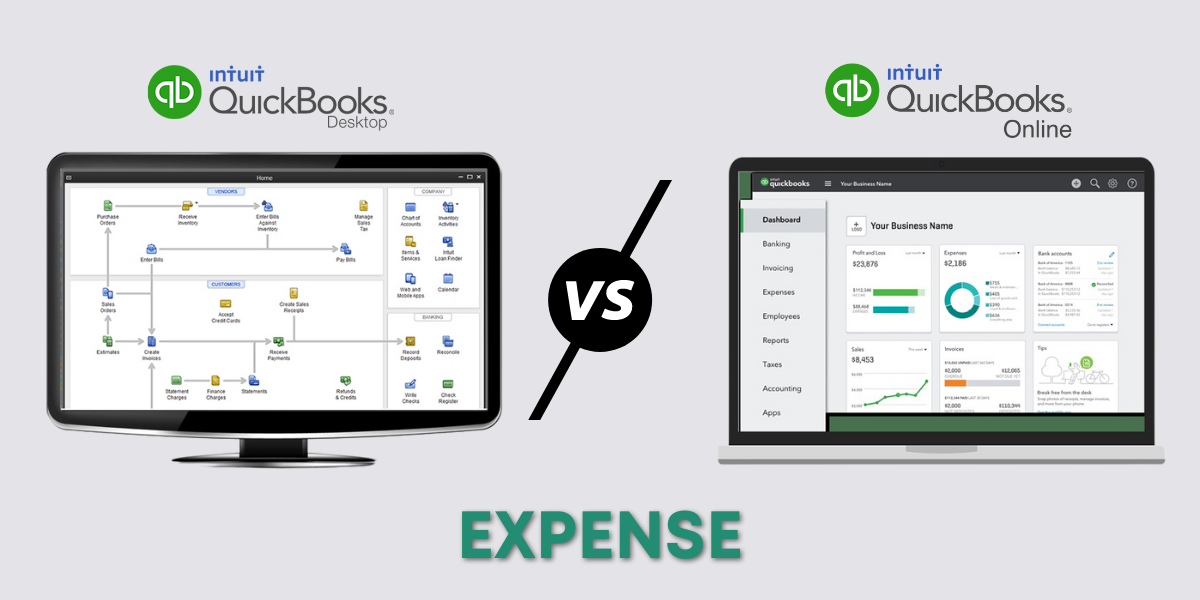
This is part of a series comparing QuickBooks Online to QuickBooks Desktop. I’ll be showing you how to do common tasks in both versions of QuickBooks. So you can decide which version would work better for your business.
In this post, I’ll show you how to record an expense in both QuickBooks Desktop and QuickBooks Online.
An expense is when you spend money on supplies or services for your business.
Recording expenses in both versions of QuickBooks is a little different depending on how you paid for the expense.
We’ll start with Desktop.
Record an Expense in QuickBooks Desktop
Debit Card / Check
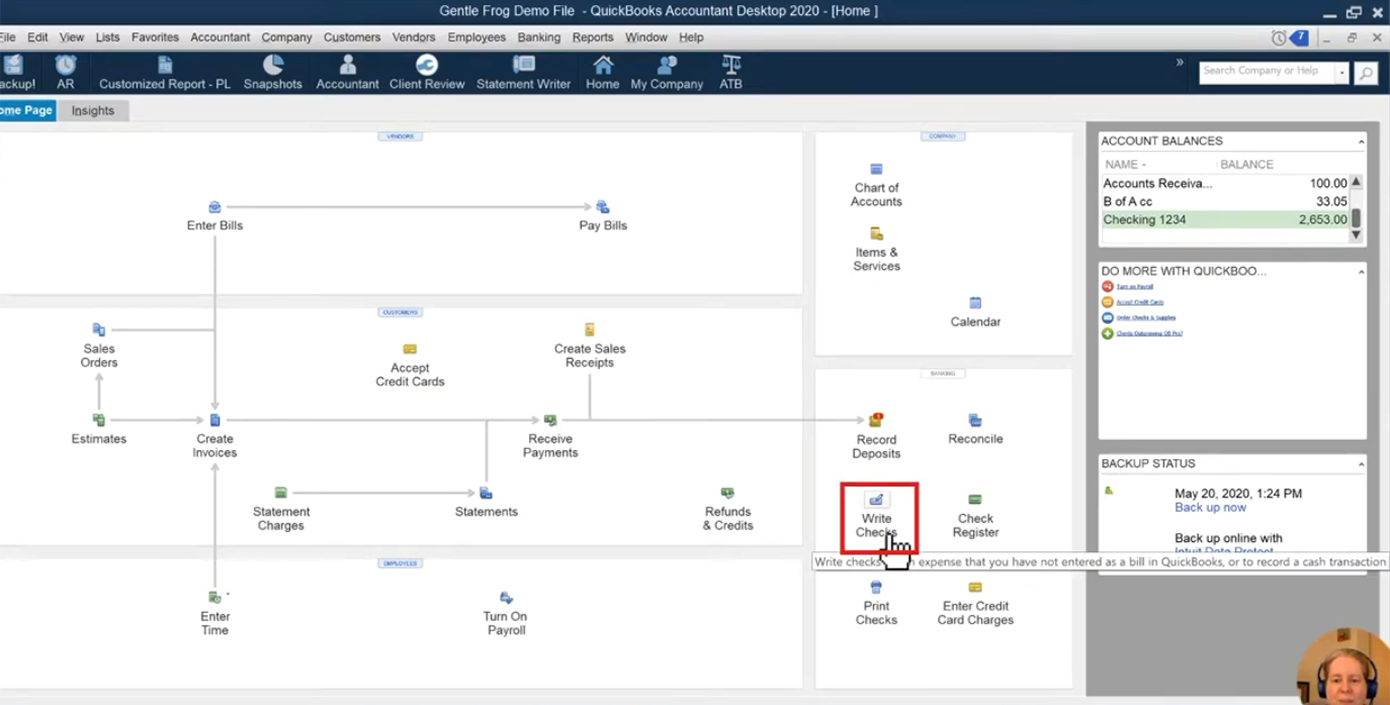
To record an expense in QuickBooks Desktop that was paid for with a debit card or check. Click the Write Check icon on the right-hand side of the homepage.
In this example, I’m going to pretend that I used a debit card to buy $50 worth of office supplies from Staples.
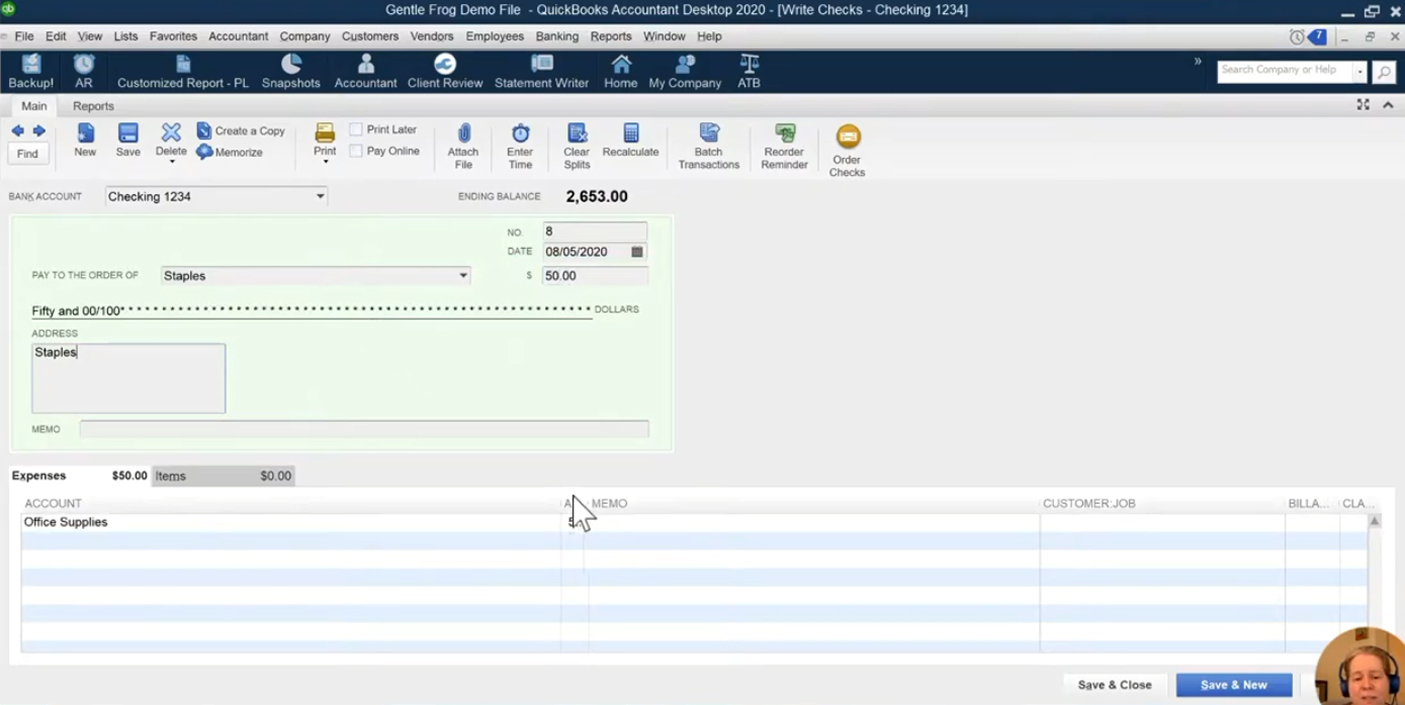
In the Bank Account drop-down menu you select the bank account the money is coming out of.
Pay to the Order Of is the person or business you’ll be paying. Staples in this example.
The check number gets entered next to NO., there’s also a field for the date and the amount.
A nice thing about either version of QuickBooks is that it auto-fills the category if it recognizes the vendor. In this example QuickBooks recognized Staples. It auto-filled in Office Supplies as the category.
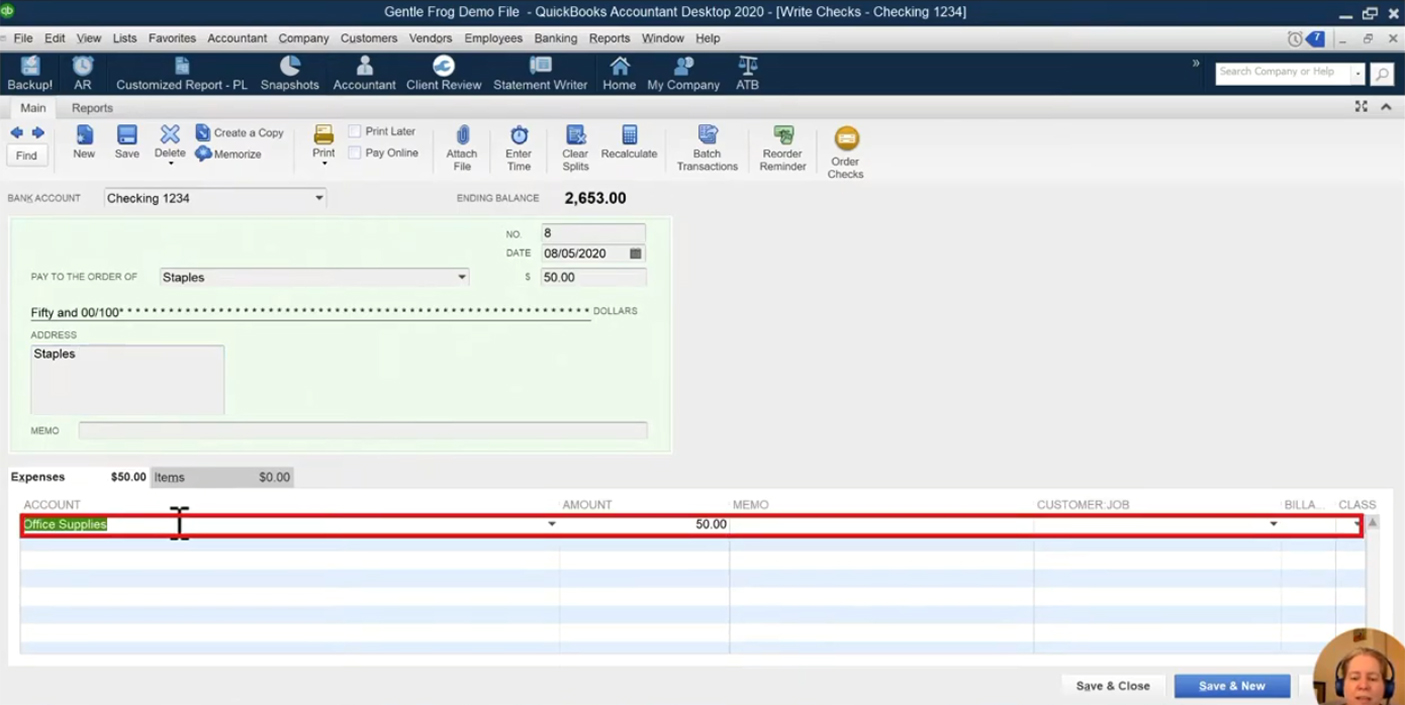
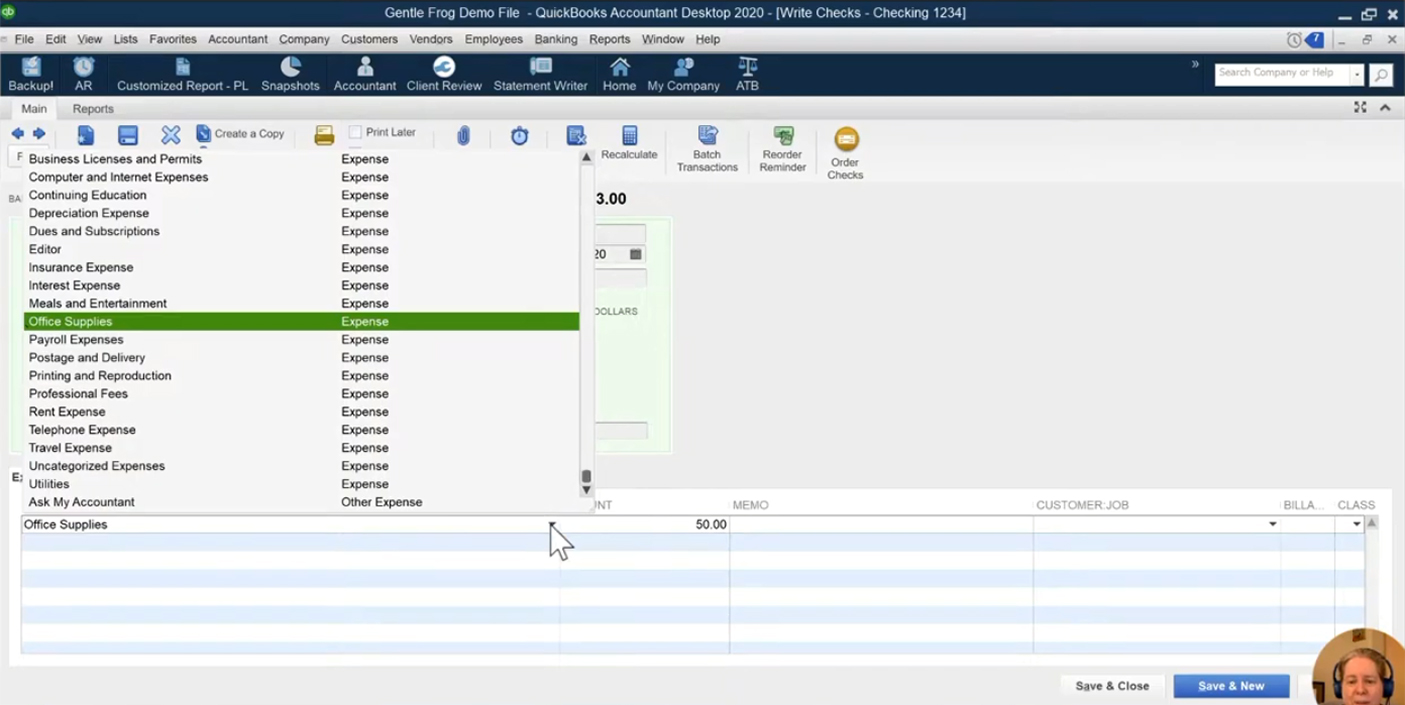
If the category it suggests is incorrect you can change it. Click the drop-down arrow and select a different category from the list.
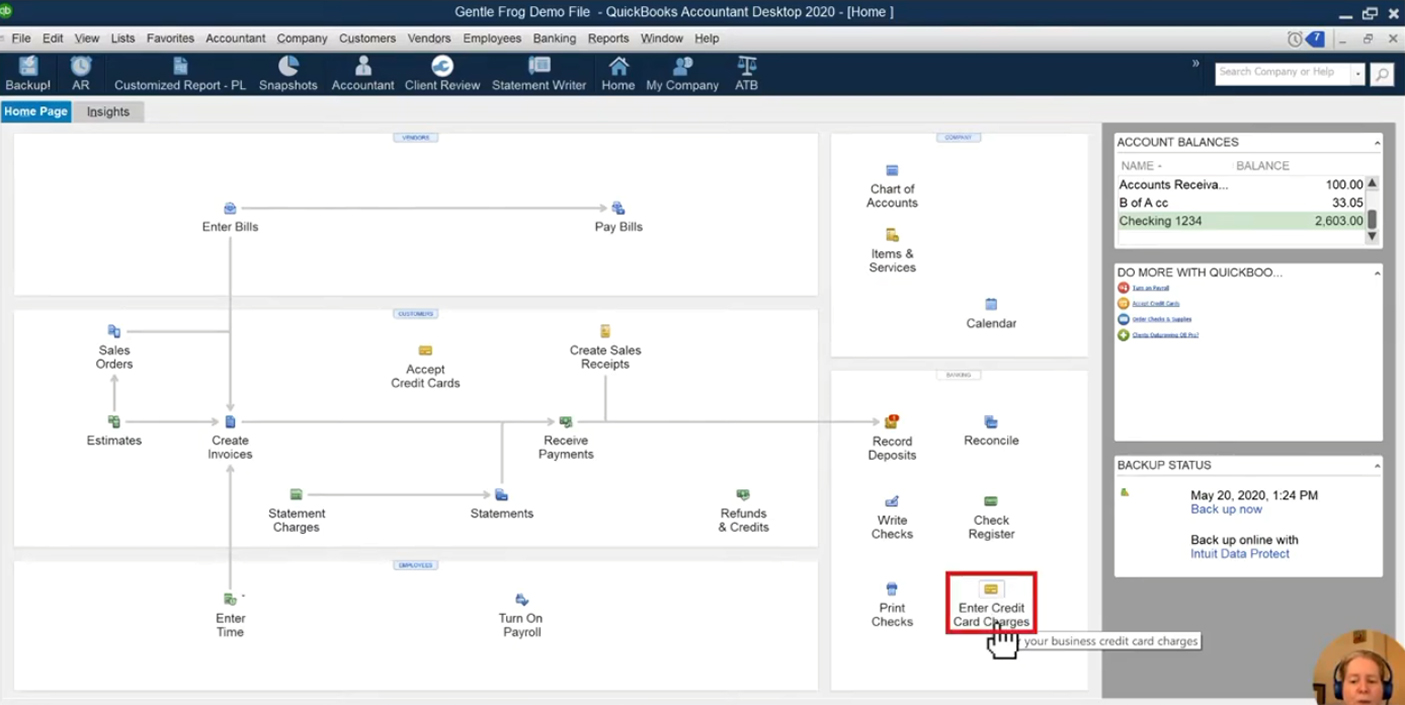
Credit Card
To record an expense paid for with a credit card. On the homepage click the Enter Credit Card Charges icon.
The next screen is similar to the Write Check screen. The biggest difference is that there’s no option to select a Bank Account. Instead, you’ll only be able to pick from Credit Cards you’ve saved in your QuickBooks account.
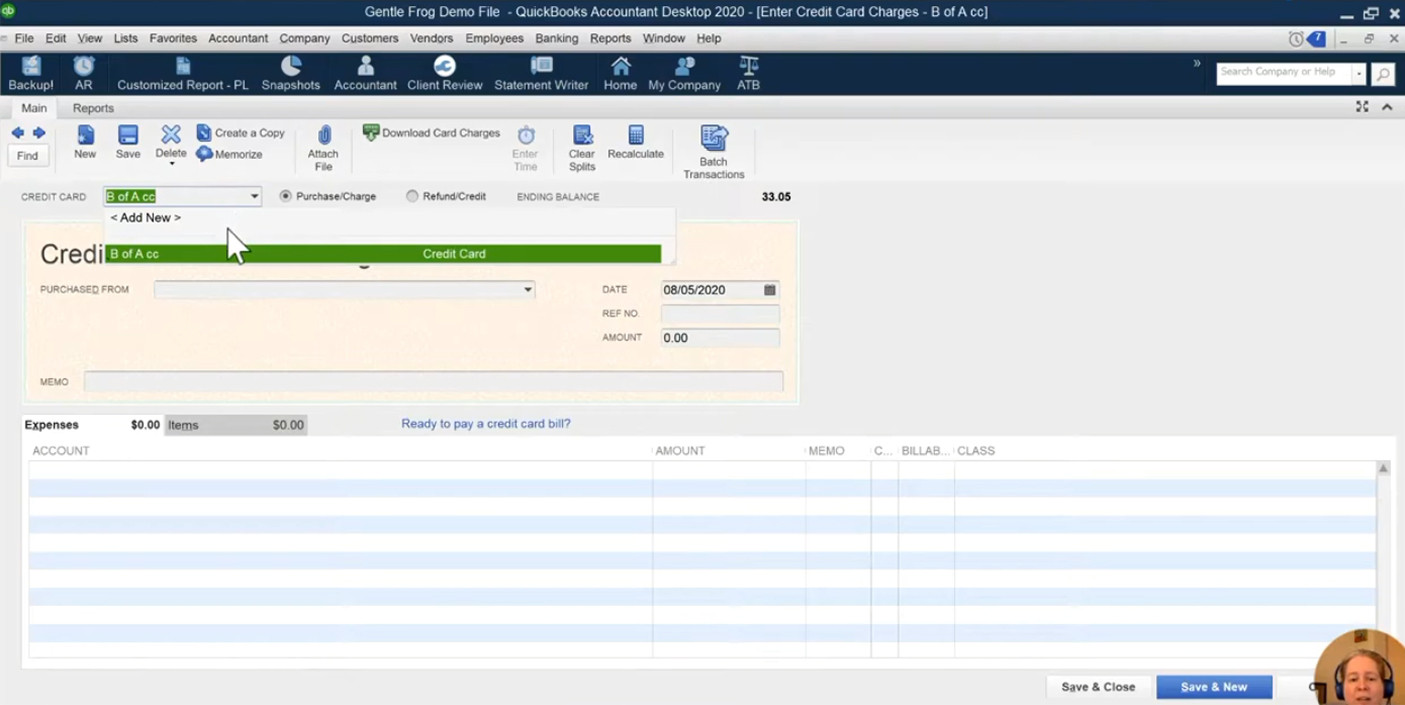
This makes it harder to accidentally record a credit card purchase as a debit card purchase.
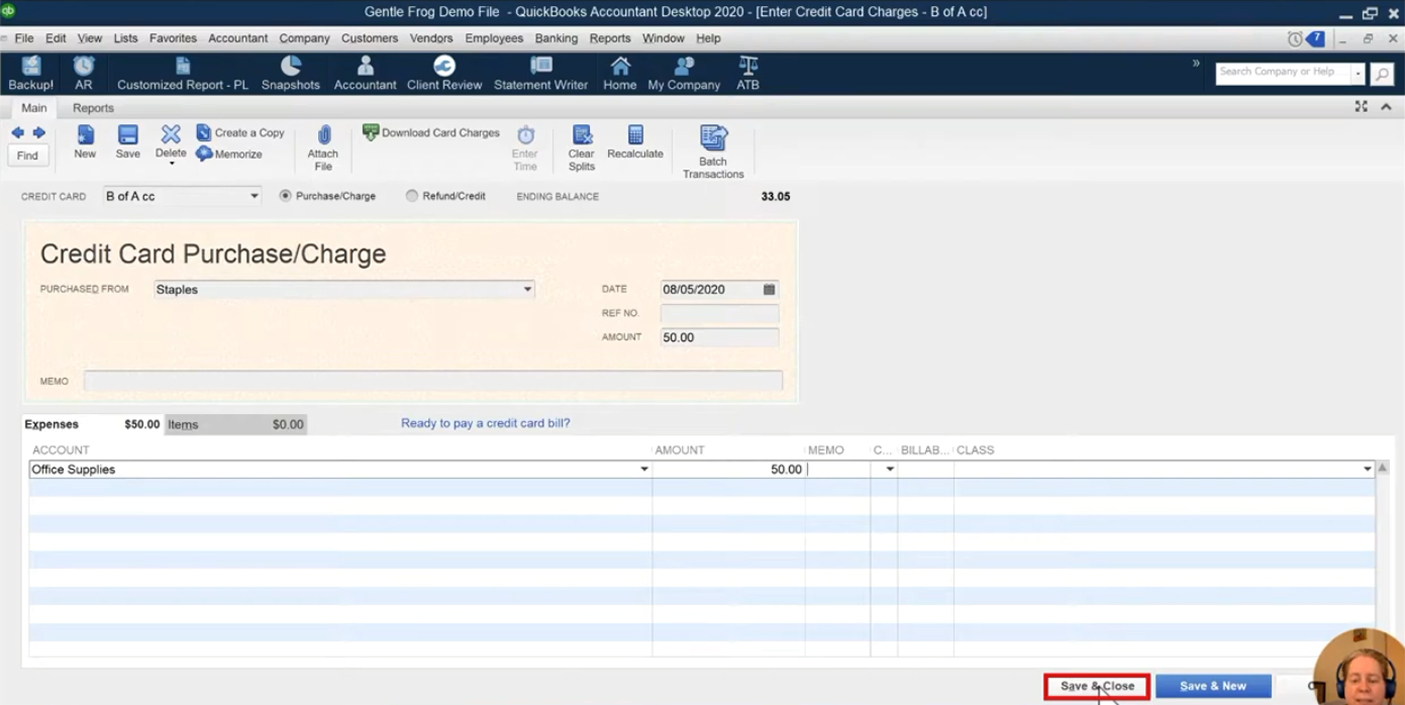
I’ll enter a $50 Staples office supplies expense like I did previously. When I’m done I click the Save and Close button at the bottom of the screen.
Record an Expense in QuickBooks Online
Like QuickBooks Desktop there are two ways to record an expense, Expense or Check.
Check is obvious, it’s for anything that you paid for with a check.
Expense is where you’d record an expense that you paid for with a credit card or cash.
You can record a debit card purchase in either, I prefer to use expense.
Check
To record a check in QuickBooks Online click the + New button in the upper left corner. Then select Check under Vendors.
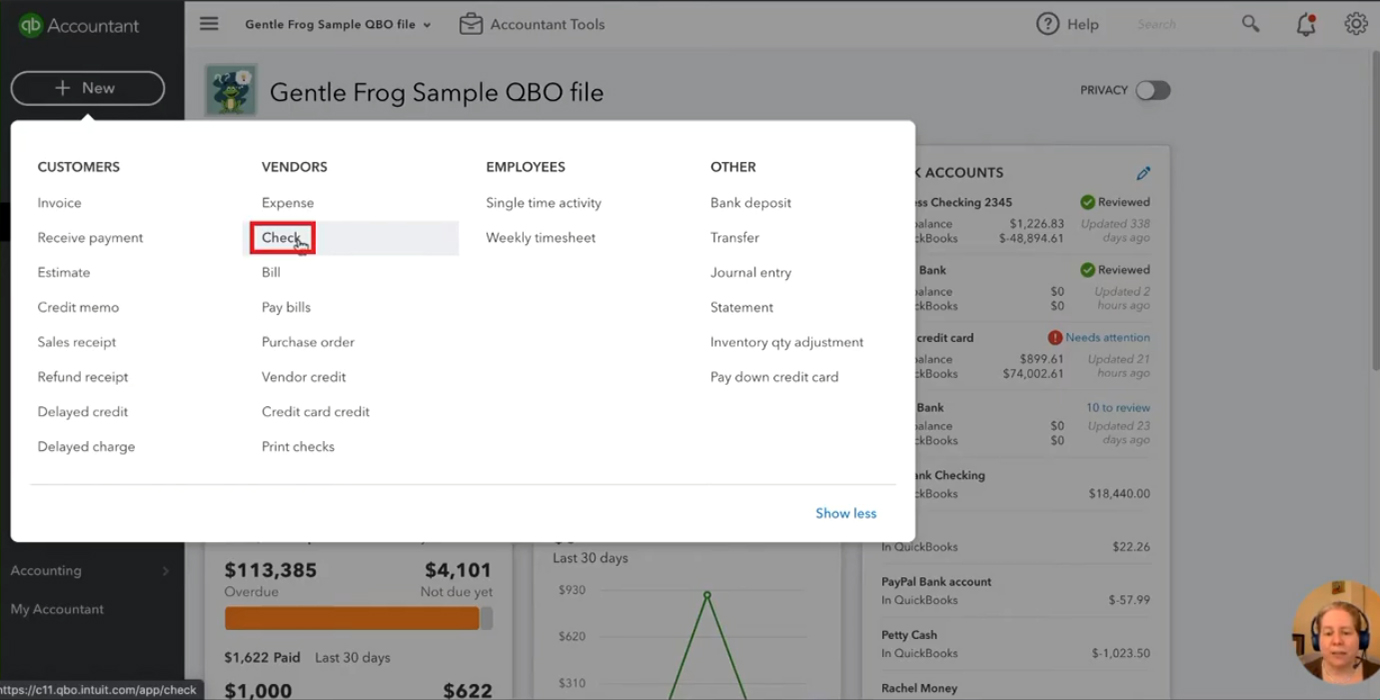
You’ll be able to pick the Bank Account the check was written from.
You can then enter a check number and there’s an option to print the check later or you can print it now.
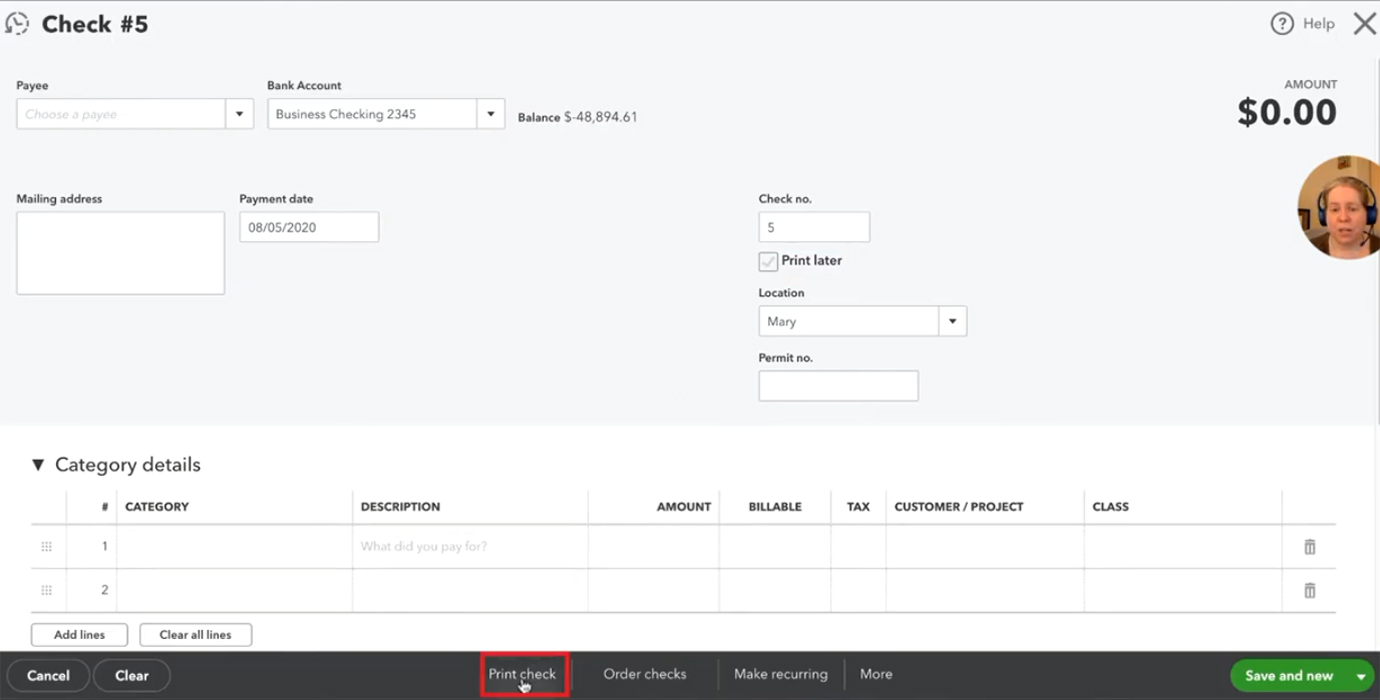
You can enter debit card payments here. I prefer to only use Check for expenses that I paid for with a physical check. For everything else I prefer to use expense.
Expense
To record an expense that for was paid for with anything bedsides a physical check. Click the + New button in the upper left corner. Then select Expense under Vendors.
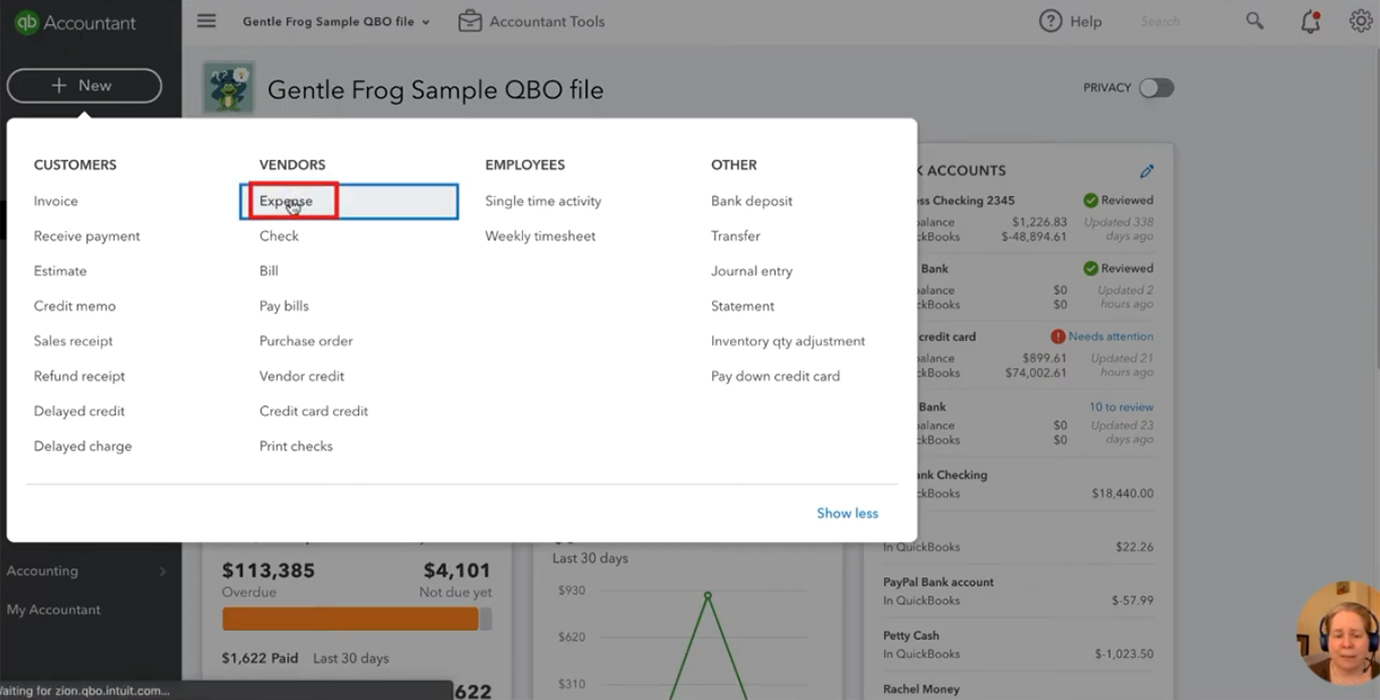
Most of the time we’re not handwriting checks to pay for expenses. We’re using the debit or the credit card.
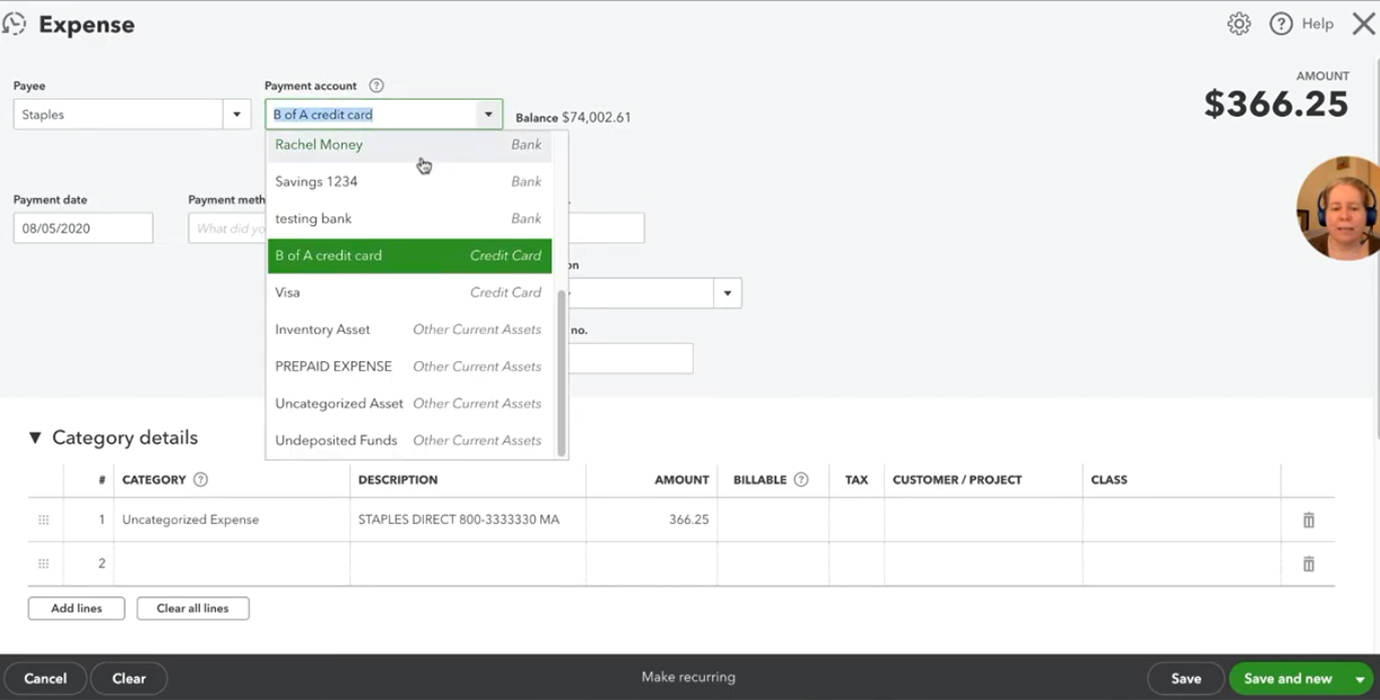
In Expense you have the option to select a payment from your credit card, checking account (debit card) or even petty cash.
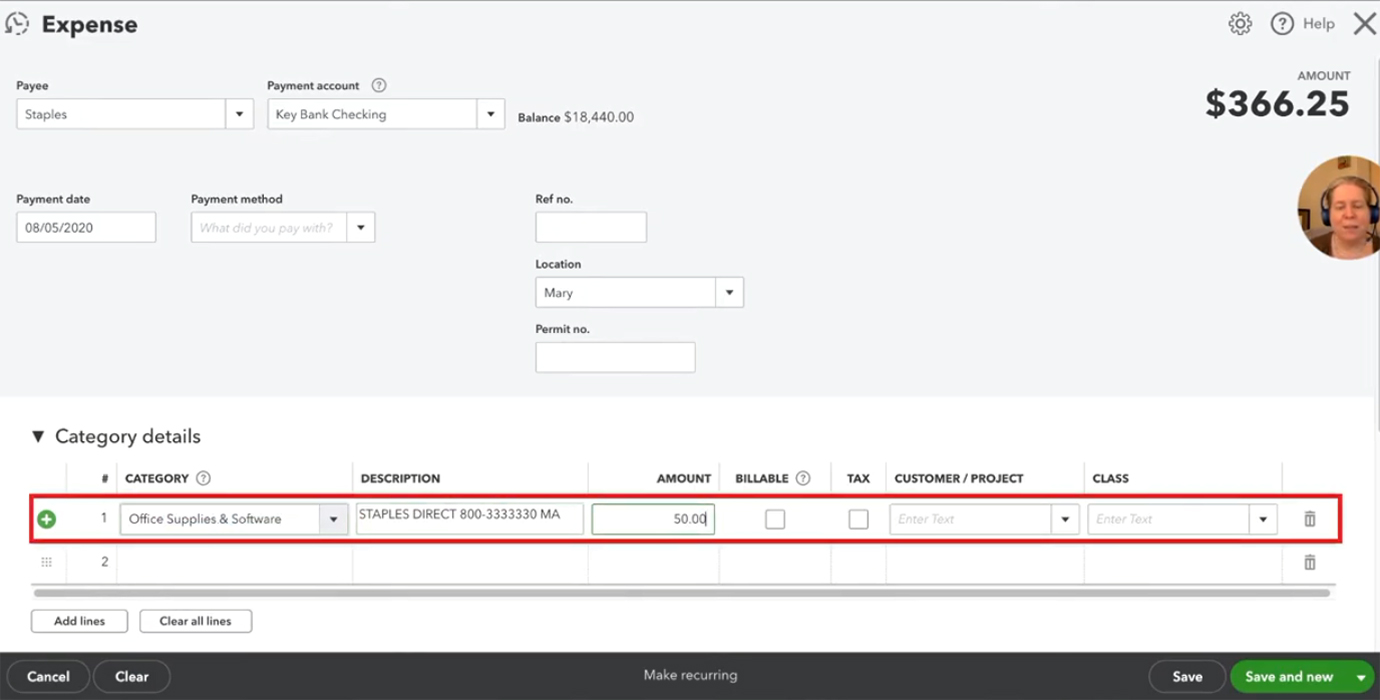
Once again I’ll enter a $50 expense for office supplies from Staples. QuickBooks Online also remembers and auto-fills categories and descriptions. It auto-filled both the category and description in this example from the last time I entered a Staples expense.
There you go. That’s how you enter expenses in both QuickBooks Desktop and QuickBooks Online. They’re similar but they do have their differences.
As I go through this series comparing the two versions of QuickBooks I want to emphasize that neither software is better or worse. But you may have a preference for one over the other.
Feel free to comment and let me know which version you prefer.
☕ If you found this helpful you can say “thanks” by buying me a coffee…
https://www.buymeacoffee.com/gentlefrog
If you’d like to watch me walk you through this comparison check out the video below: