How to Apply a Payment to an Invoice in QuickBooks Online

Written By

QuickBooks doesn’t automatically know you’ve received payments. You have to go in and manually record the payment received.

It’s an easy process but one that has to be done or your bookkeeping will be off.

Quick Instructions:

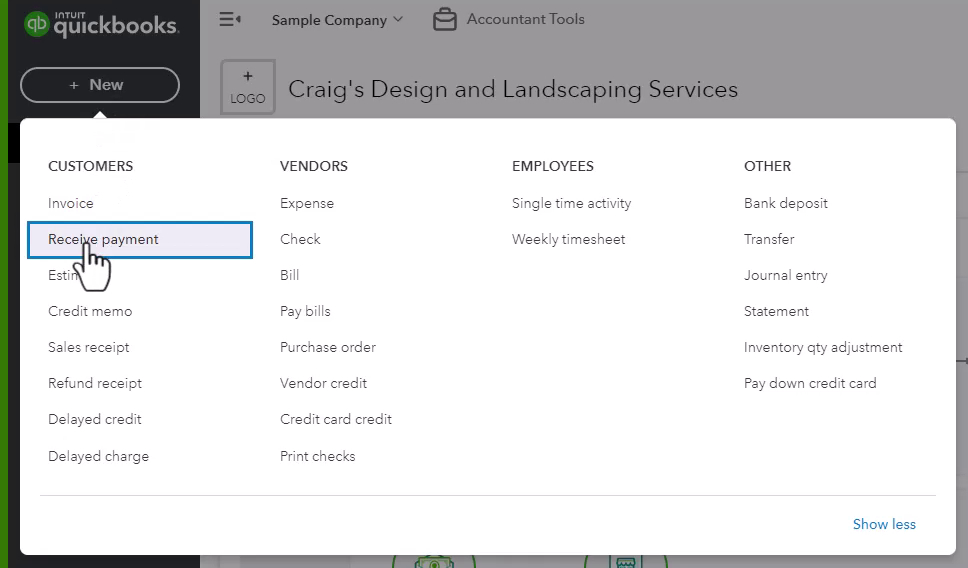
  1. Click the +New button
  2. Under CUSTOMERS select Receive payment
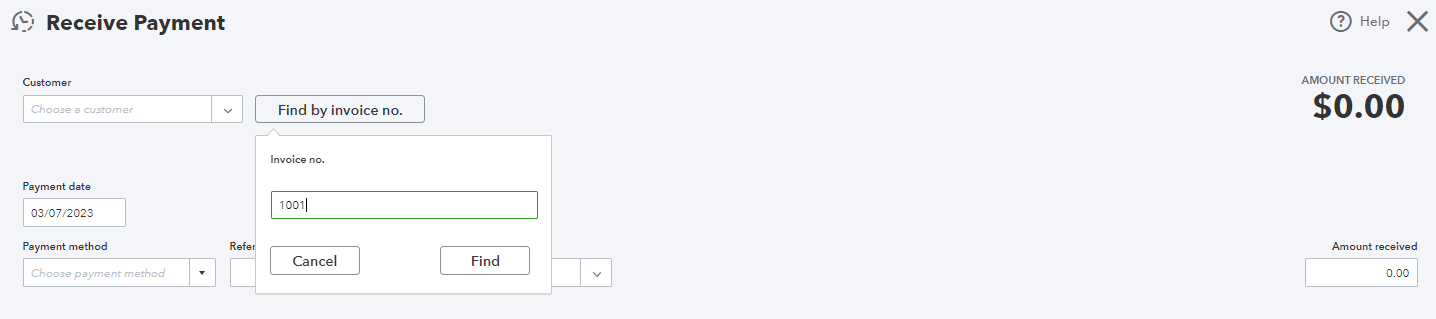
  3. Enter the name of the customer or select Find by invoice no. and enter the invoice number
  4. Fill in the following:
    • Payment date
    • Payment method
    • Reference no. (optional)
    • Deposit to
    • Amount Received
  5. Under Outstanding Transactions select the invoices the payment applies to
  6. Click Save and Close

Keep reading for a complete walkthrough with screenshots:

Receive Payment

To begin click the + New button in the upper left. Under CUSTOMERS click Receive Payment.
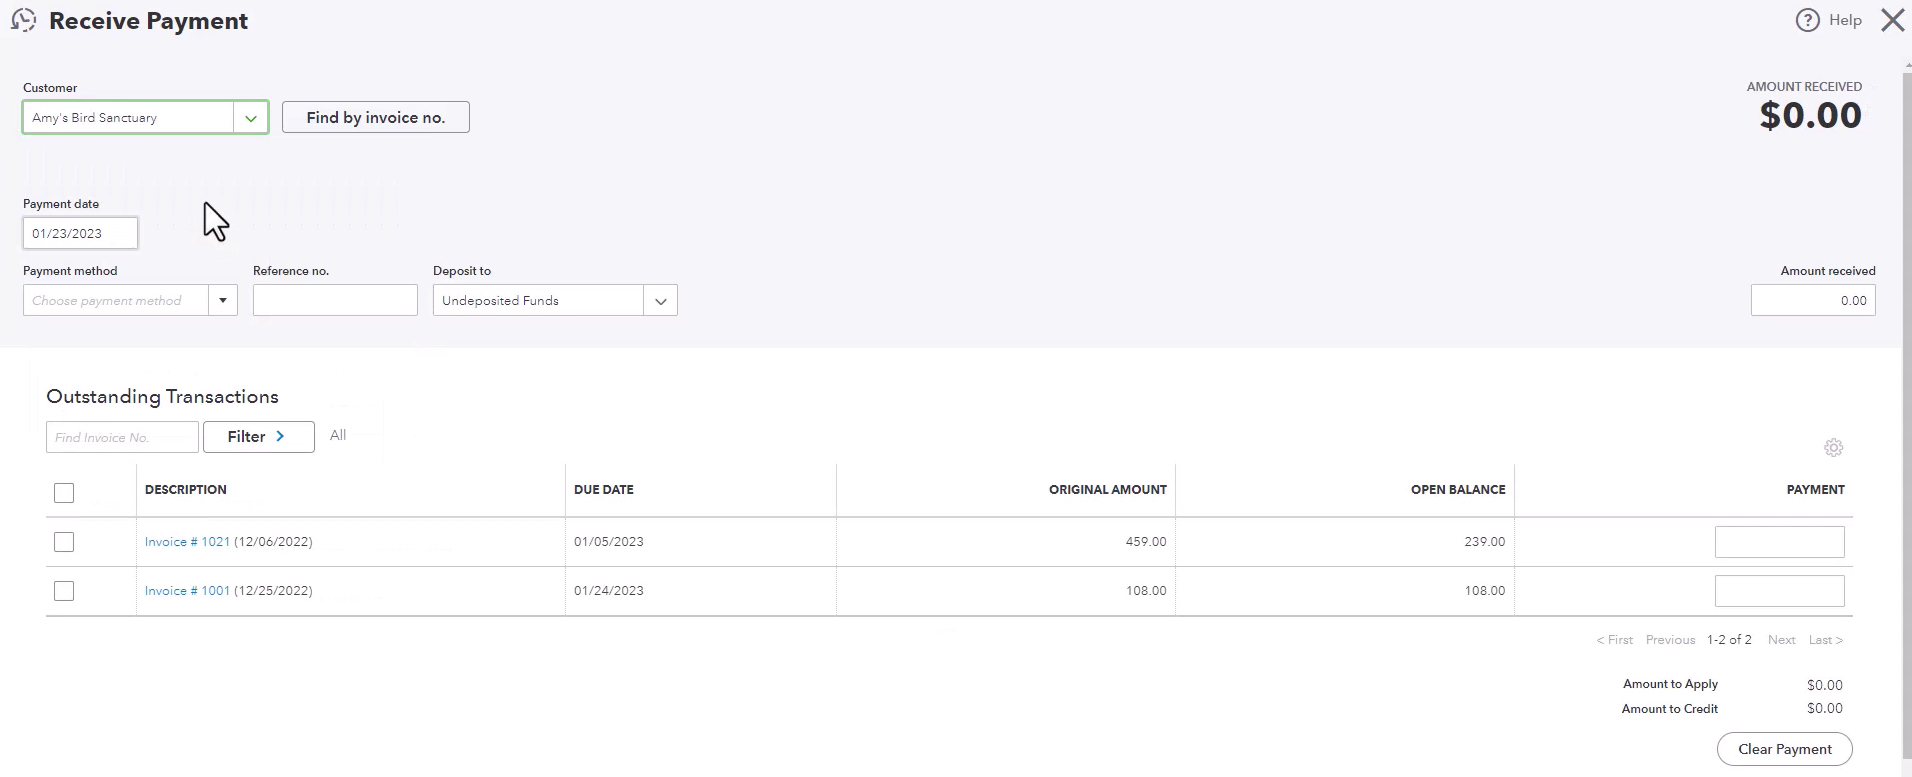
Receive payment in the +New menu in QuickBooks Online.

On the Receive Payment screen under Customer enter the name of the customer the payment is from. All open invoices for that customer will appear under Outstanding Transactions.

Outstanding Transactions on the Receive Payment screen in QuickBooks Online.Or, if you know which invoice the payment is for you can use the Find by invoice no. button.

Find by Invoice No. button when receiving a payment in QuickBooks Online.

No matter which method you use fill in the following:

  • Payment date: The date you received the payment.
  • Payment method: How you were paid (cash, check, Paypal, deposit to bank account, etc.)
  • Reference no.: Optional, if paid by check this is where you enter the check number.
  • Deposit to: The bank account this payment was deposited into. If the payment is part of a larger deposit use Undeposited Funds account.
  • Amount Received: The amount received in the payment.
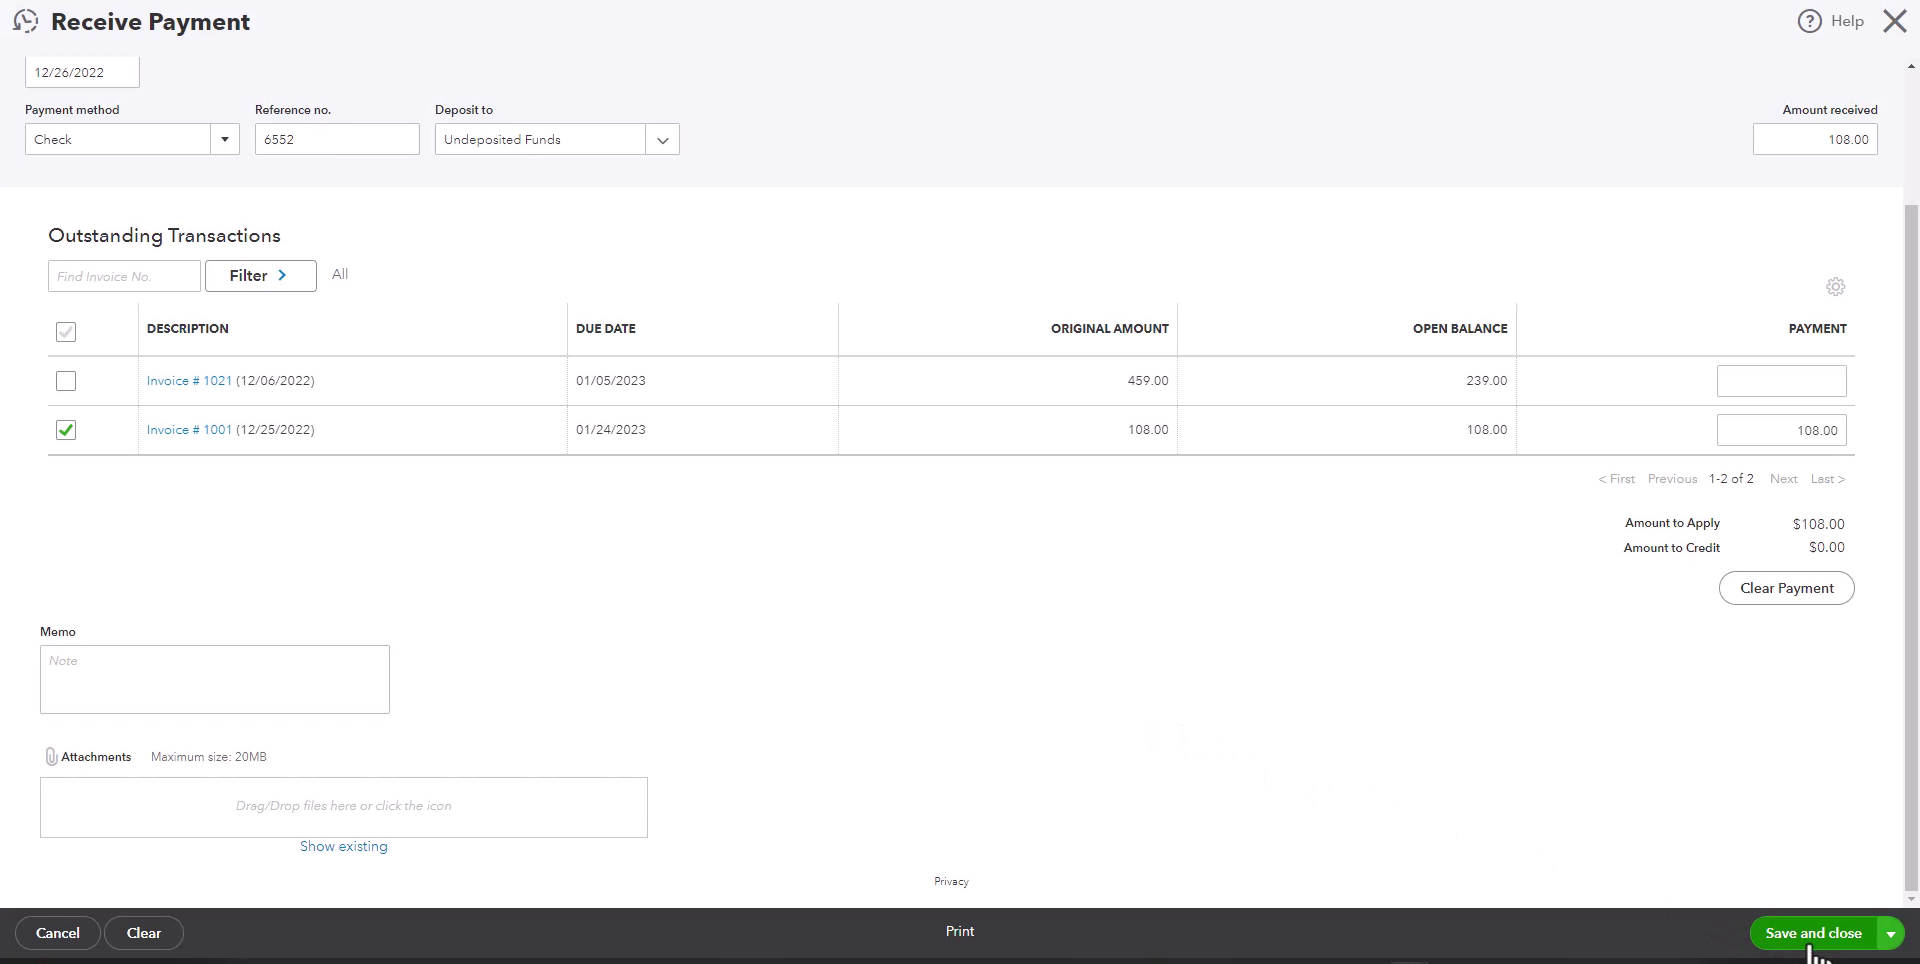
In the Outstanding Transactions section check all the invoices this payment applies to.

You can use the Attachments section to attach an image of the check.

When you’re finished click the green Save and close button in the lower right.

Receiving a payment in QuickBooks Online.

Customer Screen

You can also get to the Receive Payment screen from within a customer’s page.

To do this click Sales in the left-side menu.

Navigating to the Customers list in QuickBooks Online

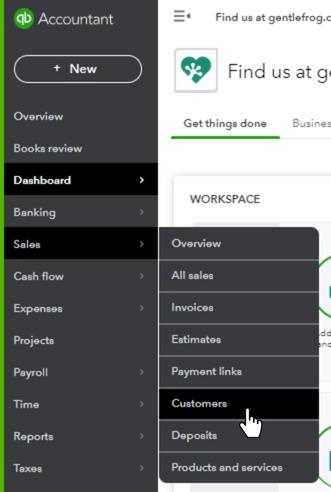
Click on the customer in your Customers list.

Then click on the Receive payment link to the right of the correct Invoice.

Receiving a payment from the customer screen in QuickBooks Online.

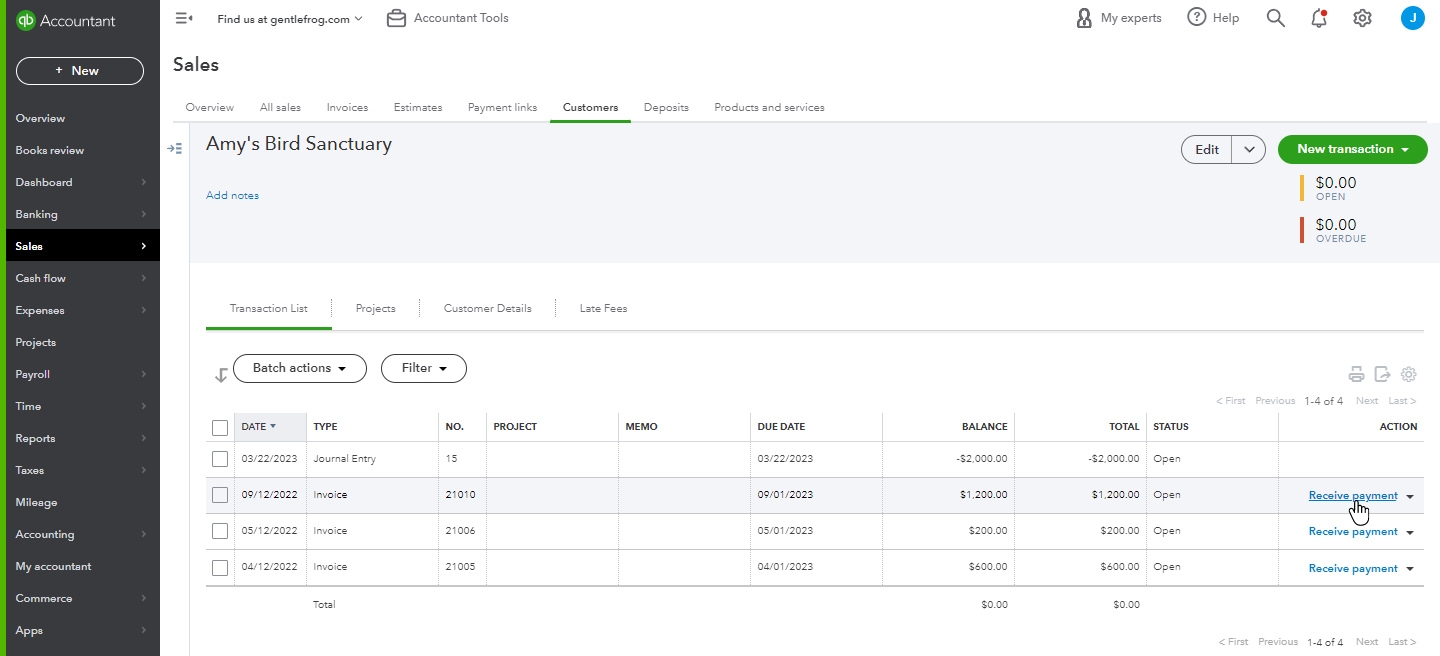
This will take you to the Receive Payment screen like above with the Customer already selected.

You now know how to apply a payment to an invoice in Quickbooks Online.

☕ If you found this helpful you can say “thanks” by buying me a coffee… https://www.buymeacoffee.com/gentlefrog

Below is a video if you prefer to watch a walkthrough.

If you have any questions about receiving payments in QuickBooks online click the green button below to schedule a free consultation.

Need some one-on-one QuickBooks assistance?
Share Now

This content is for information purposes only and should not be considered legal, accounting, or tax advice, or a substitute for obtaining such advice specific to your business. Additional information and exceptions may apply. Applicable laws may vary by state or locality. No assurance is given that the information is comprehensive in its coverage or that it is suitable in dealing with a customer’s particular situation. Gentle Frog, LLC does not have any responsibility for updating or revising any information presented herein. Accordingly, the information provided should not be relied upon as a substitute for independent research. Gentle Frog, LLC does not warrant that the material contained herein will continue to be accurate, nor that it is completely free of errors when published. Readers and viewers should verify statements before relying on them.

2 Responses

  1. If we import Invoices with Saasant or Transaction Pro, how do the Payments get associated with a particular Invoice?

    1. Mark,

      Unless you have it set up to auto apply credits (which we DO NOT suggest doing) the instructions are the same no matter how the invoice got into QBO. You use “Receive Payment,” select the customer the payment is from and you should see all their oustanding invoices on the right.
      If you need help you can schedule a 15-minute meeting and Rachel can walk you through it: https://www.gentlefrog.com/meeting/

      -Jess

Leave a Reply

Your email address will not be published. Required fields are marked *

Read similar articles

How to Use the New QuickBooks Online Invoice Layout (2024)

Learn how to Use the new QuickBooks Online invoice layout.

Have a QuickBooks / Bookkeeping Question?

Let me know what you’d like to see in future videos, blog posts, and courses.

Review Your QuickBooks

Are you a small business owner struggling to make sense of your QuickBooks data?

  • Discover how to spot costly mistakes in your bookkeeping and fix them quickly and easily.

  • Save time and money by streamlining your bookkeeping process and reducing errors.

  • Learn how to identify trends in your financial data so you can make smarter business decisions.

  • Get organized and stay on top of your finances by tracking expenses, managing receipts, and closing your books effectively.

Sign up now for this free mini-course and start mastering the essential bookkeeping skills that every small business owner needs to succeed!

FREE Mini Course

Sign up now and enjoy the peace of mind that comes with knowing your bookkeeping is accurate, up-to-date, and free from costly errors.

We won’t send spam. Unsubscribe at any time.