
In a previous blog post, I showed you how to deal with customer deposits/prepayments using a prepaid liability account.
In this tutorial, I’ll show you a different method that creates a credit that stays on the client’s account. The credit can easily get applied to the client’s next invoice.
Liability accounts tend to get used for deposits and prepayments that you may sit on the books for a few months or longer. Credits are more often used for overpayments or in place of a refund. (Like getting store credit instead of cash back when you return a product to a store).
For this example, I’m using QuickBooks Premier 2022. The instructions are the same for all 2022 versions of QuickBooks Desktop.
Quick Instructions:
Create a customer credit
- Click Customers -> Receive Payments in the top menu
- Select a customer from the RECEIVED FROM drop-down
- In the PAYMENT AMOUNT field enter the amount of the credit
- Enter the DATE
- Enter a REFERENCE # (optional)
- In the OVERPAYMENT box select LEAVE THE CREDIT TO BE USED LATER
- Click Save & Close
- Click OK in the Payment Credit pop-up
Apply customer credit to an invoice
- Click Customers -> CREATE INVOICES in the top menu
- Select a customer from the CUSTOMER:JOB drop-down
- Add products and/or services to the invoice.
- In the Main ribbon menu click Save
- Click Yes in the Available Credits pop-up
- Check off credits to apply
- Click Done
- Click Save & Close
Keep reading for a complete walkthrough with screenshots:
Create a Credit
To create a credit click Customers in the top menu then select Receive Payments.
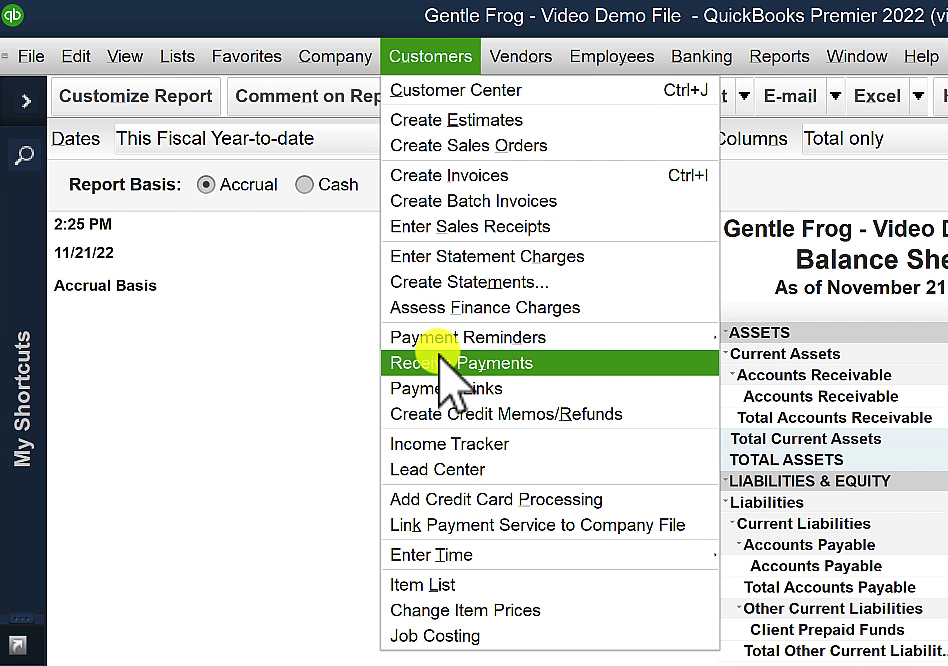
Select the customer receiving the credit from the RECEIVED FROM drop-down.
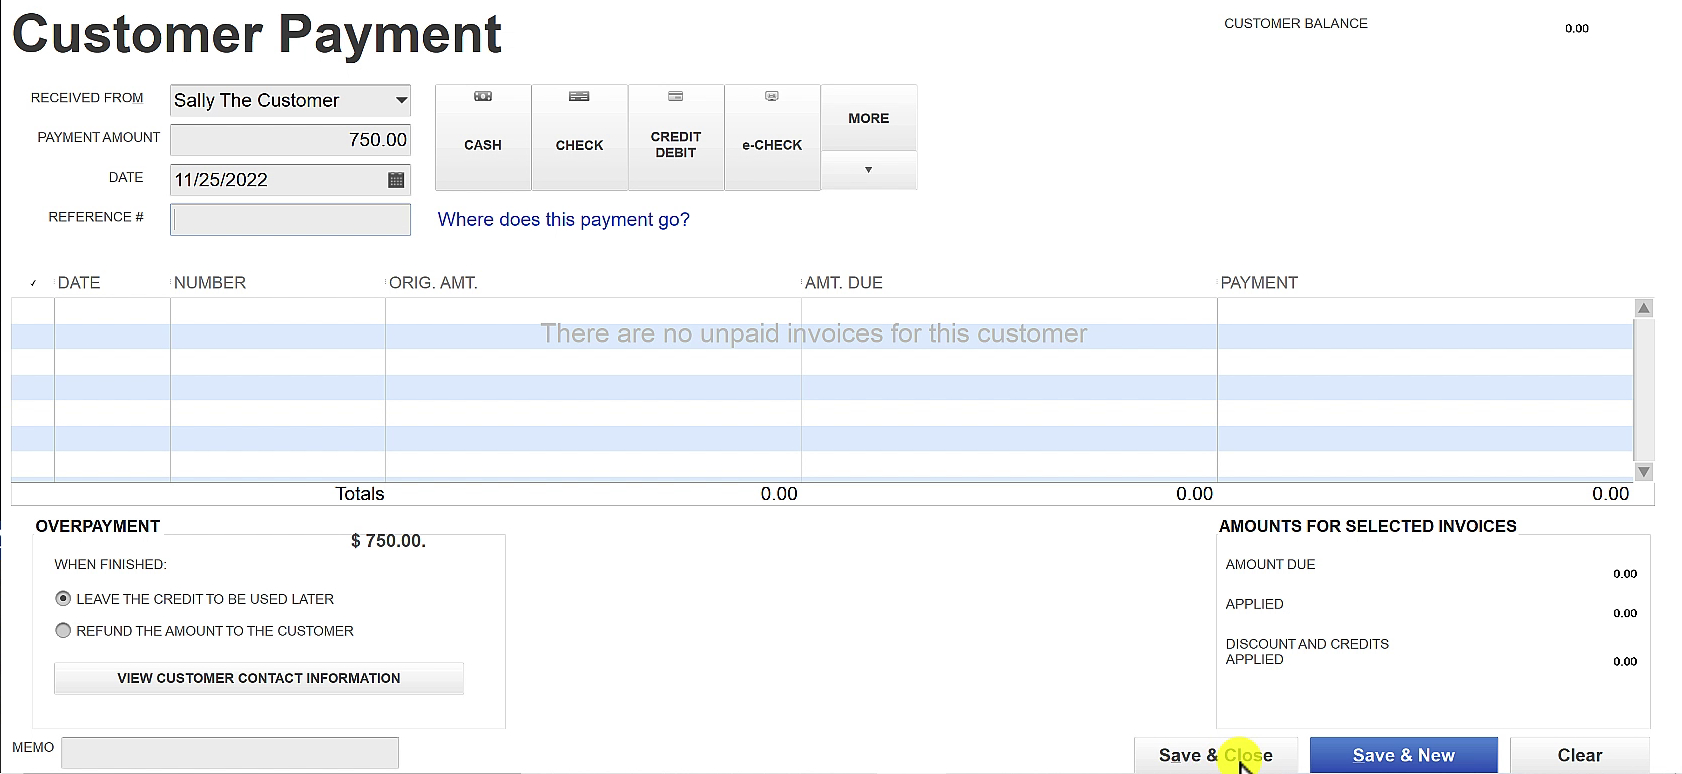
Enter the credit amount in the PAYMENT AMOUNT field.
Fill in the date. A reference number is optional.
In the lower-left corner, there’s an OVERPAYMENT box. Select LEAVE THE CREDIT TO BE USED LATER.
Then click Save & Close.
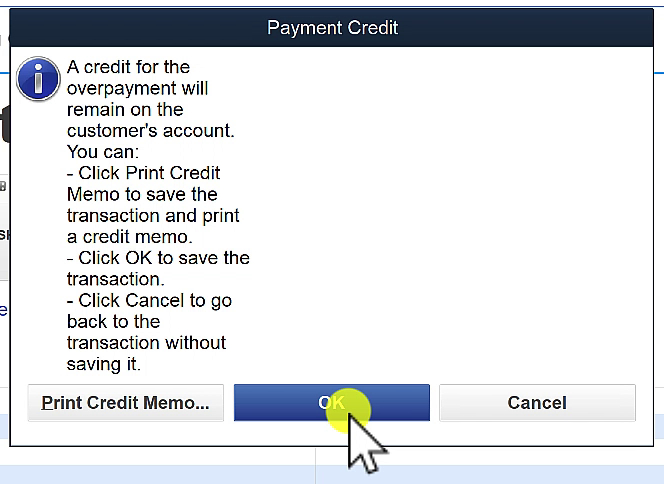
A pop-up will appear giving you a few options. Click OK to save the transaction as a credit.
Credits on the Reports
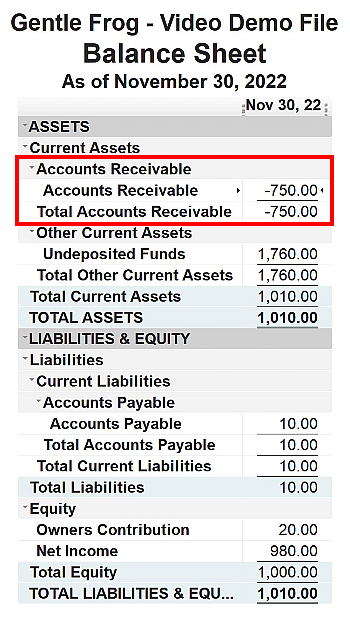
Balance Sheet
Credits appear on the balance sheet as a negative under Accounts Receivable.
Profit and Loss
Credits do not appear on the Profit and Loss Report because they’re not linked to any income account.
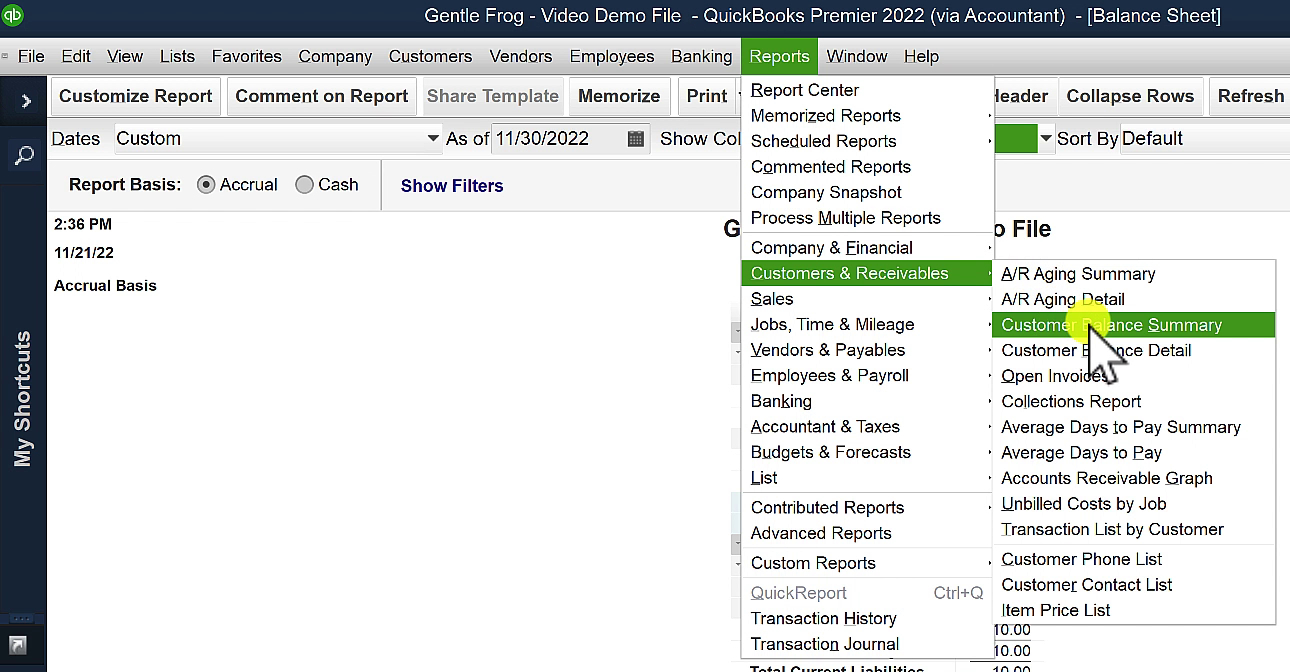
Customer Balance Summary Report
You can find customers with credits using the Customer Balance Summary report.
Click Reports in the top menu then select Customers & Receivables -> Customer Balance Summary.
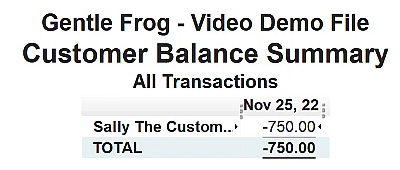
Credits will appear on this report as a negative balance.
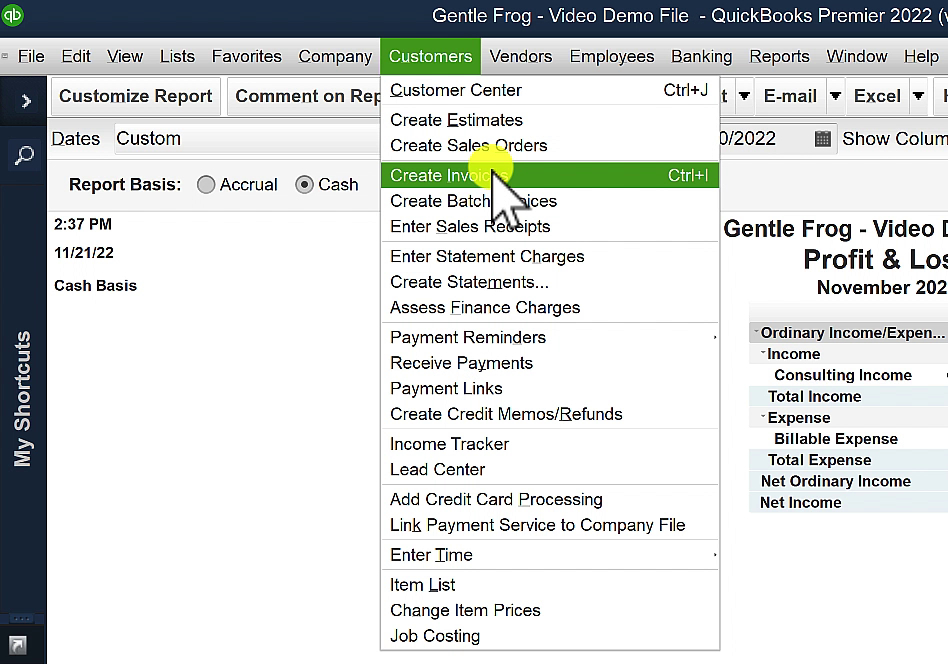
Apply a Credit to an Invoice
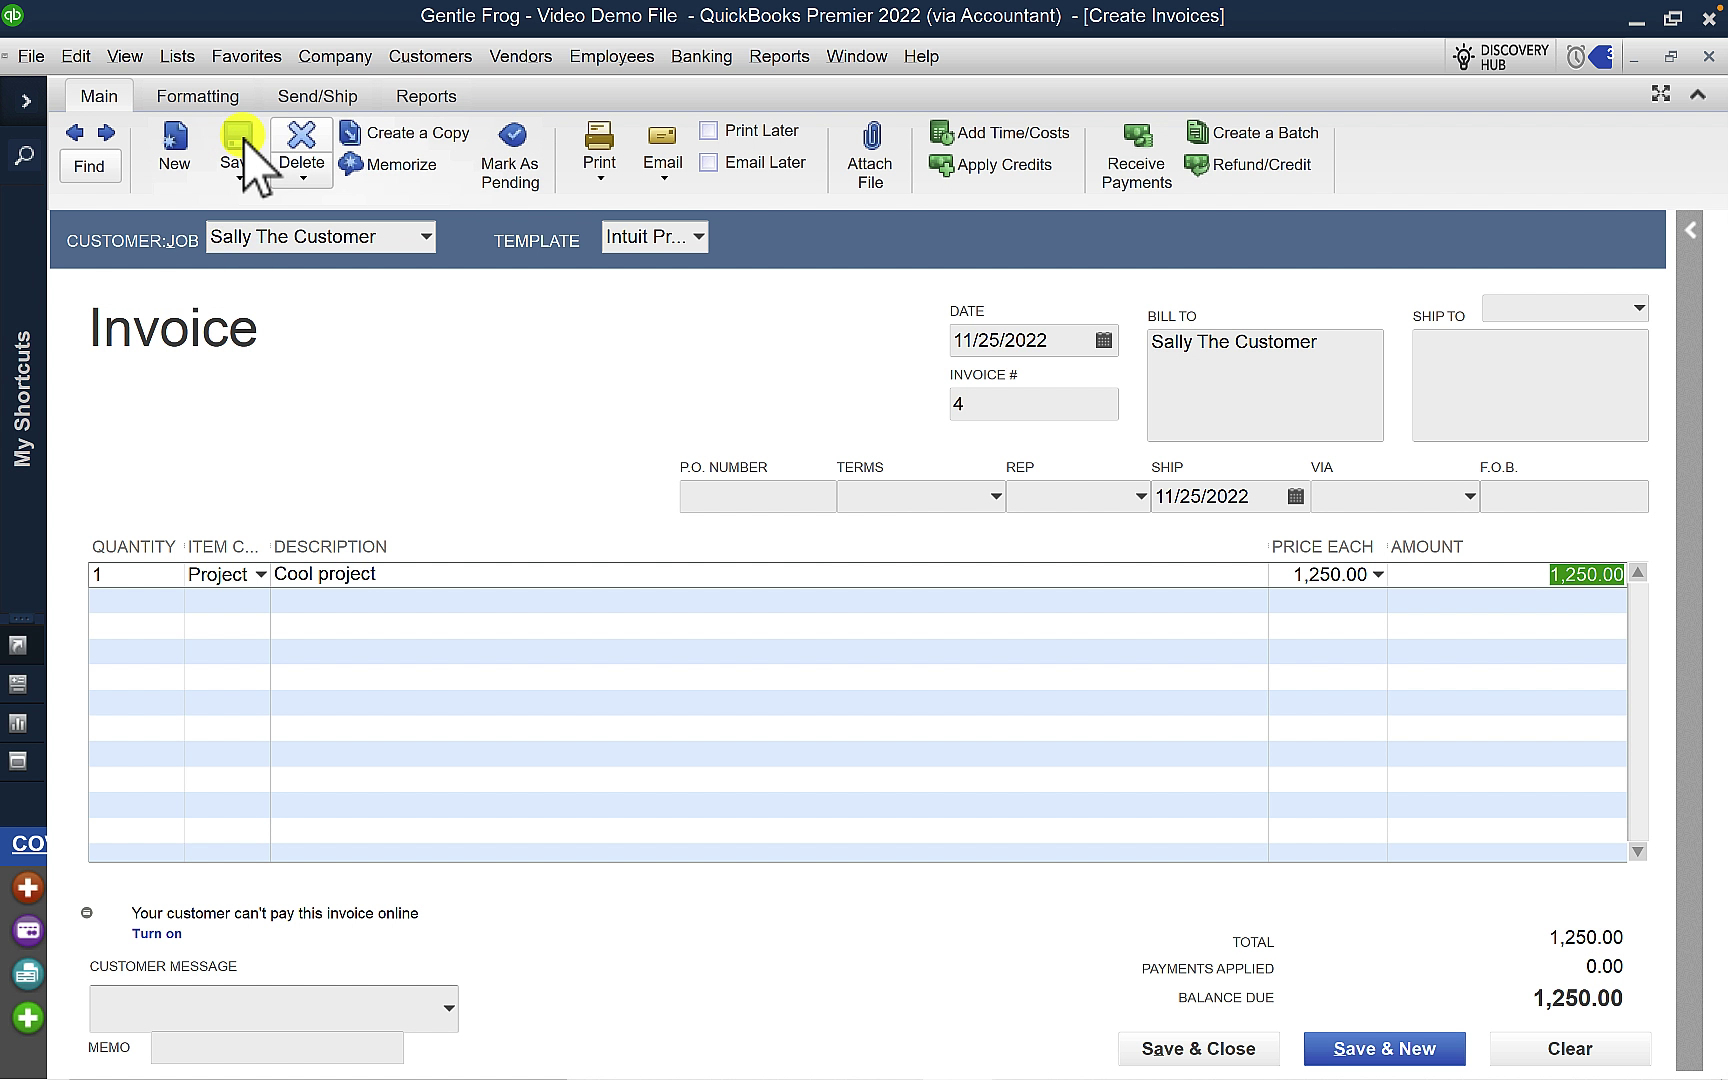
From the top menu click Customers -> Create Invoices.
Select the customer you’re creating the invoice for from the CUSTOMER:JOB drop-down.
Add products and/or services to the invoice.
Then click Save in the Main ribbon menu.
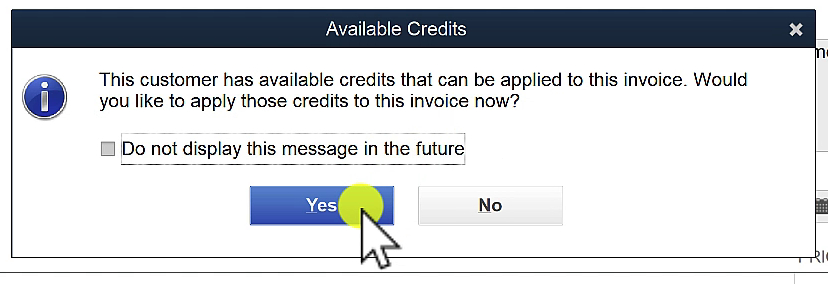
A pop-up appears letting you know the customer has available credits.
Click Yes to apply the credit to the invoice.
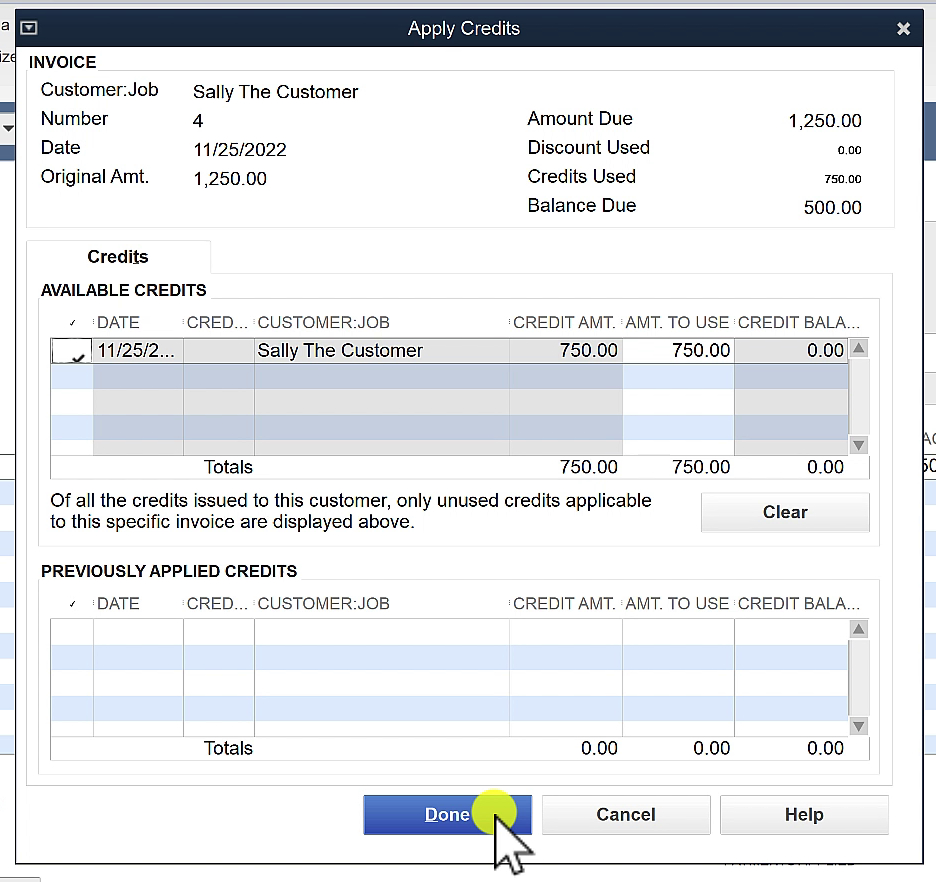
The Apply Credits pop-up appears. If your customer has multiple credits you can check off which ones to apply to the invoice.
When ready click Done.
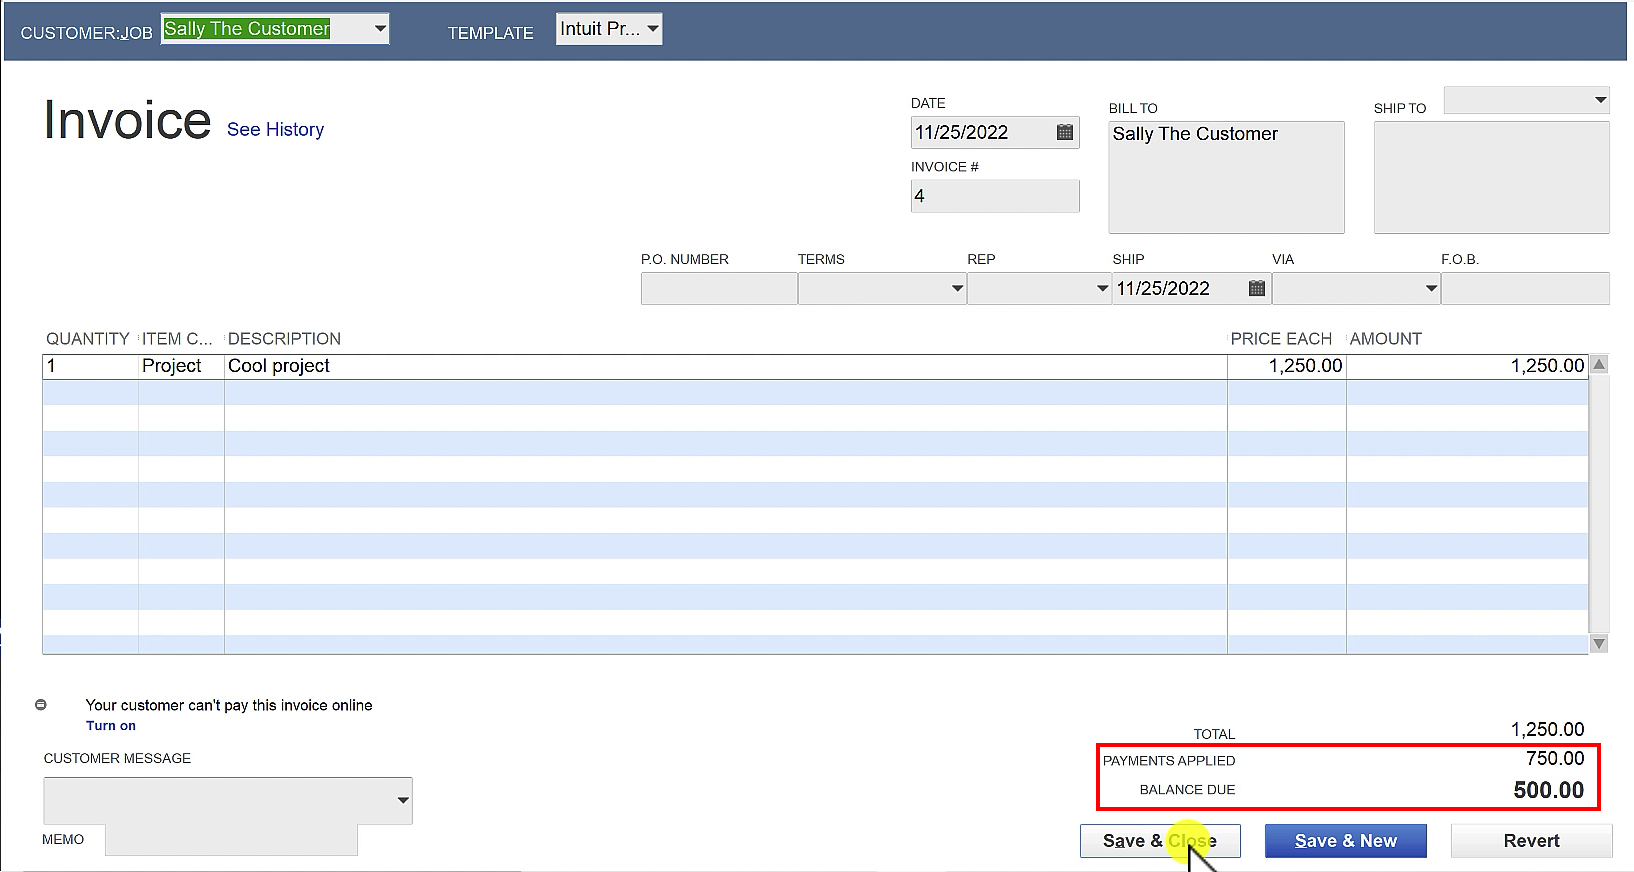
On the lower right of the invoice PAYMENTS APPLIED now equals the amount of credit you applied to the invoice. The BALANCE DUE also updates accordingly.
Click Save & Close.
You now know how to create a customer credit and apply it to an invoice in QuickBooks Desktop.
☕ If you found this helpful you can say “thanks” by buying me a coffee… https://www.buymeacoffee.com/gentlefrog
Below is a video if you prefer to watch a walkthrough.
If you have any questions about credits in QuickBooks Desktop click the green button below to schedule a free consultation.


2 Responses
On the cheque register it shows the amount paid plus the credit even though the actual payment to the bank account was the lesser amount. I would think that thais would be out of balance on the bank rec. ie: if they owed $600.00 and paid $500.00 the cheque register shoes a payment of $600.00
Hi Leslie,
The register shows the amount paid out of checking, not the bill payment amount. If you need help you can book a 15-minute meeting and Rachel can take a look at it with you: https://www.gentlefrog.com/meeting/
-Jess