This blog post is for anyone getting ready to close their Qbox account.
If you’re reading this I’m guessing you’re familiar with Qbox. But if you’re not you can check out How to Use Qbox with Quickbooks to learn more about it.
I’ve seen several people complain about losing files on their computer after closing their Qbox account. This can happen if you don’t follow the instructions closely while closing your account. So I wanted to walk through how to close your Qbox account so you don’t lose your files.
Quick Instructions:
- Go to https://www.coraltreetech.com/qbox
- Click the green Login button
- Click Admin in the upper right corner
- Click Close Account in the left side menu
- Follow the instructions on the screen CAREFULLY
- Uninstall the Qbox client from the Windows control panel
- Copy all the folders and files in your Qbox folder to a different folder
- Rename the Qbox folder
- Check the box in #5 if you don’t want to close team members accounts
- Check the box in #6 if you want to delete folders on shared users computers
- Click the Continue button
- Fill in the exit survey
- Click the Submit button
- Enter your password
- Click the Close Account button
Keep reading for a complete walkthrough with screenshots:
Login to Qbox
The first step is to log in to your Qbox account at https://www.coraltreetech.com/qbox

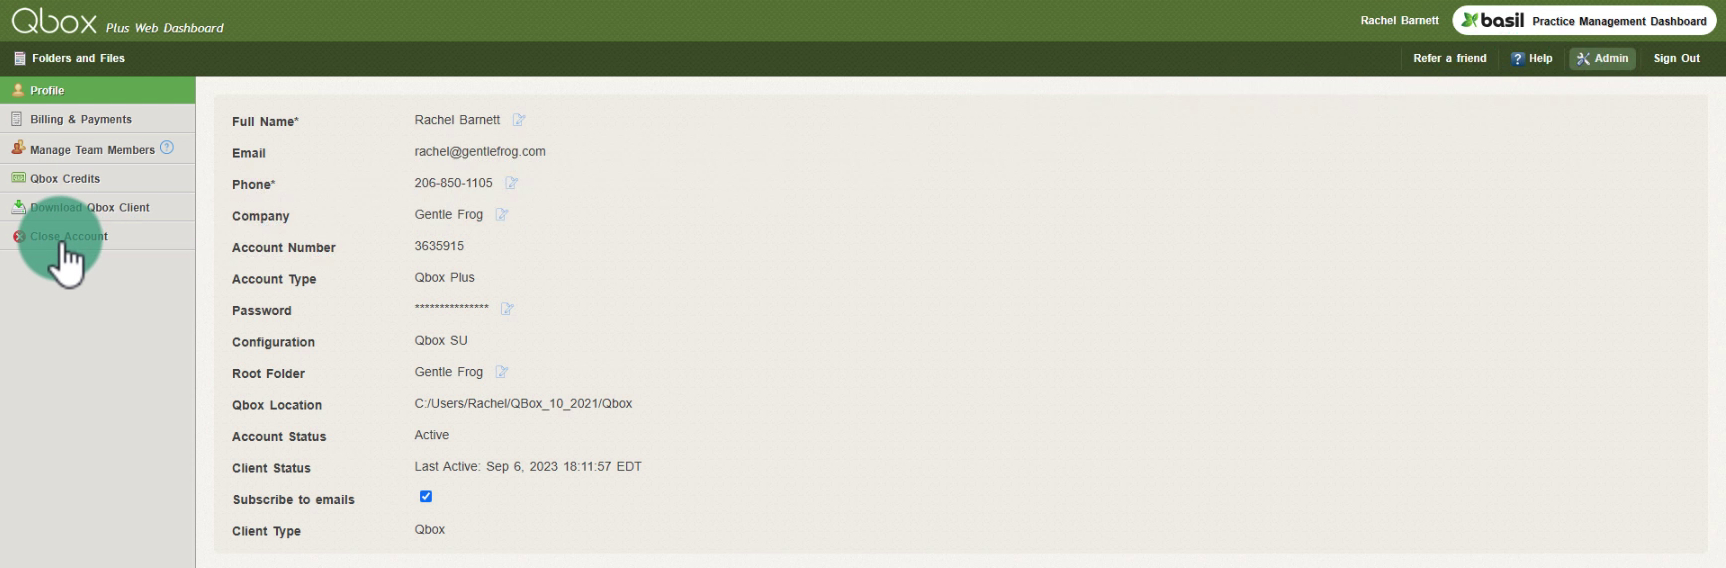
Close Account
Once you’re logged in click on Admin in the upper right corner.

At the bottom of the left side menu click Close Account.
Instructions
Here’s the part where you have to pay attention. These are the instructions that have to be followed or you’ll lose files:
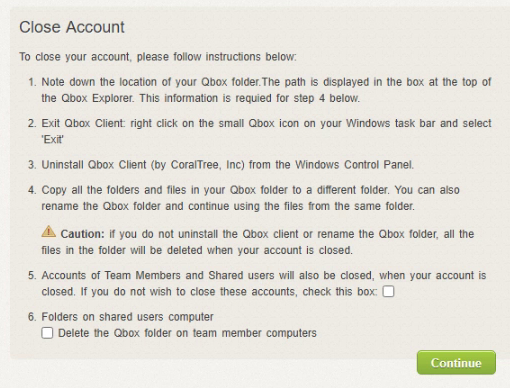
Let’s go step-by-step through these instructions.
1. Note down the location of your Qbox folder. The path is displayed in the box at the top of the Qbox Explorer. This information is required for step 4 below.
Open the Qbox Explorer and below the main menu is the file path you need to “note down”:

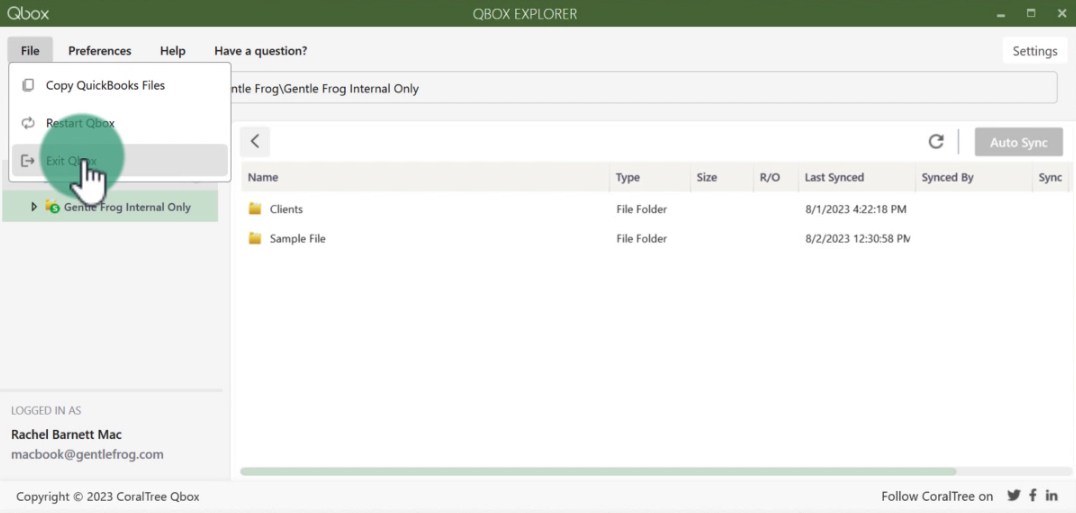
2. Exit Qbox Client: right click on the small Qbox icon on your Windows task bar and select ‘Exit’
When I right-click on the Qbox taskbar icon I don’t see any “Exit” option. I tried clicking “Close window” and that didn’t work. What I had to do was click File in the Qbox Explorer menu and select Exit Qbox.
3. Uninstall Qbox Client (by CoralTree, inc.) from the Windows Control Panel.
You may have a different version of Windows than me. Check out the instructions from Microsoft on How to Uninstall or Remove Apps from Windows. It includes instructions for Windows 10 and 11.
4. Copy all the folders and files in your Qbox folder to a different folder. You can also rename the Qbox folder and continue using the files from the same folder.
⚠️ Caution: if you do not uninstall the Qbox client or rename the Qbox folder, all the files in the folder will be deleted when your account is closed.
This warning is the part that you DO NOT want to ignore.
You must uninstall the client, copy the files to a different folder, OR rename the folder. If you don’t the files in that folder WILL BE LOST when you close your account.
To be super duper sure no files are lost I suggest doing all three:
- Uninstall the client
- Rename the folder
- Make a copy of the folder
5. Accounts of Team Members and Shared users will also be closed, when your account is closed. If you do not wish to close those accounts, check this box: [ ]
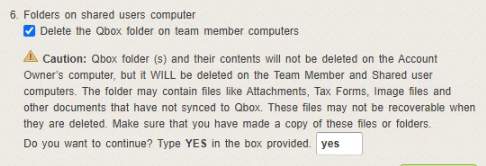
6. Folders on shared users computer
[ ] Delete the Qbox folder on team member computers
For #5 and 6, make sure any team members and shared users know you are closing the account beforehand so they have the option to backup any files they might need.
If you check the box on #6 you get the following warning:
Once you’ve followed all these steps and you feel comfortable that you’ve backed up everything you need click the Continue button.
The next screen is an exit survey. Fill it in and click the Submit button.
Finally, it will ask you to enter your password. Then click the Close Account button to finish closing your Qbox account.
You now know how to close your Qbox account without losing any of your files.
☕ If you found this helpful you can say “thanks” by buying me a coffee… https://www.buymeacoffee.com/gentlefrog
If you have questions about using Qbox with QuickBooks Desktop click the green button below to schedule a free consultation.