This is part two in a series on getting started in QuickBooks. This series is for anyone who’s been using QuickBooks and already has it set up.
Part one was all about reviewing transactions and adding them to the register.
Today I’ll show you how to :
- Reconcile reviewed transactions with your bank statements
- Double-check categories in the Profit and Loss report
You’ll be looking for any missing or duplicate transactions. And, fixing them when needed.
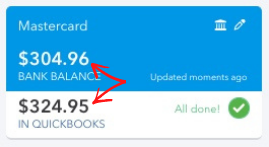
If all transactions were added correctly, as I showed part one, then your bank balance and your Quickbooks balance should match.
Reconciling
There are a couple of ways to start reconciling your accounts.
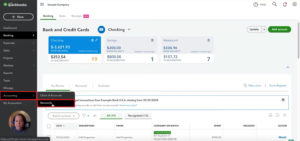
One way is to click on Account -> Reconcile in the left-hand menu.
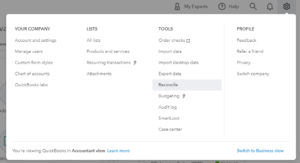
You can also get there by clicking the gear icon in the upper right corner. Then selecting Reconcile under Tools.
Either method will get you to the same place.
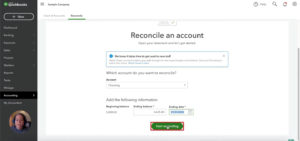
From here you’ll select the account you’ll be reconciling. Make sure you have the corresponding account’s bank statement on hand.
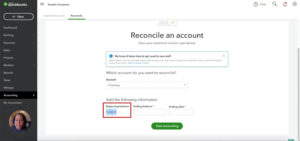
Verify that the beginning balance in Quickbooks matches the beginning balance (or last month balance) on your bank statement.
In the Ending Balance field, you’ll enter the ending balance from your bank statement. Then enter the ending date of the bank statement and click the “State reconciling” button.
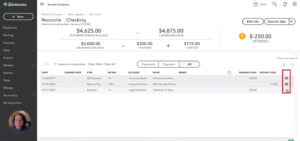
You’ll see a list of transactions. Check off every transaction that appears on your bank statement.
You want to make sure every transaction that appears on your bank statement gets checked off in QuickBooks.
If you have any transactions that don’t get checked off then you may have a duplicate transaction.
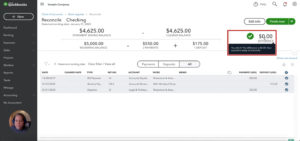
You want the difference to be zero.
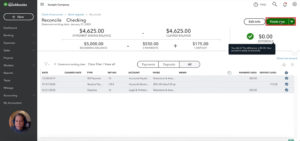
If the difference equals zero and you’ve checked off all transactions from you’ve bank statement. Then you want to click the Finish now button.
You’ll need to repeat this for each bank account for every month that you haven’t yet reconciled.
Double Checking Categories
Now I’ll show you how to double-check that your categories are correct.
This isn’t foolproof but it does a great job of catching most incorrect categories.
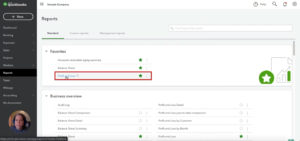
Click on Reports in the left-hand menu and then select the Profit and Loss report.
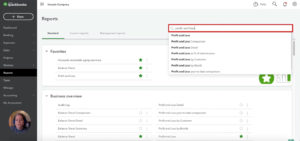
If you don’t see the Profit and Loss report in your favorites you can use the search box.
The Profit and Loss report is available no matter which version of QuickBooks Online you’re using. This is not a special report limited to higher editions.
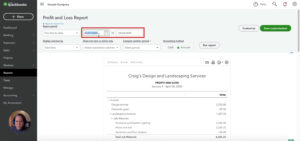
When the report first appears you won’t see a way to change the date range on the screen. You’ll need to scroll up to view the customization fields.
This Year-to-date should be fine or you can adjust it to the date period you’ve been working with.
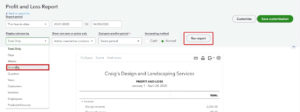
Below the date you’ll see “Display column by” and it will be set to “Total Only.”
This means it will show you the totals for the date range you selected.
I’d like you to change “Total Only” to “Months” and then click the “Run report” button.
In part one I showed you how to organize and categorize the incoming and outgoing money. Earlier, when reconciling we checked that all the numbers match the bank statement.
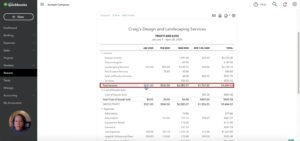
Now we’re going to look at the Profit and Loss report and check if the totals, by month, make sense.
First, I’m going to look at the total income.
I’m look at each month and checking for any anomalies. In my example March is very high compared to the other months.
If you see a difference like this it could be a miscategorized transaction. A transfer that was incorrectly entered as income. Or, if you put your own money into your business from a personal account and entered it as income.
That’s the end of part two. In part three I’ll show you how to check the Transaction Report and fix any mistakes.
☕ If you found this helpful you can say “thanks” by buying me a coffee…
https://www.buymeacoffee.com/gentlefrog
If you’d like to watch me walk through this process check out the video below:

