
In this tutorial, I’ll show you how to use QuickBooks Timesheets to keep track of your hours worked and make sure you bill your time back to customers or clients correctly.
There are other options and software available that can track hours worked but I’m going to show you how you can do it from within QuickBooks Online.
Apps
Apps.com is a list of applications that integrate with QuickBooks.
On the apps.com homepage, you can scroll down to the search bar and enter “time” to get a list of time-tracking apps.
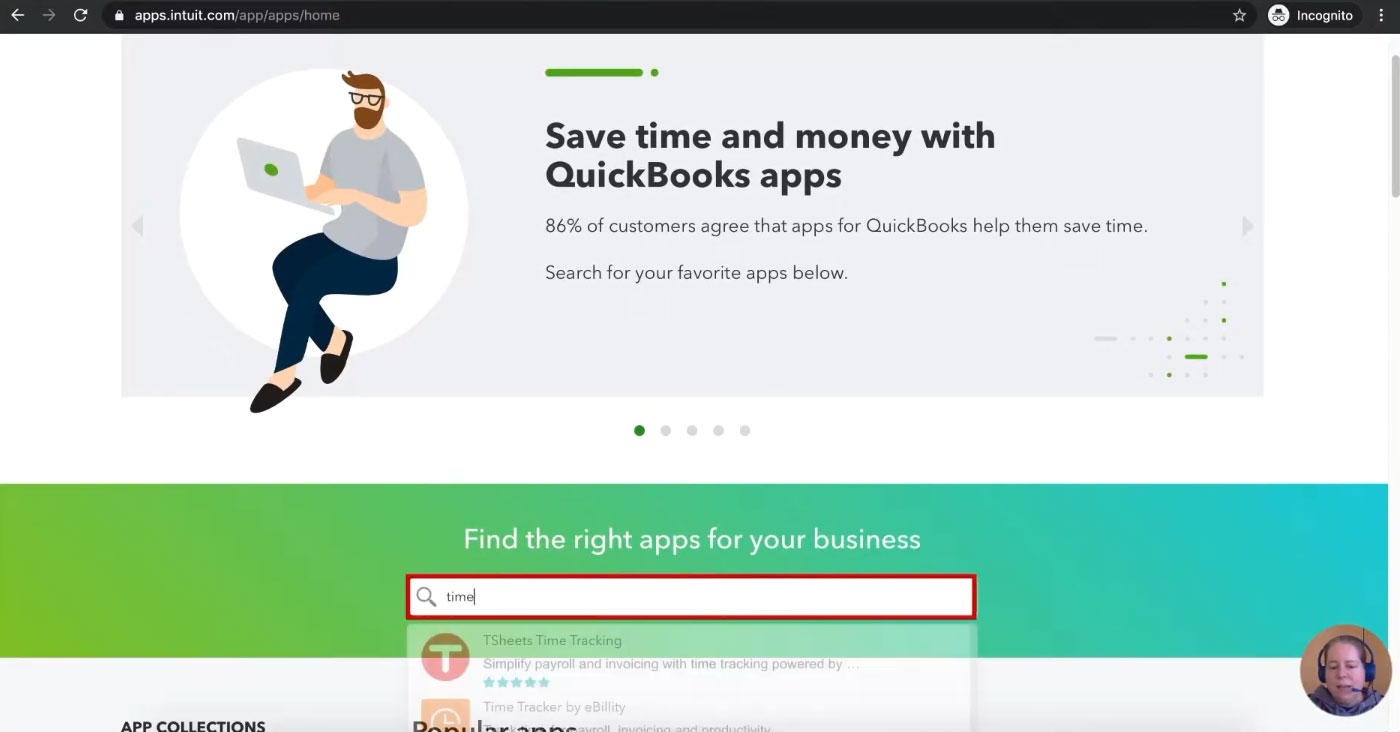
At this time, 75 apps are integrated with QuickBooks that can track time.
You can go through these apps and find one that works for you. The app that I’ve used and like the most is T Sheets.
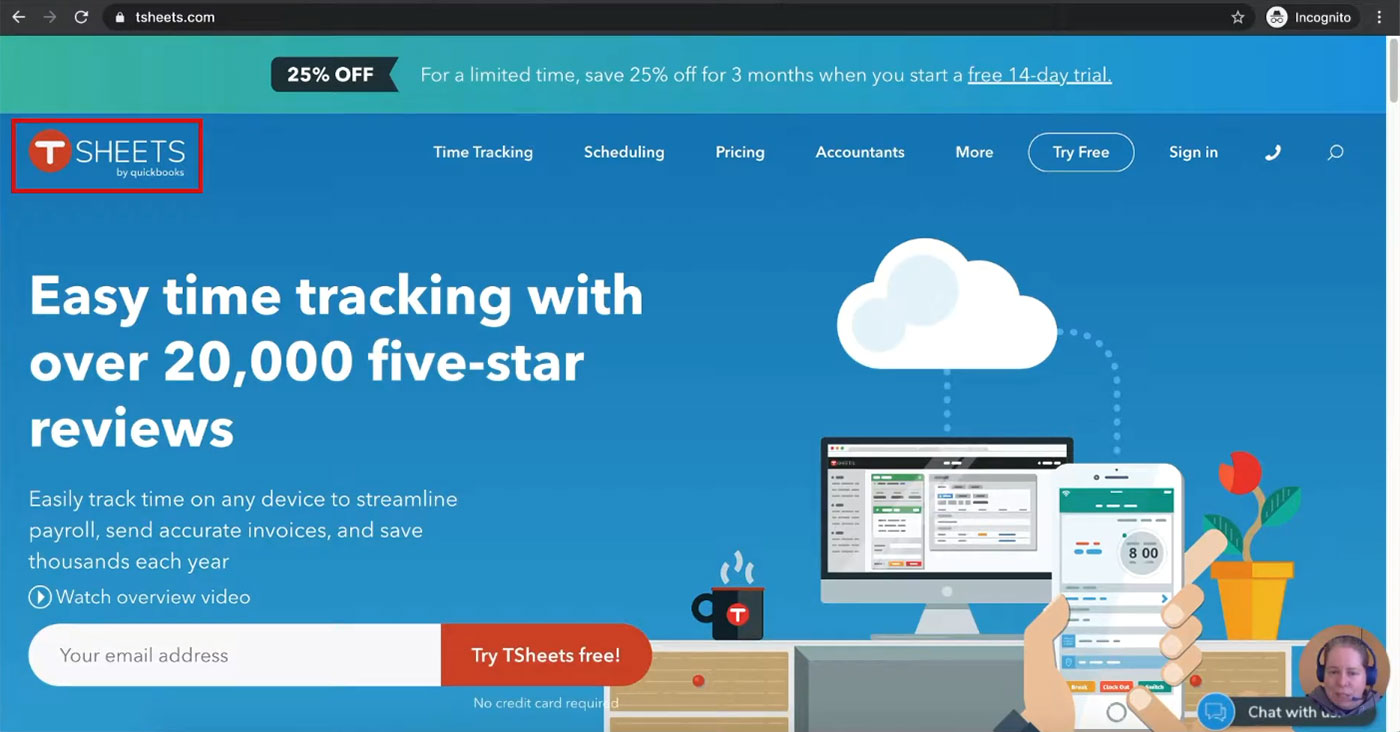
T Sheets was started by a guy in Idaho who sold it to Intuit, QuickBook’s parent company. The integration works well since Intuit maintains this app.
My second recommendation is ClockShark Time Tracking. I haven’t used this one personally, but many of my accounting friends do and think it’s fantastic.
![]()
Time Tracking Within QuickBooks
You don’t have to use an app; QuickBooks has time tracking built in.
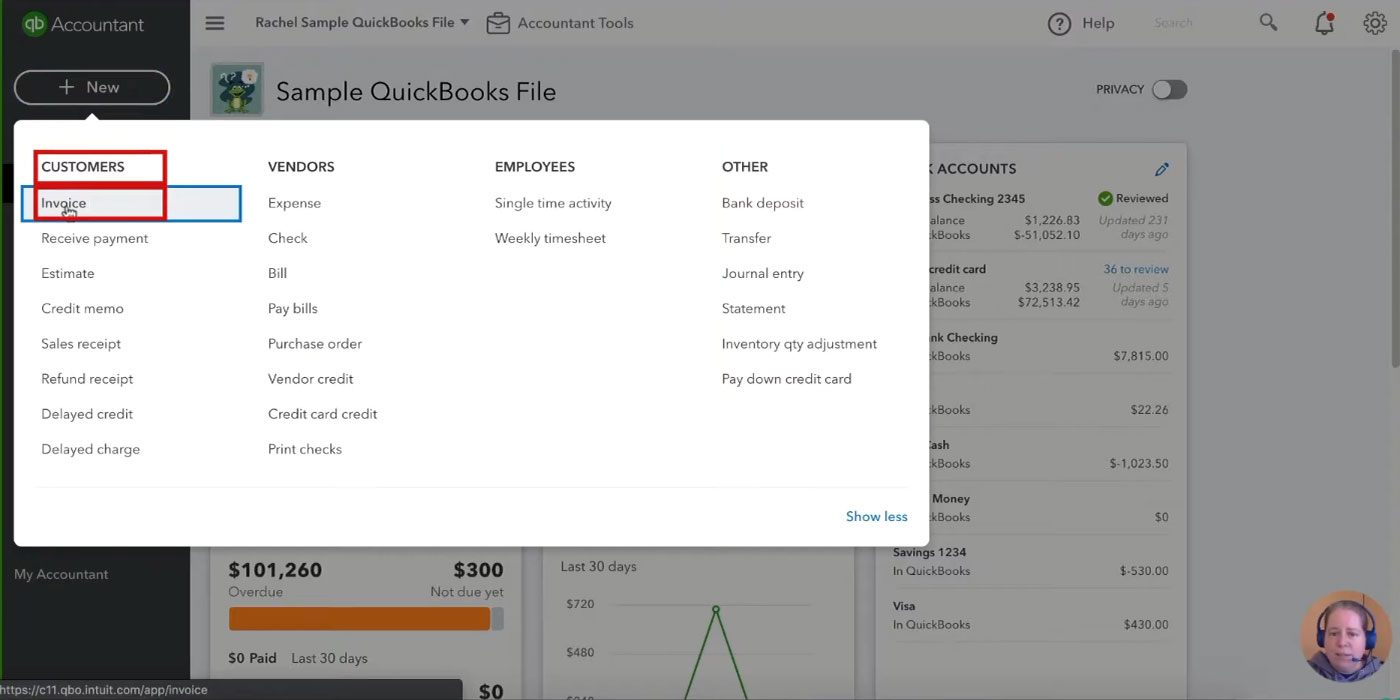
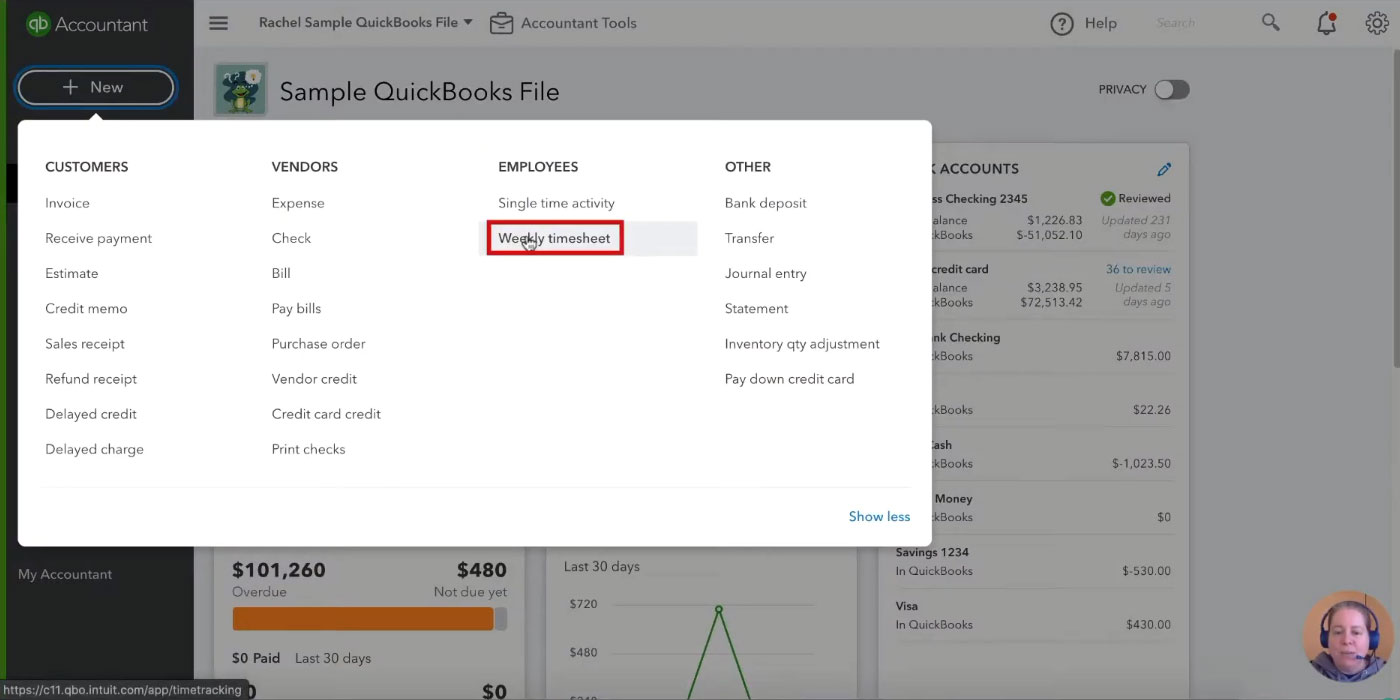
In the upper left-hand corner, click the “+ New” button. Under the EMPLOYEES column, you’ll see “Single time activity” and “Weekly timesheet.”
![]()
You’ll want to choose which works best for your situation. Using both can create a mess.
Single Time Activity
When you choose a single-time activity, you’ll start by selecting the date and the name of the person doing the work. In this example, I’m entering time worked for myself, “RachelTheContractor.”

The “Cost rate (/hr)” is for you to keep track of how much the work being done costs you. This comes in handy if you have employees. You can enter how much the employee costs you per hour and how much you bill your client for the employee’s work.
“Customer/Project” is where you’d enter who the person is working for or what project they’re working on.
Check off “Billable (/hr)” and enter the amount you are billing the customer.
You should only check off Taxable if the work is, in fact, taxable.
You do not need to enter Location and Class at this time.
Time is where you enter how much time was spent doing the work.
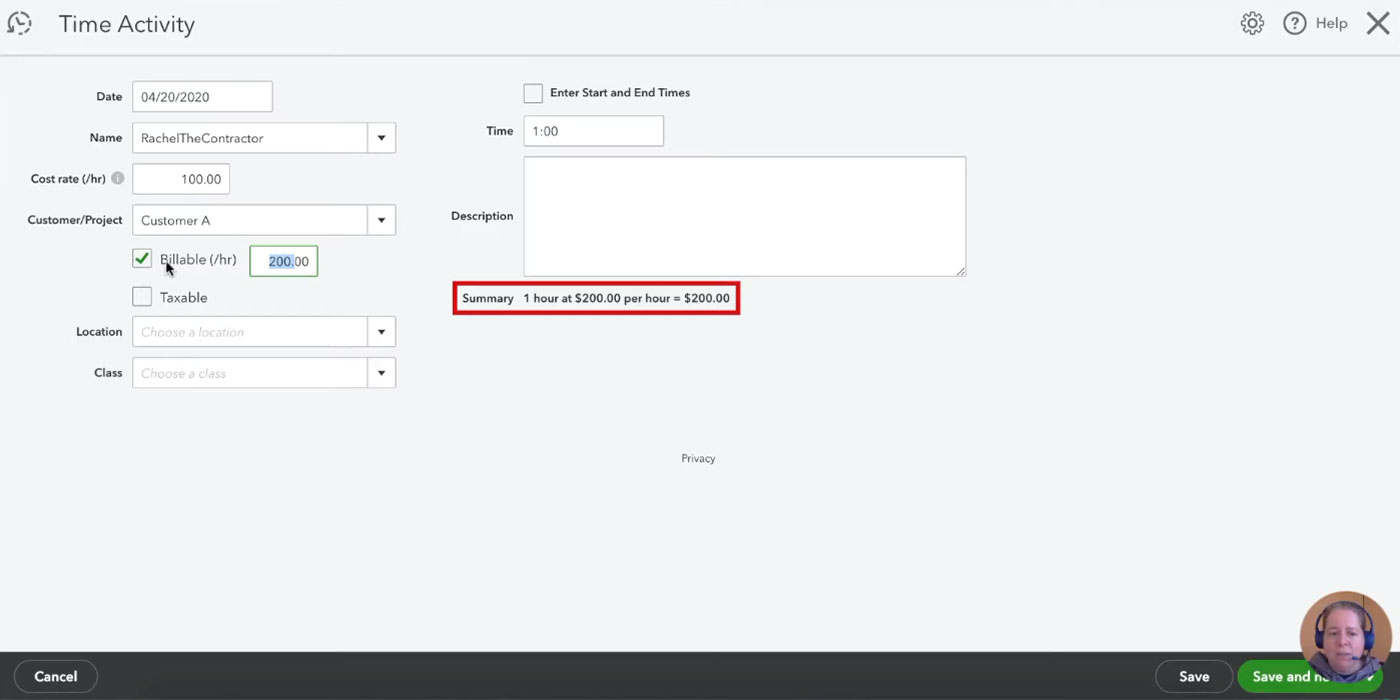
In the example above, I’ve worked 1 hour for Customer A, billing $200/hr. QuickBooks shows a Summary that reflects that information.
In the Description field, you can enter notes about the work done.
When you’ve finished entering the time worked, click the green arrow in the lower-right-hand corner and select “Save and close.”
Billing Your Clients
Let’s say you’ve been keeping track of the hours you work for clients within QuickBooks, and you’re now ready to bill your clients at the end of the month.
Click on the “+ New” button in the upper-left corner, in the Customers column select Invoice.
In this example, I’ll be billing Customer A. On the right-hand side of the screen, you can see a list of all the billable times I’ve worked for Customer A that haven’t been invoiced yet.
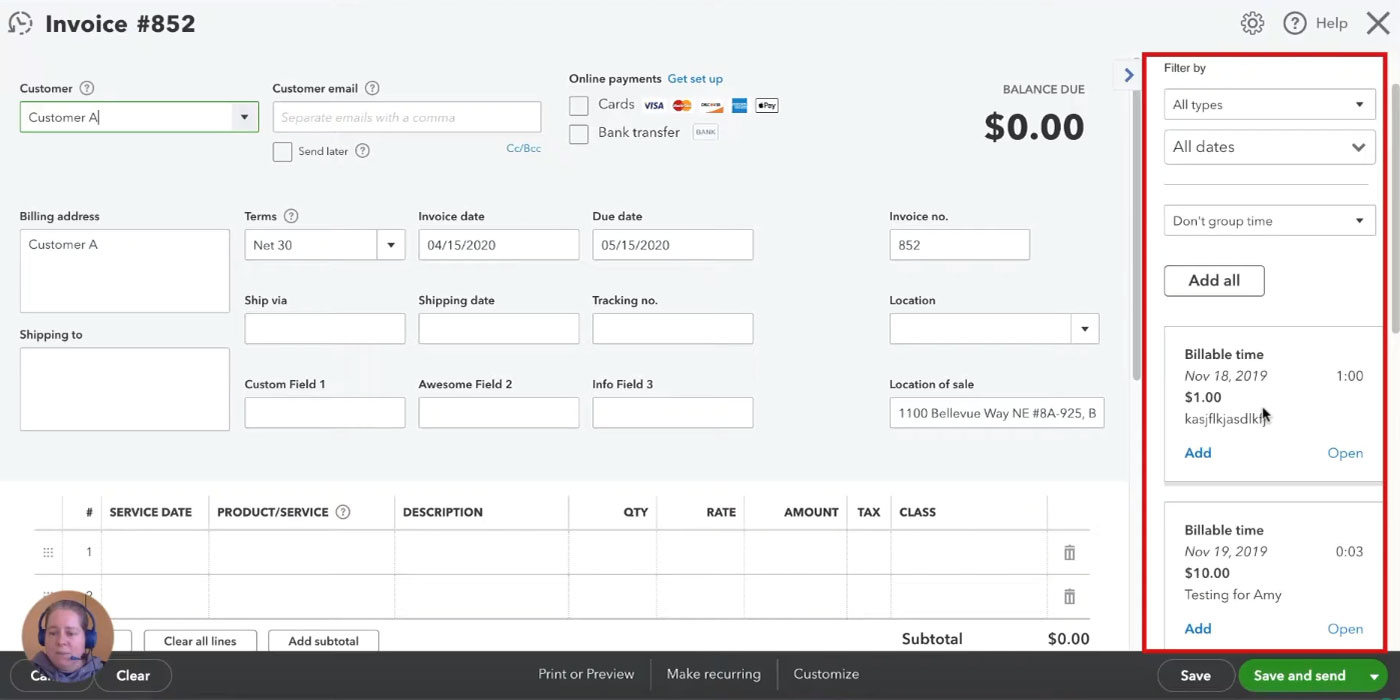
I will add one of these times to the invoice by clicking Add. When I do that, it’s removed from the list and added to the invoice. A green check mark lets me know it was added to the invoice.
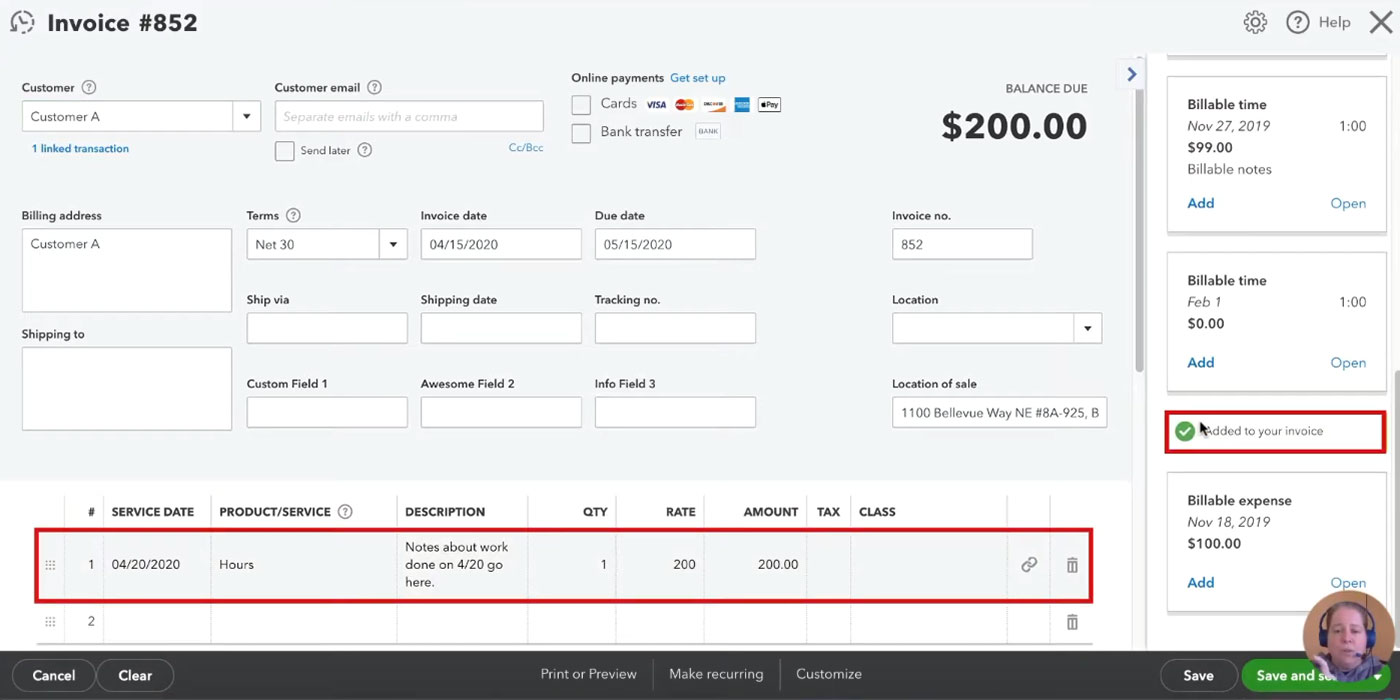
All the information I previously provided is automatically entered into the invoice. This includes the notes I put in the Description field. All of these fields can be edited before sending your invoice.
If you’re happy with the invoice, click the green “Save and send” button in the lower right-hand corner to send the invoice to your client.
If you don’t want to send the bill yet, you can select “Save and close,” and that billable time will no longer be available to add to another invoice. This ensures you can’t accidentally double-bill your client.
Weekly Timesheet
Let’s now take a look at tracking time with the Weekly timesheet.
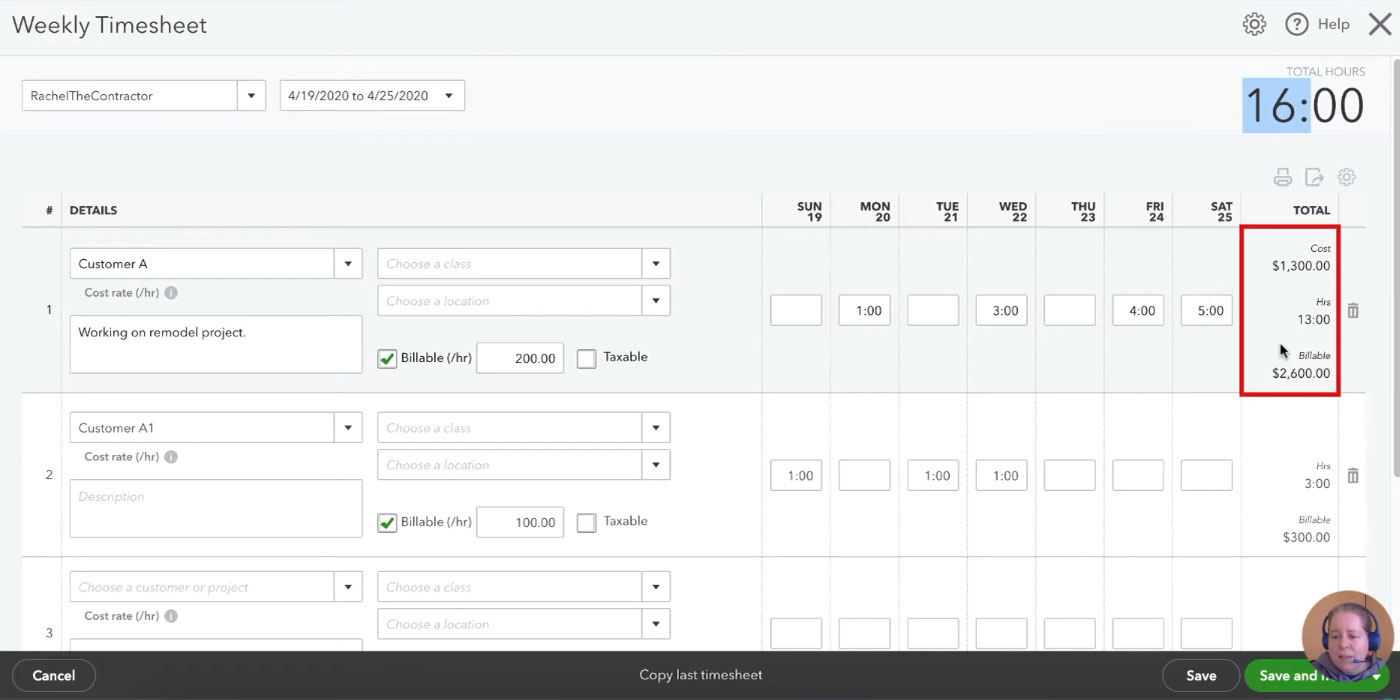
Within the Weekly Timesheet, you’ll first enter who’s working and the week they’re working.
In my example, the time I reported for Customer A in Single Time Activity is already filled in.
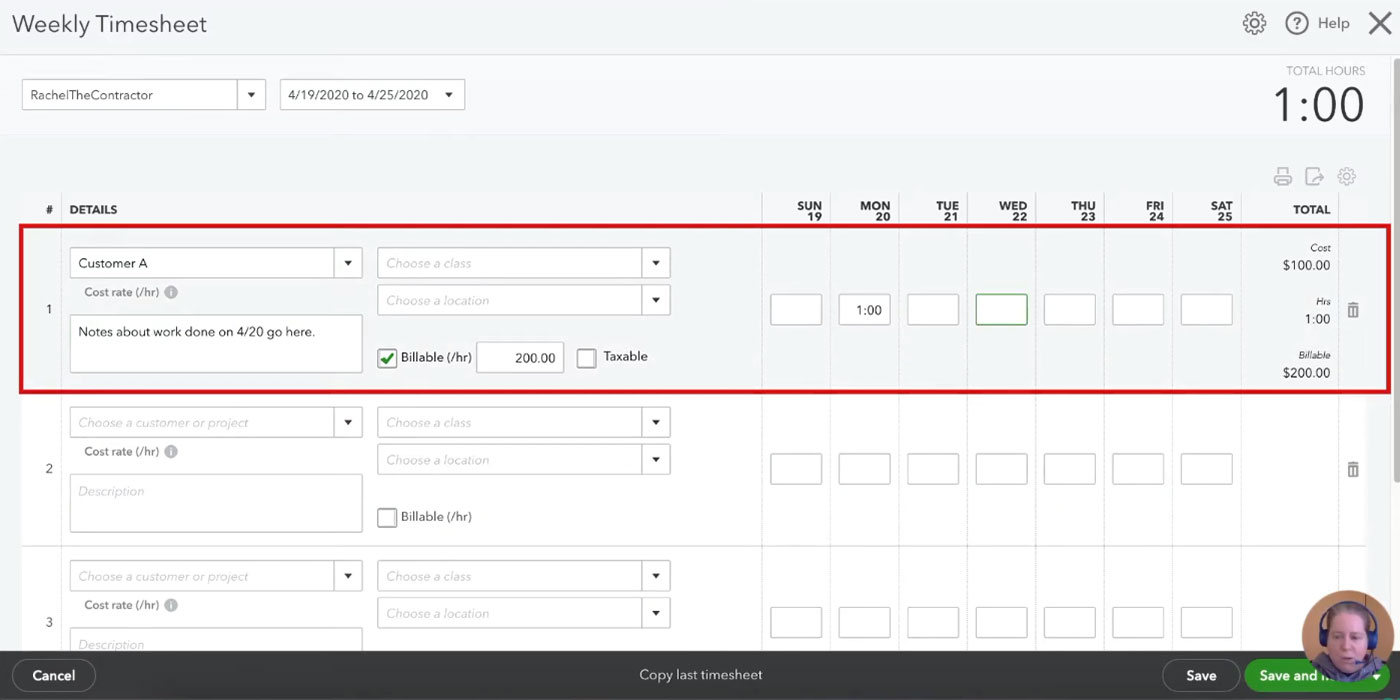
I dislike the Weekly Timesheet because the Description/notes cover the whole week for a client. If I need to make detailed notes, I prefer to use Single Time Activity so I can enter notes for each time I work.
In the Weekly Timesheet, you can enter as many clients as you worked for that week, the hours worked, and how much you billed.
The Weekly Timesheet does not allow you to set a cost. I’ve entered hours worked for a second client, and you can see in the image below that the work imported from the Single Time Activity includes cost, while the work I entered in the Weekly Timesheet does not.
When you’ve entered all your hours, click the green arrow in the lower right-hand corner and select “Save and close.”
Unbilled / Uninvoiced Time
One of the nice things about marking time you’ve worked as billable in QuickBooks is that you can run a report to find billable time you haven’t invoiced yet. This has helped me remember to invoice clients I only work for a few times a year.
You can find the report by clicking Reports in the left-hand menu, searching for “time,and selecting “uninvoiced time.”
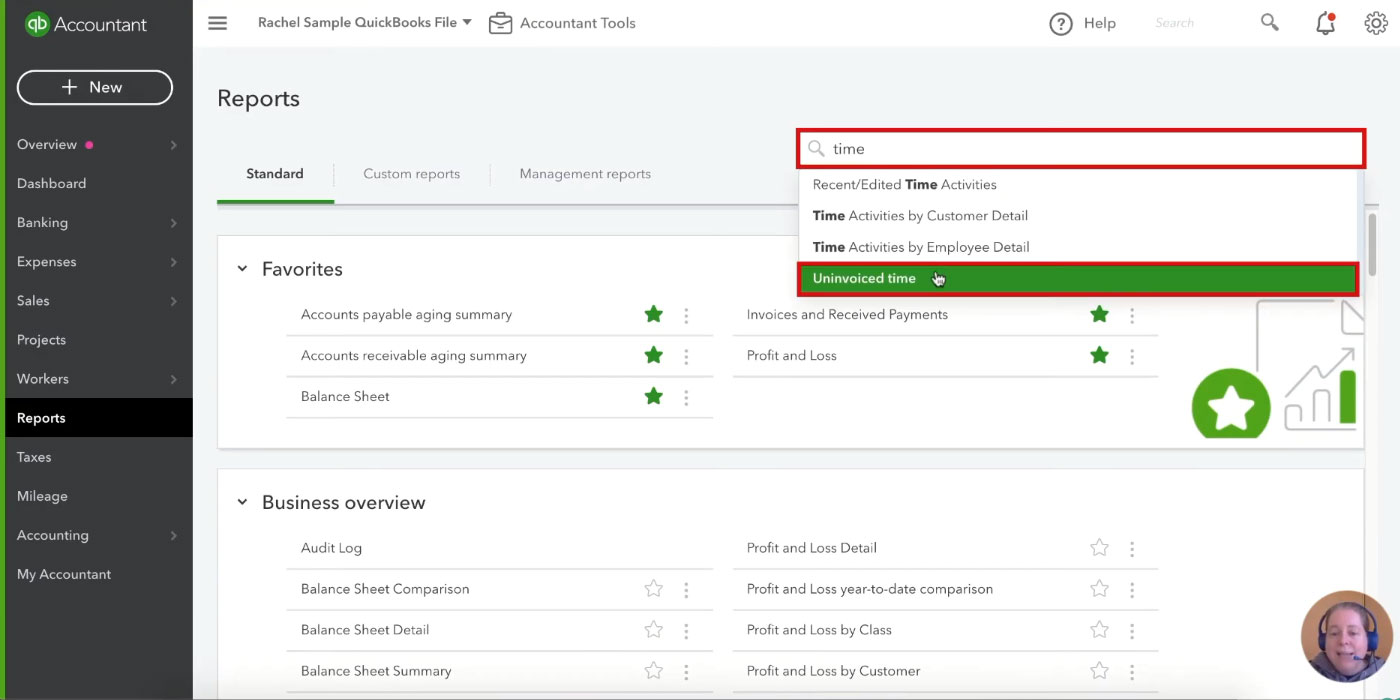
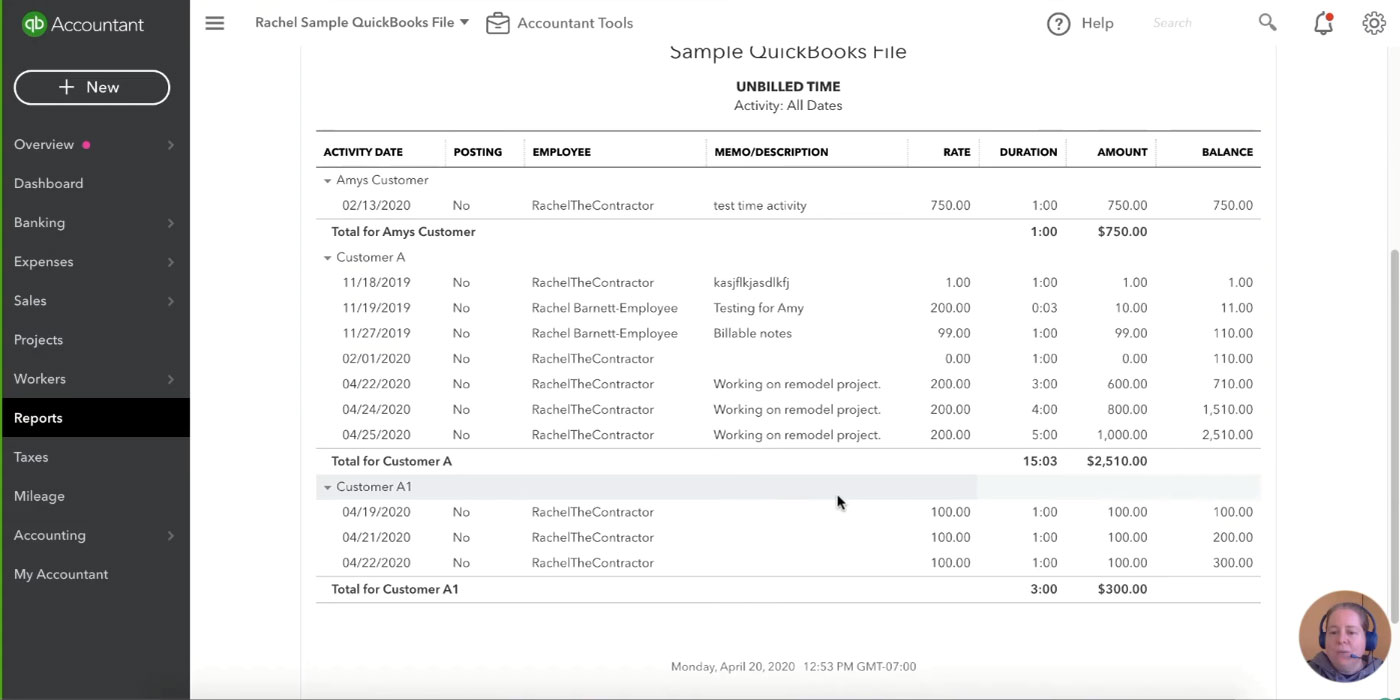
This report shows a full list of the billable times you haven’t billed/invoiced for yet.
These are just two ways to track and bill time within QuickBooks Online. If you’d like more of a stopwatch style tracker, you can always check out what’s available at Apps.com.
☕ If you found this helpful, you can say “thanks” by buying me a coffee…
https://www.buymeacoffee.com/gentlefrog
If you’d like to watch me walk you through this time tracking process, you can watch the video below:


4 Responses
Hi,
Can you please help to train on quick books payroll, employee and how to consolidate invoice with payroll to do profitability for each employee.
This is more complicated than I’d want to put into a blog. If you’d like to set up an appt with me (www.gentlefrog.com/meeting), I’d be happy to discuss this with you.
I really want to be able to track time and how much we pay our employees for our Worker’s Comp insurance, but I don’t have the options that you have on your screen when I go to the time activity, like the cost rate option.
Hi Miranda, QBO has changed the Time Tracking screen since that video was made. You should now see a checkbox labeled “Billable (/hr)” when you check this off it gives you the option to put in the cost/hr rate.