Sub-customers are a type of customer in QuickBooks online associated with a parent customer.
Sub-customers are commonly used for franchises or locations.
For example, if you own a cleaning business and you work with a company that has several short-term rental properties, you clean. Each rental could be a sub-customer of the main company.
You can also use sub-customers to track jobs or projects (if you use QBO Plus or Advanced, you can use Projects).
In this tutorial, I’ll show you how to create sub-customers, create invoices for them, and apply payments to those invoices.
Quick Instructions:
Create sub-customers
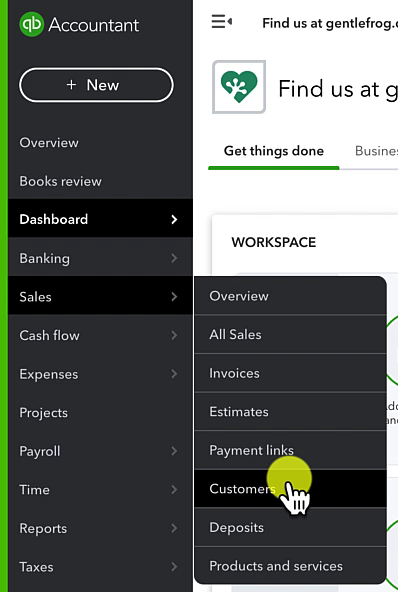
- Click Sales -> Customers in the left side menu
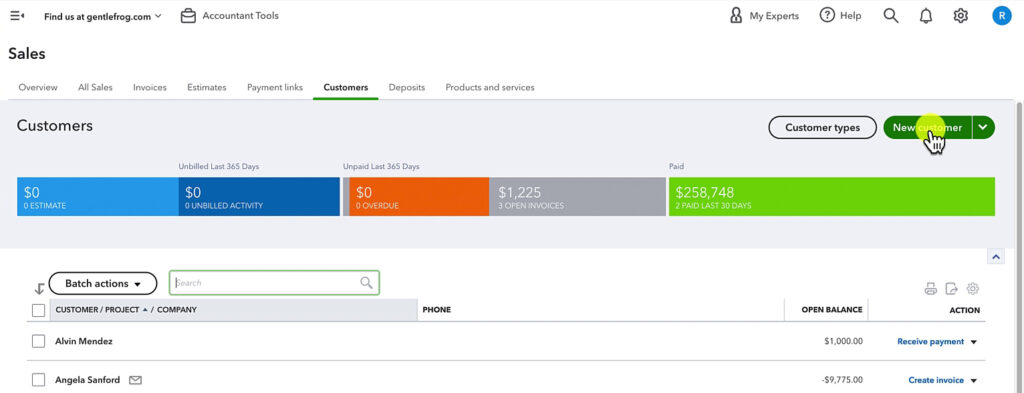
- Click the green New customer button
- Fill in any fields
- Check off is a sub-customer
- Select a Parent customer from the drop-down
- Check off Bill parent customer, if applicable
- Click Save
Create invoices for sub-customers
- Click +New in the upper left corner
- Under CUSTOMERS click Invoice
- In the Customer drop-down box, the sub-customer will appear underneath the parent customer
- Fill in as needed
- Click Save and close
Apply Payment to sub-customer invoice
- Click +New in the upper left corner
- Under CUSTOMERS click Receive payment
- Find the parent customer in the Customer drop-down
- Fill in Payment method, Reference no. (if applicable), Deposit to, and Amount received
- Check out which invoices the payment gets applied to
- Click Save and close
Keep reading for a complete walkthrough with screenshots:
Creating a Customer (Parent)
To create customers and sub-customers, you first need to navigate to the customer list. Then, click Sales in the left-side menu, then Customers.
To add a new customer, click the green New customer button in the upper-right corner.
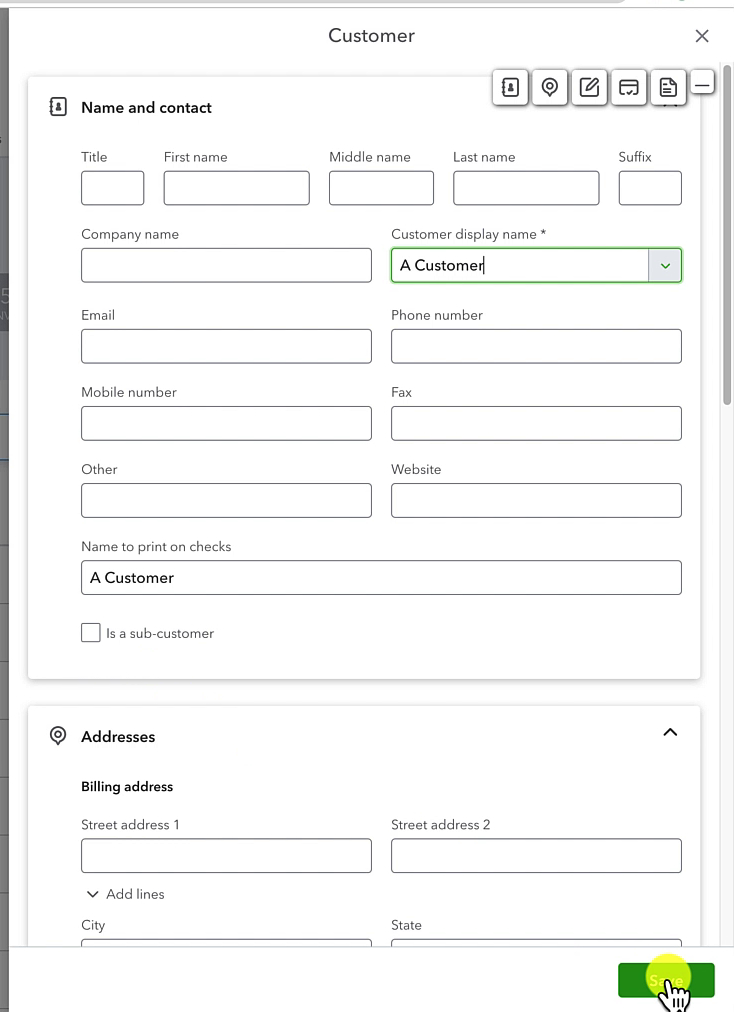
A Customer pop-up will appear where you can enter the information for your new customer.
When creating a customer, you can fill in as many fields as you like. The only mandatory field is the Customer display name.
For this example, I’m creating the parent customer who will have sub-customers. I name this “A Customer.” Then, click the Save button to continue.
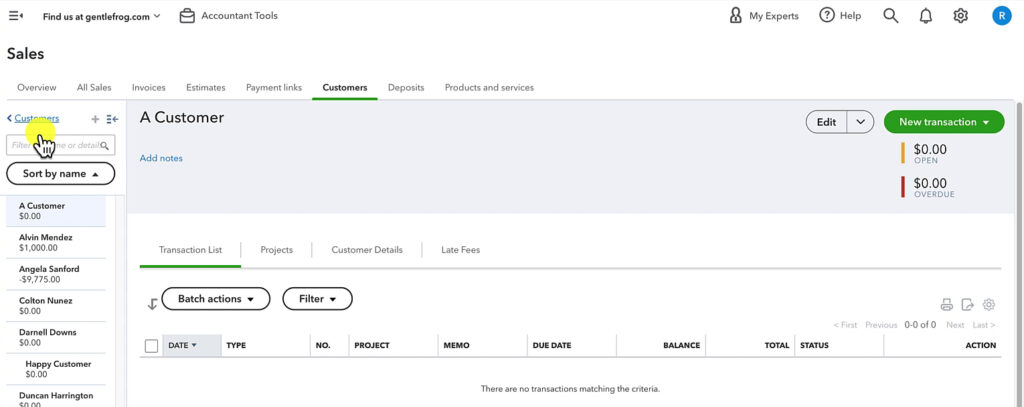
You will now be in the profile of your new customer.
Creating a Sub-Customer
To create a sub-customer, return to the customer list by clicking the blue Customers link to the left.
Click the green New customer to the right like we did to create a customer.
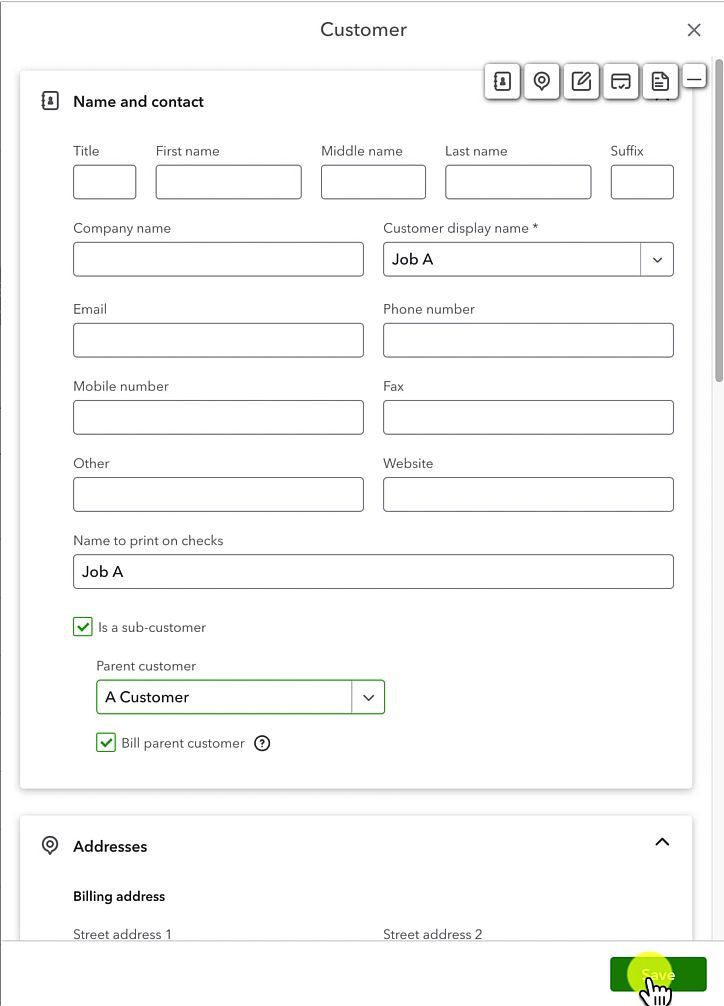
At the bottom of the Name and contact section, you’ll find the Is a sub-customer check box.
When you check that box a drop-down appears where you select the parent customer.
Another check box, Bill parent company, appears. This tells QuickBooks to bill anything related to the sub-customer to the parent customer.
For my example, I’m calling this sub-customer “Job A” and making it a sub-customer of “A Customer”.
I also created a sub-customer called “Job B”.
In the customer list, sub-customers appear underneath the parent customer.
Sub-Customer Invoices
Creating an invoice for a sub-customer starts with clicking the +New button and selecting Invoice under CUSTOMERS.
Fill in the invoice screen like you normally would for any customer.
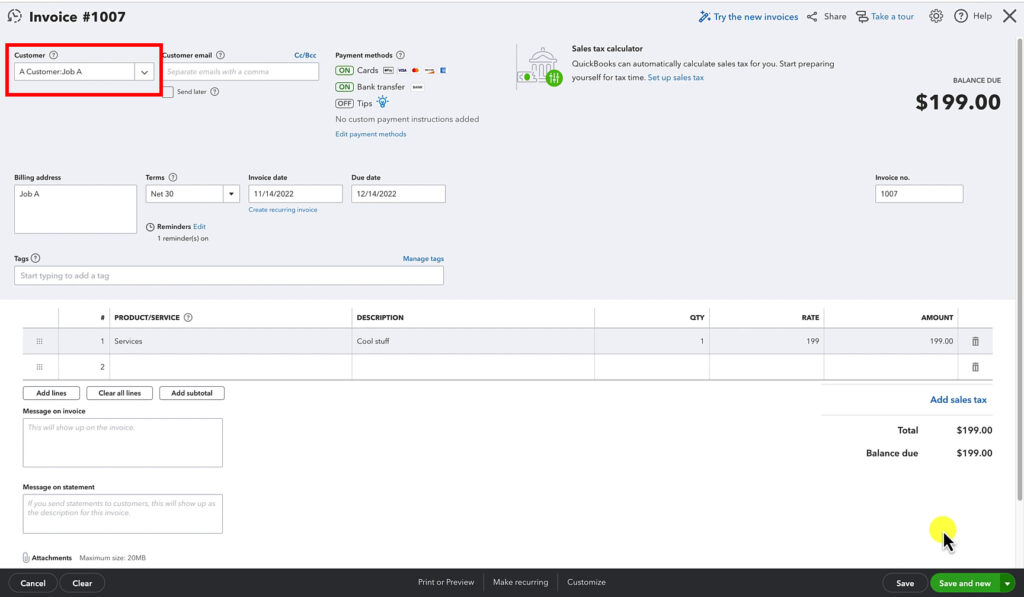
When you select a sub-customer from the Customer drop-down menu you’ll notice it appears as “Customer: Sub-customer”. In my example below it’s “A Customer: Job A”:
I created an invoice for both sub-customers Job A and Job B so I can show you what this looks like in the customer profiles.
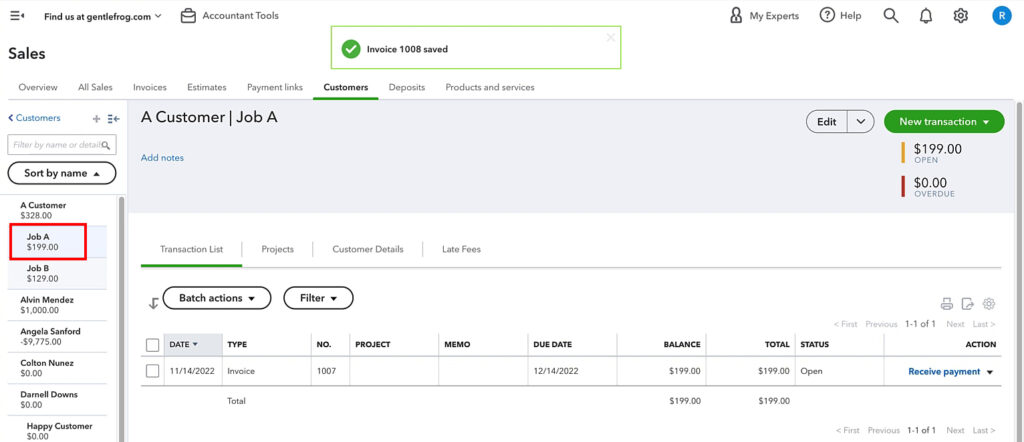
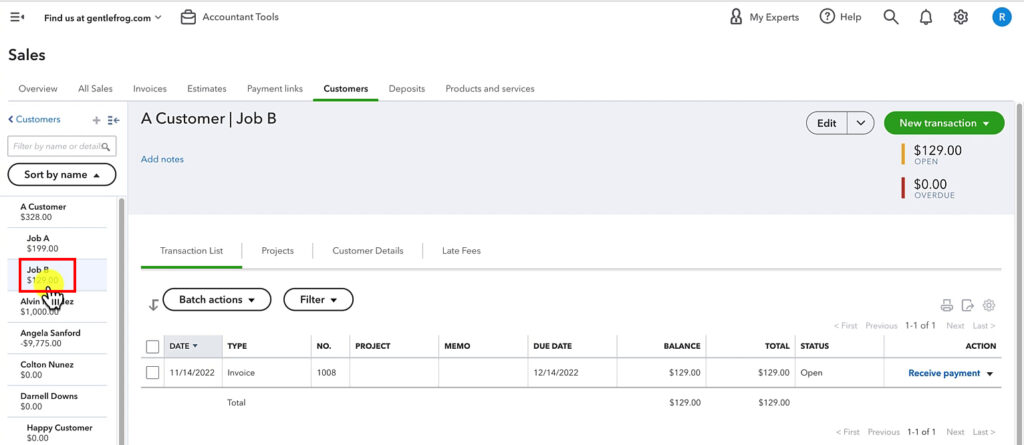
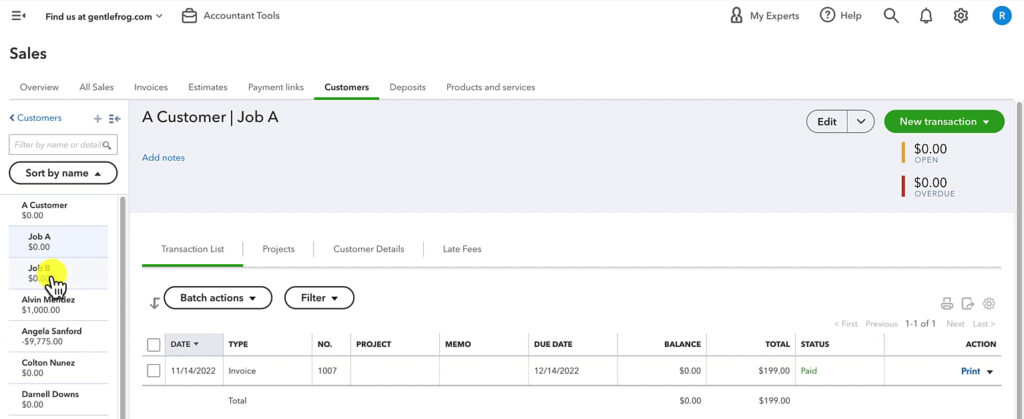
When you view a sub-customer profile you’ll see the invoices associated with that sub-customer.
Job A profile:
Job B profile:
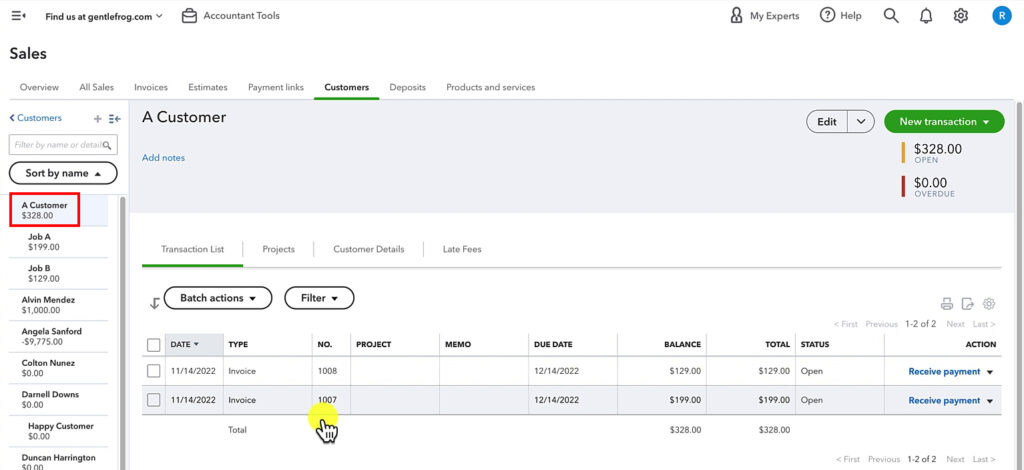
When you view the parent customer’s profile you’ll see invoices associated with that customer as well as any sub-customers.
Here is “A Customer” showing the invoices from Job A and Job B:
Apply a Payment to a Sub-Customer Invoice
Customers with sub-customers will often send payments that cover multiple sub-customers.
There are a couple of different ways you can get to the screen to apply a payment.
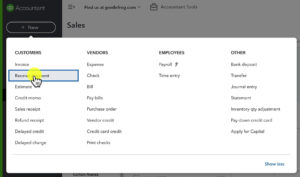
One way is to use the + New button in the upper right and select Receive Payment.
When you use this method you’ll need to select the customer from the Customer drop-down.
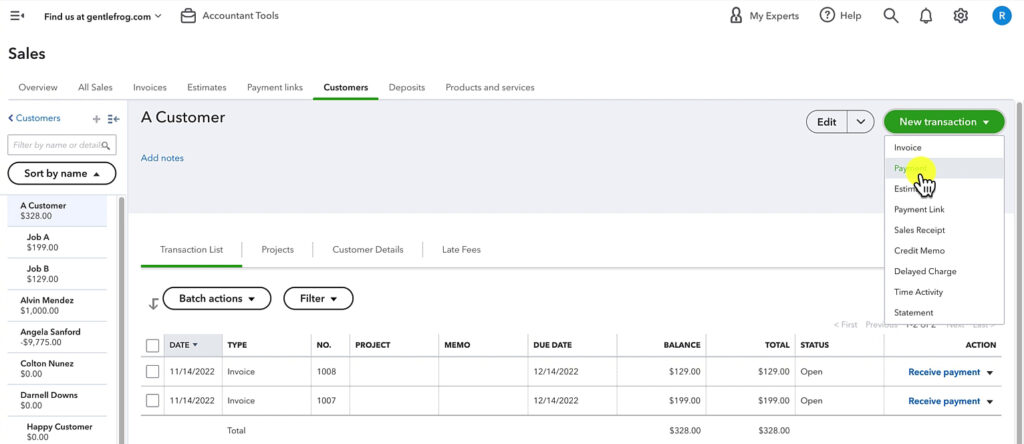
The other method is from within the parent customer’s profile.
Click the green New Transaction button and select Payment from the drop-down.
On the Receive Payment screen, your parent customer will automatically be selected as the Customer.
Fill in the Payment method, Reference no. (if applicable), Deposit to (which account the money was deposited into), and the Amount received.
In my example below, I have a check covering the invoices for Job A and Job B. When both those invoices are checked off you can see the amount to apply equals the amount received.
Click Save and Close when you’re done receiving your payment.
When you view the parent customer’s profile you’ll see the invoices (now with a status of Paid) along with the payment.
When you view the sub-customers you will only see the invoice with a status of Paid.
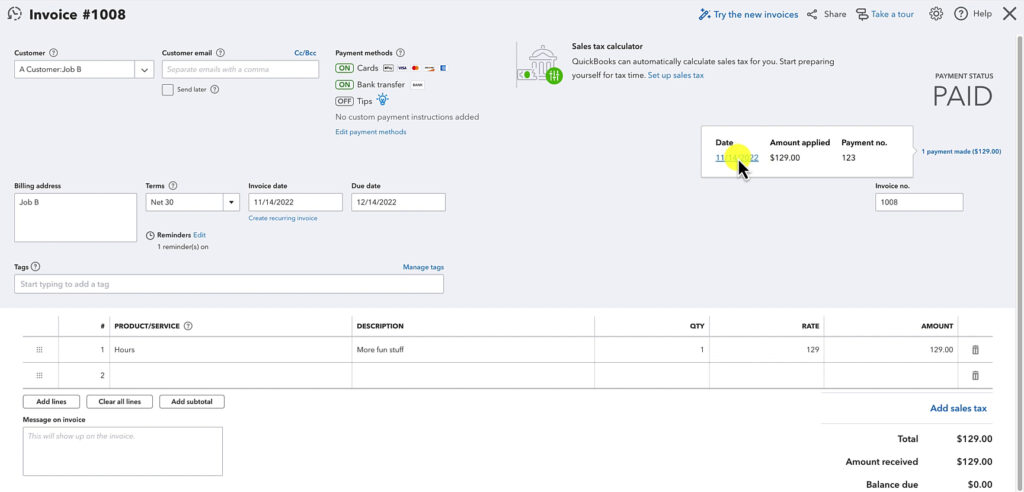
There’s no information in a sub-customer profile letting you know how invoices were paid. To figure this out you can click on the invoice.
On the right under the giant PAID text, you’ll see a little blue payment made link. When you click on that link it’ll show you a list of the payments applied to the invoice.
Click on a payment’s date and it will open up the Receive Payment page for that payment.
You now know how to create sub-customers, invoices for sub-customers, and apply payments to those invoices.
☕ If you found this helpful, you can say “thanks” by buying me a coffee… https://www.buymeacoffee.com/gentlefrog
Below are videos if you prefer to watch a walkthrough.
If you have any questions about sub-customers in QuickBooks Online, click the green button below to schedule a free consultation.







One Response
Thanks this was very helpful!