In this blog post, you’ll learn how to record a loan in QuickBooks Online with a down payment applied to the loan.
Quick Instructions:
- Navigate to the Chart of accounts
- Click the +New button
- Select Assets from the icons at the top
- Select Fixed Assets in the Save account under drop-down menu
- Select anything from the Tax from section drop-down (this doesn’t matter)
- Enter an Account name
- Click Save
- In the Chart of accounts click the New button
- Select Liabilities from the icons at the top
- Select Long Term Liabilities in the Save account under drop-down menu
- Select anything from the Tax from section drop-down (this doesn’t matter)
- Enter an Account name
- Click Save
- Click the +New button in the left side menu
- Select Journal entry in the OTHER column
- In line 1, under ACCOUNT select the asset account. under DEBITS enter the loan amount.
- In line 2, under ACCOUNT select the loan account. under CREDITS enter the loan amount.
- Click Save and close
- Click the +New button in the left side menu
- In the VENDORS column select Check (if you paid by check), otherwise select Expense
- Payee is the company that issued the loan
- Bank account is the account the money came from
- Payment date is when you made the down payment
- Under CATEGORY select the loan account
- Under AMOUNT enter the amount of the down payment
- Click Save and close
Keep reading for a complete walkthrough with screenshots:
Creating the Asset & Loan Accounts
The first step is creating accounts in the Chart of accounts for both the asset and the loan.
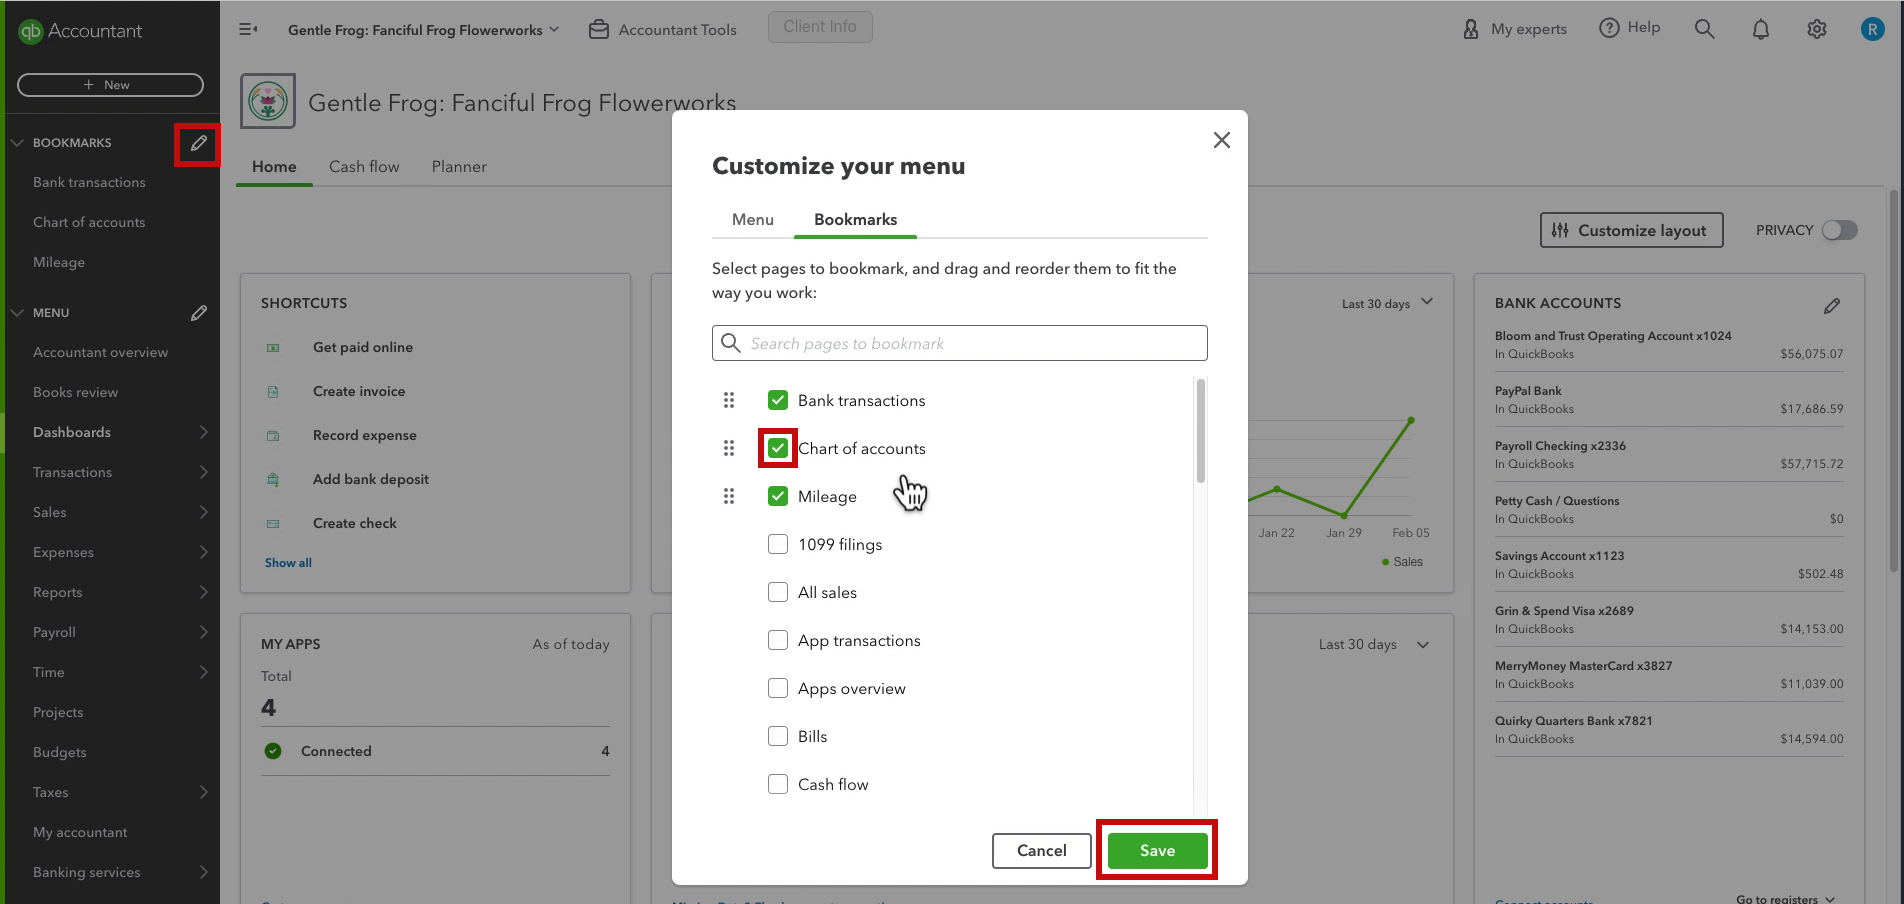
I have the Chart of accounts bookmarked in the QuickBooks menu. To bookmark it click the pencil icon next to BOOKMARKS. Search for Chart of accounts, check it off, and click Save.
Within the Chart of accounts click the green New button on the right.

Create Asset Account
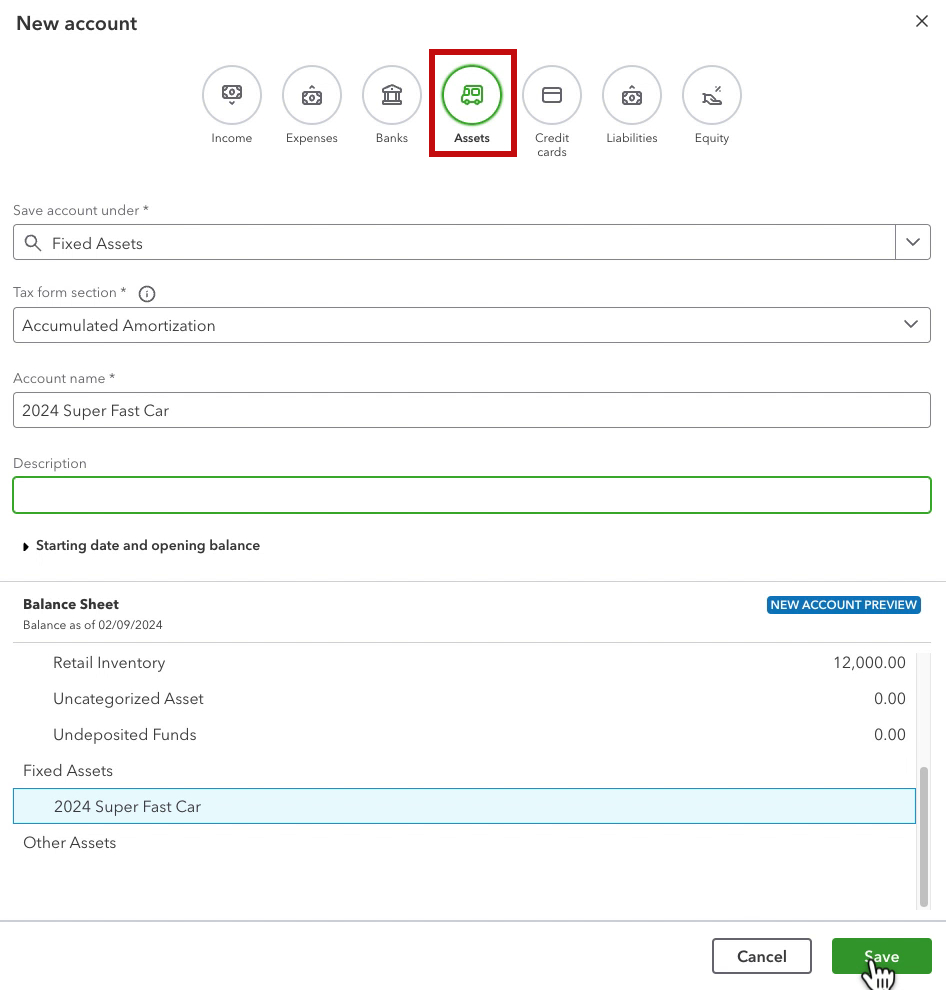
At the top of the New account pop-out click the Assets icon.
In the Save account under drop-down select Fixed Assets.
Tax form sections doesn’t matter, I usually select the first item in the list.
The Account name should be something that makes it clear to you what the asset is. If you’re purchasing a truck don’t name it “business truck.” Name it something like “2024 Toyota Tacoma”.
Description can be left blank. You can also use this to add additional information like a vehicle VIN.
When ready click Save.
Create Loan Account
To create the loan account click the green New button again.
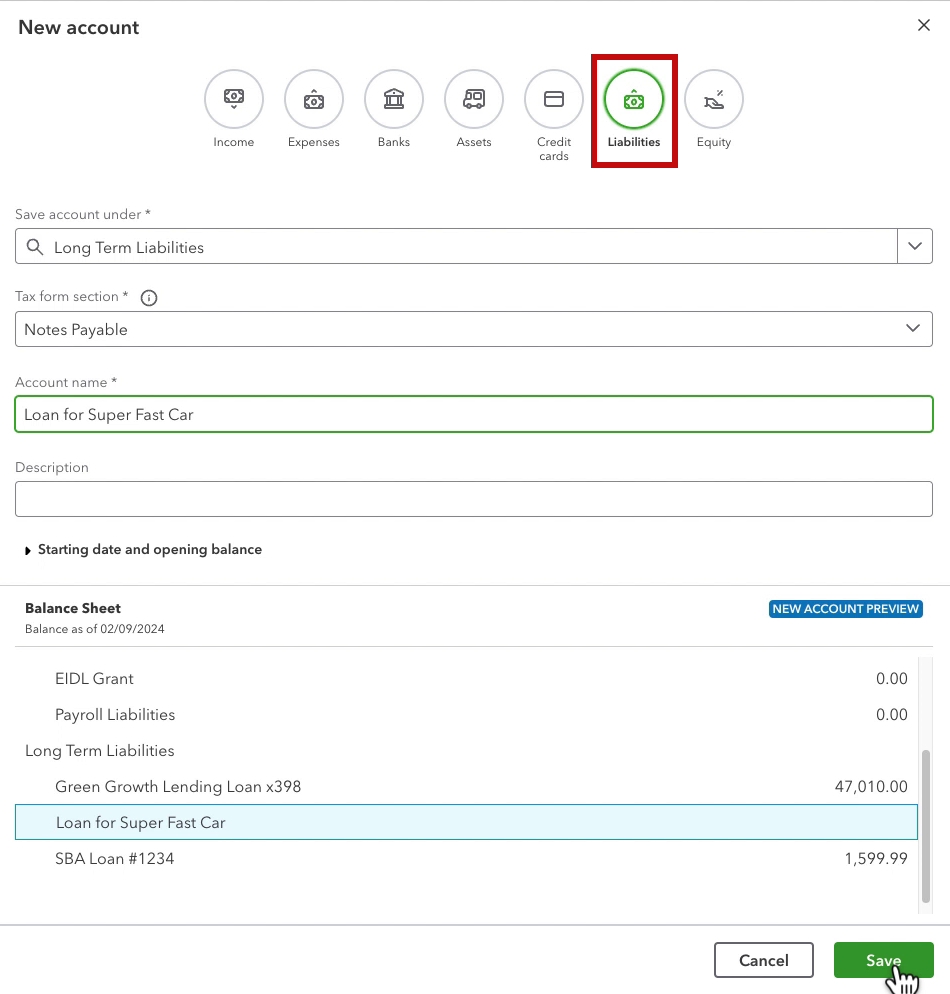
At the top of the New account pop-out click the Liabilities icon.
In the Save account under drop-down select Long Term Liabilities. (If the loan will take you less than a year to pay off, select Other Current Liabilities).
Tax form sections doesn’t matter, I usually select the first item in the list.
The Account name should be something that makes it clear what the loan is for, or who it’s from. It’s common to include the last 4 digits of the loan number like you would with a bank account.
Description can be left blank. You can also use this to add additional information like who issued the loan, full loan number, etc.
When ready click Save.
Record Loan Amount
Now that we have our asset and loan accounts we need to record the loan amount.
I’ll show you two ways to do this.
Journal Entry
The first method for recording the loan is with a journal entry.
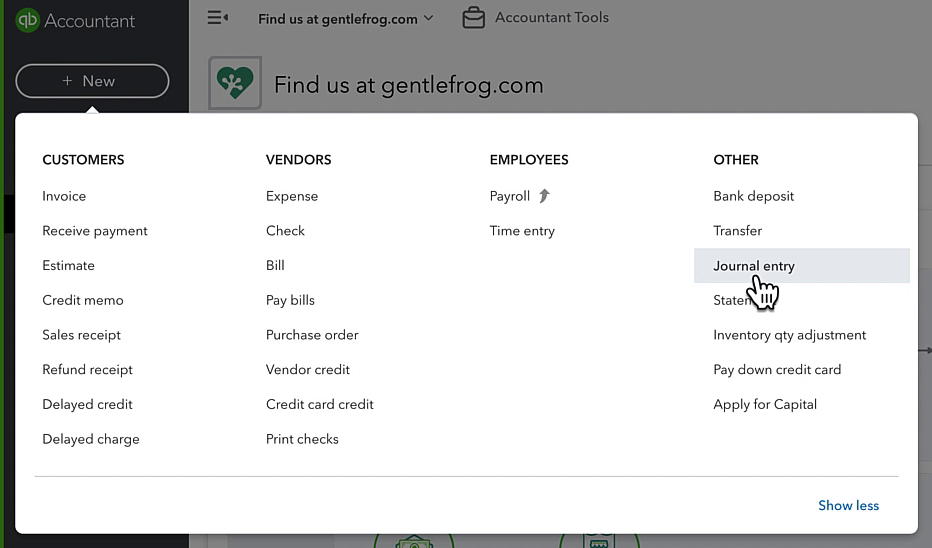
To create a journal entry click the +New button in the left side menu. Then select Journal entry in the OTHER column.
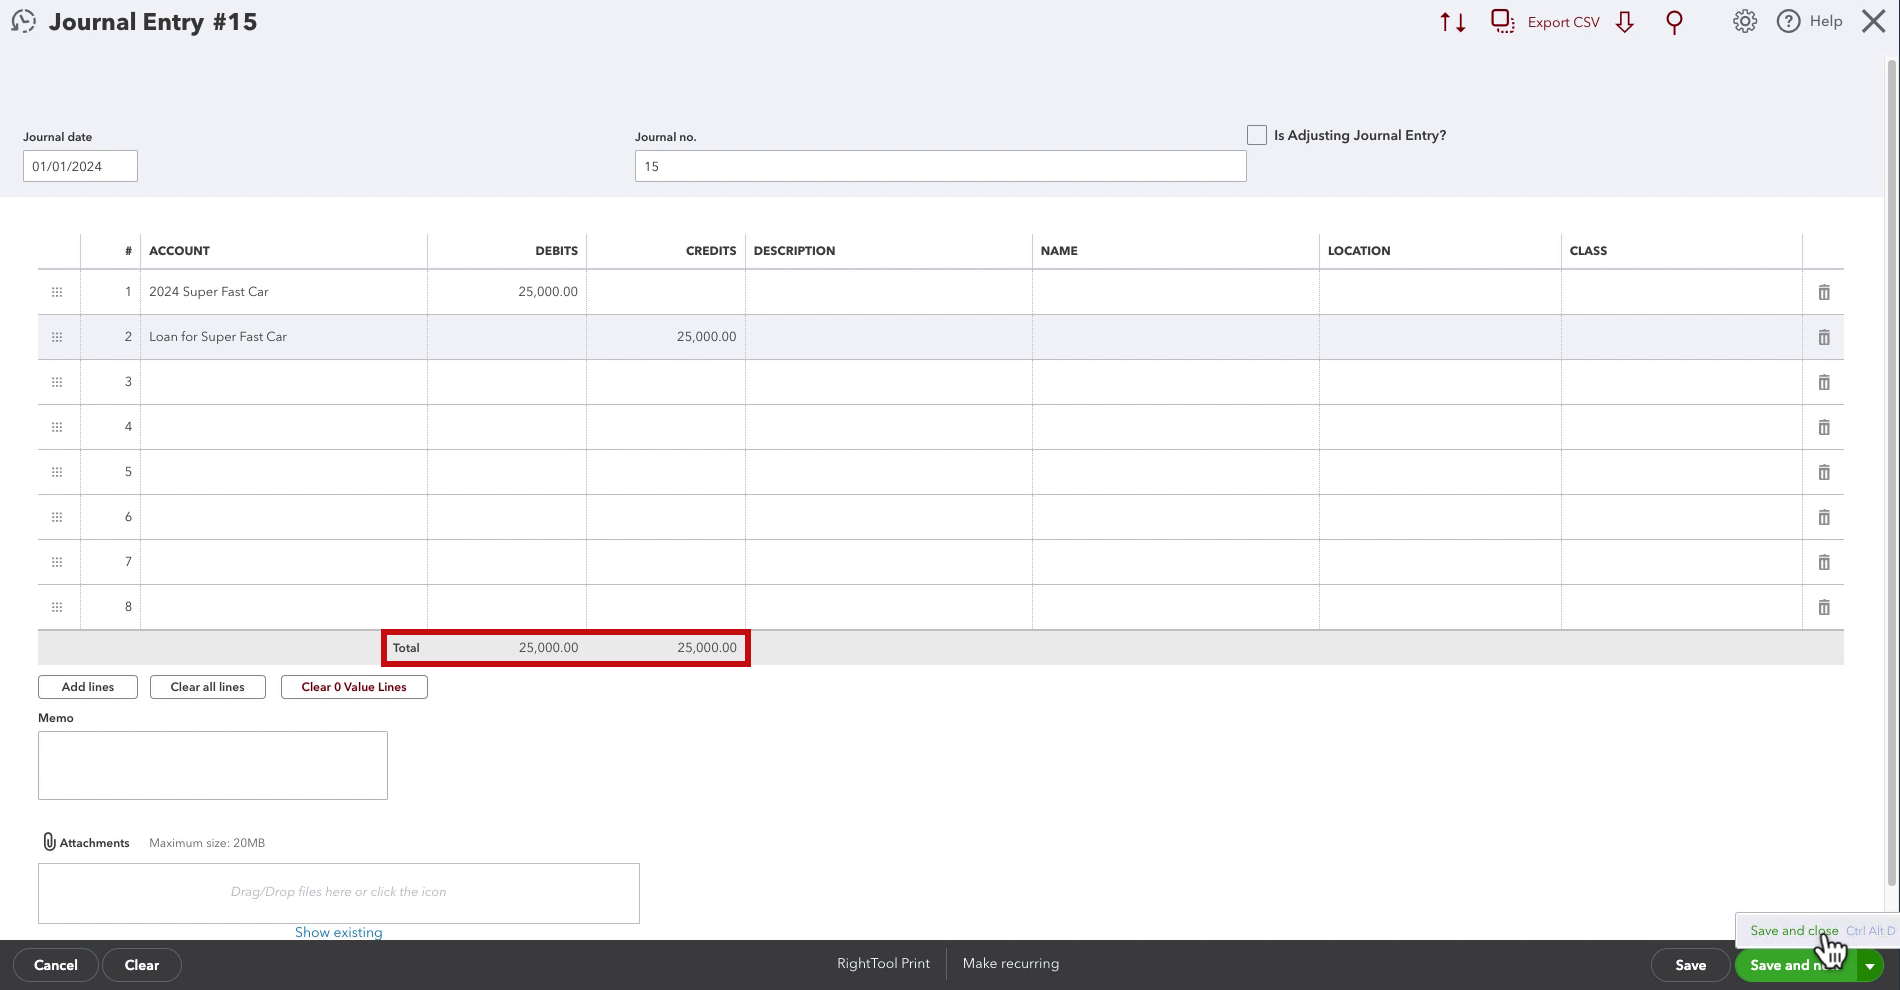
The Journal date should be the day the loan was created.
On line 1 under ACCOUNT enter the asset account. Under DEBITS enter the loan amount.
On line 2 under ACCOUNT enter the loan account. Under CREDITS enter the loan amount.
A journal entry’s Total debits and credits should always be the same.
When ready click Save and close.
Add Journal Entry in Register
The other method for recording the loan is from within the register of the asset and loan.
I’ll start with the asset register by searching for the asset within the Chart of accounts.
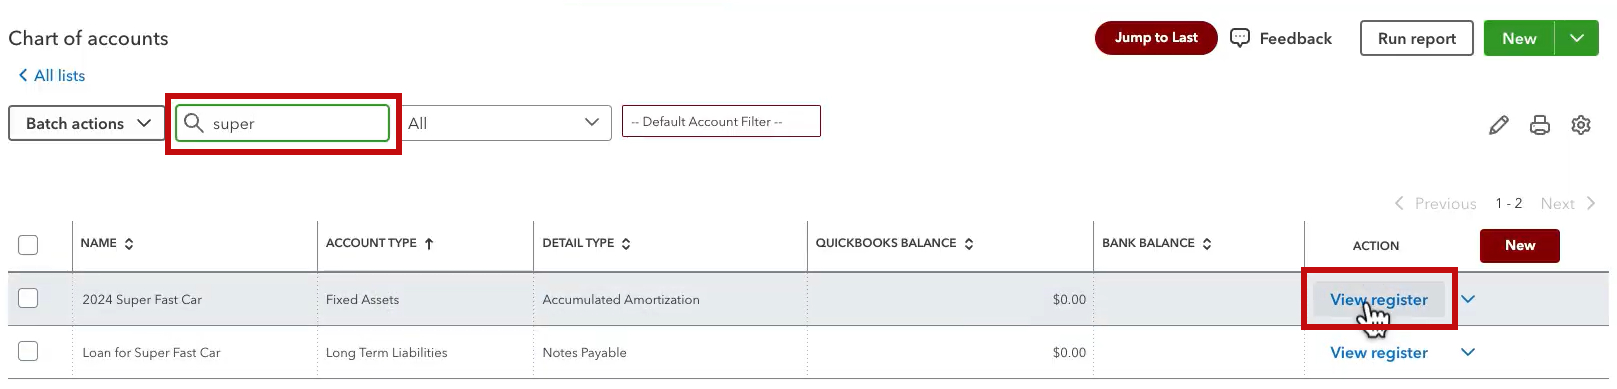
Click the View register link to the right of the asset account.
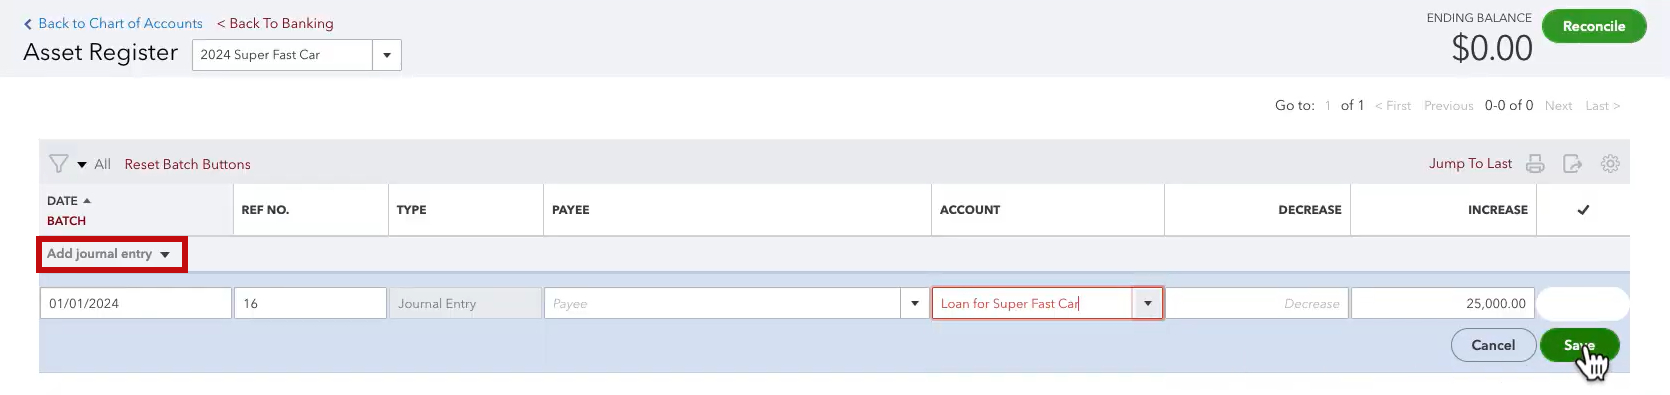
Click Add journal entry on the left.
Enter the date of the loan. Skip PAYEE. Under ACCOUNT select the loan. Under INCREASE enter the loan amount. Click Save.
This created a journal entry in the back end just like I showed in the previous method. I find that it’s easier for people to understand increase/decrease rather than debit/credit.
It doesn’t matter which method you use.
Record Down Payment
Now that we have our loan amount entered we can record the down payment.
To apply the down payment to the loan create either an expense or a check. They’re very similar. I’m going to use a Check.
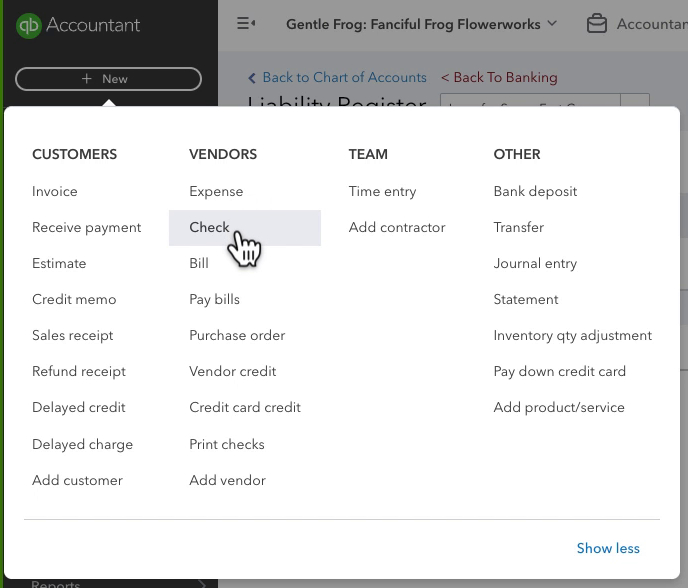
Click the +New button in the left side menu. Then click Check in the VENDORS column.
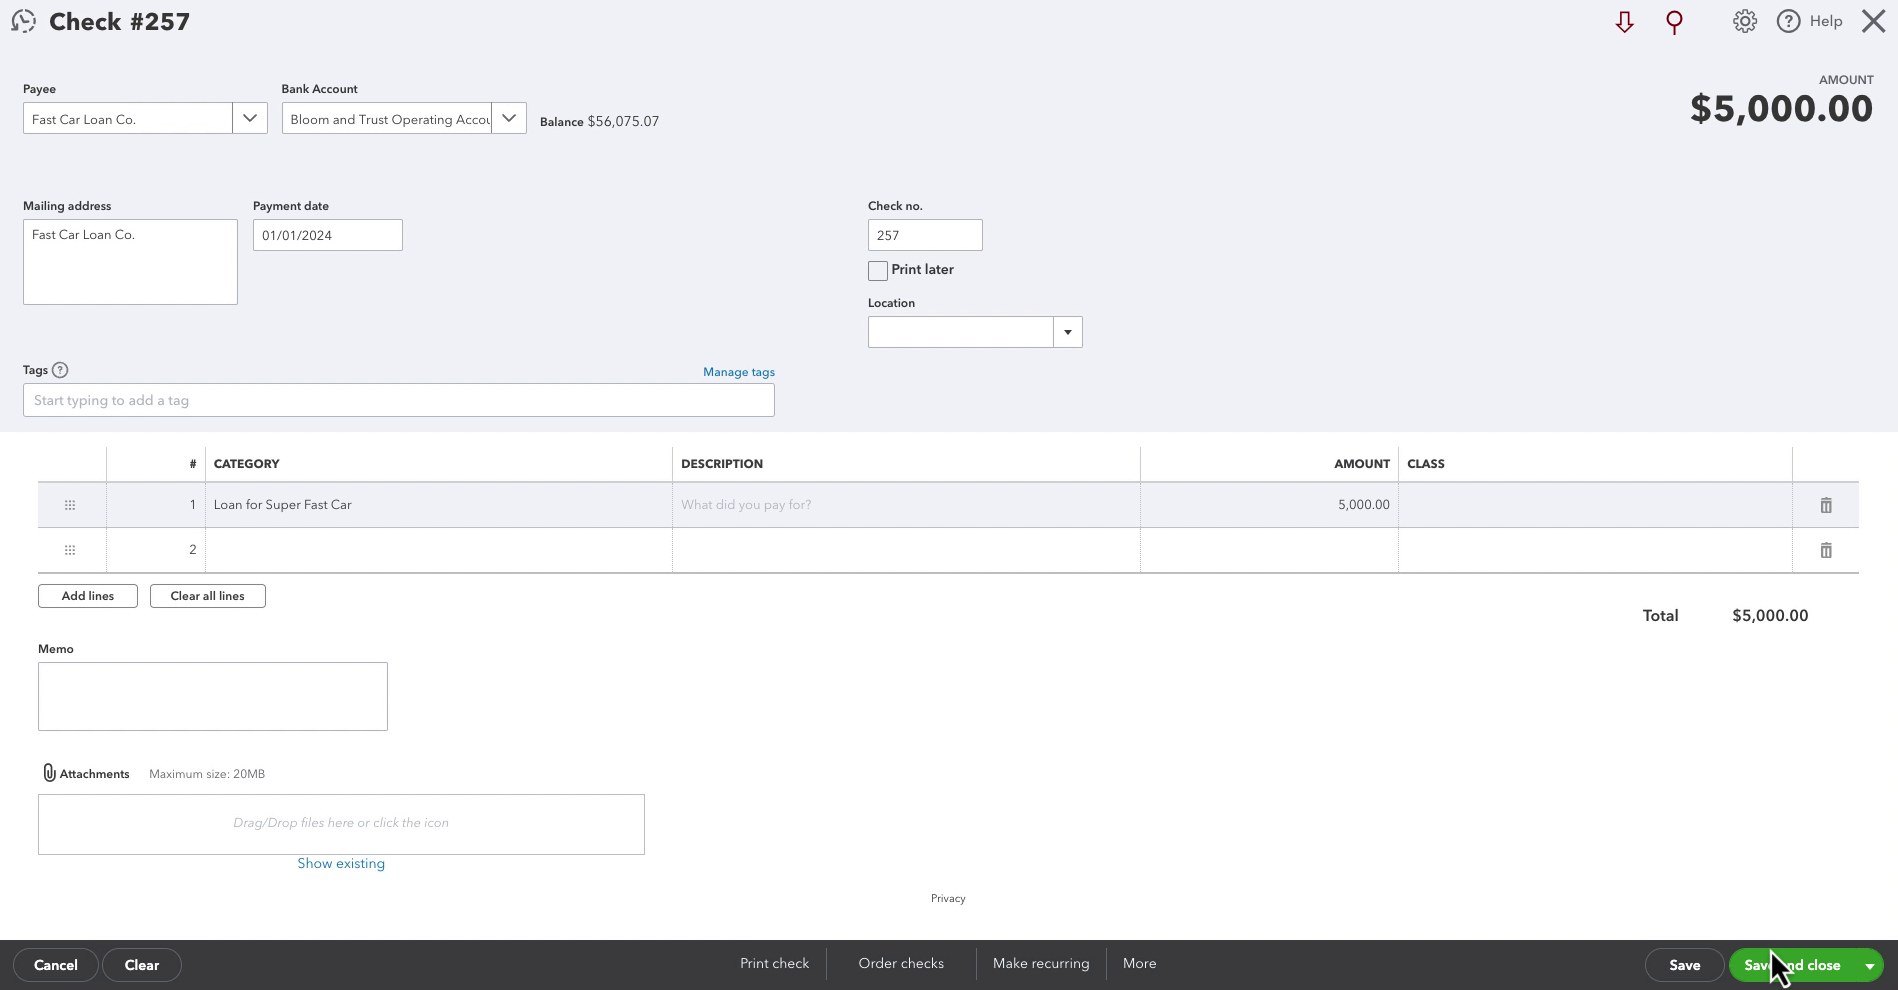
The Payee is the company that issued the loan. Bank account is whichever bank account the money came from. Payment date is when you made the down payment.
In the lower section under CATEGORY select the loan account. Under AMOUNT enter the amount of the down payment. When ready click Save and close.
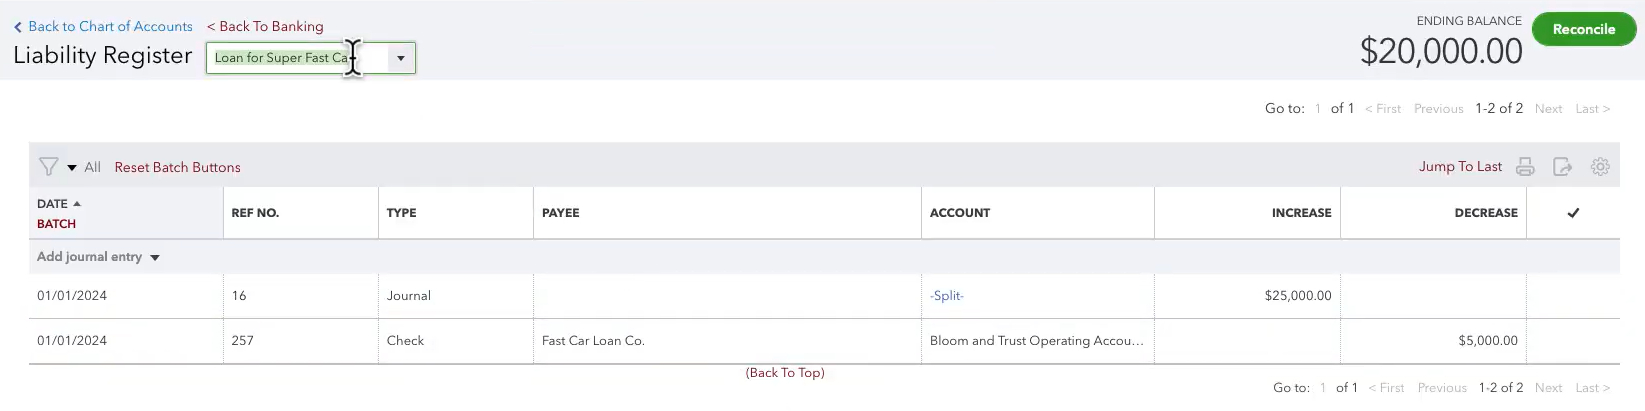
The loan register now shows that I owe $20,000 on the loan.
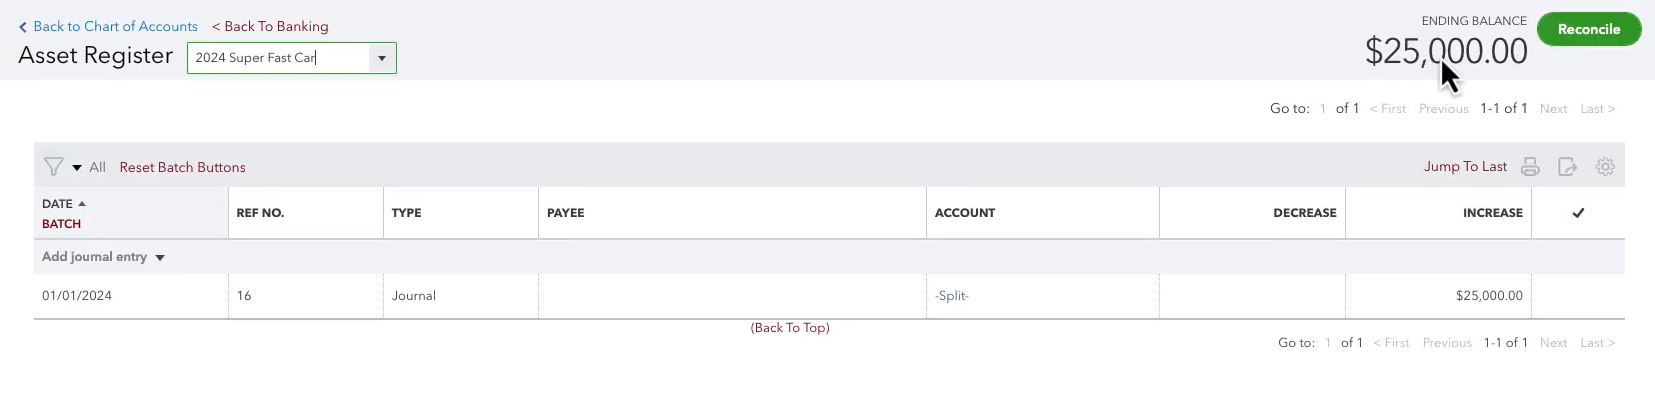
The asset register shows that the value of the asset has not changed.
If you want to know how to record your loan payments check out the blog post: How to Record A Payment To A Loan In QuickBooks Online
Scroll down if you’d like to watch the video version.
☕ If you found this helpful you can say “thanks” by buying me a coffee… https://www.buymeacoffee.com/gentlefrog
If you have questions about recording loans in QuickBooks Online click the green button below to schedule a free consultation.