In this tutorial, I walk you through the left-side navigation menu of QuickBooks Online. In both Business and Accountant views.
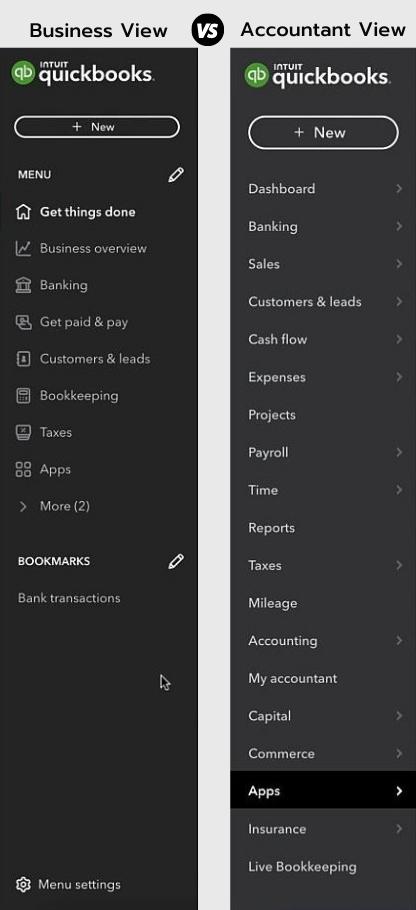
Business Vs. Accountant View
In QuickBooks Online there are two different “views” Business and accounting. The left-side menu will look different depending on which view you’re in.
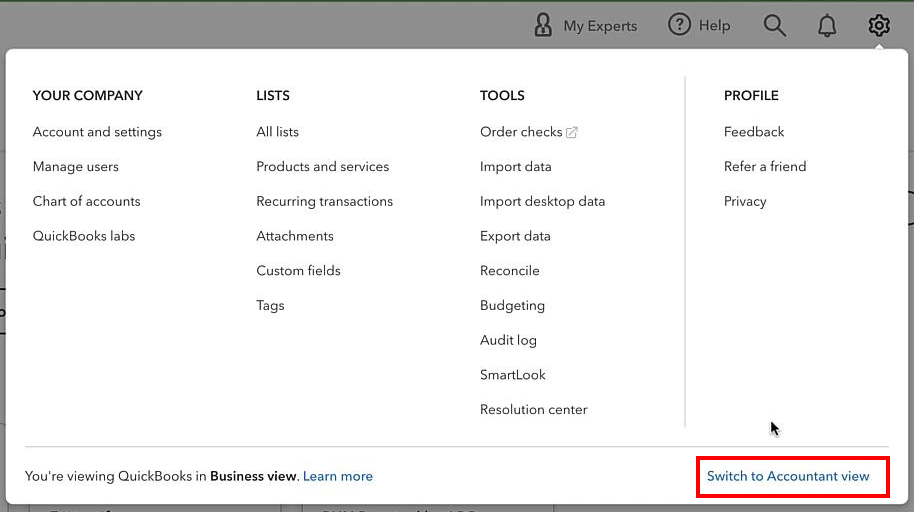
To switch between menu types click the gear in the upper right-hand corner.
In the menu that appears you’ll see text across the bottom saying “You’re viewing QuickBooks in Business/Accounting view.” (It will tell you which one you’re in). On the bottom right corner of the menu, you’ll see a link to switch views.
When you create a new QuickBooks Online account you’ll often be in Business View so that’s where we’ll begin.
Business View Menu
Customizing the Menu
You’ll notice there are two pencils in the Business View menu. One next to MENU and one next to BOOKMARKS. If you click these you get a Customize window where you can select what you want to appear in the menu.
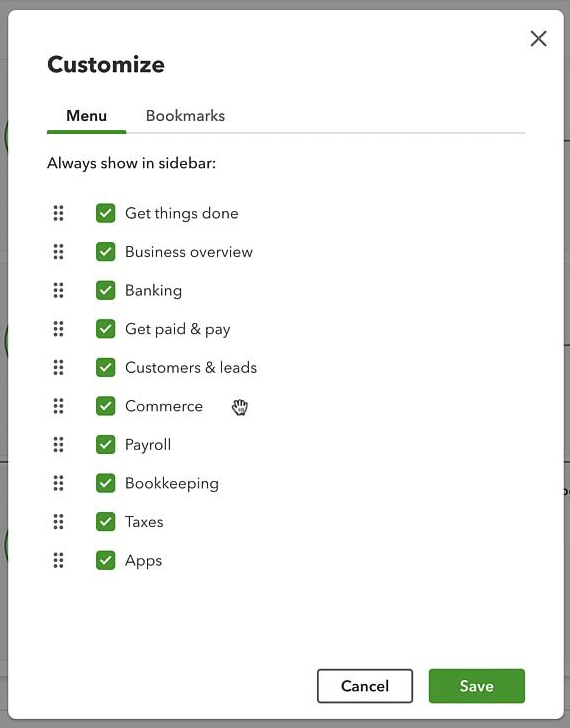
You can check or uncheck whatever you would like to see in your menu.
If you click the dots to the left of any of the items it allows you to drag and reposition it in the menu.
When you have your menu the way you’d like click Save.
Add Bookmarks
If there’s something you’d like to see in the menu that’s not there you can add it to Bookmarks.
To do this click the pencil next to BOOKMARKS.
The Customize pop-up window will appear with Bookmarks selected.
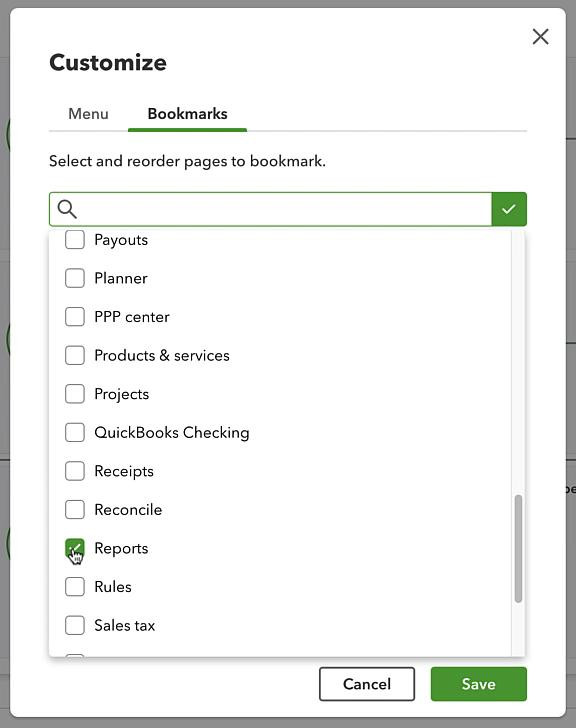
Click in the search box and start typing or scroll through the list until you see what you’d like added to your menu. Check it off and click Save.
Now that you know how to edit the menu let’s go through what’s in the stock QuickBooks Online menu.
Get things done
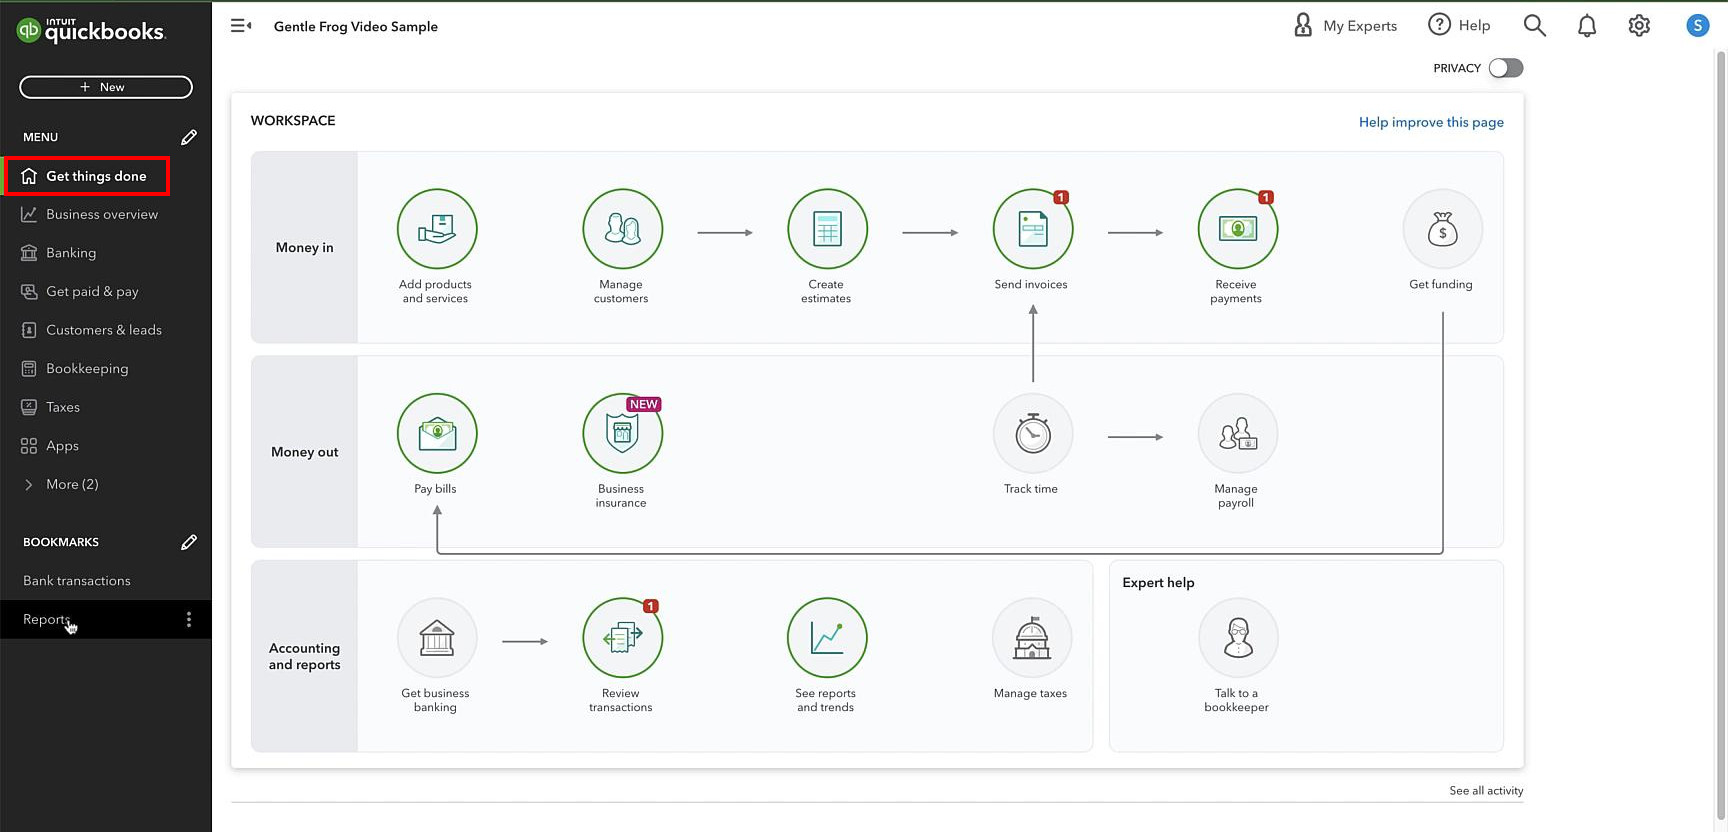
This screen is like a roadmap of things you can do in QuickBooks Online.
It has basic workflows for Money in and out. You can click on any of the icons and navigate to that section of QuickBooks.
Business overview
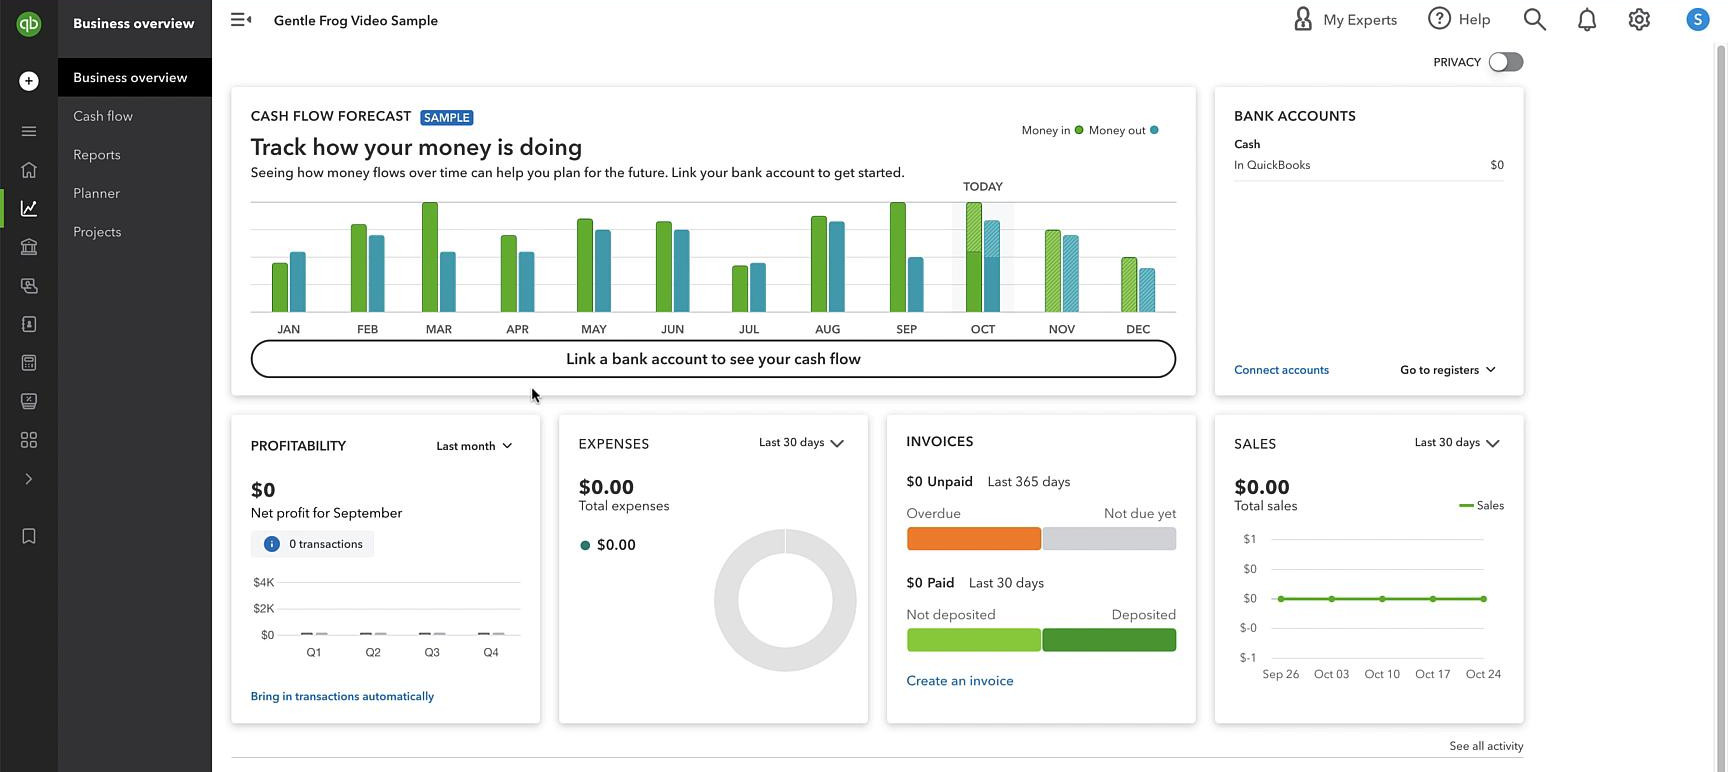
This screen shows you an overview of your business.
It could be really great but unfortunately, I can’t find a way to customize it besides changing the date range of some of the reports.
Banking
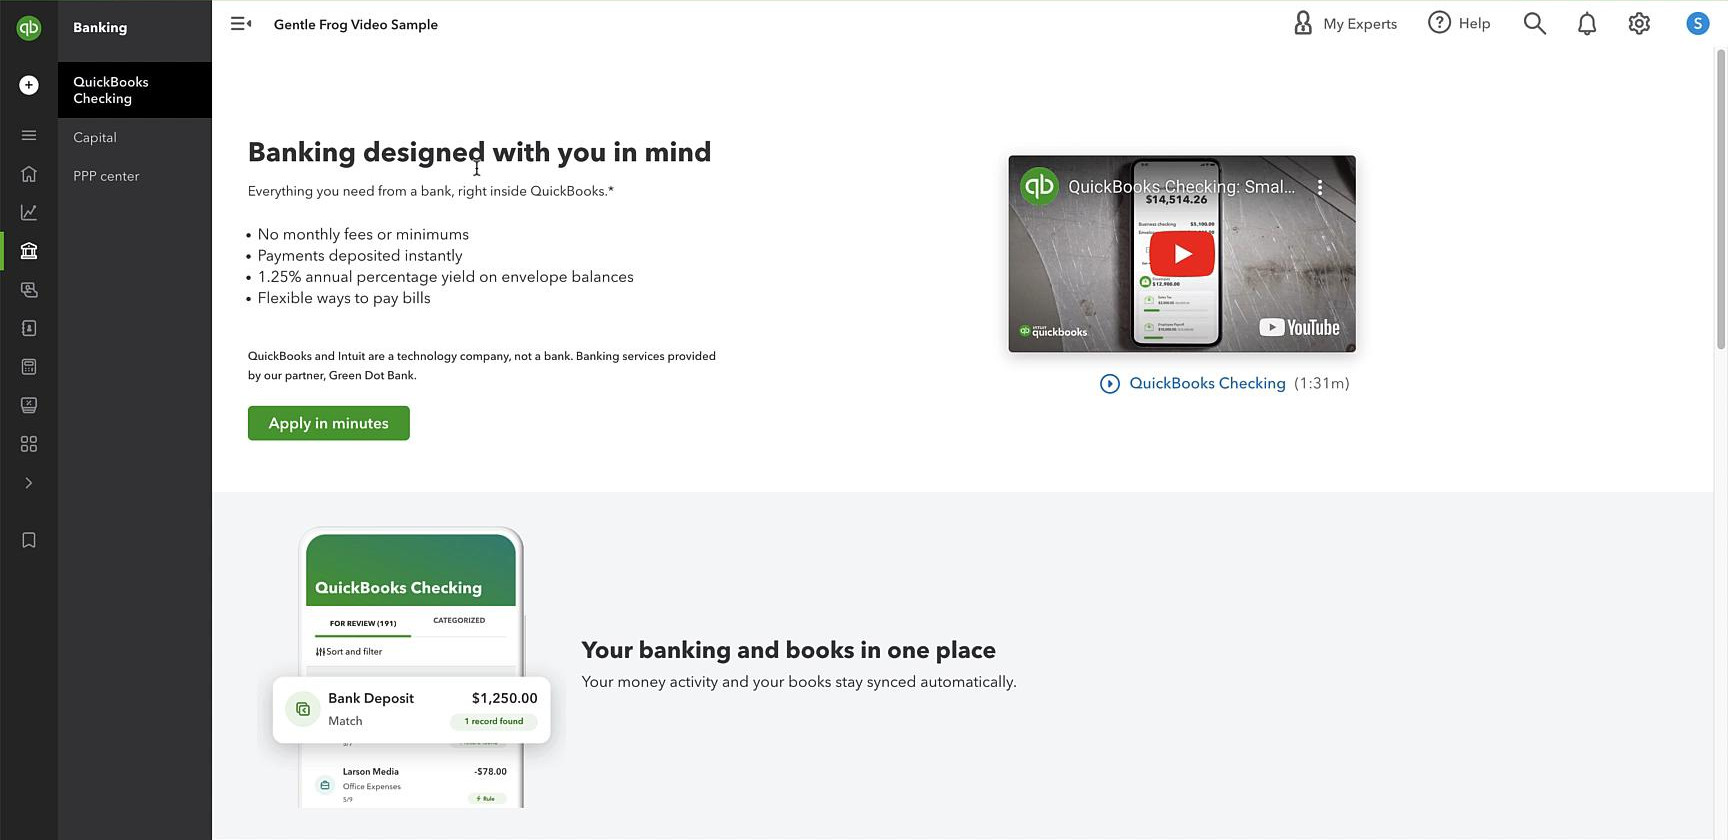
This is where you can sign up for QuickBooks Checking and QuickBooks Capital.
Get paid & pay
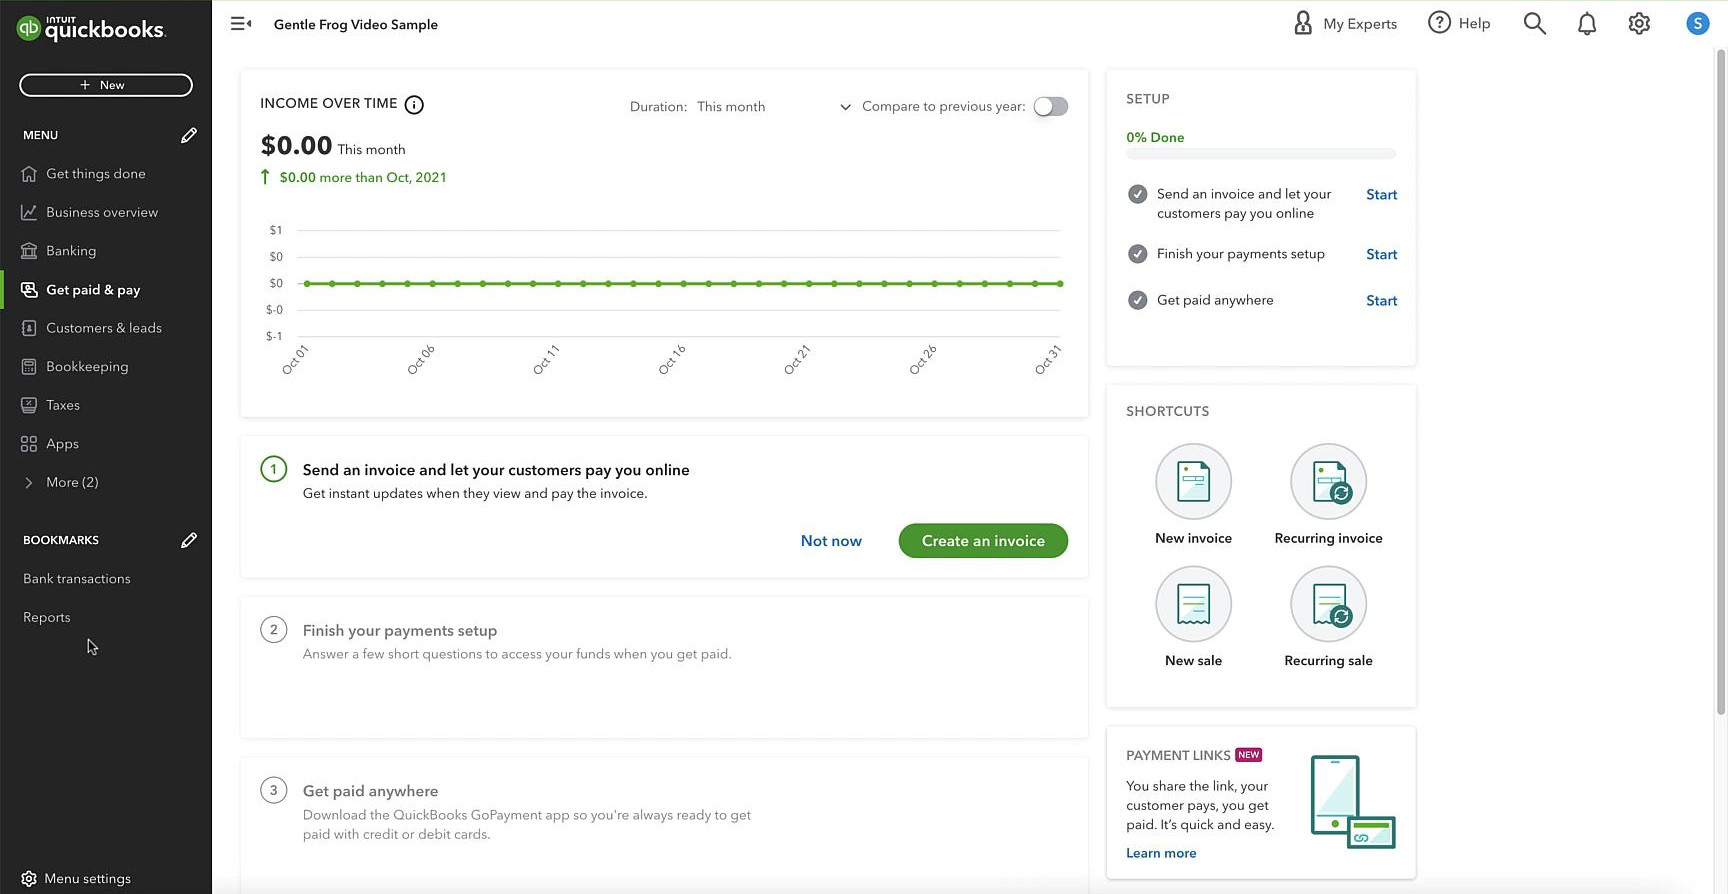
This is where you’ll find things related to you getting paid and paying others.
It shows you your Income over time and has shortcuts to creating invoices and sales receipts.
Customers & leads
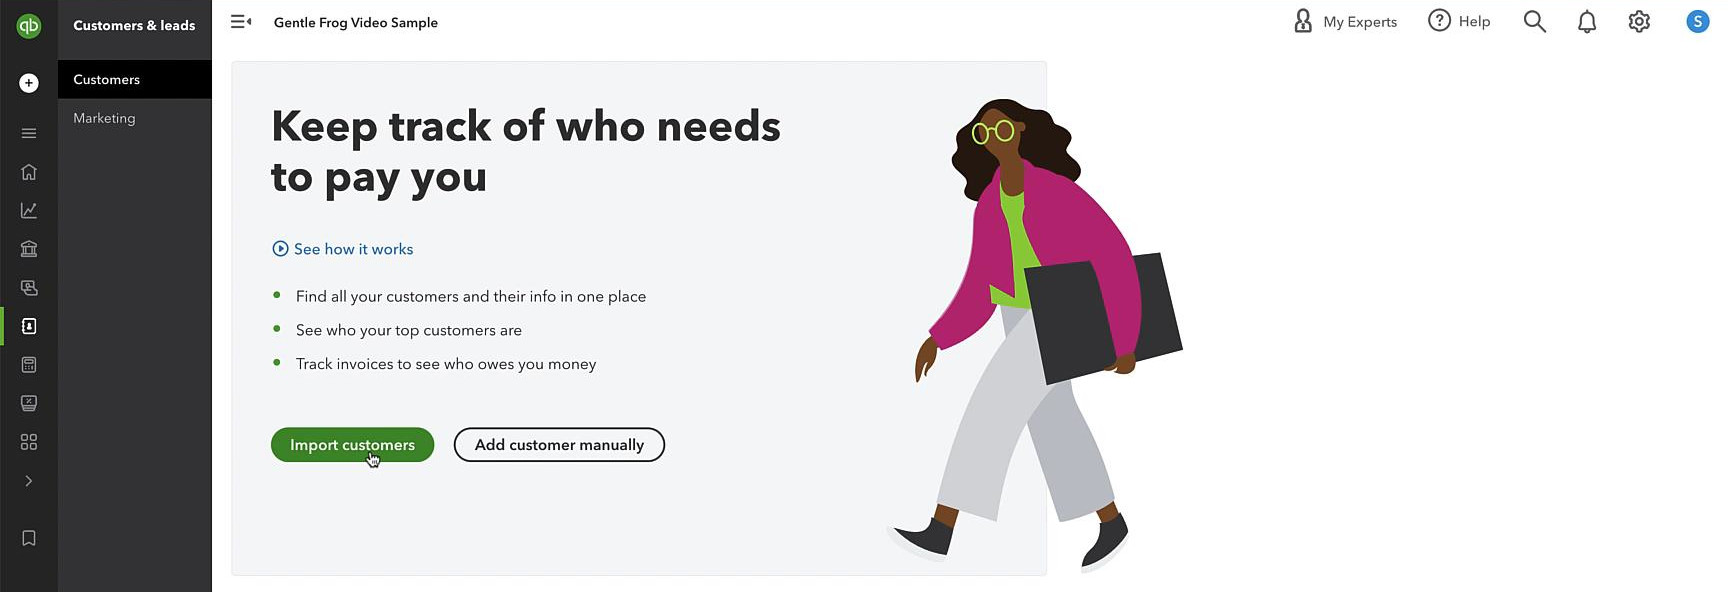
This is where you’ll go to add your customers to QuickBooks.
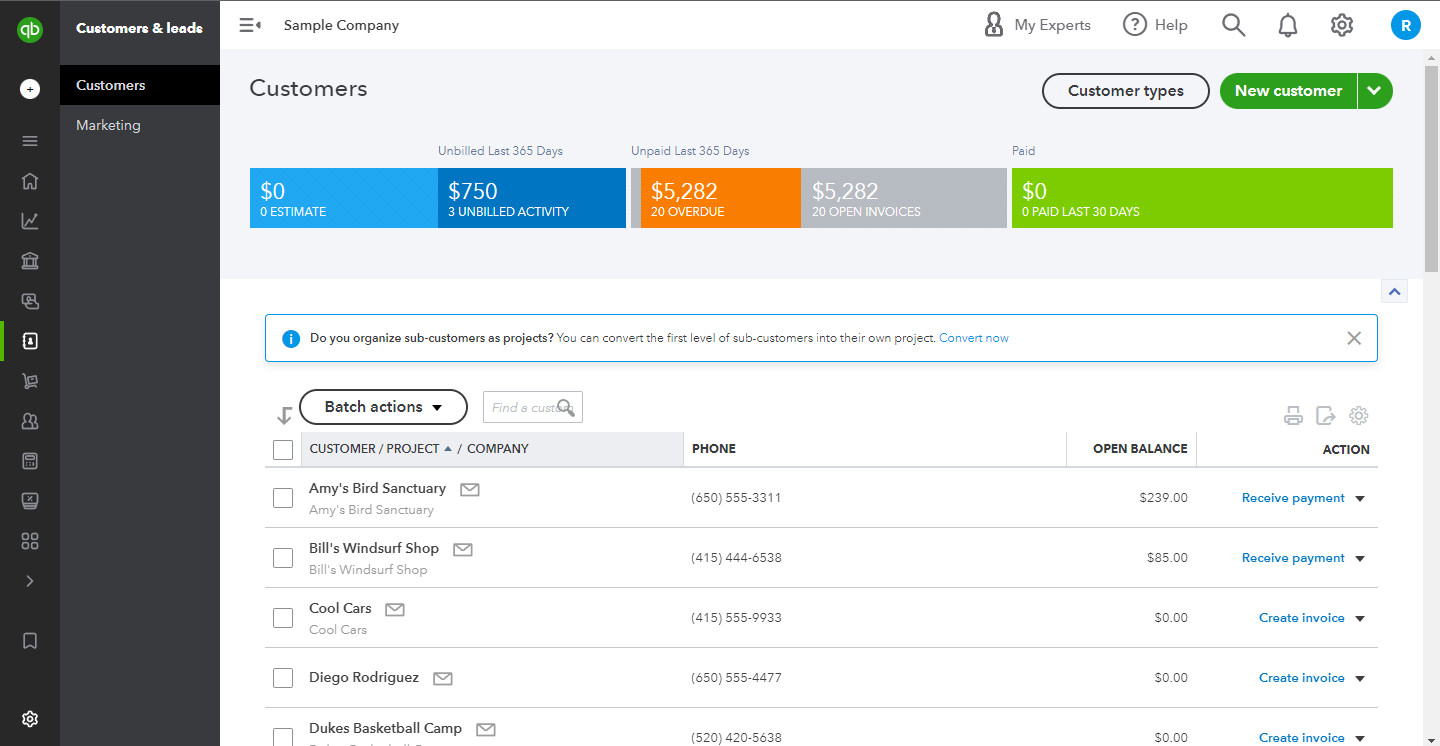
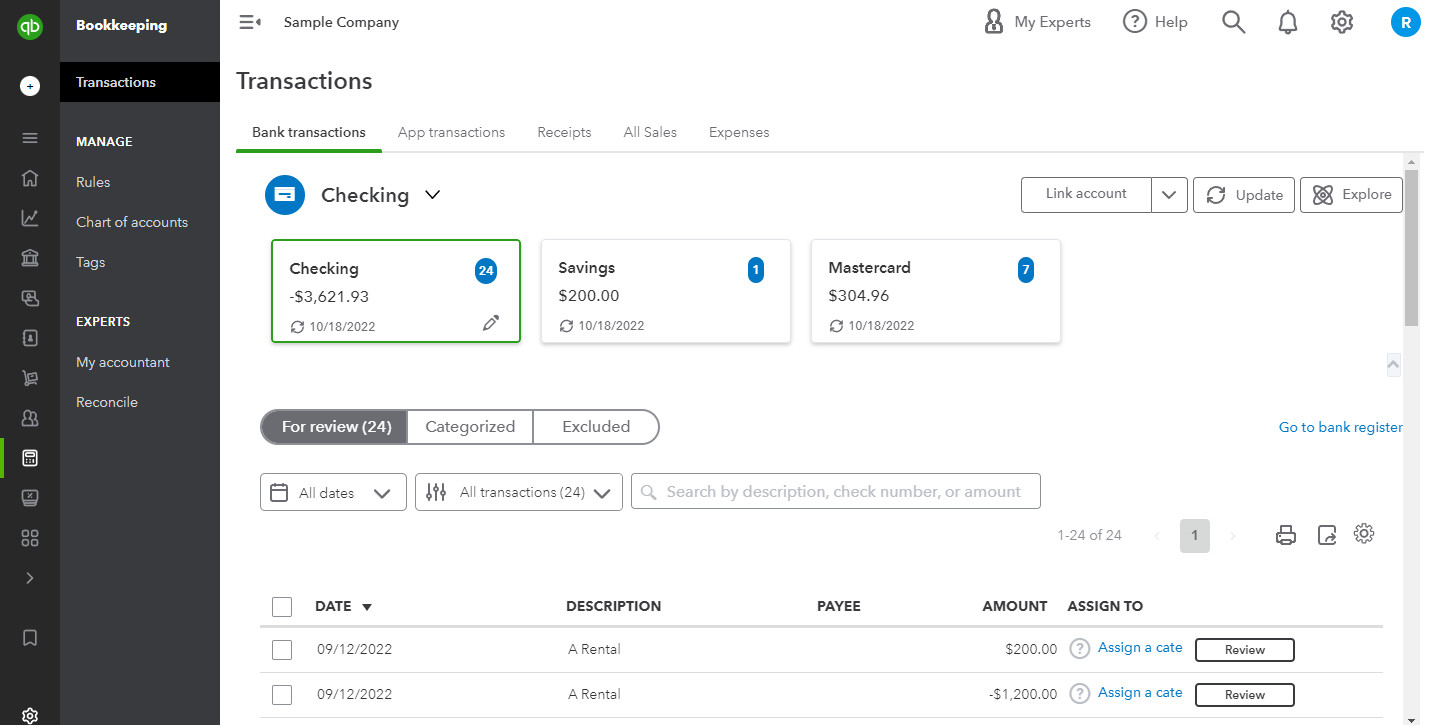
Once you’ve added customers it will look more like this:
Within Customers & leads there’s also a Marketing section.
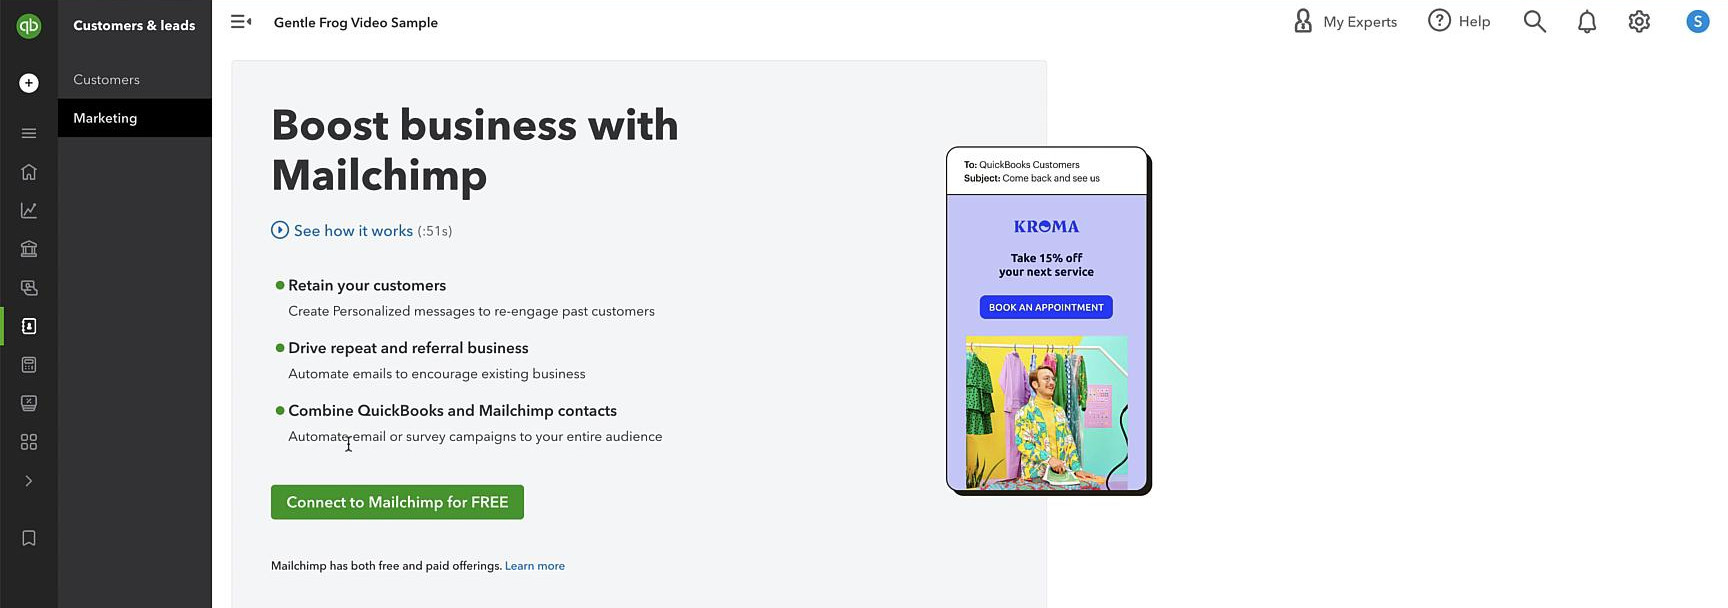
Intuit owns the email marketing software Mailchimp. From this screen, you can connect your Mailchimp account so both software can share data with each other.
Bookkeeping
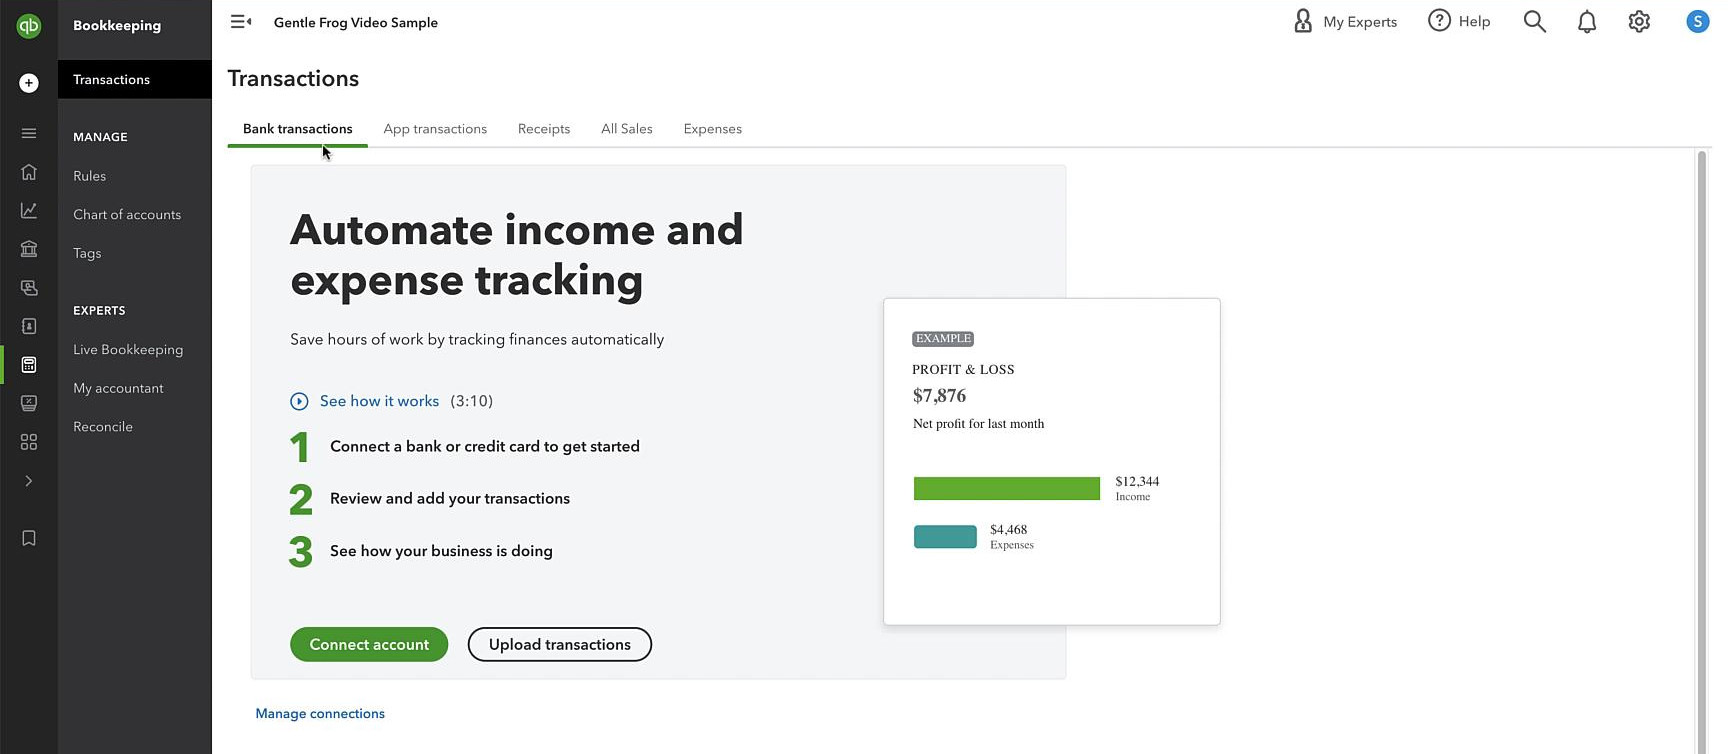
This is the banking section of QuickBooks. This is where you’ll connect your bank accounts.
When you’re bank accounts are connected you’ll see a list of the transactions that you can review and categorize. It will look more like this:
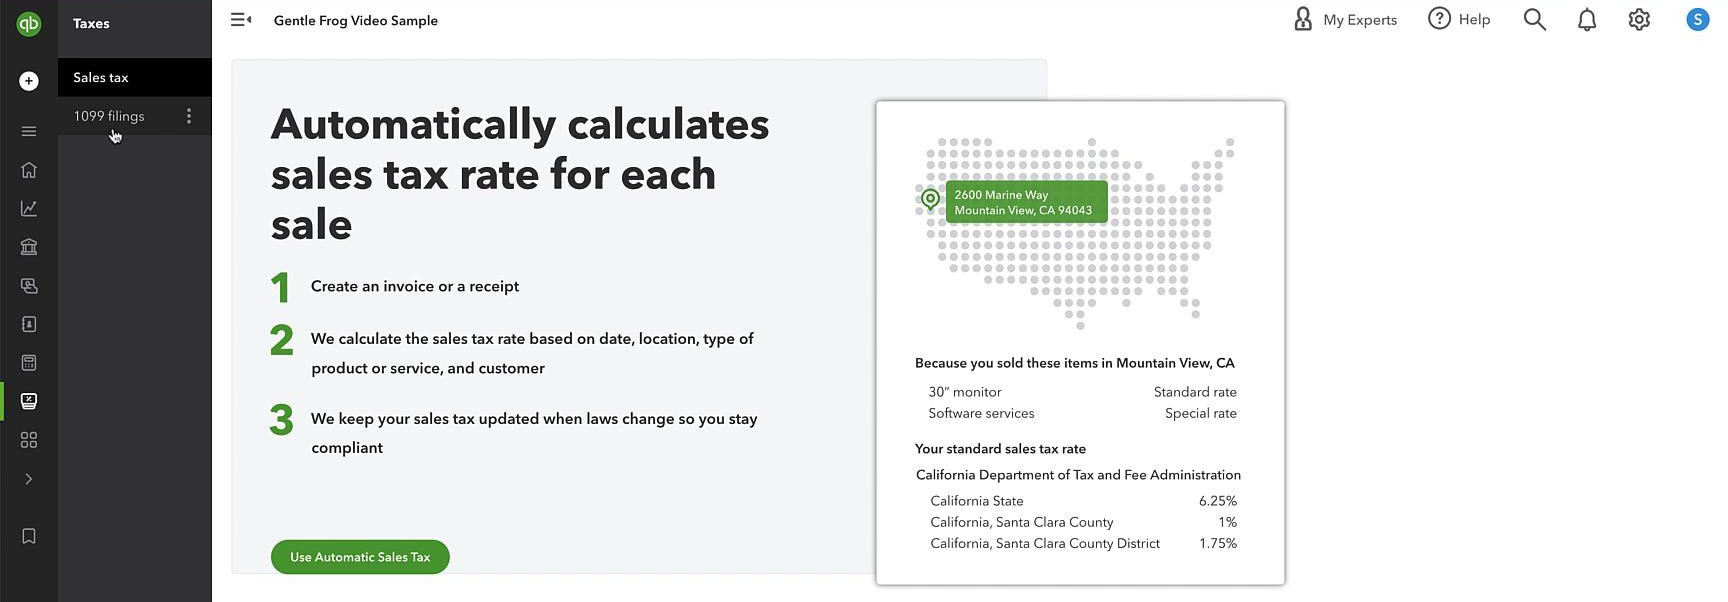
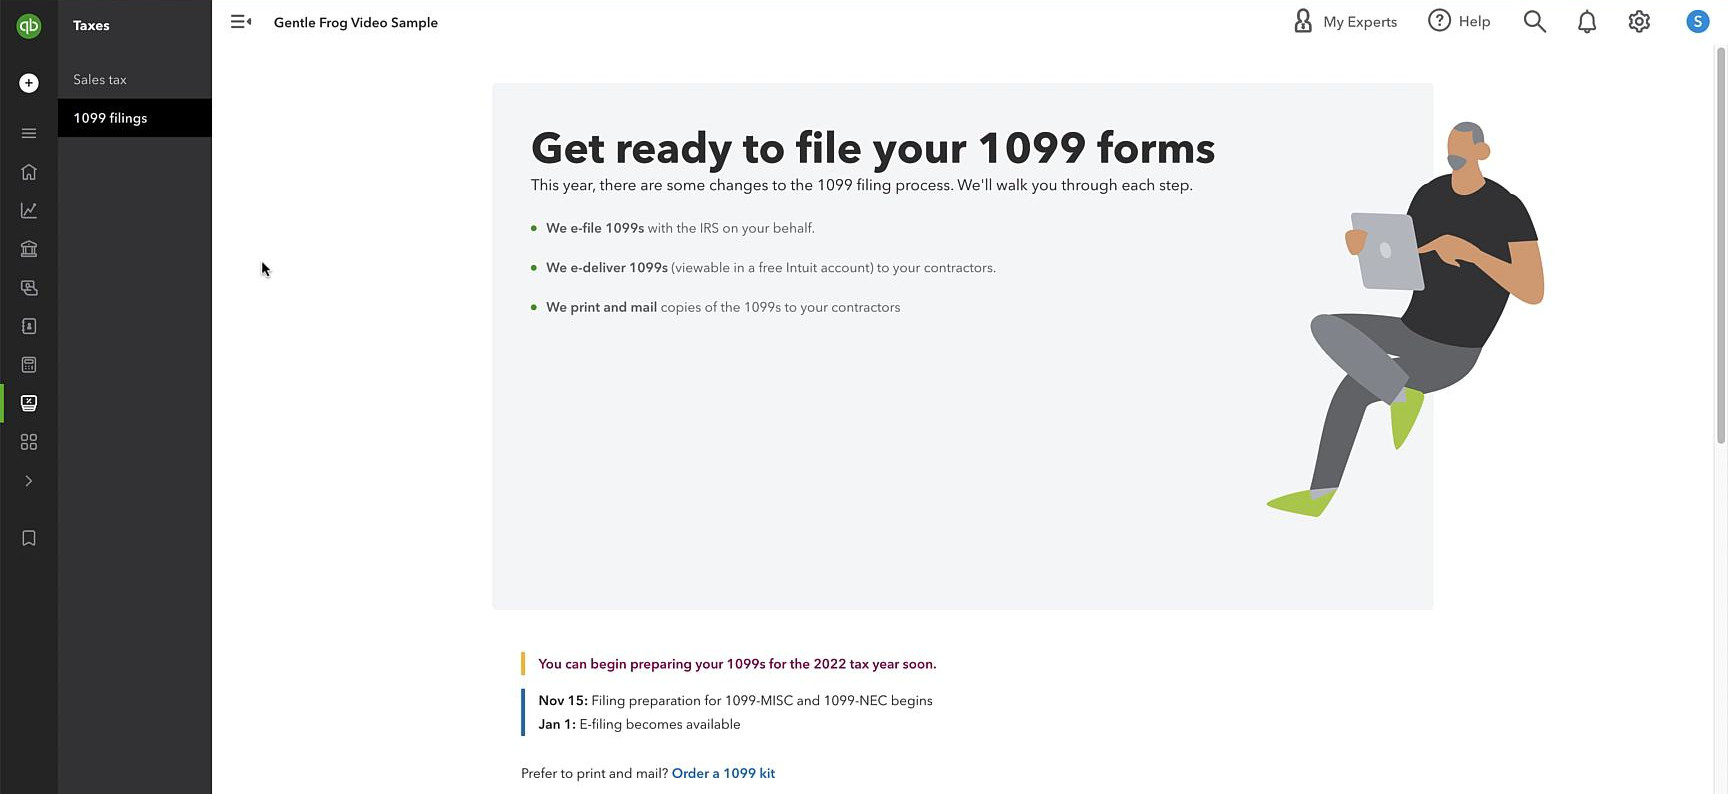
Taxes
This is where you’ll set up your sales tax:
And, your 1099 filings:
Apps
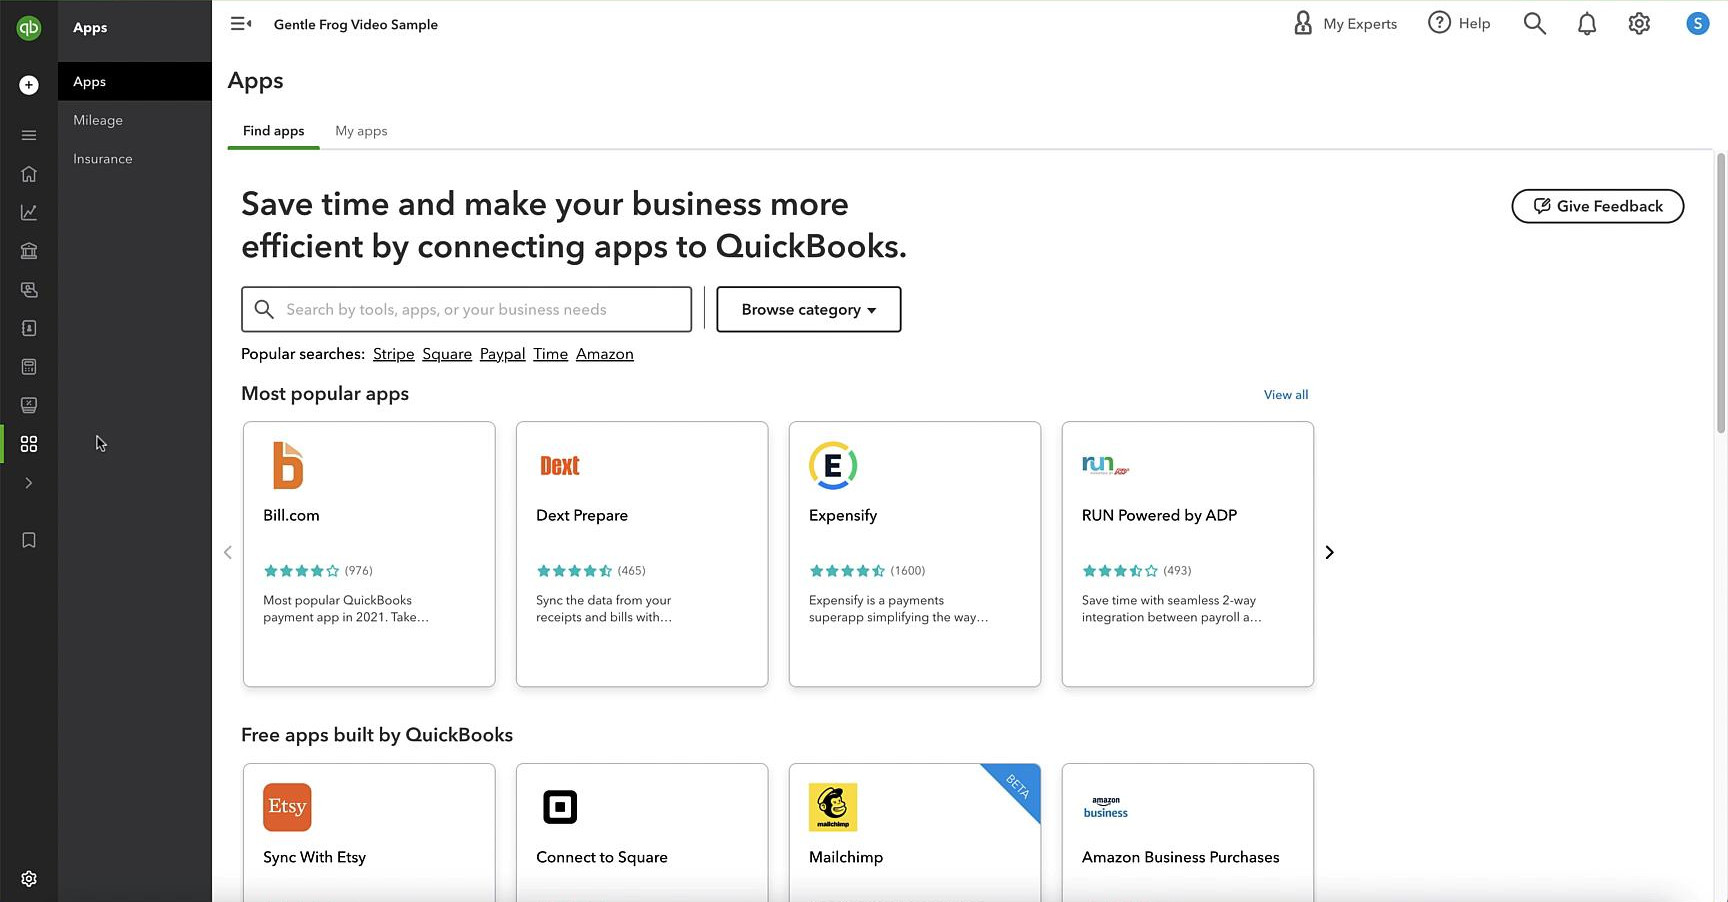
This is where you’ll find apps that you can connect to QuickBooks.
If there’s something QuickBooks doesn’t do or doesn’t do to your liking there’s probably an app for it.
Accountant View
Personally, I prefer the accountant view.
Not because I’m an accountant/bookkeeper but because I find it’s easier to work with and find things.
A lot of this was already shown in Business View so we’ll go through it quickly.
Dashboard
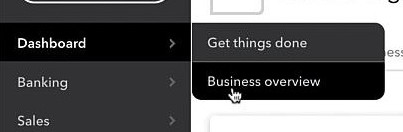
This includes Get things done and the Business overview.
Banking
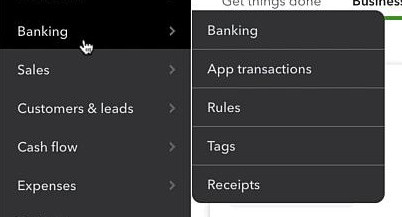
This is like the Bookkeeping section of the Business view. It includes the Banking screen, App transactions, Rules, Tags, and Receipts.
Sales
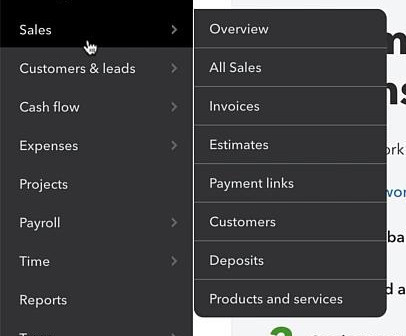
Here you’ll find everything for sales including an Overview, All Sales, Invoices, Estimates, Payment links, Customers, Deposits, and Products and services.
Customers & Leads
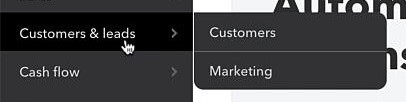
Like Business view, this will take you to your Customer list and Marketing.
Cash Flow
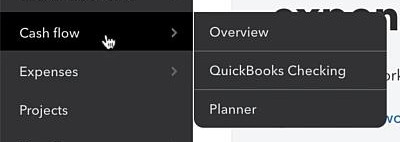
Under Cash Flow, you’ll find a cash flow Overview, QuickBooks Checking, and a cash flow Planner.
Expenses
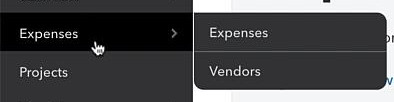
From here you’ll find your Expense transactions and your list of Vendors.
Payroll
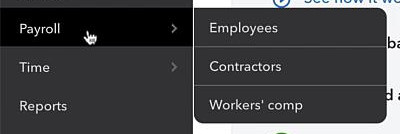
Under Payroll you’ll find Employees, Contractors, and Workers’ comp.
Time
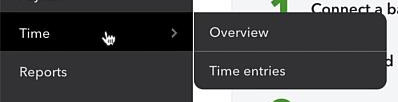
This is where you’ll find your time tracking, it includes an Overview and Time entries.
Taxes
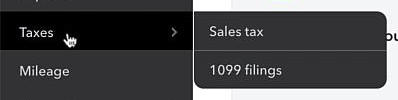
Just like in Business view this will take you to your Sales tax and 1099 filings.
Mileage
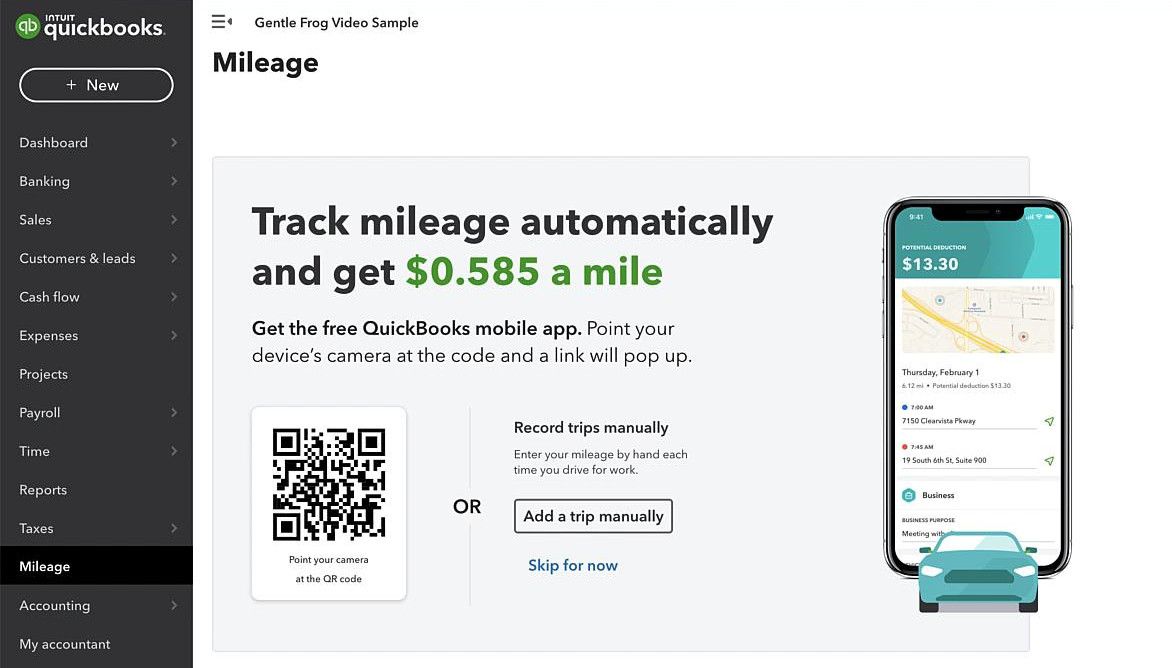
Mileage wasn’t included in Business view. If you use your vehicle for business and you’re not already using a tracking app the QuickBooks app is a great option.
Accounting
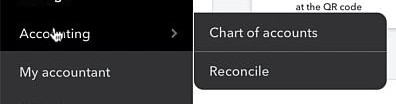
Under accounting, you’ll find the Chart of accounts and Reconcile.
Capital
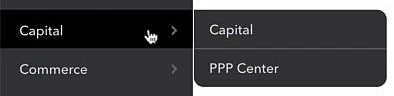
This is like Banking in Business view. From here you’ll find Capital and the PPP Center.
Commerce
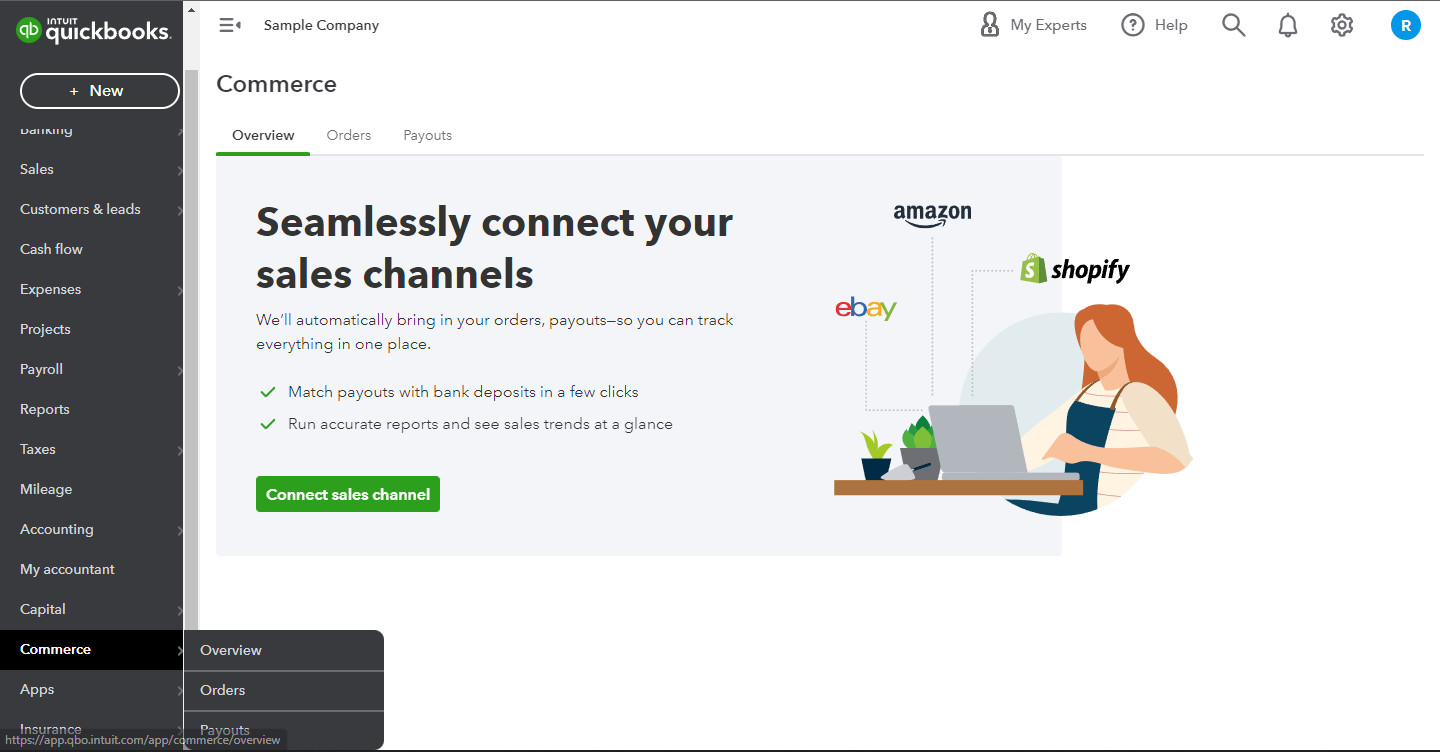
In Commerce, you can connect sales channels like Shopify, eBay, and Amazon. From the menu, you can see Overview, Orders, and Payouts.
Apps
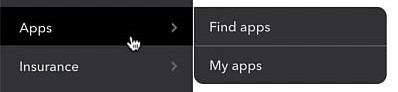
Like Business view, from here you can Find apps to connect to QuickBooks and view the apps you have installed under My apps.
+New
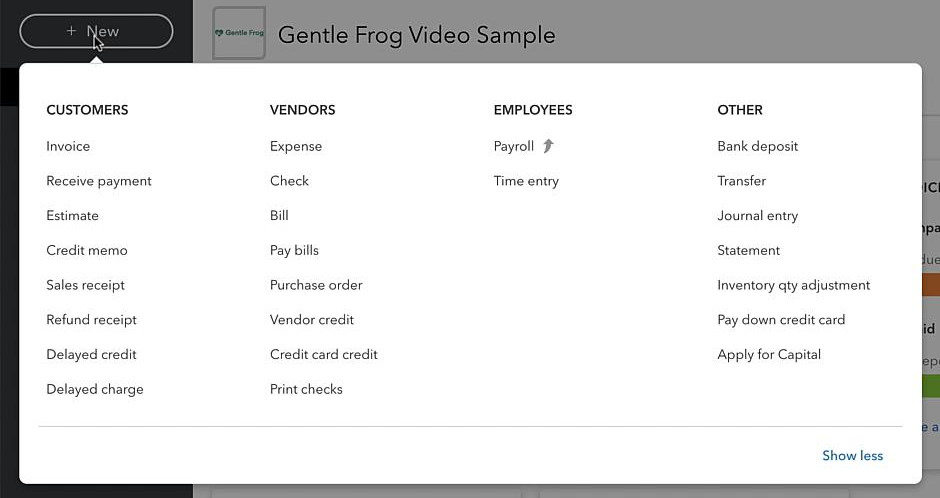
Both Business and Accountant view have a +New button above the left-side nav.
I LOVE the +New button. I refer to this as the “I want to do something button.” It’s a quick way to navigate to where you can do things like creating an invoice, writing a check, recording a time entry, creating a journal entry, etc.
If I want to “do something” in QuickBooks this is where I go.
You’ve now seen what’s in the left-side navigation in QuickBooks Online.
☕ If you found this helpful you can say “thanks” by buying me a coffee…
https://www.buymeacoffee.com/gentlefrog
Below is a video if you prefer to watch a walkthrough.
If you have any questions about the navigation, where to find something in QuickBooks or just QuickBooks Online in general. Click the green button below to schedule a free consultation.