One of QuickBooks Online’s key features is the ability to import data from various sources. This saves time and reduces errors in manual data entry.
Whether you need to import bank transactions, customer information, vendor details, chart of accounts, products and services, or invoices, QuickBooks Online provides a user-friendly platform for efficiently transferring data.
In this blog post, I’ll show the process of importing data into QuickBooks Online. Including navigating to the Import Data screen, downloading a sample data file, importing your data, and mapping your data fields.
Import Data
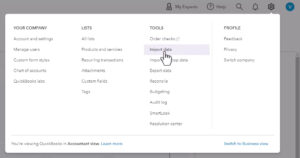
To import data into QuickBooks Online you’ll first need to navigate to the Import Data screen.
To get there click on the gear in the upper-right corner of the screen and click Import data in the TOOLS column.
The Import Data screen has options for importing…
- Bank Data
- Customers
- Vendors
- Chart of Accounts
- Products and Services
- Invoices
You can also import from QuickBooks Desktop and Sage 50 / Peachtree.
Importing Bank Data
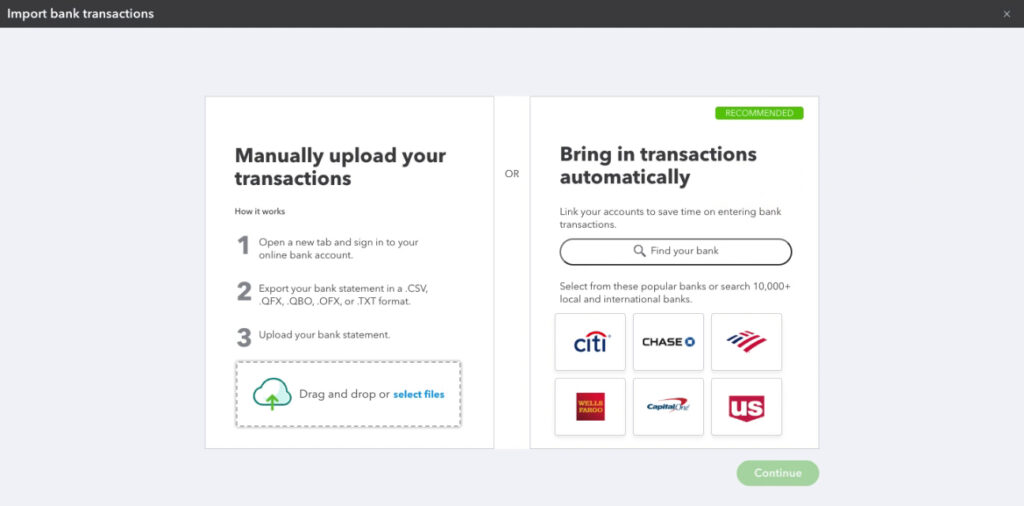
When you click on Bank Data it’ll open the Import bank transactions screen:
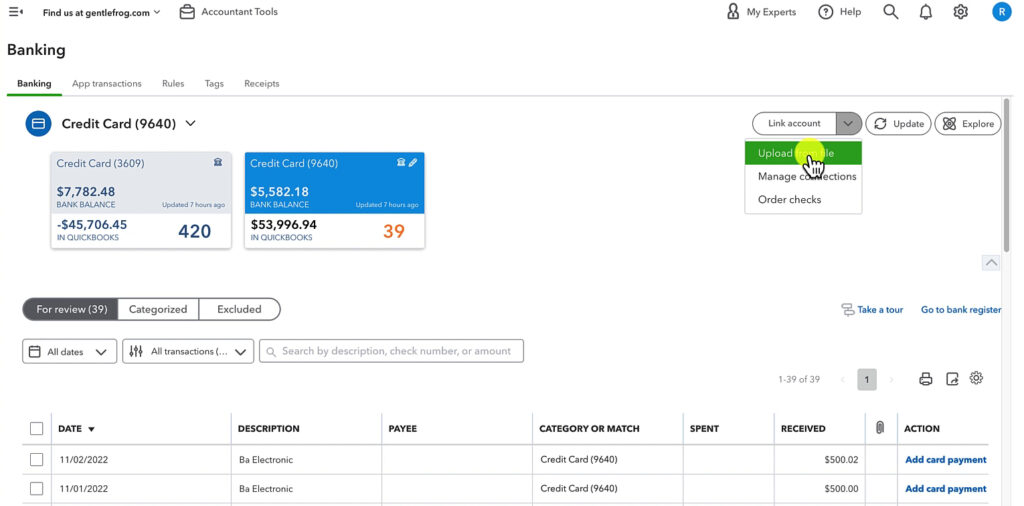
This screen may look familiar to you. That’s because it’s the same screen you’ll get when you “upload from file” on the Banking screen:
From the Import bank transactions screen, you have the option to import the following file types:
- .CSV
- .QFX
- .QBO
- .OFX
- .TXT
Importing Other Data
Each of the other data-importing screens and processes is similar.
Here’s what the Customer Import screen looks like:
On all the data import screens, you have the option to import a CSV/Excel file or a Google Sheet.
It’s a good idea to download a copy of the sample file first so you know what your file should look like.
Here’s what the sample customer file looks like:
You can delete all but the headers, add your own data, and save the file with a new name. Then, you can upload it to QBO.
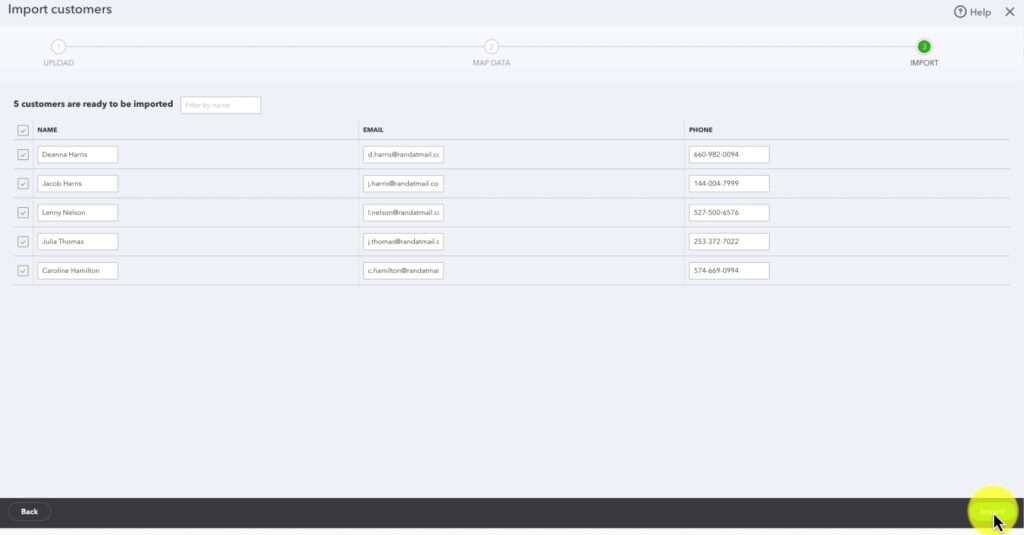
Let’s walk through the rest of the customer import.
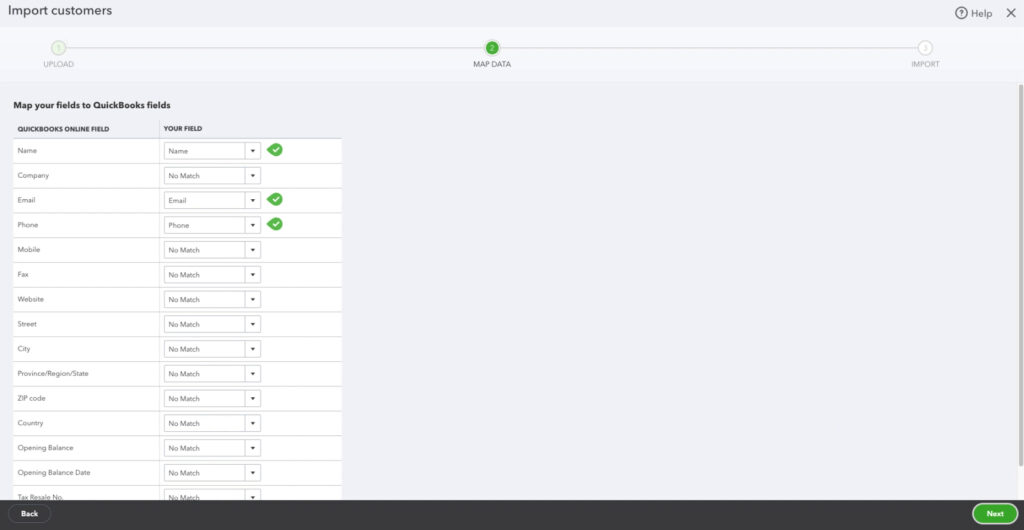
Once you select the file you’re importing, you’ll map the fields to fields within QBO. If you’re using the sample, the header names will easily match.
The next screen lets you review the information being imported.
One thing to note is that when uploading Products and Services, you’ll want to import parent accounts first and THEN sub-accounts.
I also have a blog post, How to Import Invoices into QuickBooks Online, if you’d like to see that process.
☕ If you found this helpful you can say “thanks” by buying me a coffee… https://www.buymeacoffee.com/gentlefrog
Below is a video if you prefer to watch a walkthrough.
If you have questions about importing data into QuickBooks Online click the green button below to schedule a free consultation.

