It’s January, time to start thinking about taxes and getting your tax forms created.
There are two versions of software that accountants like to use to create 1099s Tax1099 and Track1099.
I like to use online software because I find it be cheaper and easier than trying to get the forms, fill them out, mail them, etc.
In this tutorial I’ll show you how to use Track1099.
Quick Instructions:
- Create an account at Track1099.com
- Select Track1099 when it asks which form you’d like to use
- Import new Payer
- Select which accounting software you’ll be importing from (I use QBO for the example)
- Click the Connect with QuickBooks button
- Sign in to QuickBooks
- Select the company file and client to use with Track1099 and click the Next button
- Click Connect
- Select which 1099 form you need (1099-NEC for the example)
- Select “Map to Box 1 – Nonemployee Compensation”
- Check off that you agree and click the Import button
- Click on the payer name in the All Payers list
- Scroll down the Payer page to verify information was imported correctly from QuickBooks
- Click the green Save button
- Click the blue Manually button to enter recipients manually
- Enter Recipient’s Name
- Select the recipient’s federal ID type
- Enter the recipients federal ID number
- Enter recipients address
- Recipients second name, account number and office code are optional
- Enter the amount you paid the recipient in nonemployee compensation
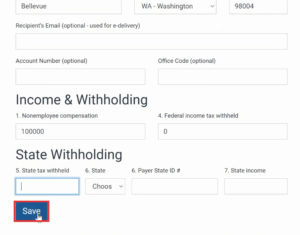
- Enter federal and state tax withholding, if applicable
- Click the Save button
- Click the E-file tab
- Select your mailing method
- Enter your credit card info
- Click Pay Now
Keep reading for full instructions with screenshots.
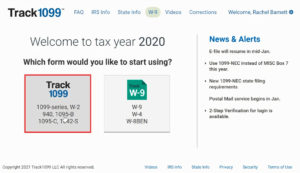
After creating an account at Track1099.com you’ll see a screen asking which form you’d like to start using, 1099 or W-2. We’ll be using the 1099.
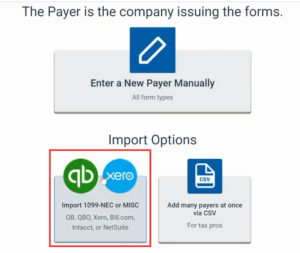
On the next screen, you enter the “Payer” which is the company issuing the forms. As an accountant working with many clients I’d enter each client individually as a Payer.
For yourself, you can enter your information manually. Or, use the option to import from other software like QuickBooks and Xero.
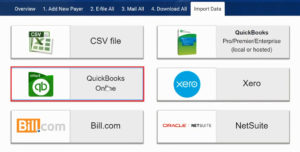
I’ll be using the import option which opens a screen with several options to choose from. I’ll be selecting QuickBooks Online.
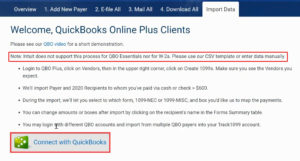
Next, you’ll connect QuickBooks.
There’s a note on this screen that Intuit doesn’t support this process for QBO Essentials or for W-2’s and that you need to use the manual data entry for that. If they don’t support QBO Essentials then they also don’t support QBO Simple Start. If you use either of these versions you’ll need to use the manual data entry.
Click on the Connect with QuickBooks button to continue.
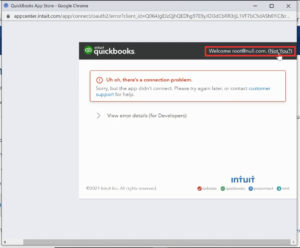
A pop will appear where you log in to QuickBooks. It may give you an error like it did for me. Click on “Not You?” to go to the login screen.
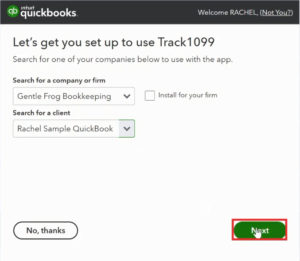
When you’ve logged into QuickBooks you’ll see a setup screen. If you have multiple QuickBooks files, as I do, you’ll need to select the correct one from the dropdown menus. Then click the green Next button to continue.
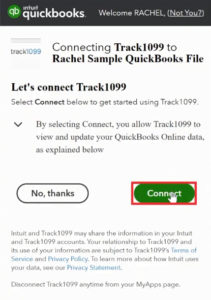
The next screen is confirming that you want to connect Track1099 to QuickBooks. Click the green Connect button to continue.
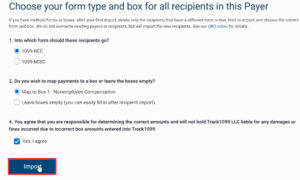
Next, you’ll select which forms you need, 1099-NEC or 1099-MISC. I’ll be selecting NEC.
For the next selection choose “Map to Box 1 – Nonemployee Compensation.”
Check off that you agree and click the Import button.
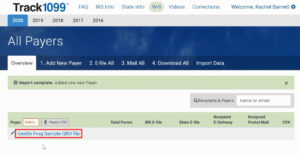
The import may take a few moments. When it’s complete you’ll see the All Payers screen.
In my sample file I have one payer, which I’ll click on.
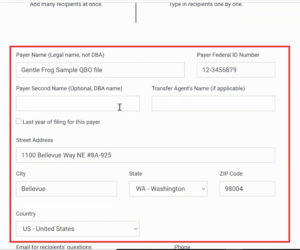
The next screen will have fields auto-filled from the import. You’ll want to review that all the information is correct.
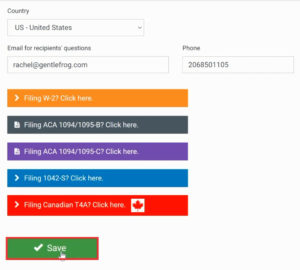
At the bottom of the screen are options for filing various forms. We’re filing a 1099-NEC so we won’t select any of these and instead click the Save button.
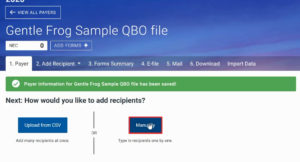
Now you’ll be able to add recipients. You can upload from CSV or enter them manually.
For this example I’ll do it manually.
On the next screen we’ll enter the first recipient’s information.
- Recipient’s Name
- Federal ID type
- Federal ID number
- Second Name (optional)
- Address
- Account Number (optional)
- Office Code (optional)
Under Income & Withholding enter how much nonemployee compensation you paid the recipient . You’ll have to check QuickBooks for this. The Federal income tax withheld is likely zero.
Next is State Withholding. I’m in Washington, which has no state withholding so I skip this section and click the blue Save button.
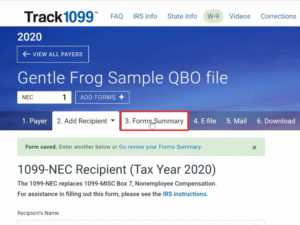
When you save it takes you to the same page but blank so you can enter another recipient. When you’ve finished entering all recipients click the Forms Summary tab.
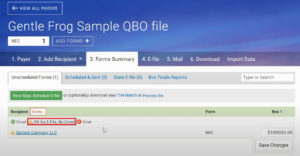
This page shows you a list of all the forms you’ve created. I have one form in my list and it’s got a little yellow warning symbol next to it. It shows that means it’s OK to E-File but there’s no email address.
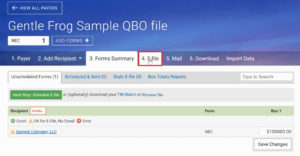
Click on the E-fie tab to continue to the final step.
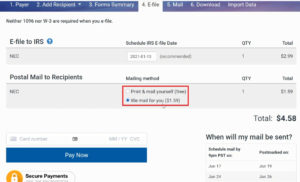
On the E-file page you have the option to print and mail the files yourself or have Track1099 mail them for you (for a small fee).
To finish enter your payment info and click Pay Now.
That’s how easy it is to create your 1099’s with Track1099. In a future tutorial I’ll show you how to use Tax1099.
☕ If you found this helpful you can say “thanks” by buying me a coffee…
https://www.buymeacoffee.com/gentlefrog
If you’d like to watch me walk through the process of creating 1099’s with Track1099 check out the video below:




2 Responses
Very informative. You helped me to understand how to prepare the 1099’s using Track1099. Thank you.
I will look for you on other topics
You’re welcome Tina!
We’re so glad the blog post was able to help you out.
-Jess