
Have you ever needed to remove customer-related transactions from your QuickBooks Online file? In today’s blog post, I’m going to show you how. We’ll create a sales receipt and invoice for a new customer, and then go back and removing the unnecessary one.
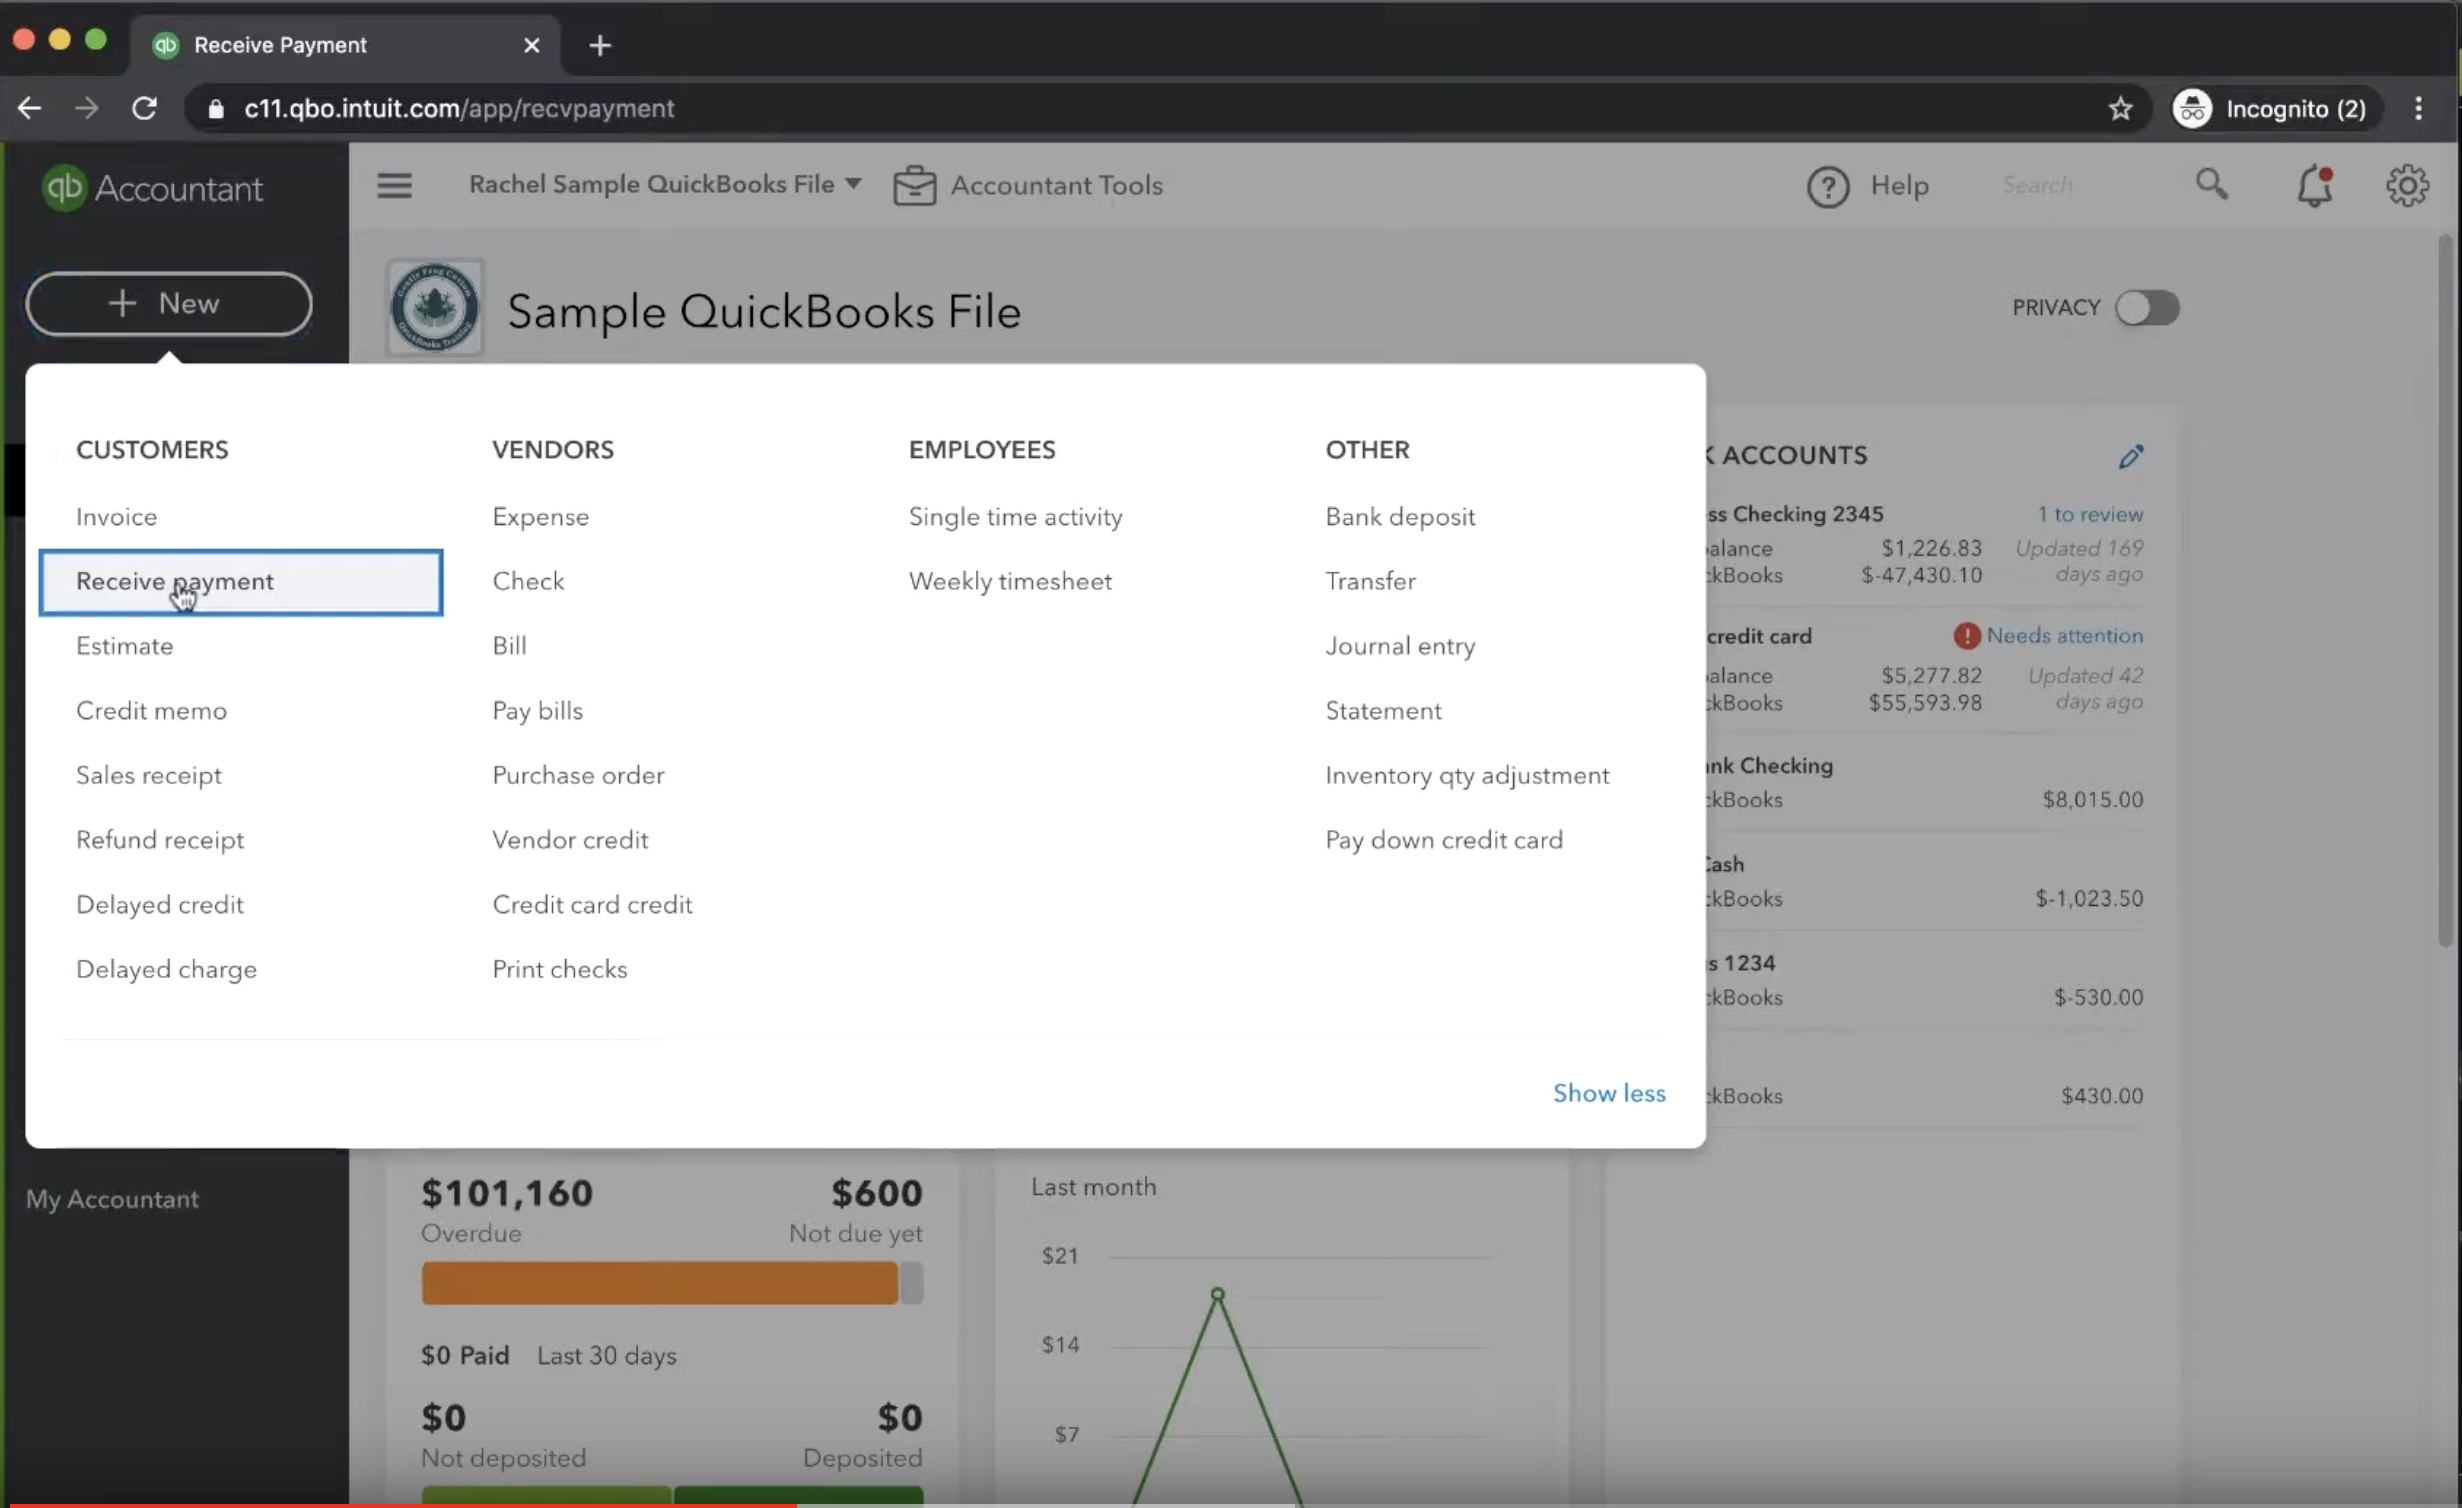
To begin, we need to navigate to our QuickBooks Online Dashboard and click the New button in the top left-hand corner. If you’re not in the Dashboard, look to the left-hand navigation menu and click the item titled Dashboard.

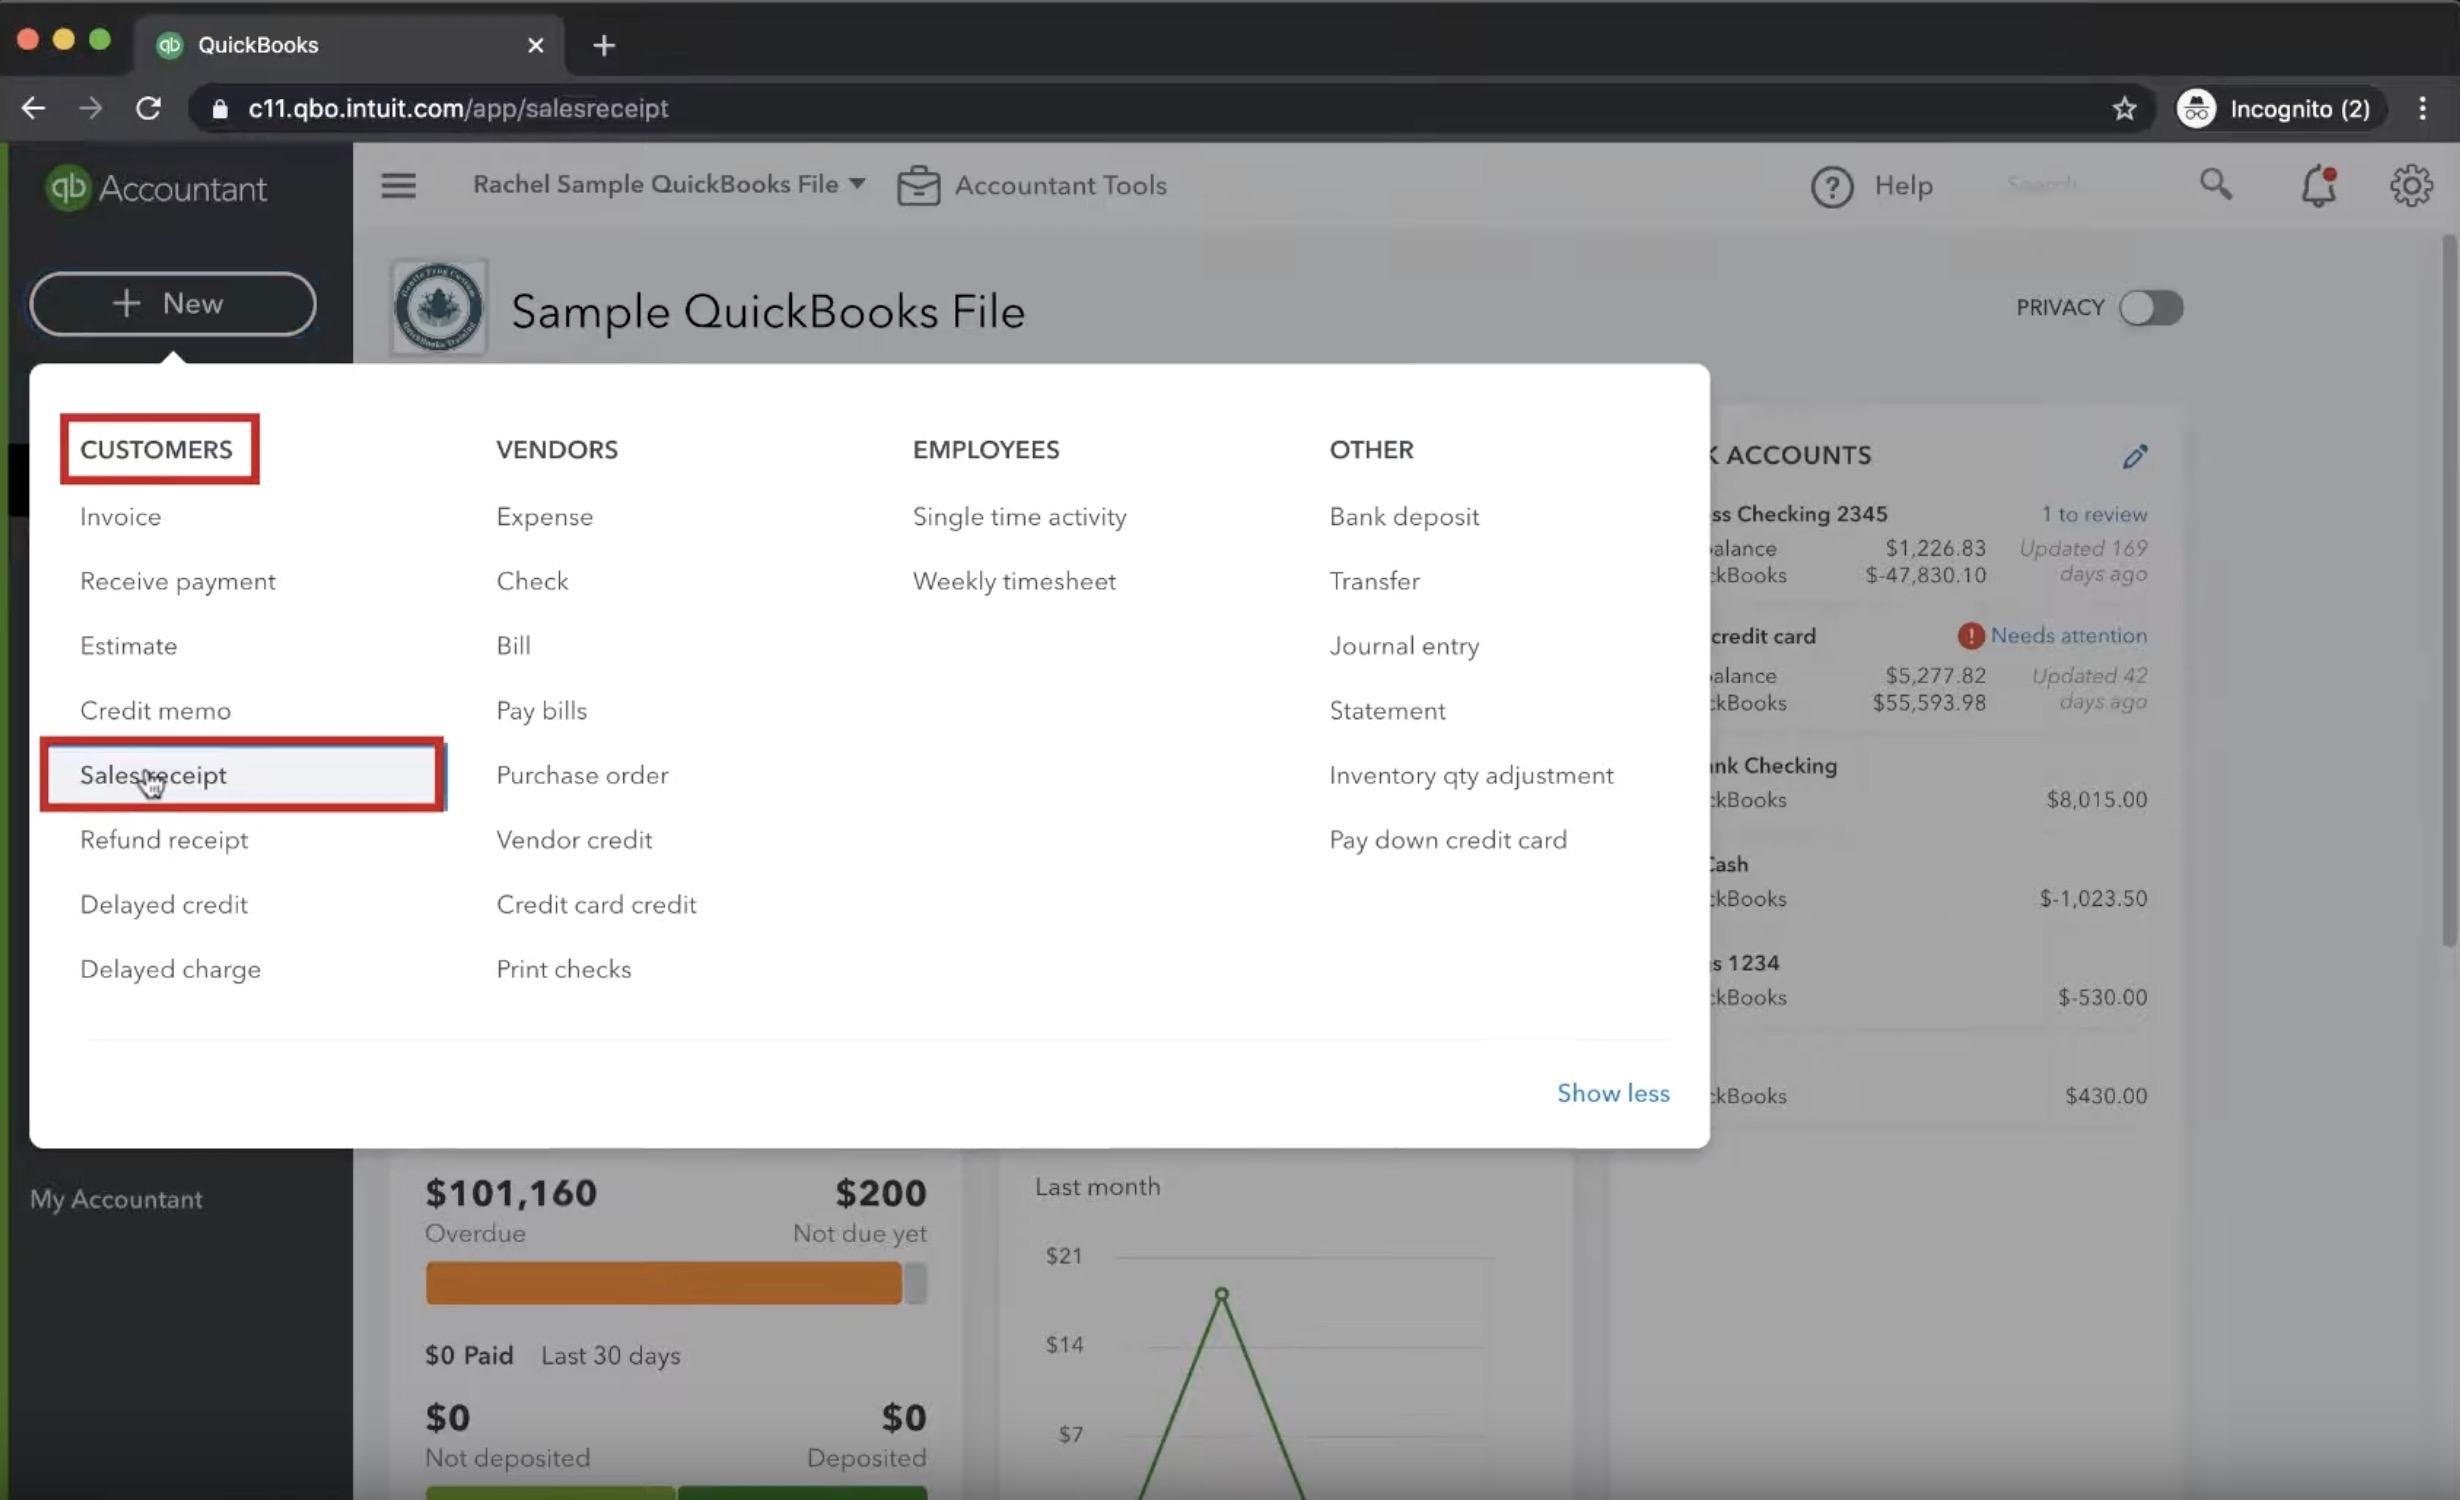
Clicking the new button will show a menu that contains four columns:
- Customers
- Vendors
- Employees
- Others
We are interested in the column titled customers, and we must navigate down to the 5th item titled Sales Receipt.
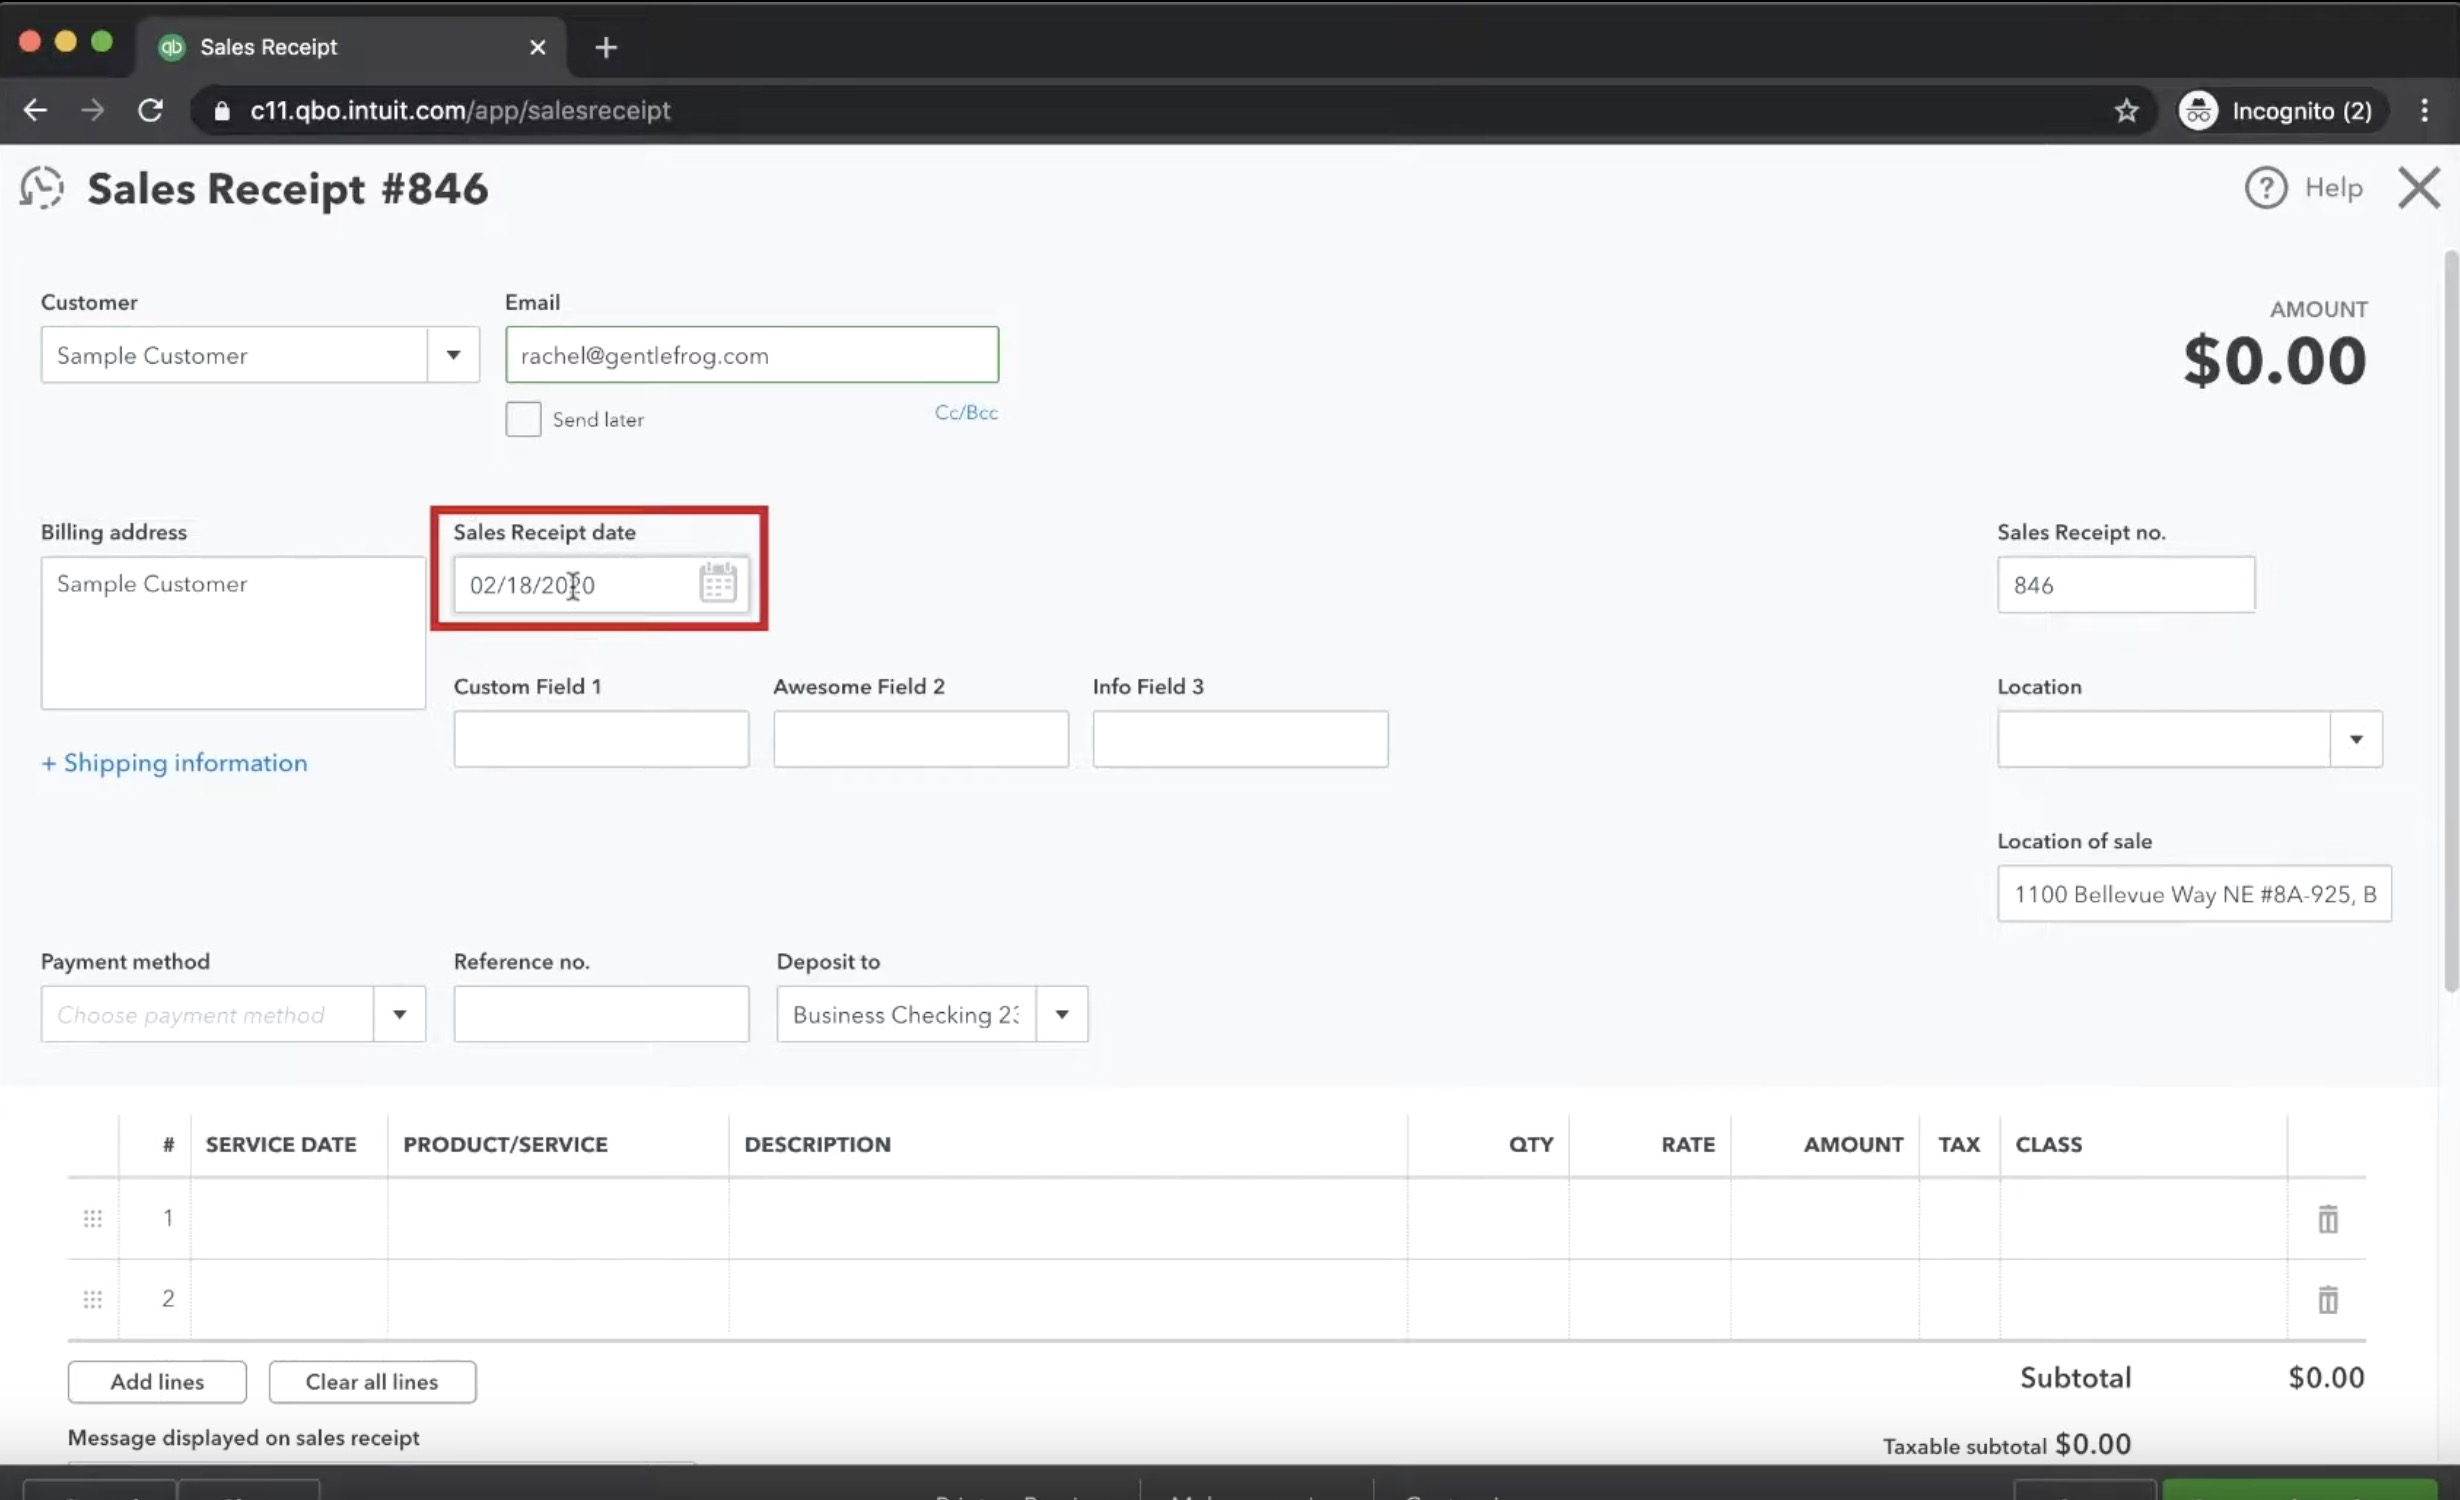
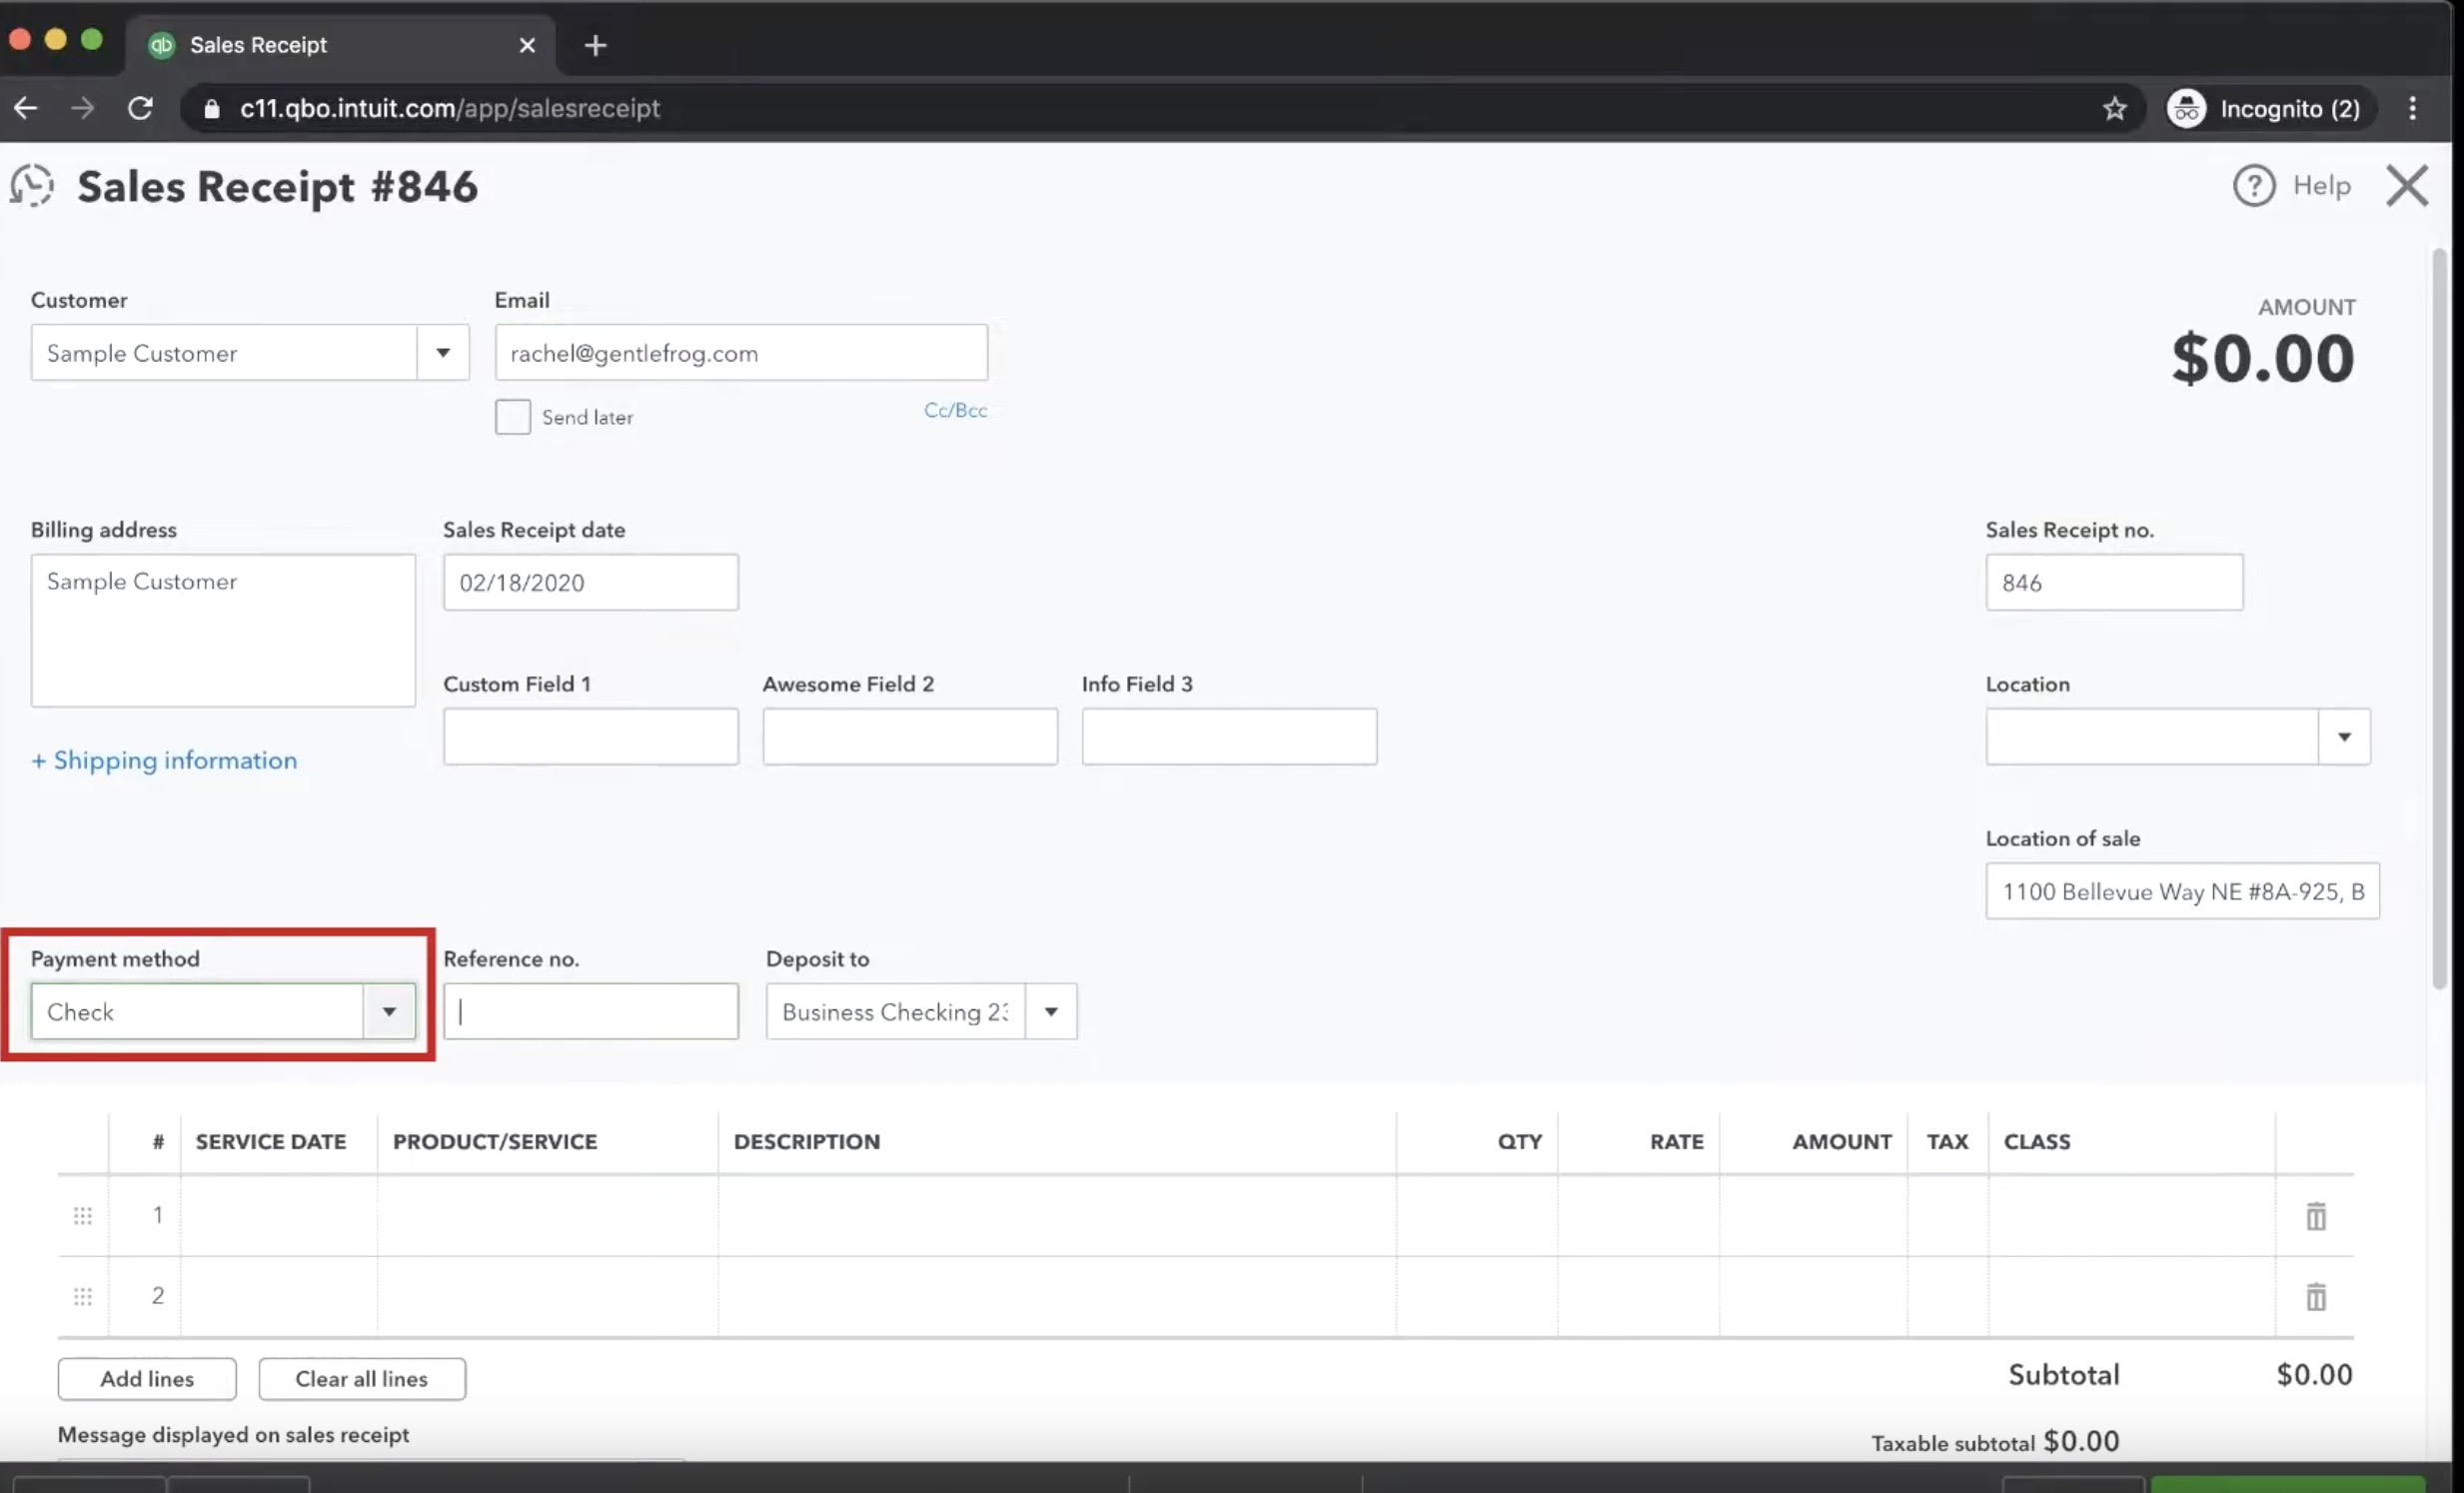
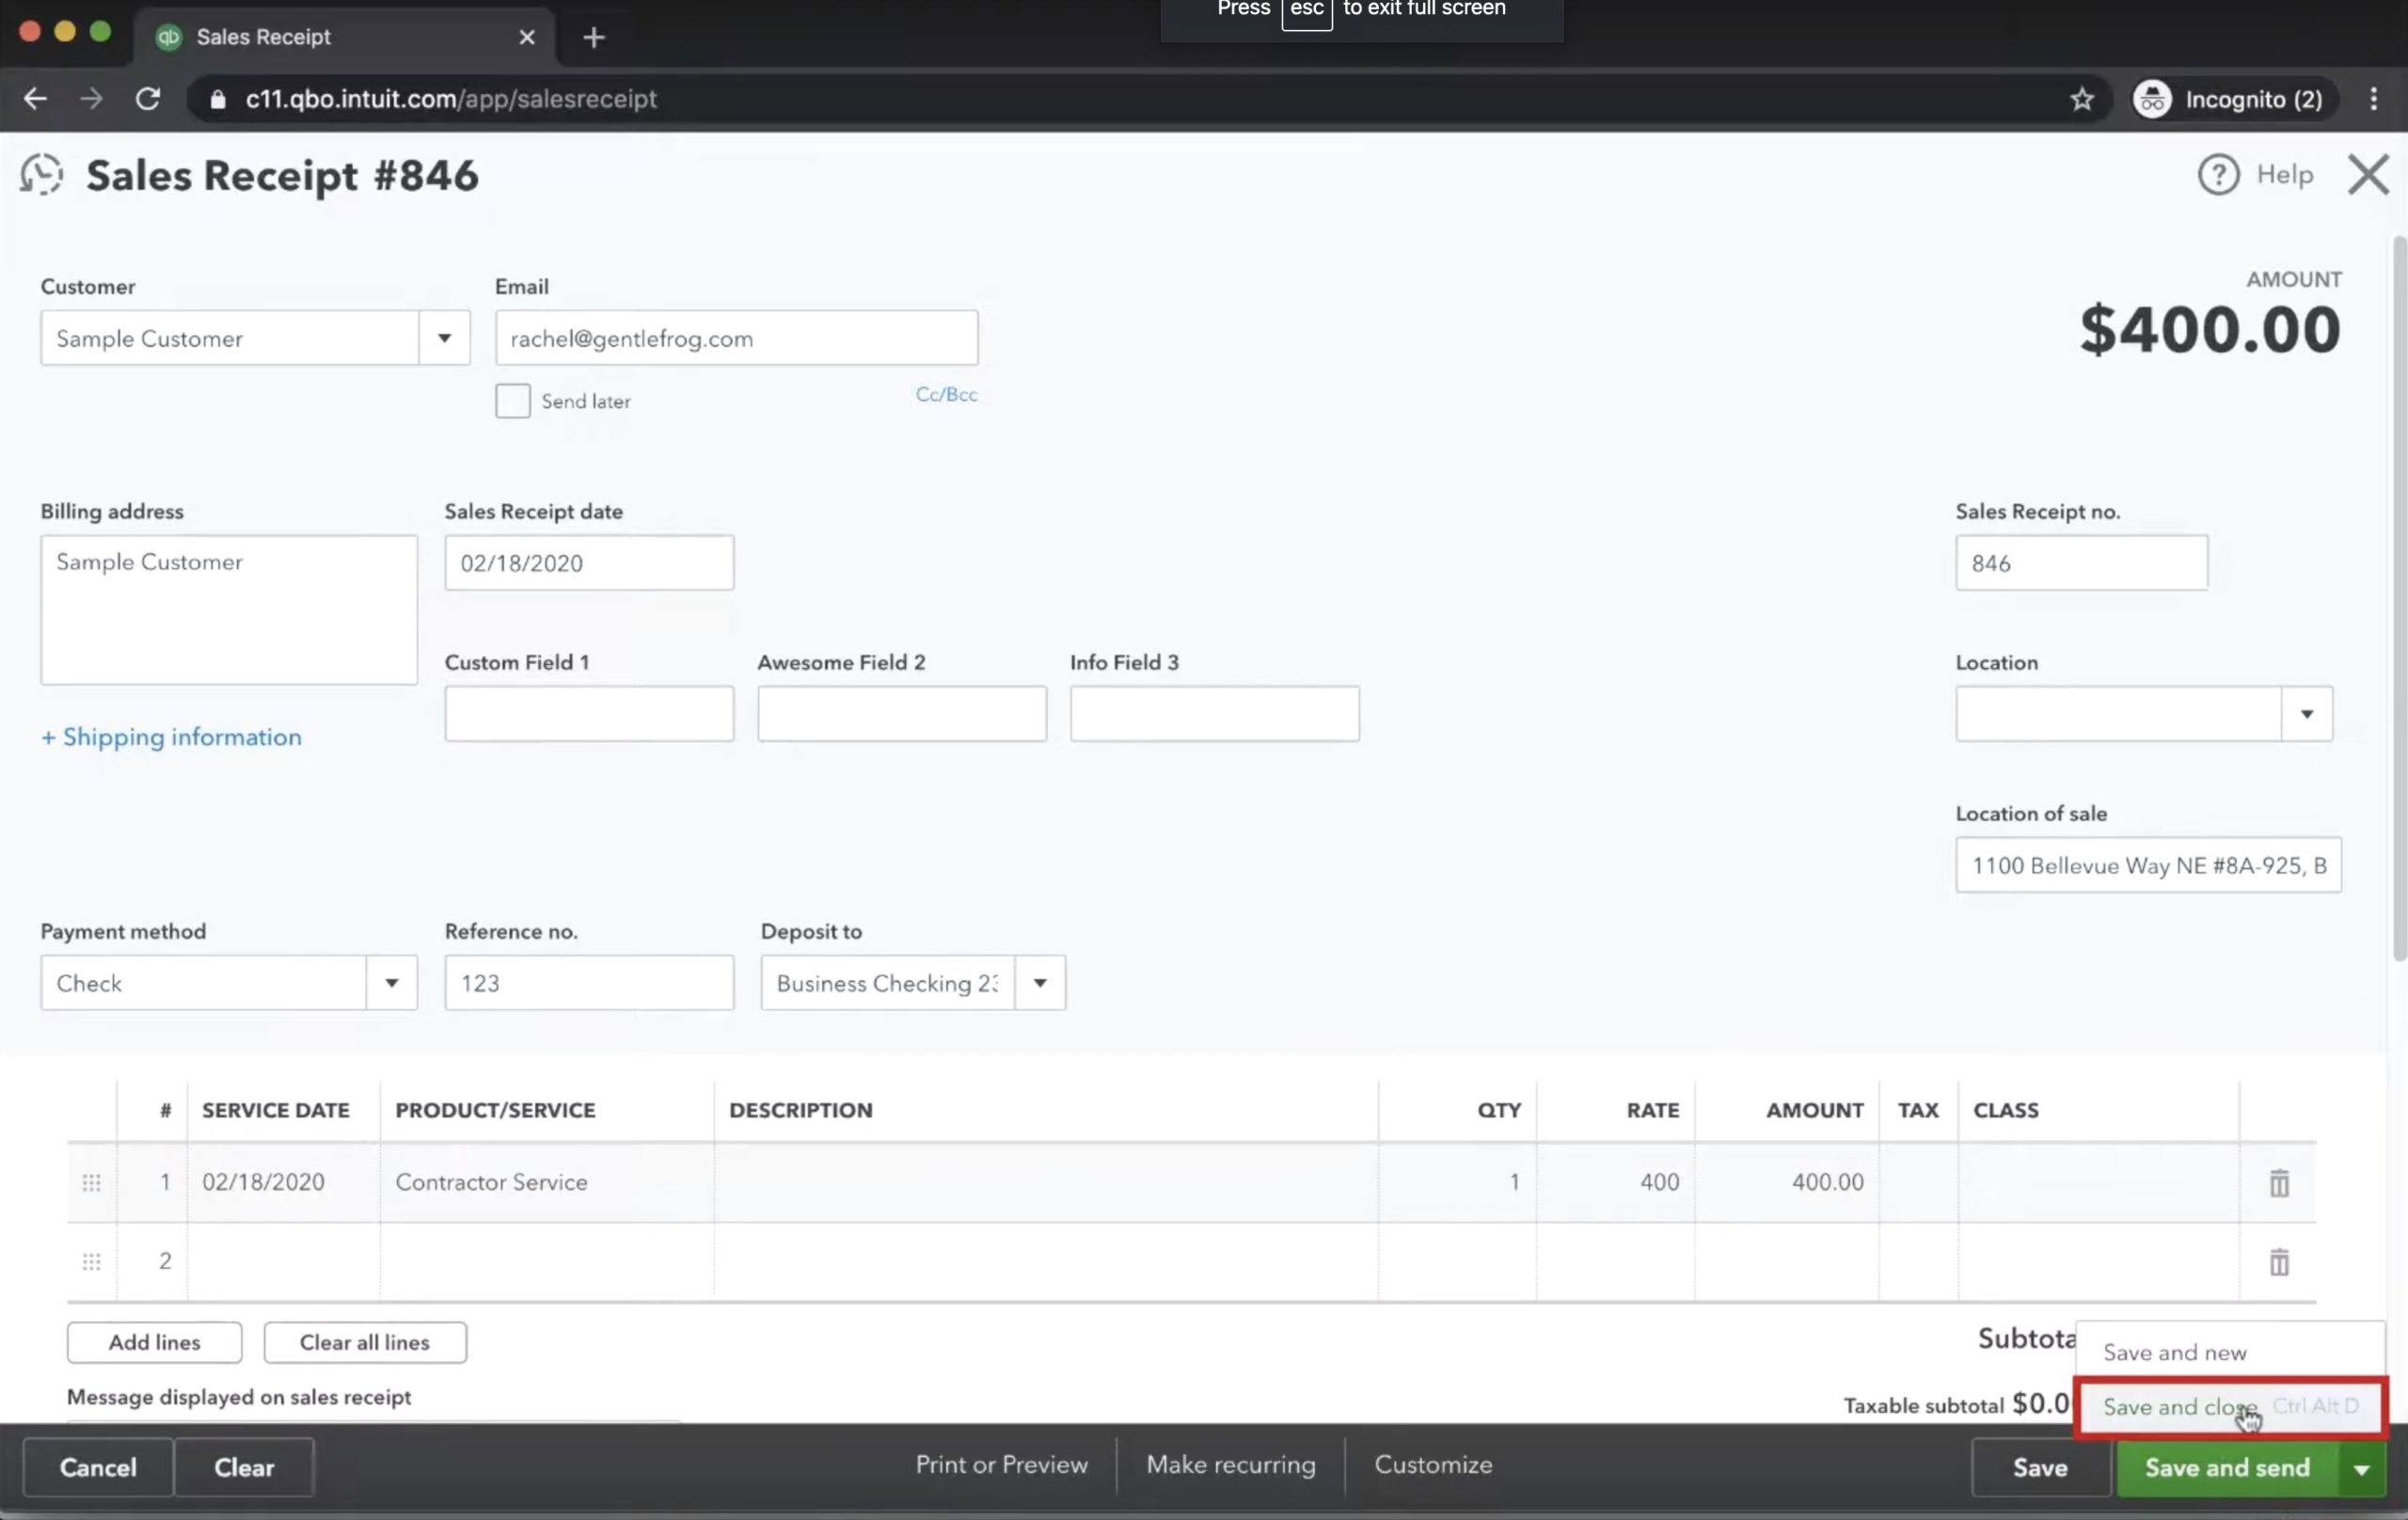
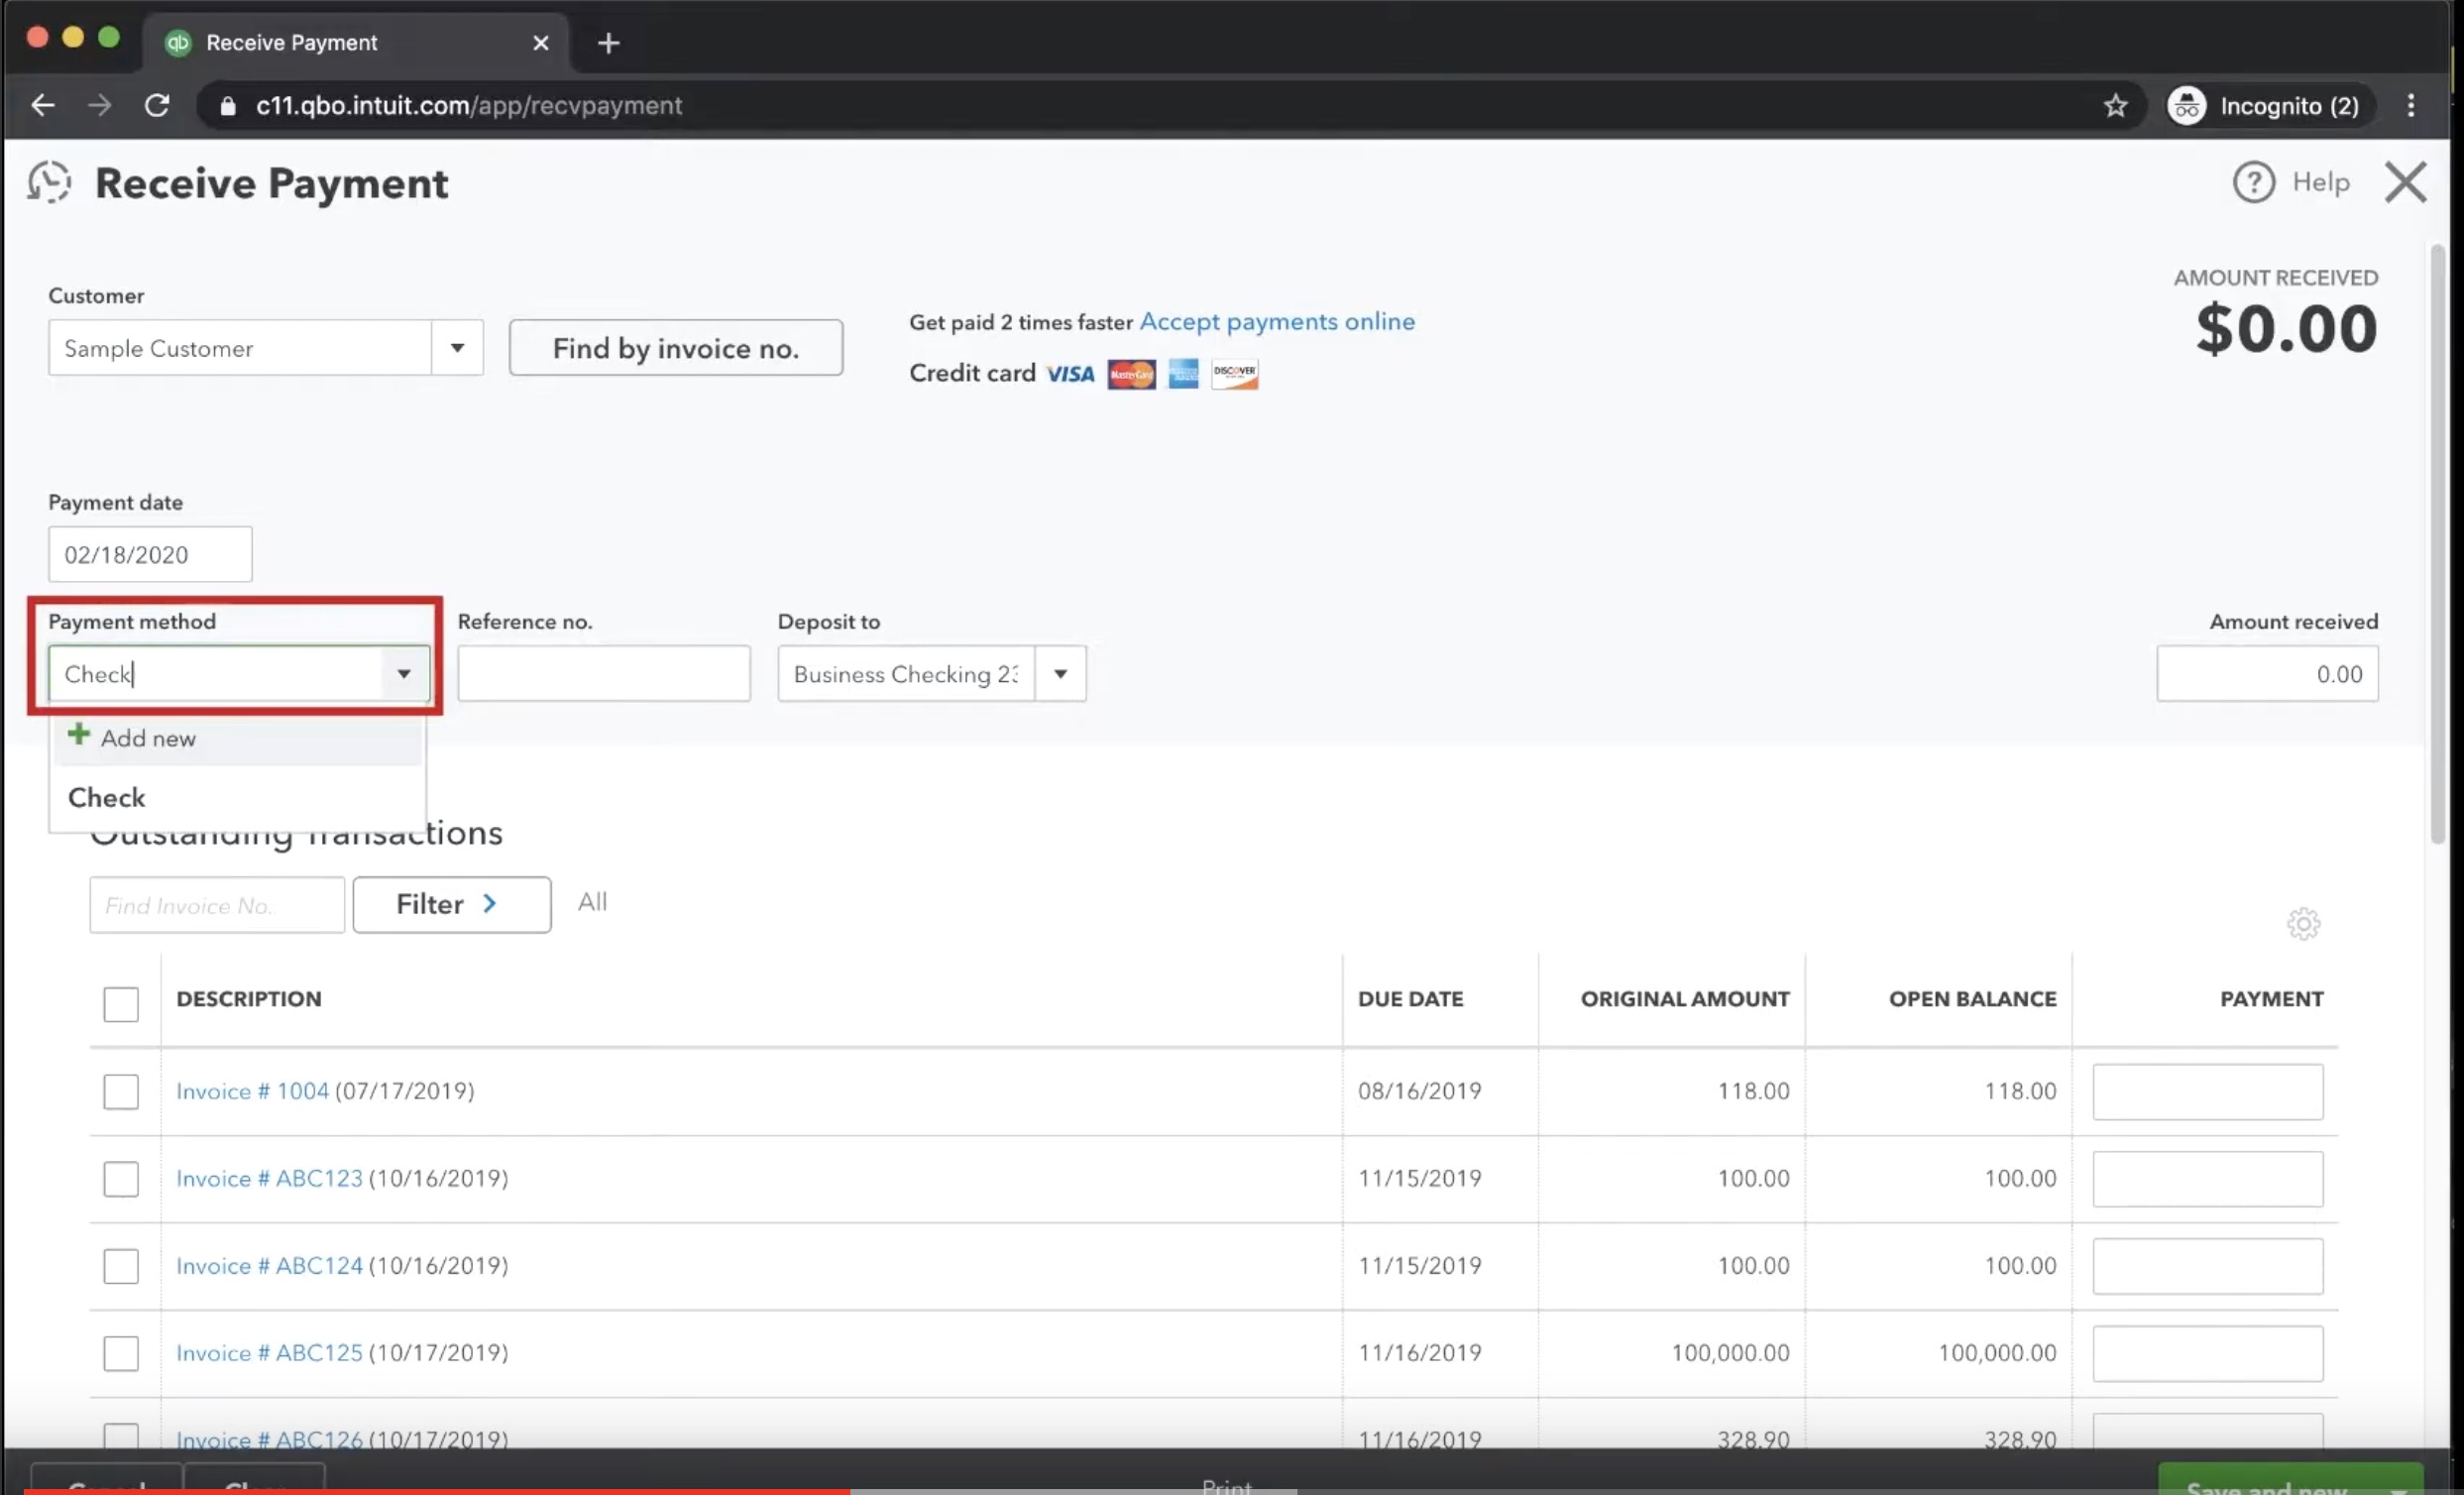
After clicking on the sales receipt link, a new box will pop-up to input all the required information. We enter the customer information, including name and email. Select a sales date and invoice number, and we describe what was sold along with its price ($400) and how the customer paid. Once the required data is filled in, we click the green save and close button on the bottom right-hand side of the screen to complete this sales receipt and close the window.
For this tutorial, we need to assume that we’ve created this sales receipt without realizing it and that we’ve inadvertently created an invoice. This happens to our clients all the time.
Next, we need to go back over to our left-hand navigation screen, click New again, and under Customers, click Receive Payment.
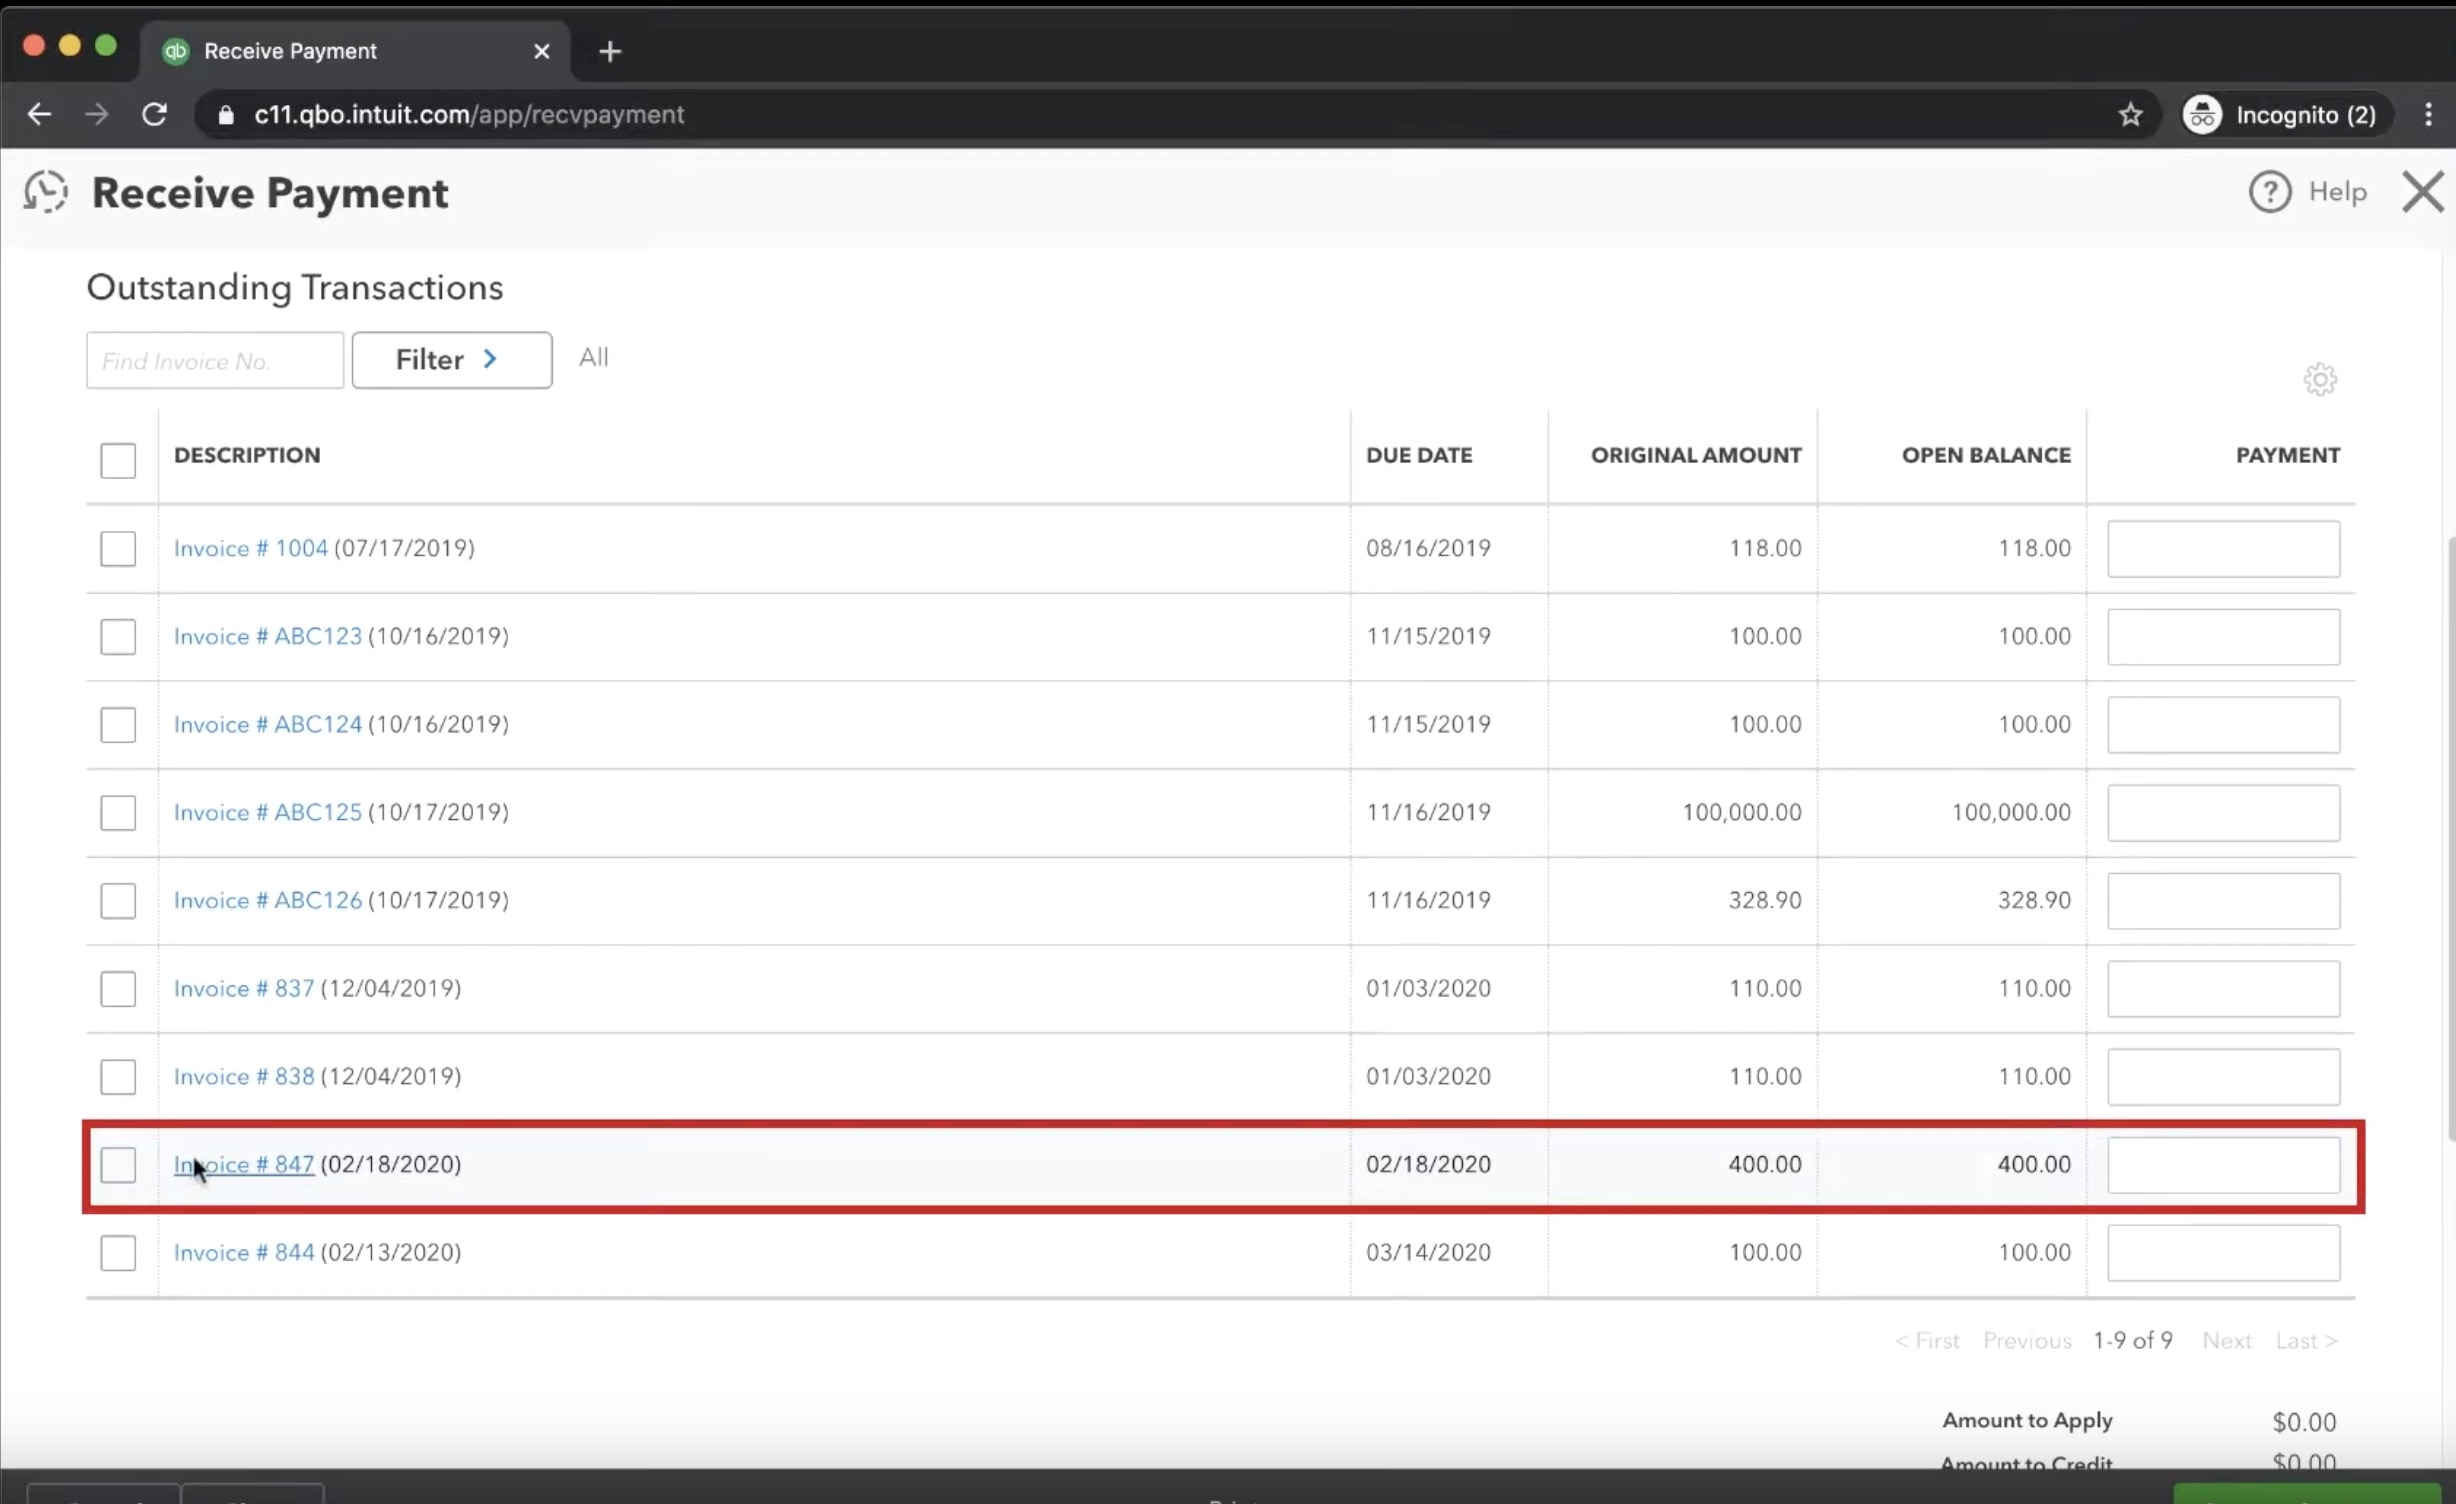
We’re now going to tell QuickBooks that we’ve received payment for this invoice by receiving a check. On the new screen, mark the payee as Sample Customer, the payment method as “check” and assign it to the invoice we just created. And finally, navigate to the lower right-hand corner and click save and close.
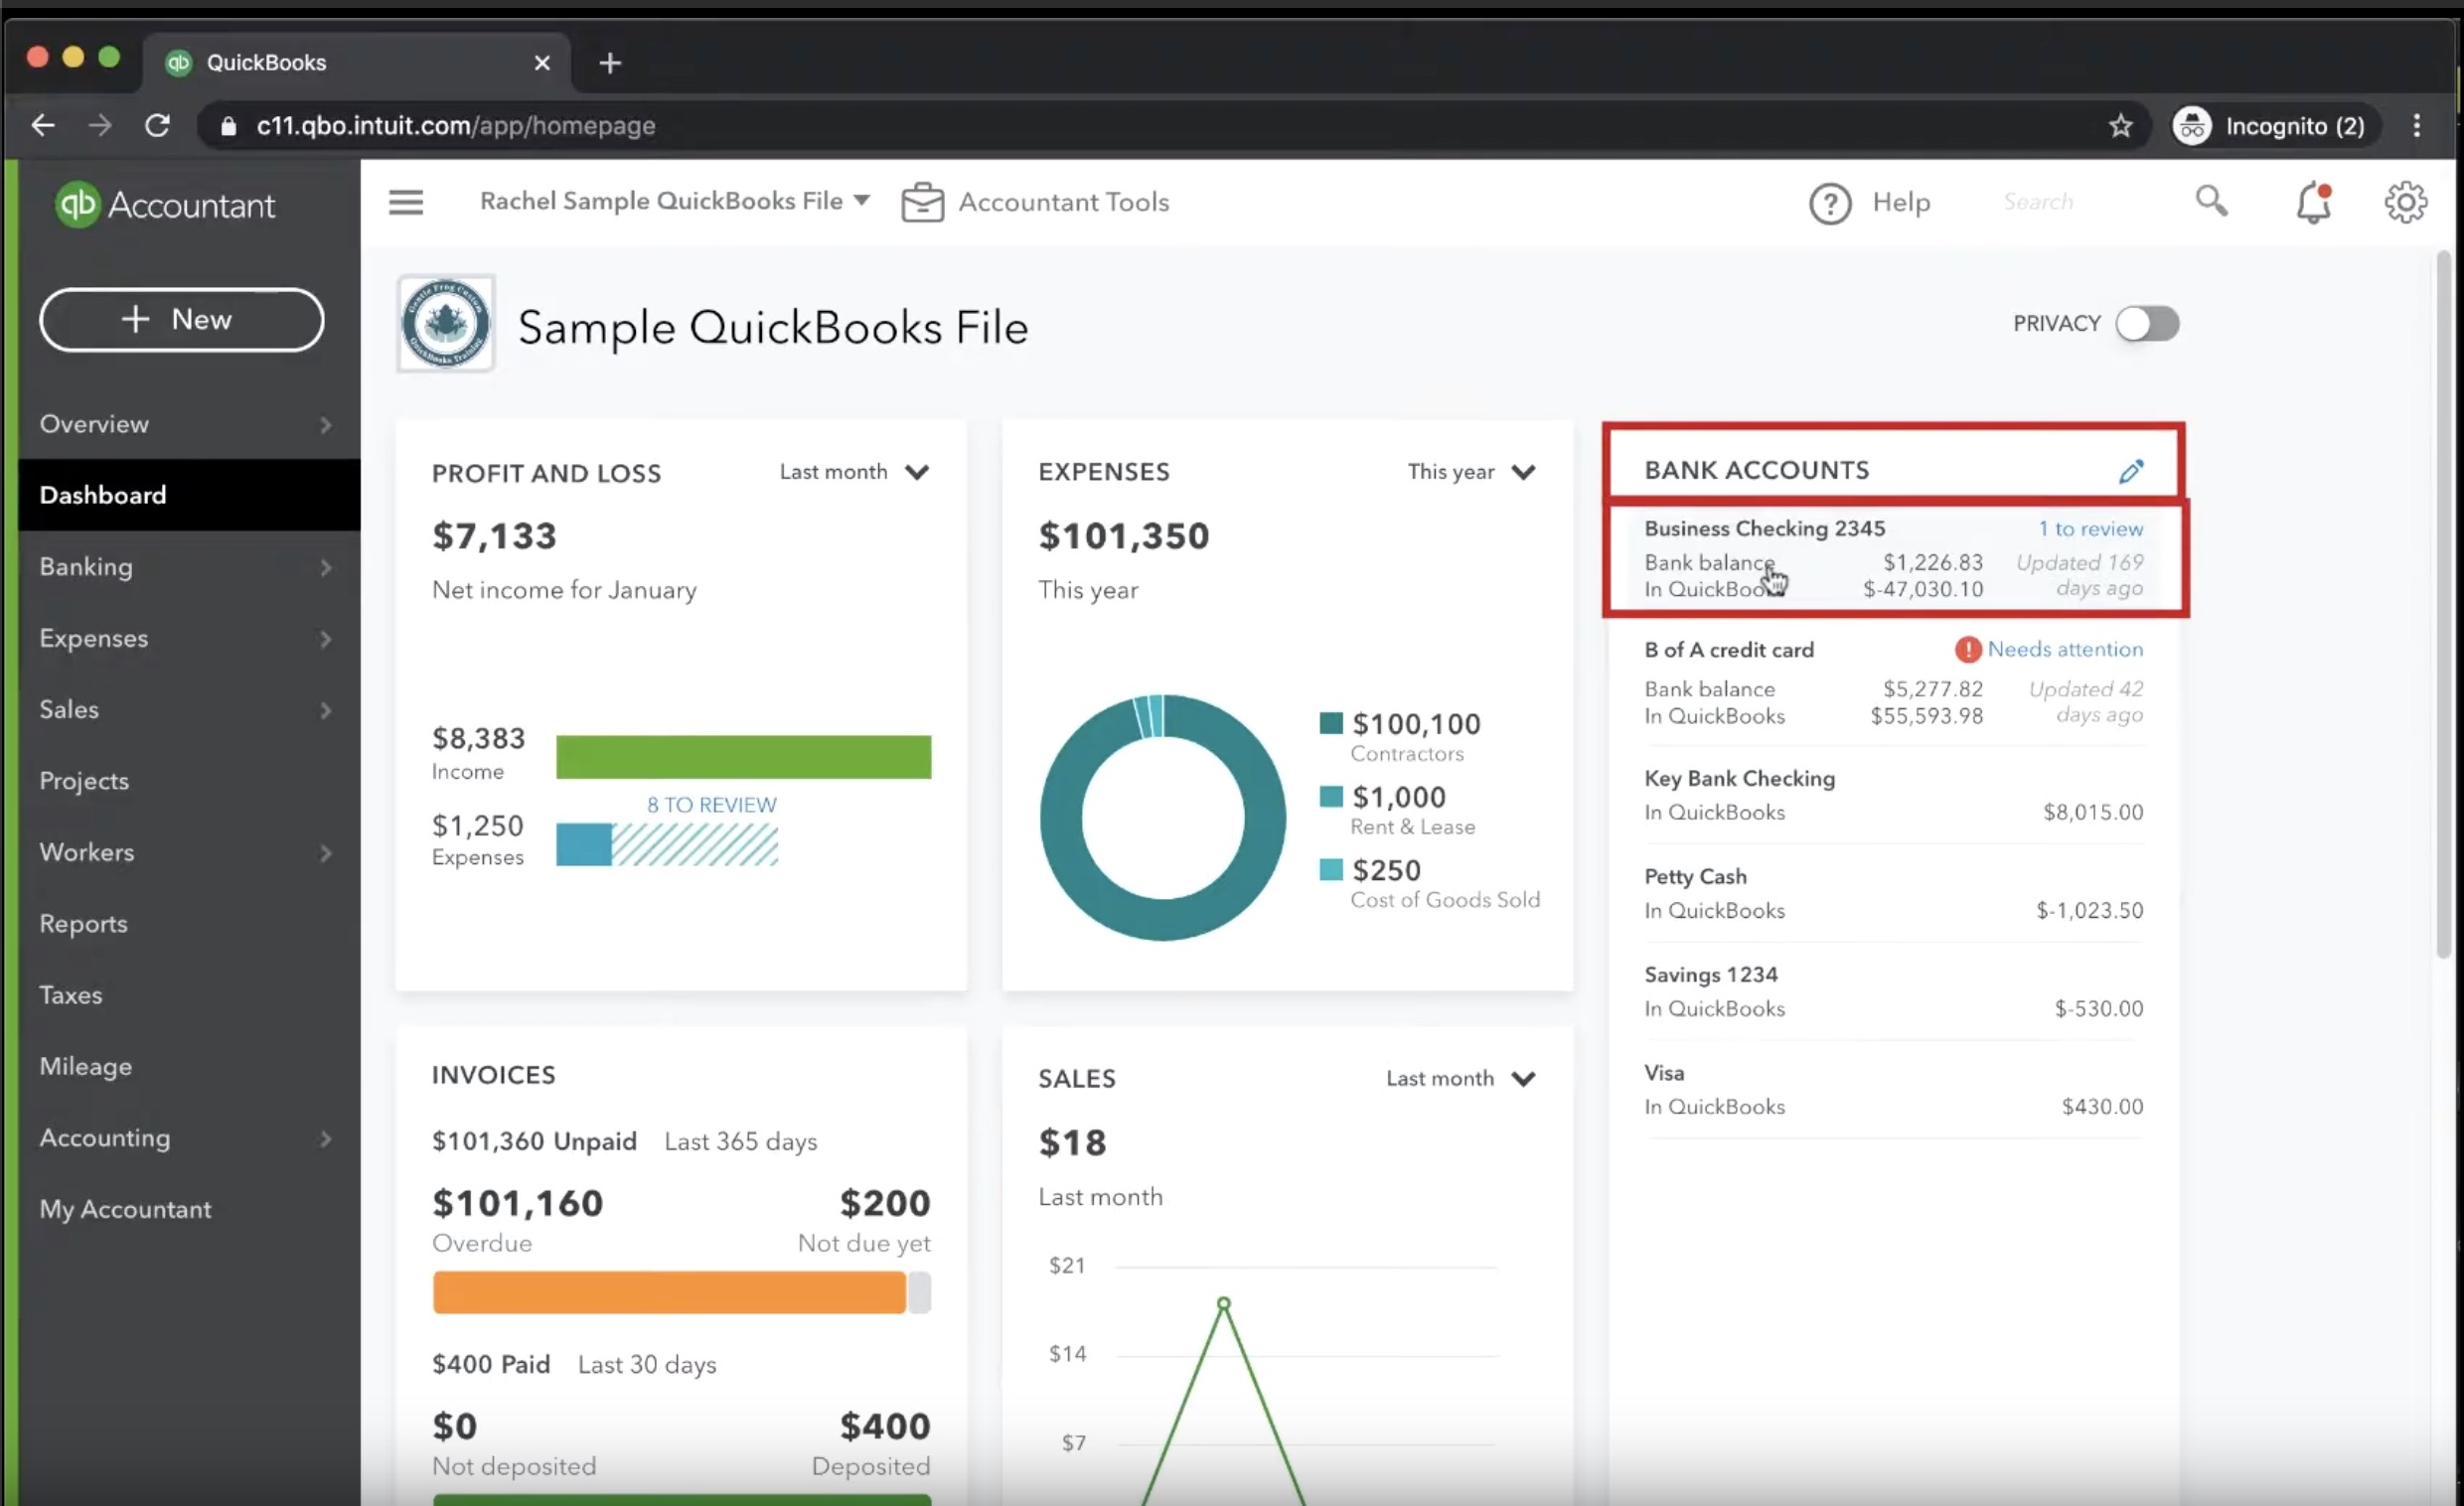
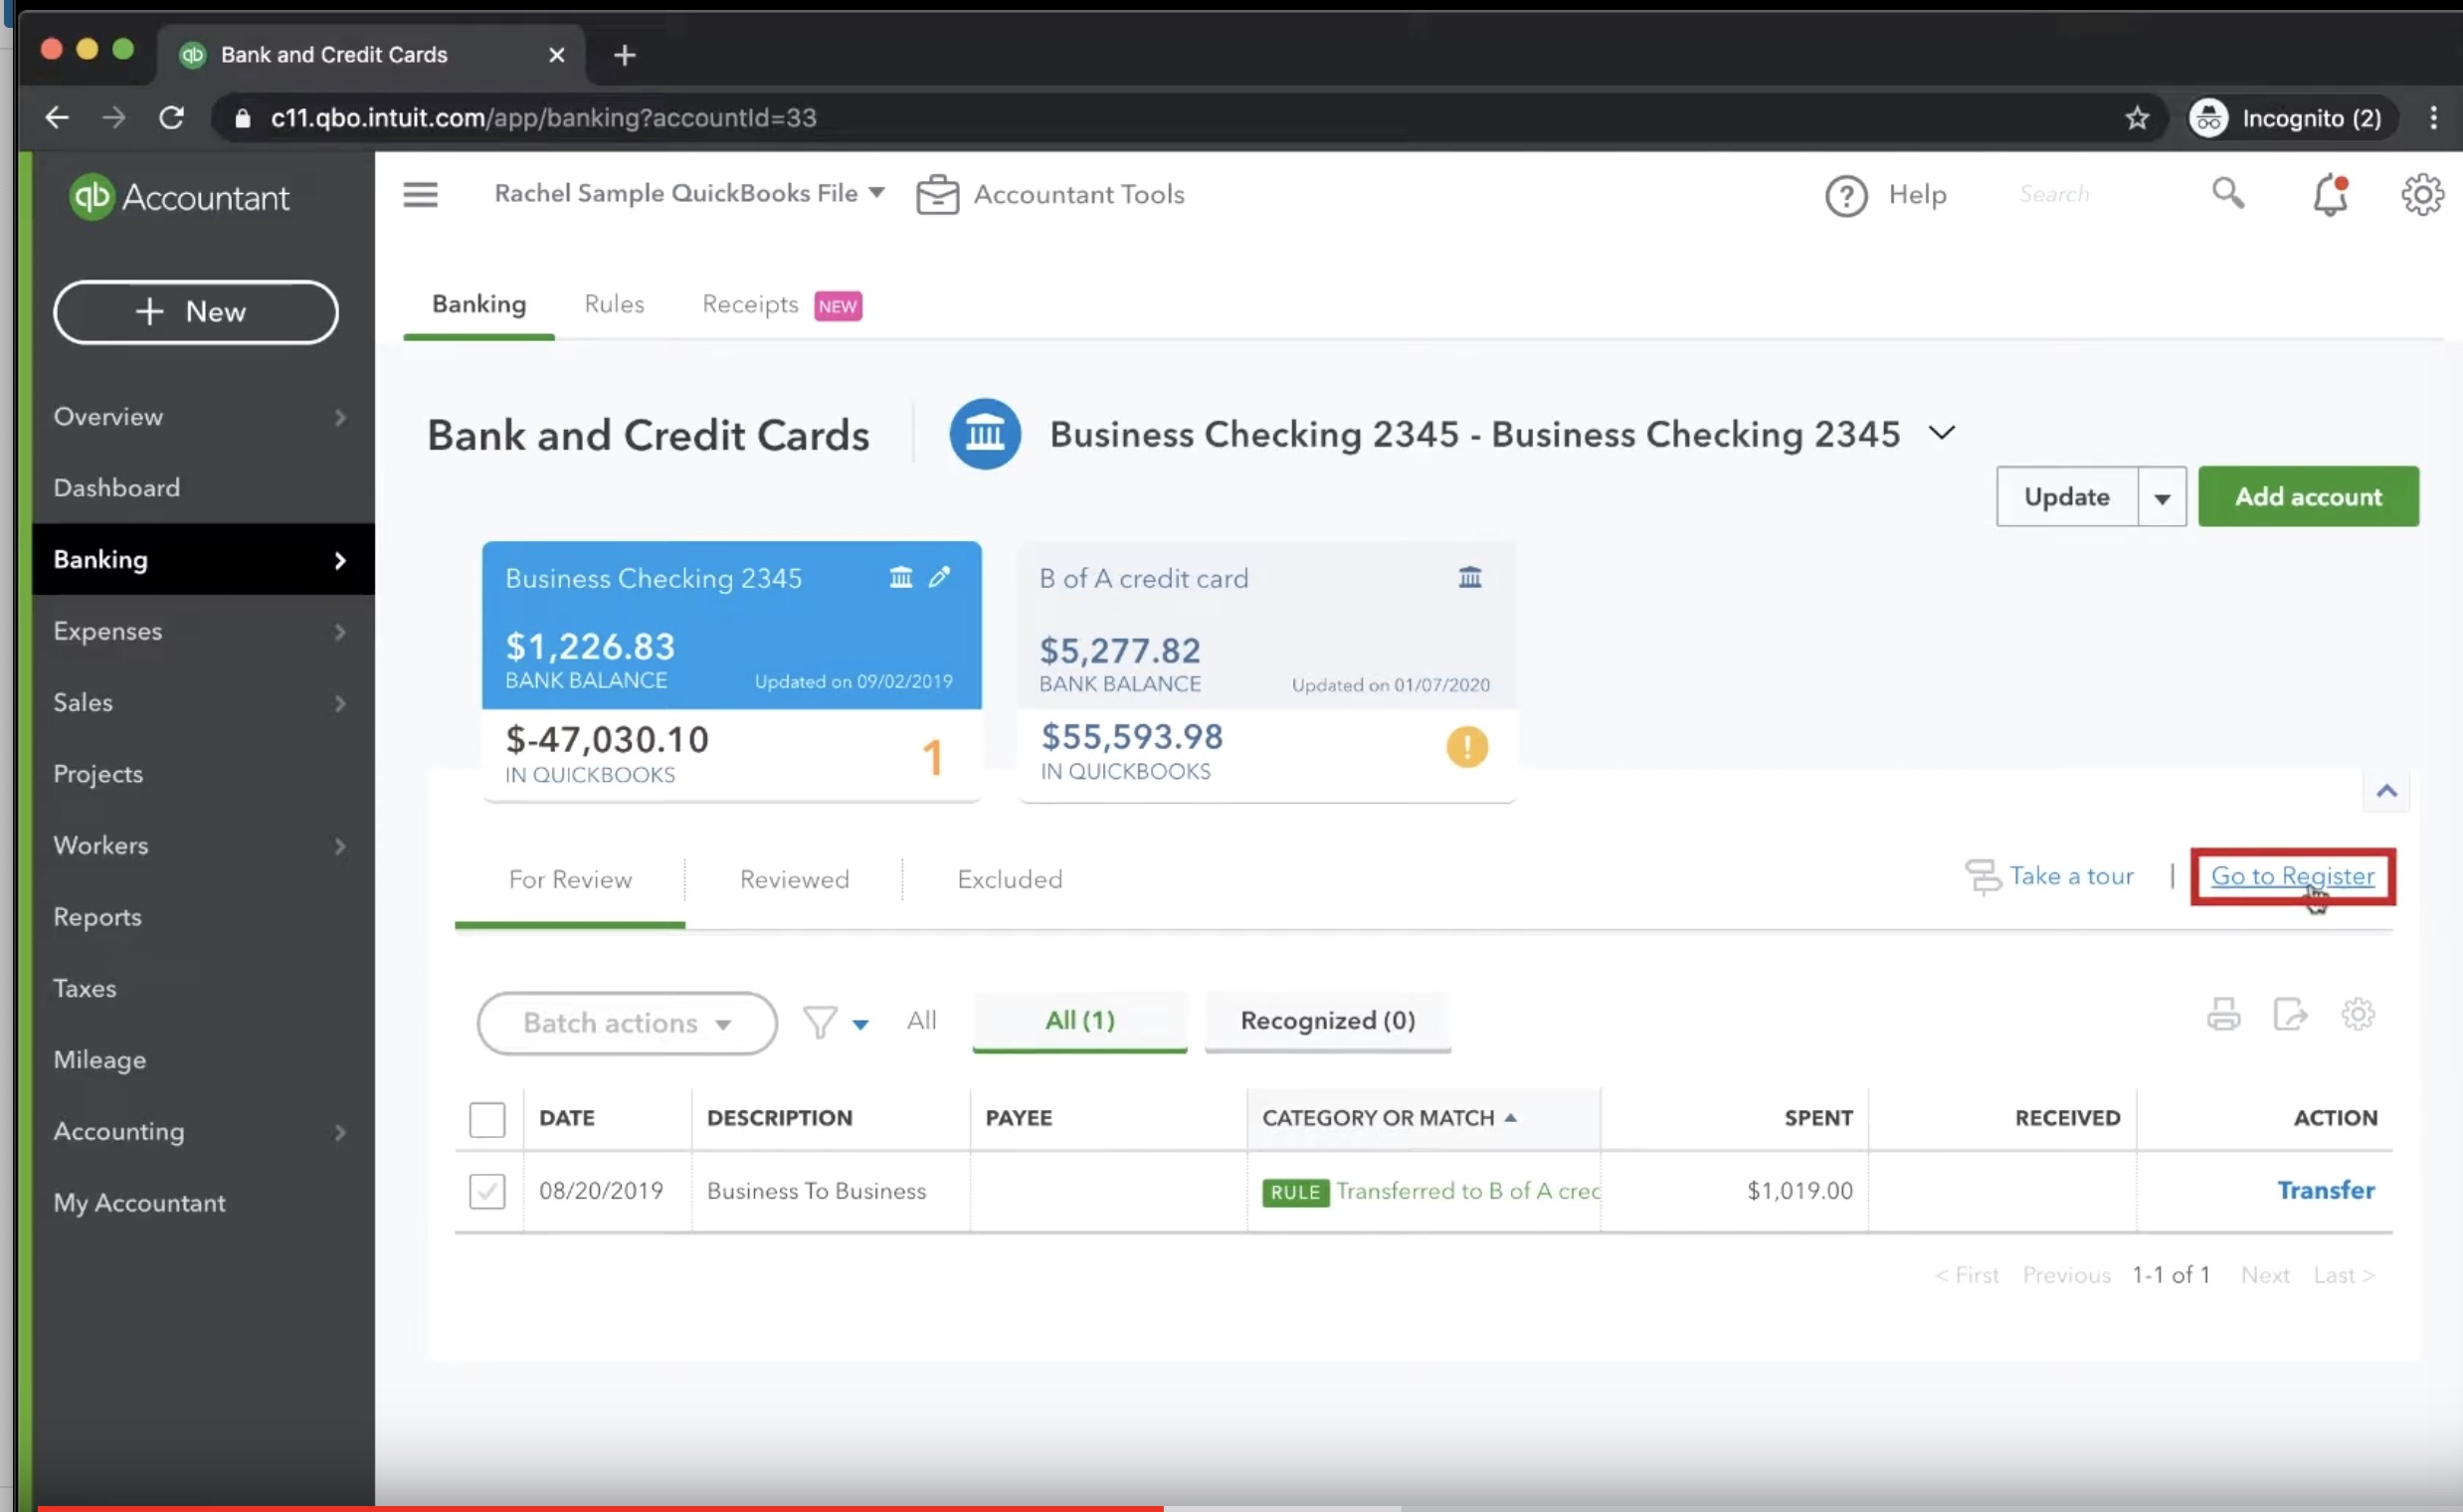
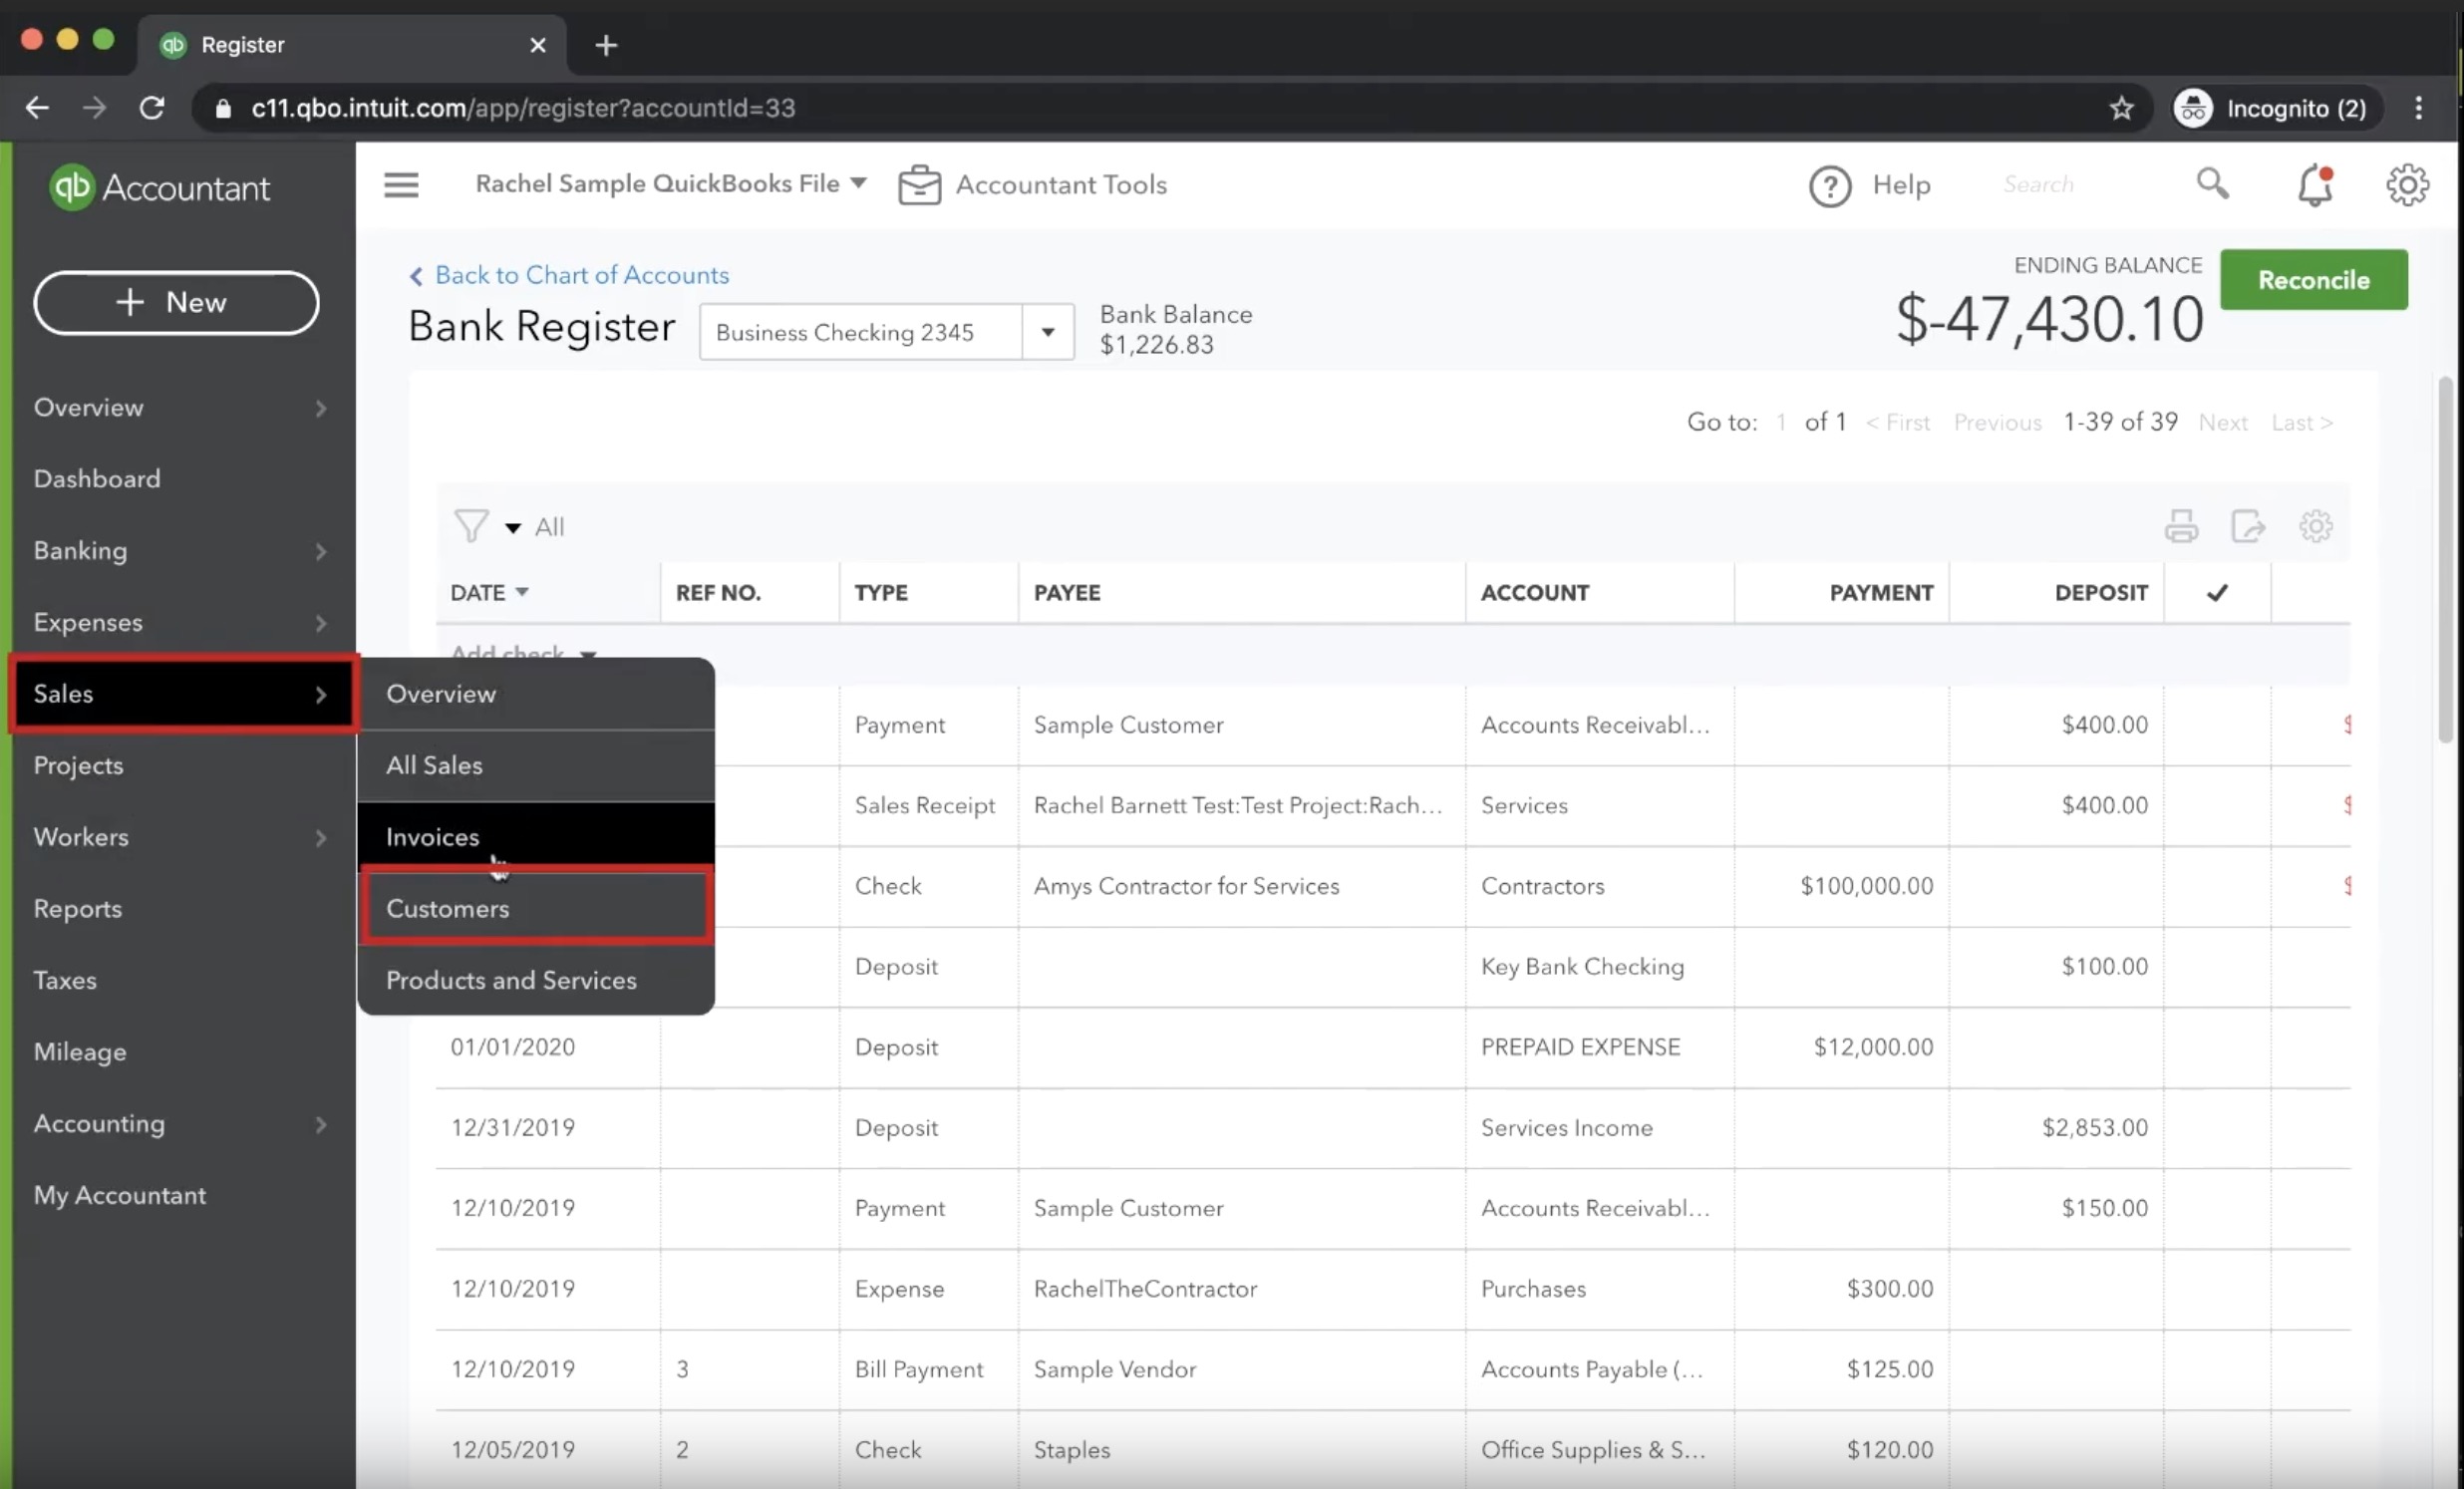
To recap, we’ve created a sales receipt and marked it as paid. We assigned the payment of the $400 consulting services to Sample Customer and marked it as paid by Check into our Business Checking Account. Next, we need to head over to the check register. There’s a handful of ways to get there. We’re going to get there by clicking on the Business Checking account as outlined below.
After we’ve clicked on the checking out, we’ll need to click the Go To Register button.
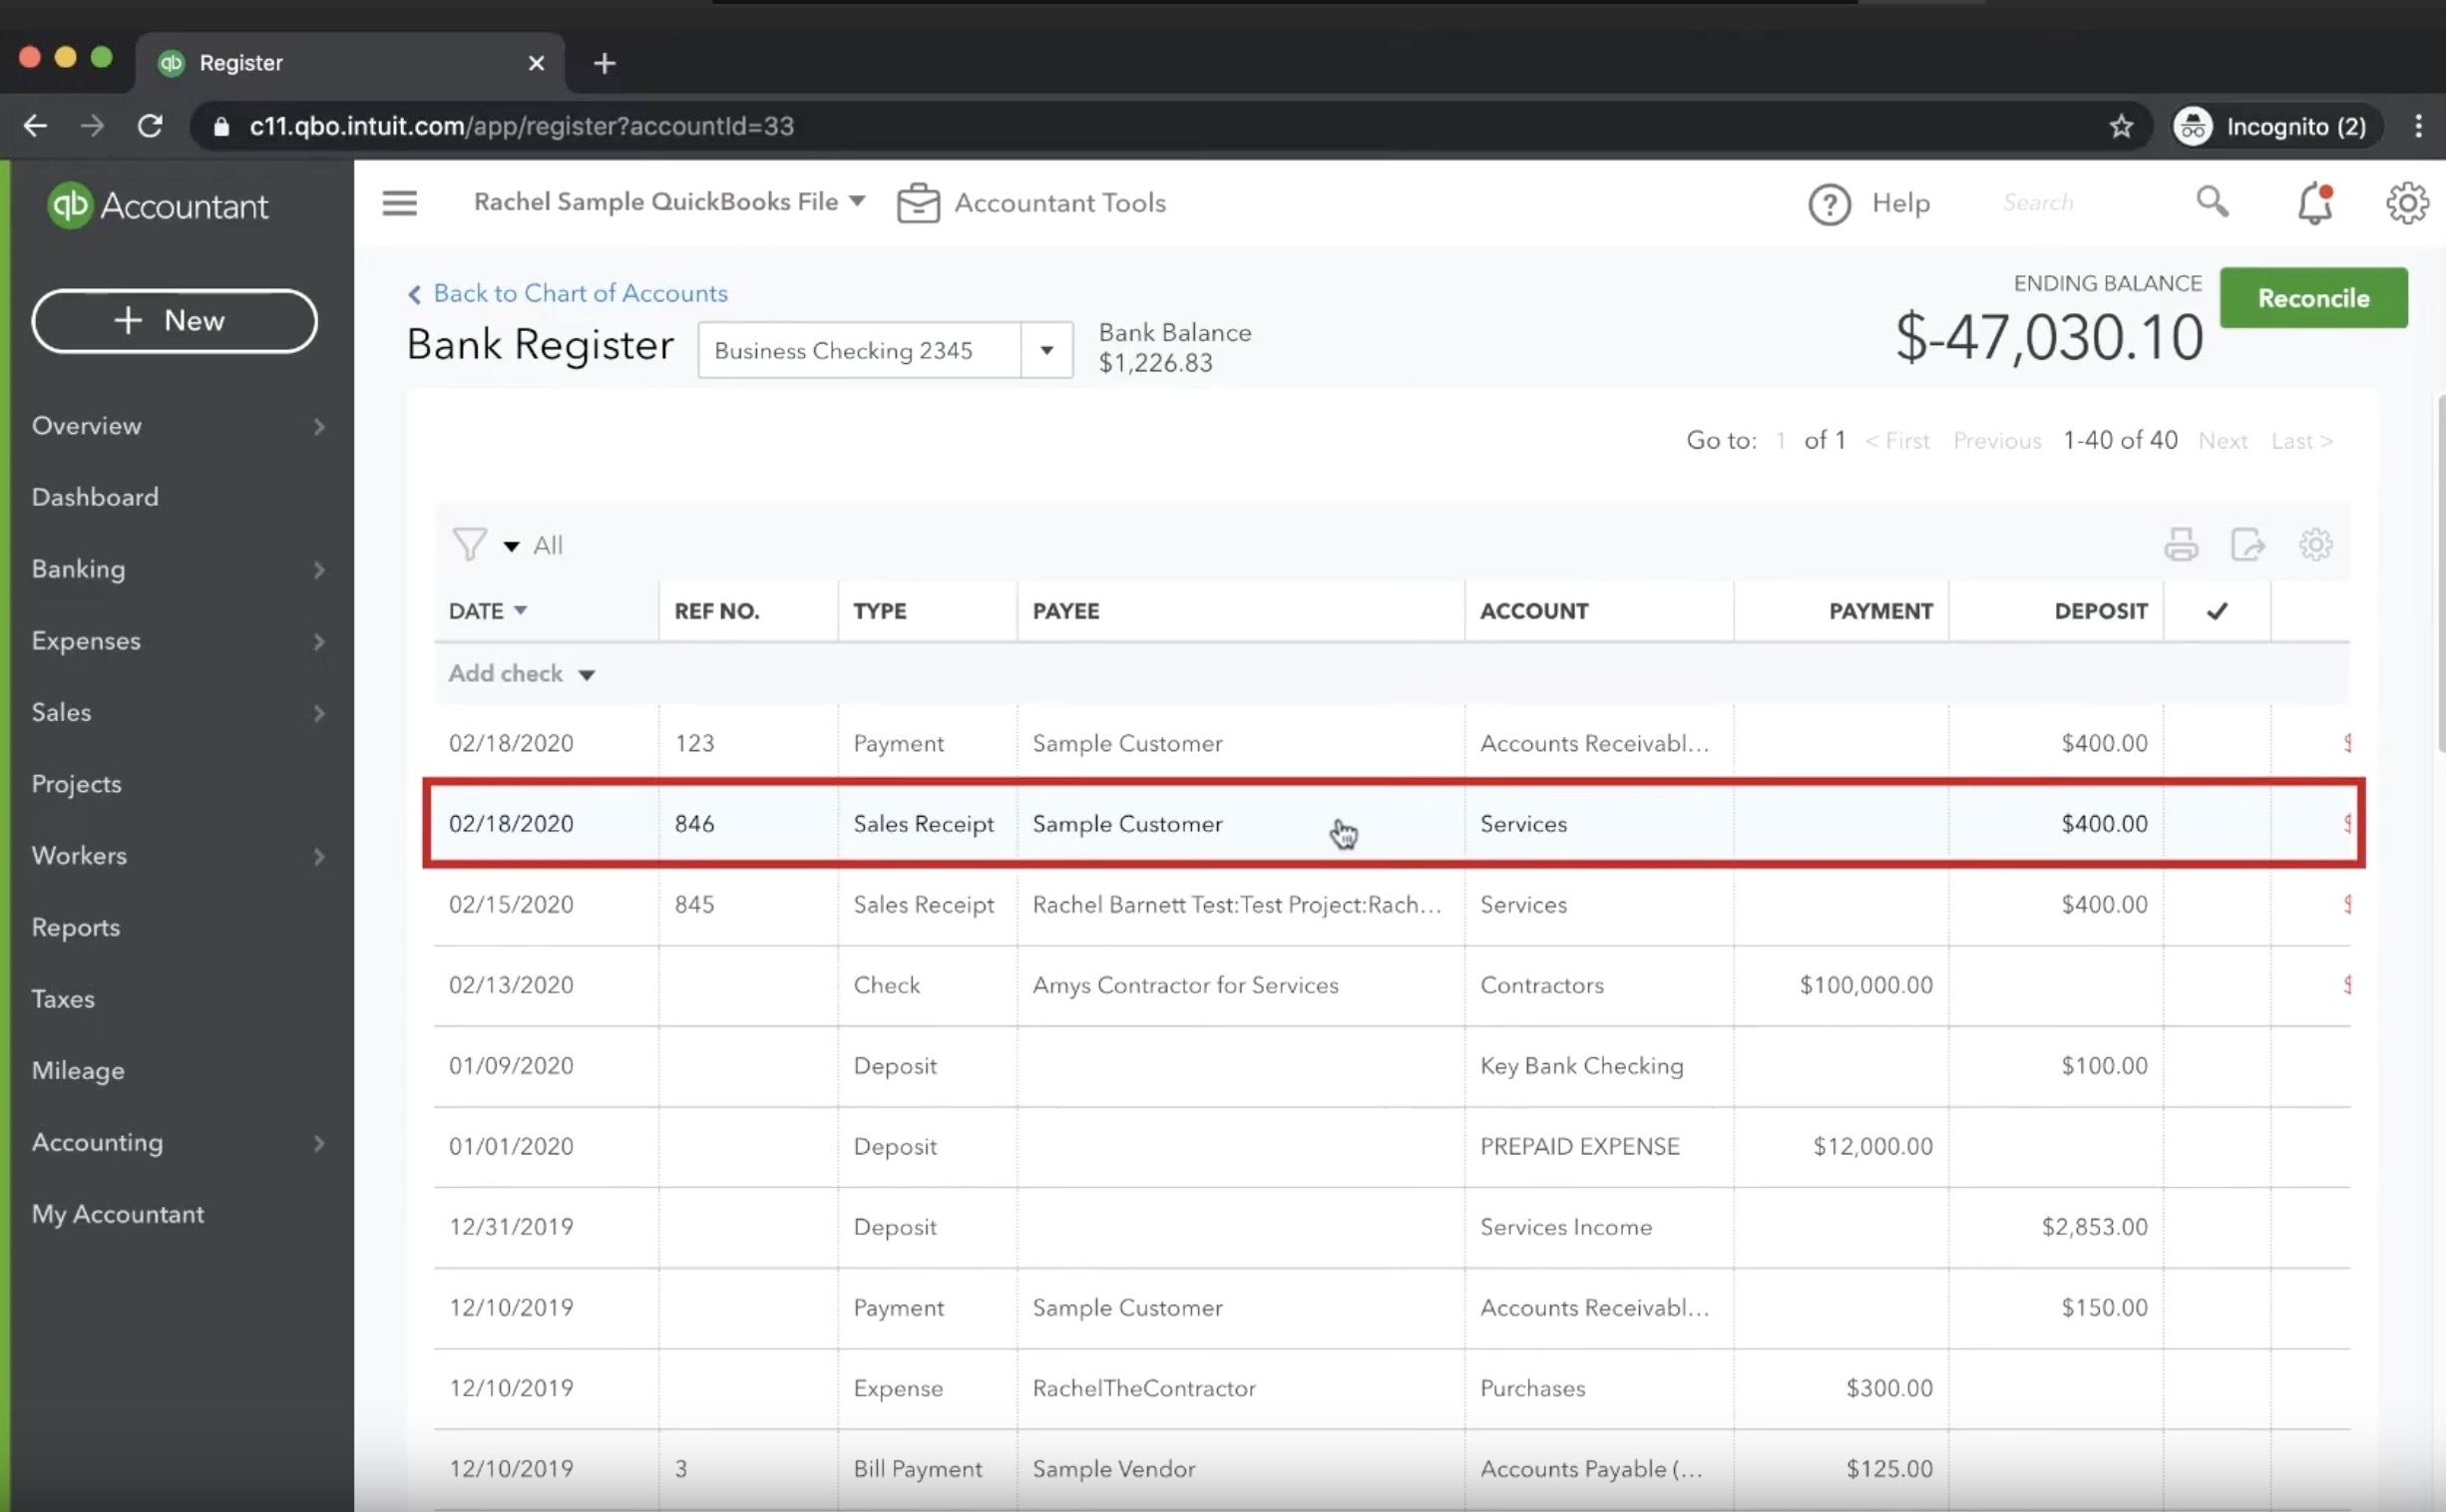
What we discover when we look in the register is that we see the transaction twice. We’ve accidentally recorded the payment two times.

If we click on the sales receipt, it doesn’t look like there is anything wrong. All the information is complete and accurate, we just have two of them.
The take away from this is that we can enter things into our check register in multiple ways. In this case, we entered it in once as a sales receipt and then unknowingly entered it in again when we created an invoice.
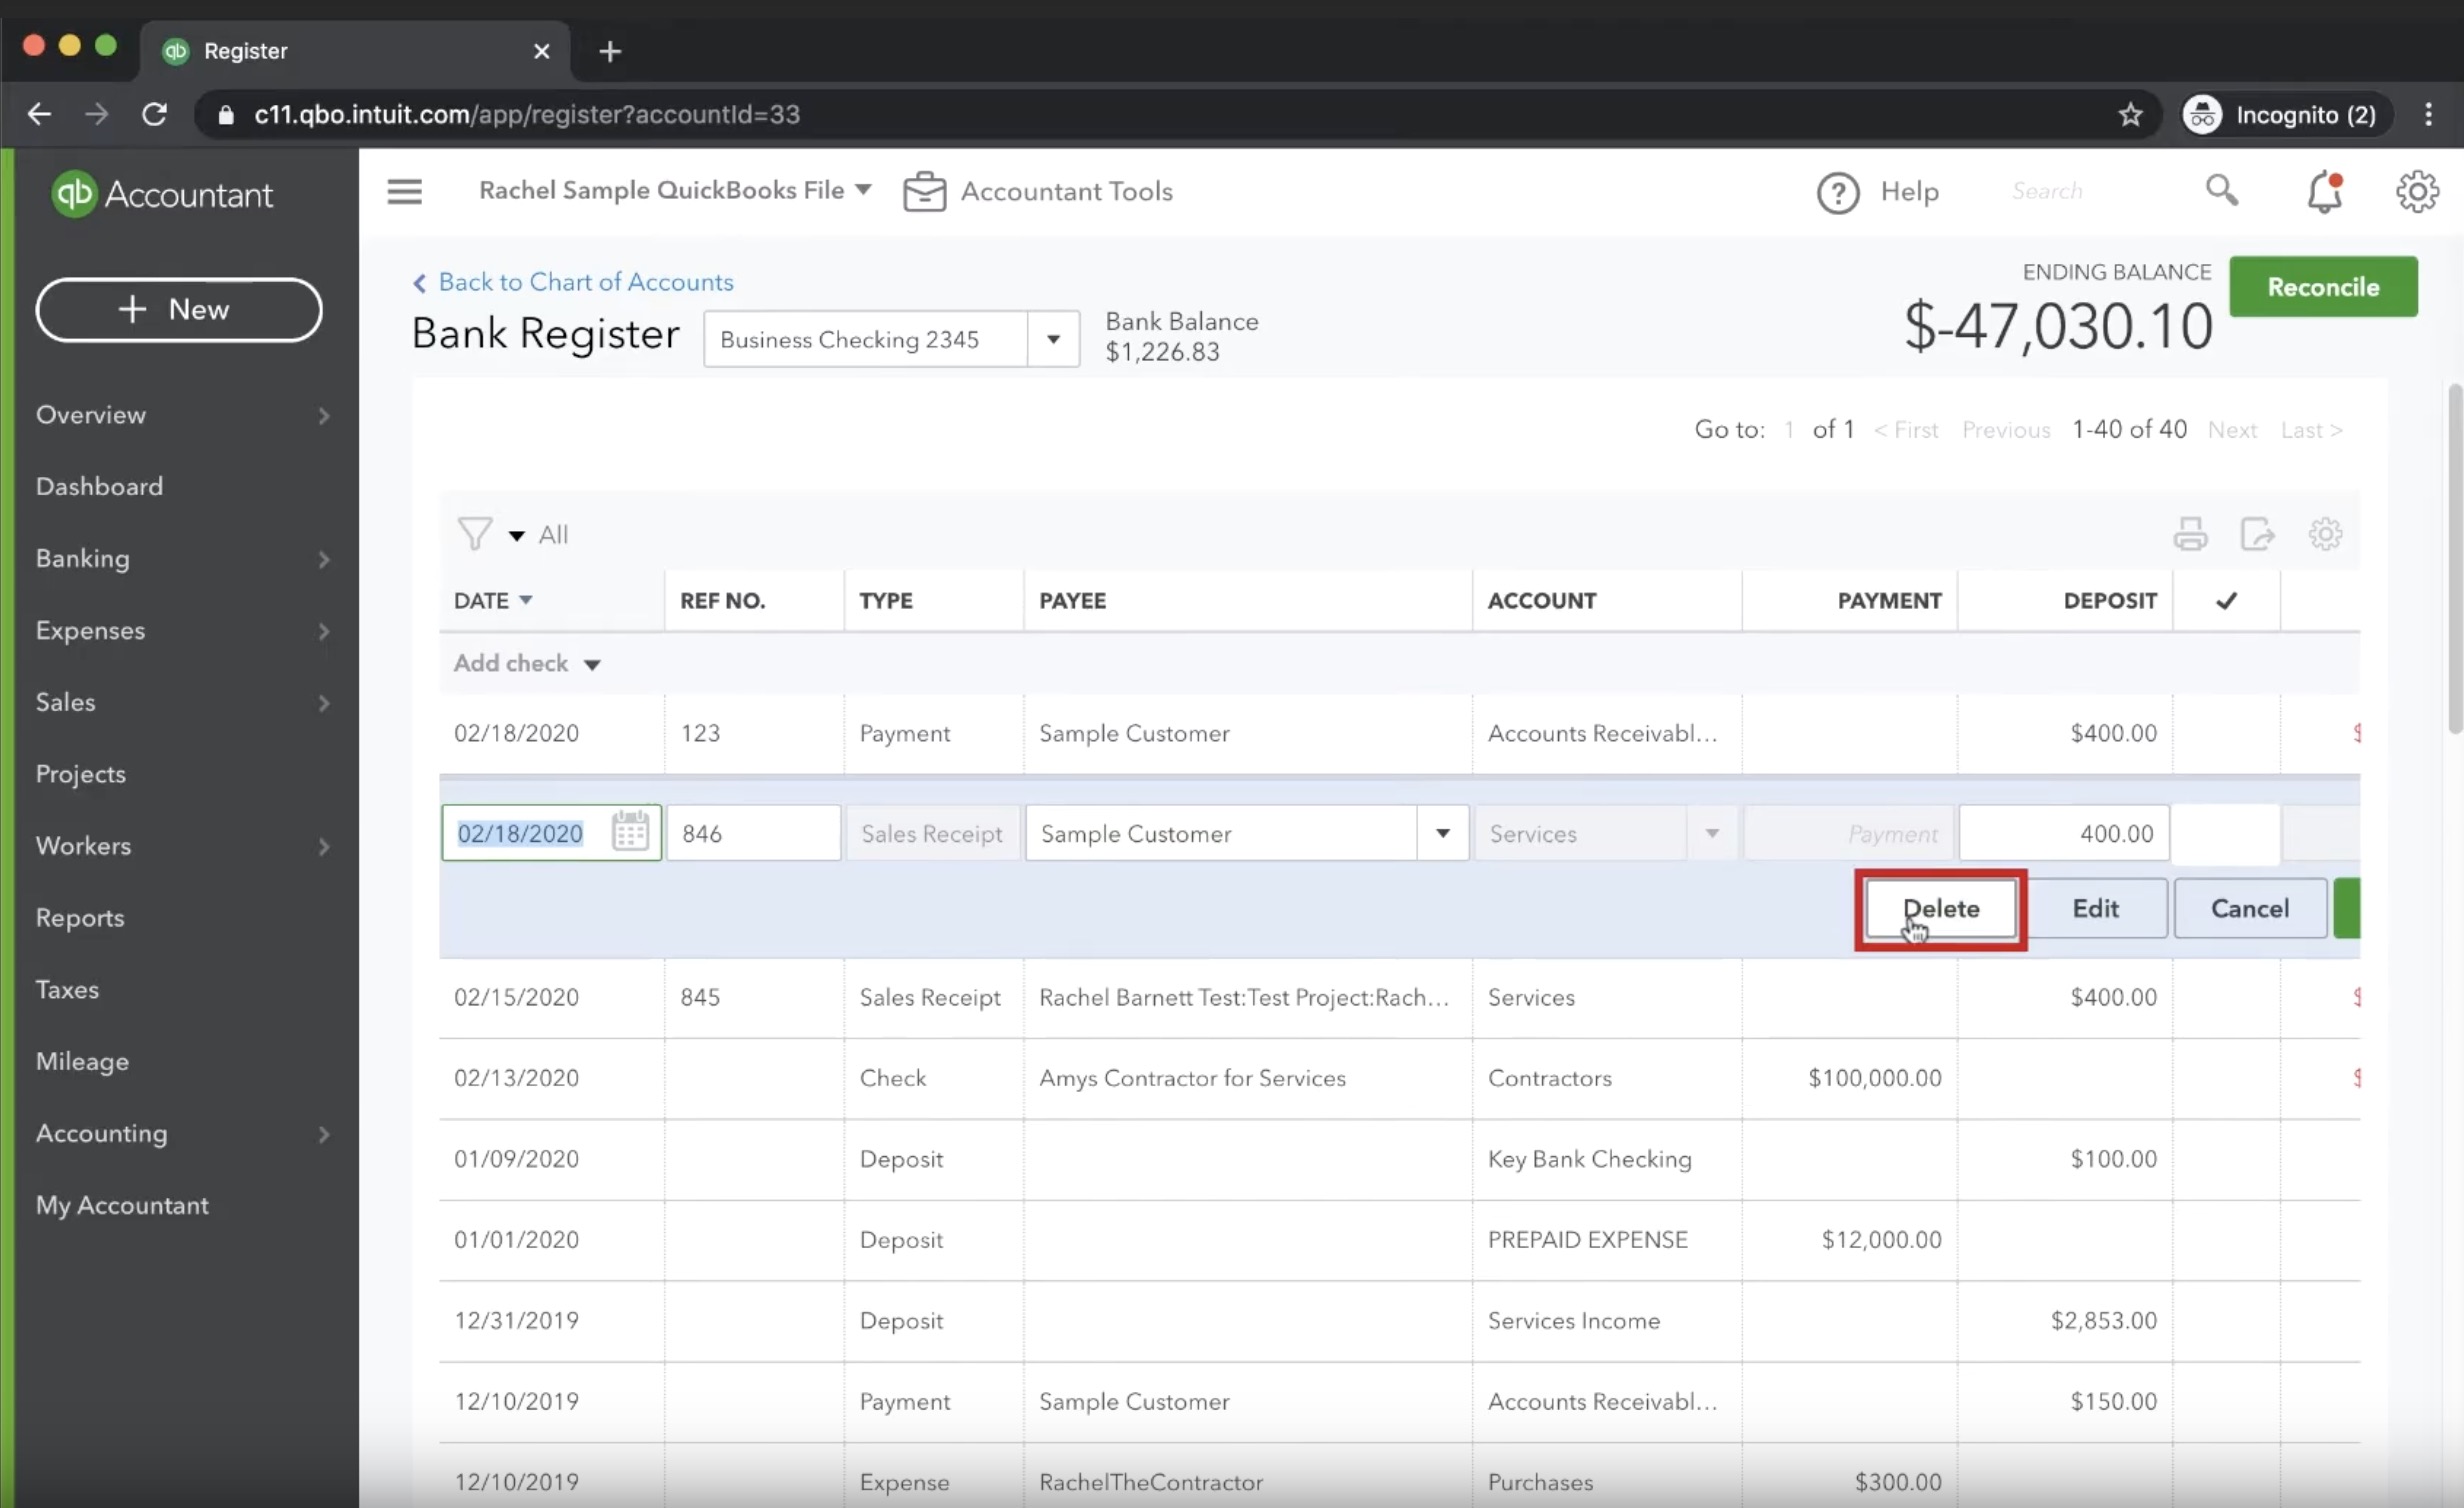
Before we can move forward, we need to make a decision. What are we going to delete? Do we remove the sales receipt or the invoice? Which one you delete is up to you. In our example, we’re going to delete the sales receipt. To begin, locate the sales receipt and click it.
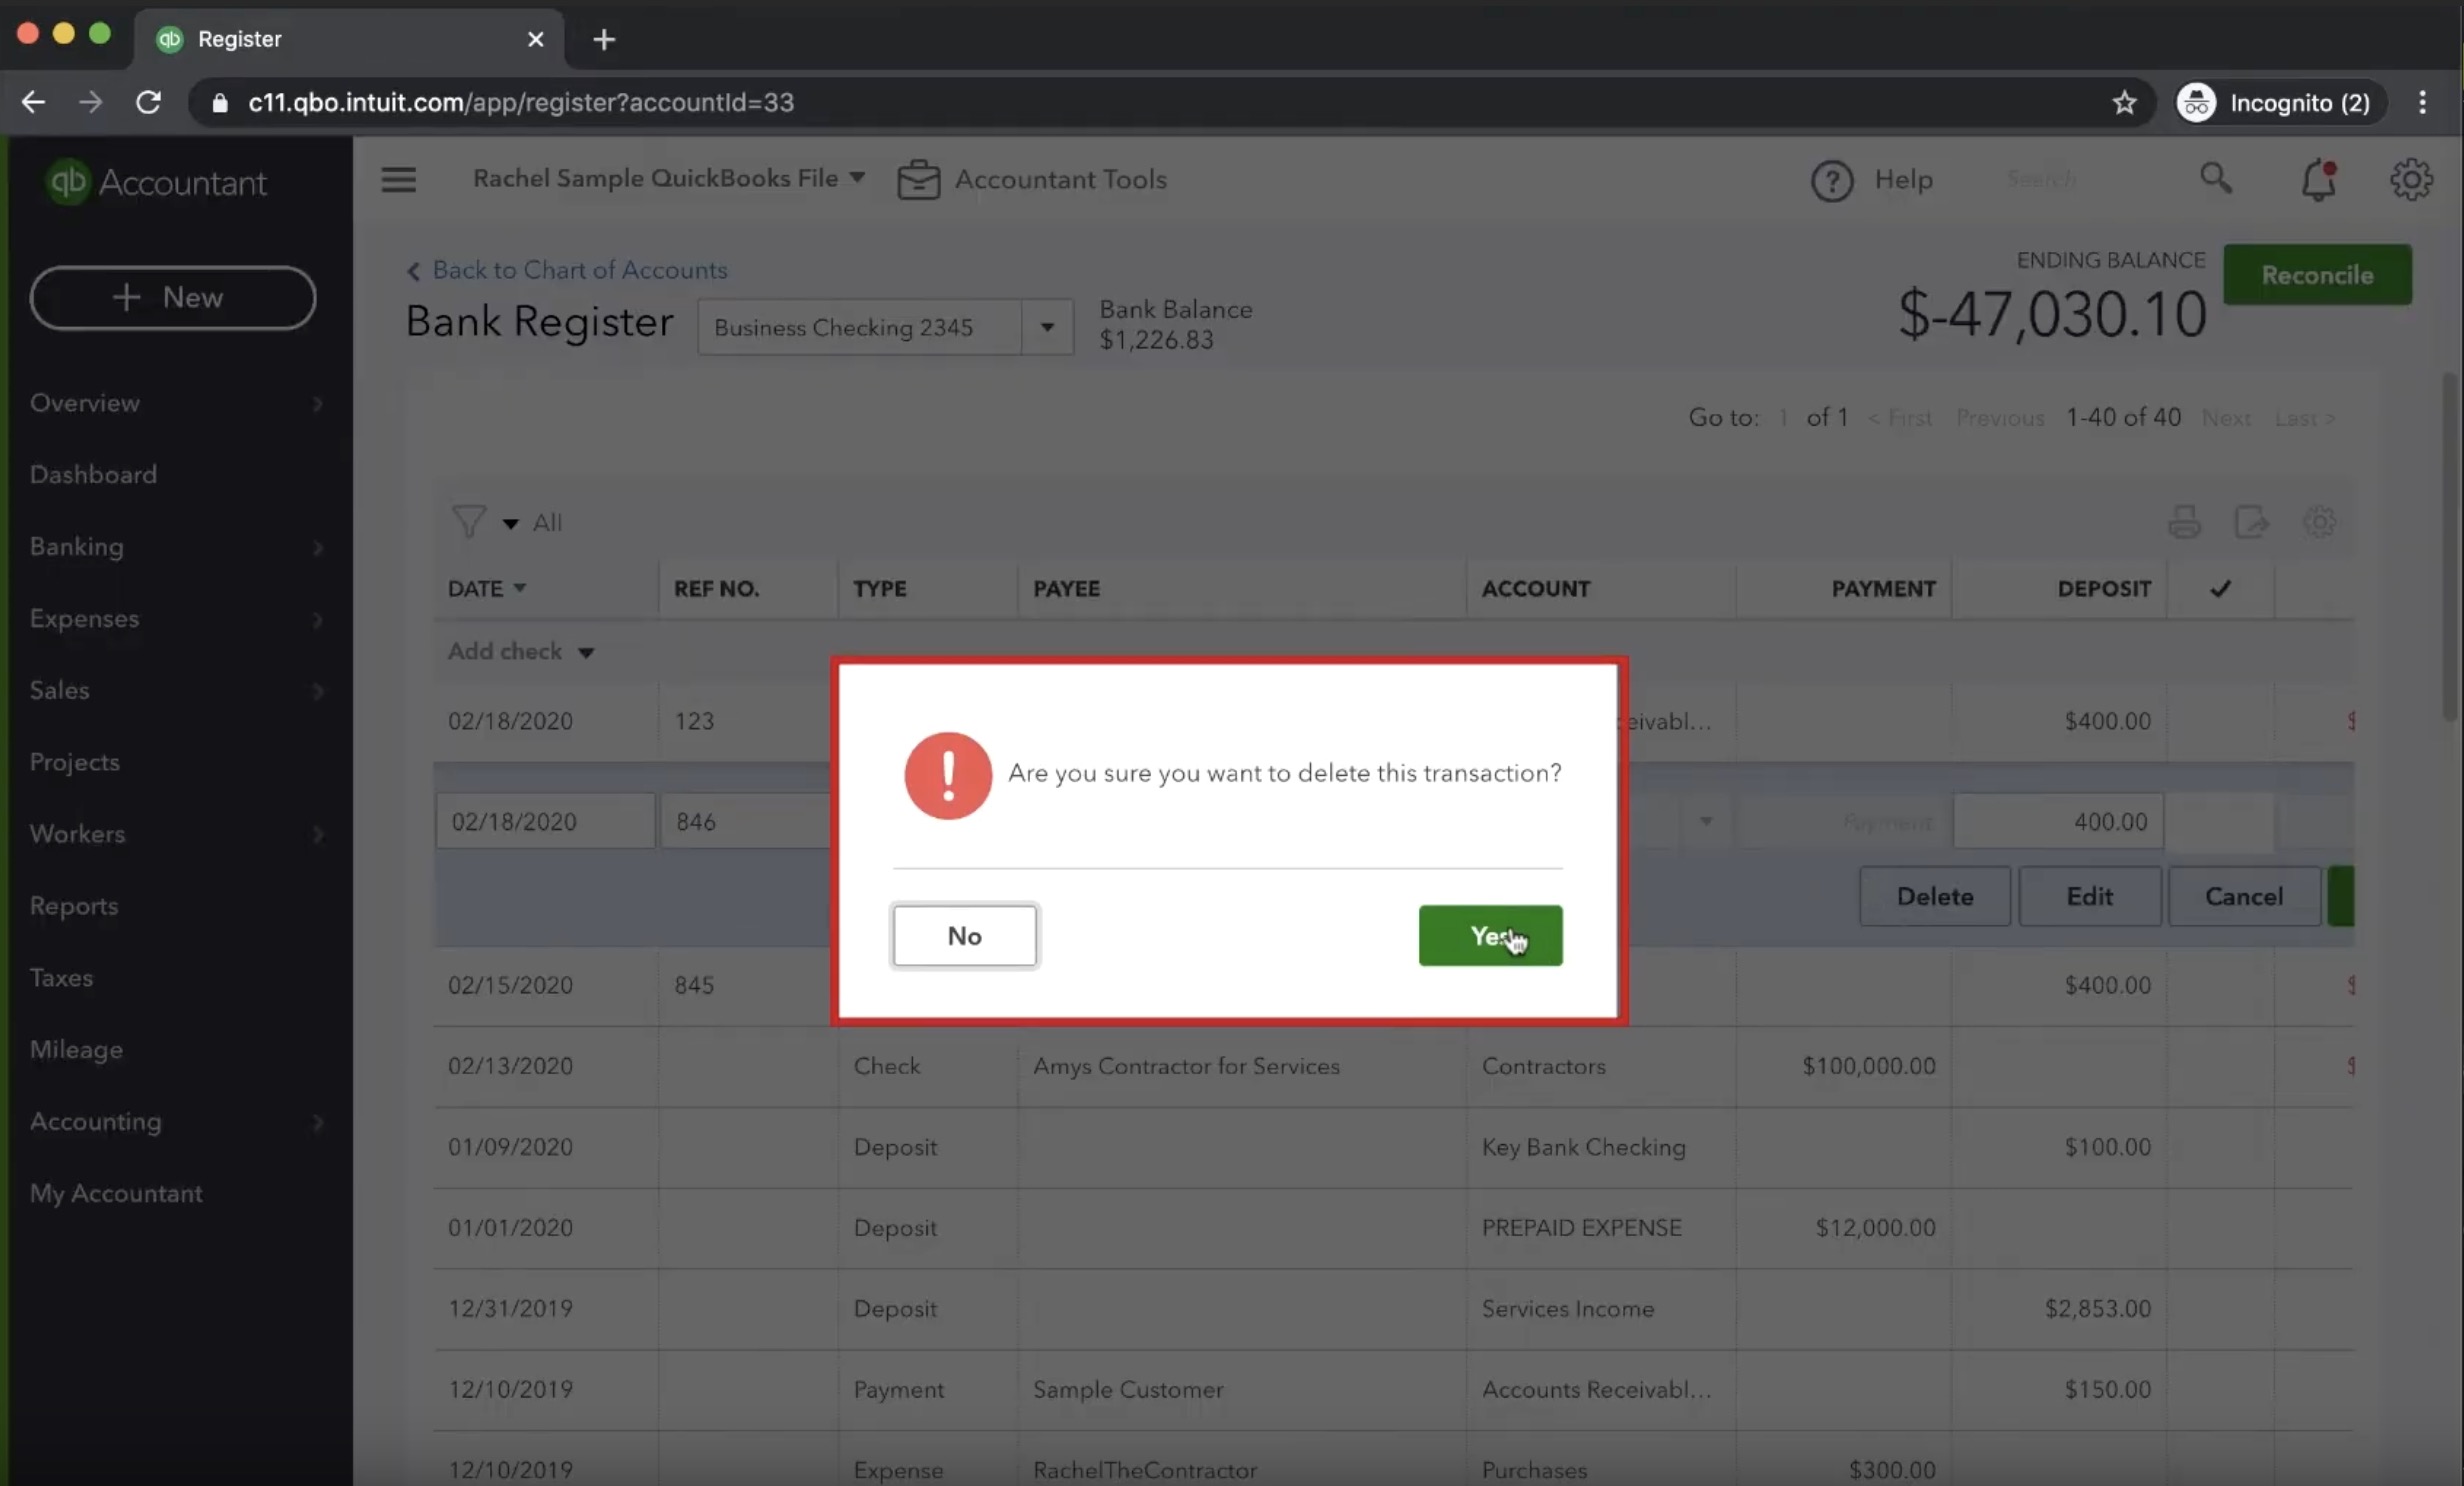
By clicking the sales receipt, new options will become available. We’ll see Delete, Edit, and Cancel. We click delete, and then on the dialog box that pops up, we’ll click yes to confirm the deletion.
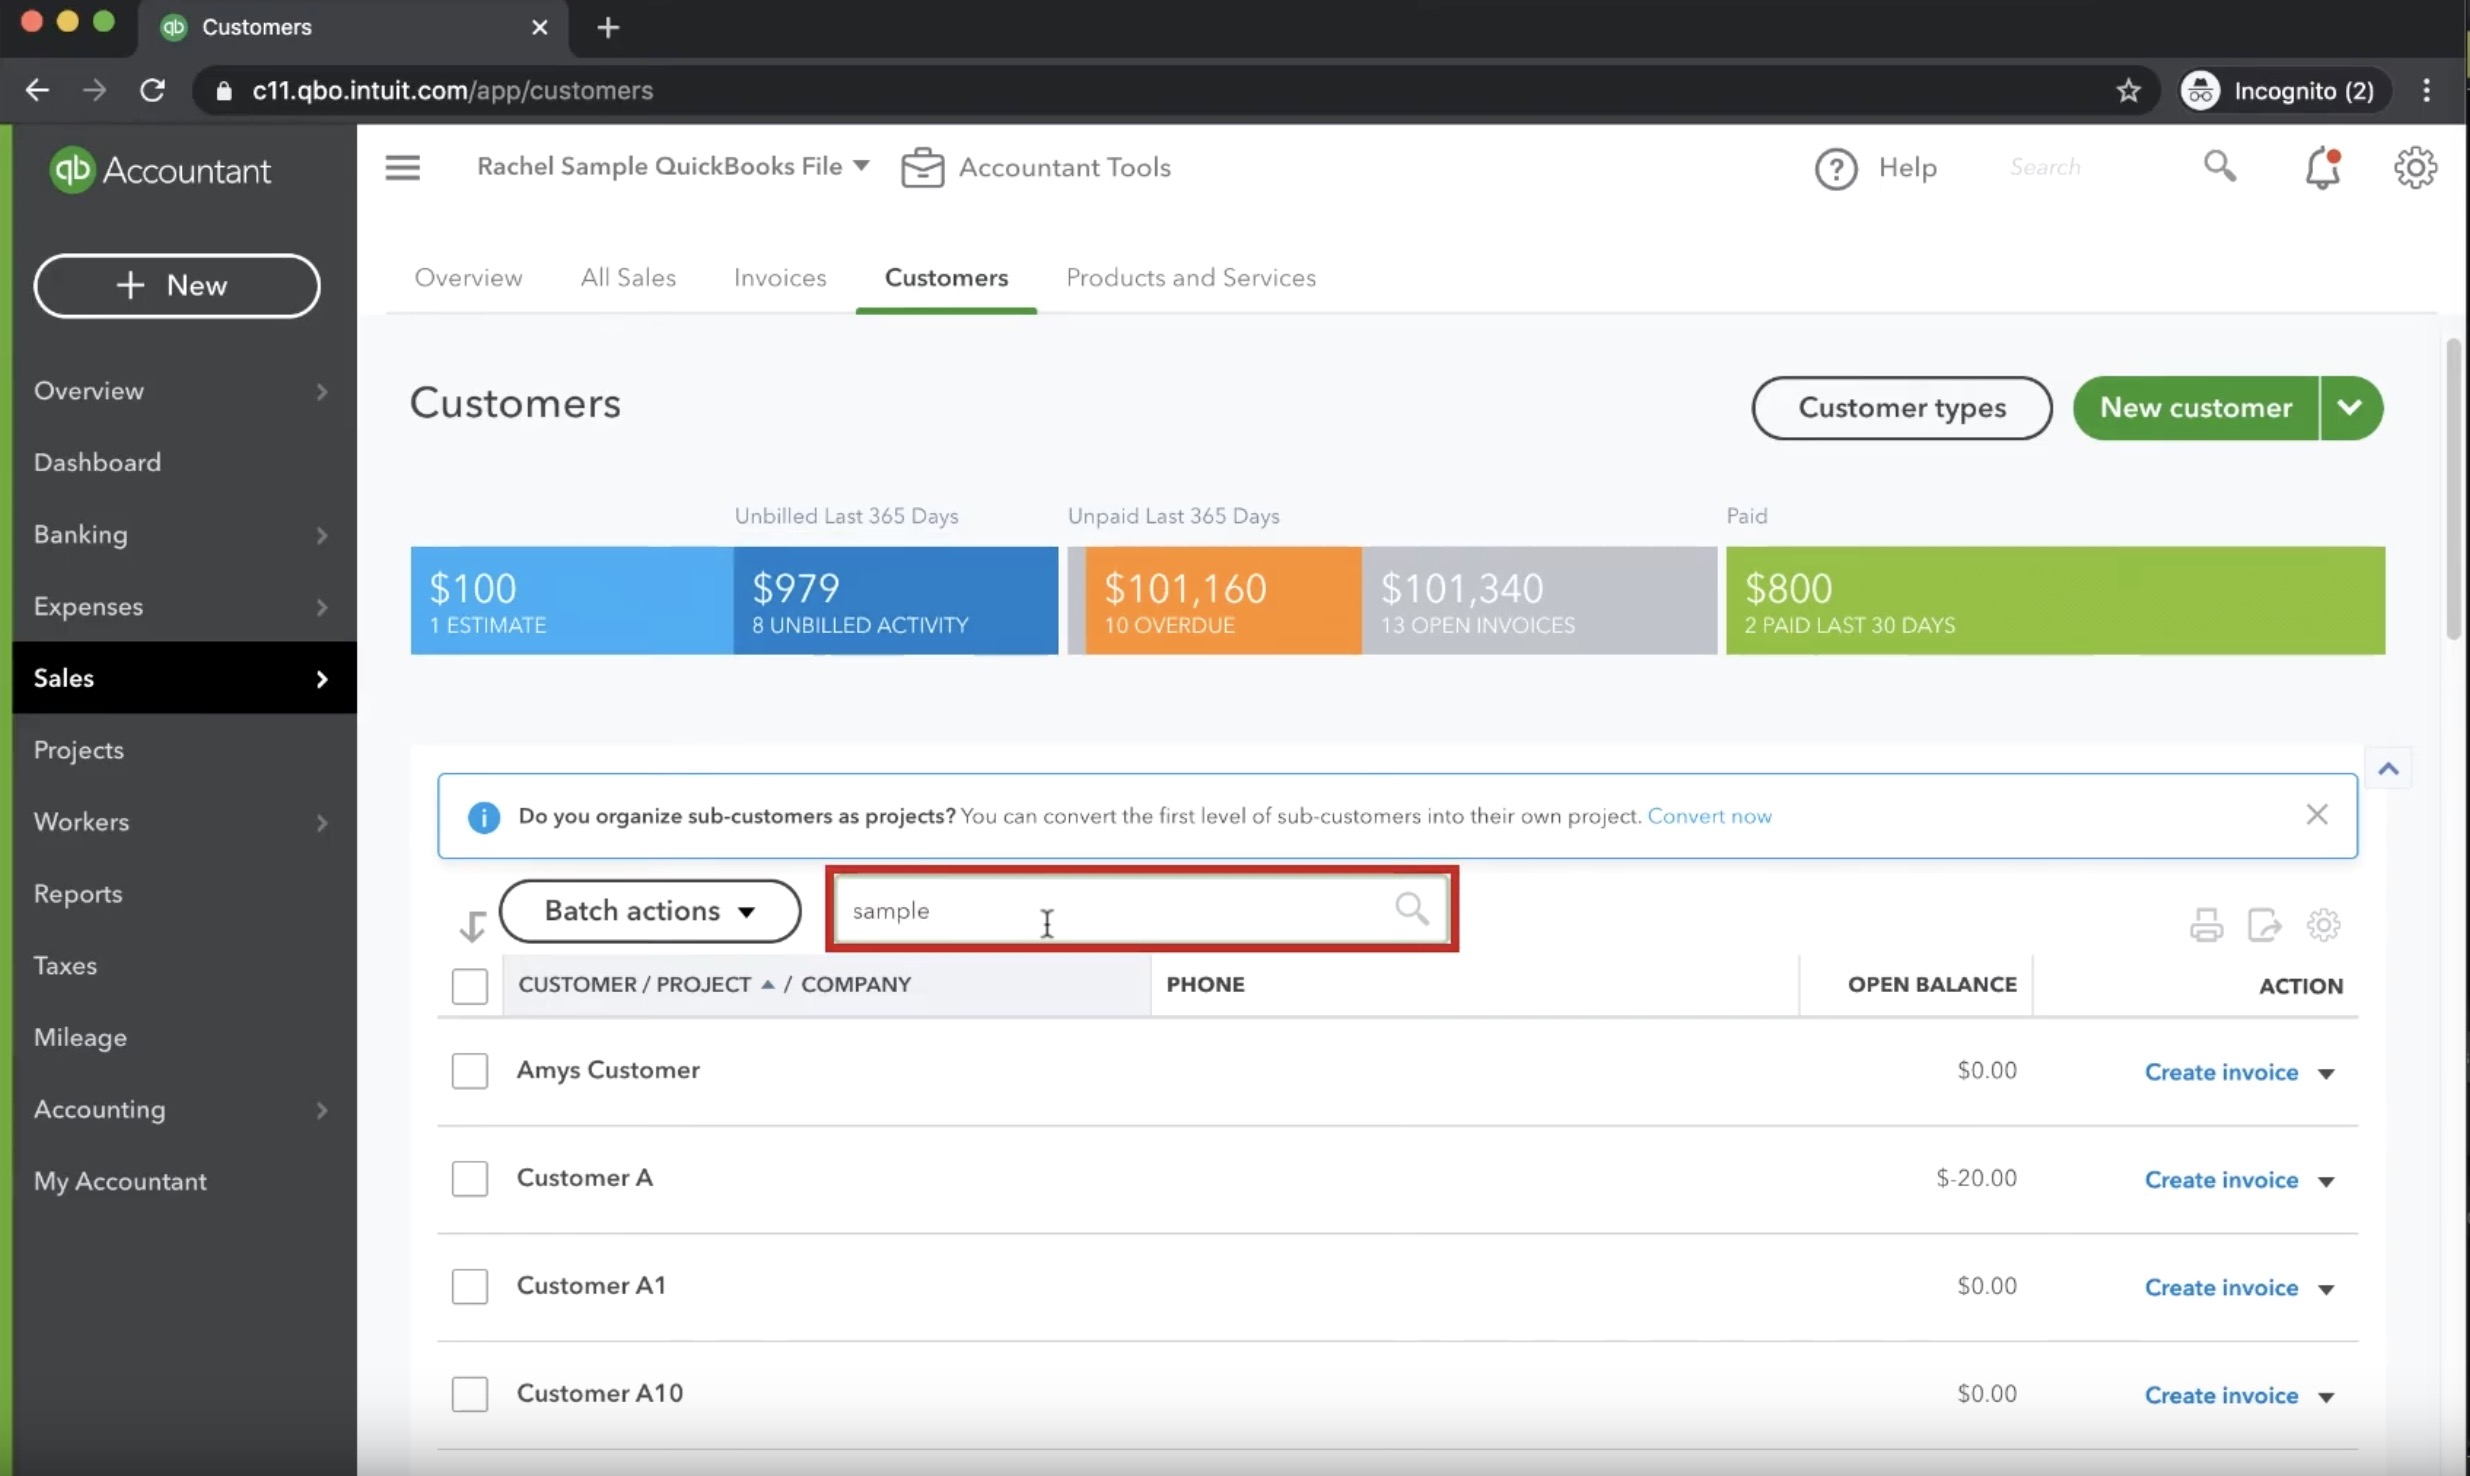
So now we’ve gone back through into the bank register and deleted the transaction. Let’s confirm that what we did was correct. It’s a good idea to go back to our sample customer and look at all the transactions assigned to them and confirm we no longer have a duplicate. To verify this, look to the left-hand column, select sales, and then customers.
From there, we click the customers tab at the top of the screen and then look to the center of the page for a search box. In the search box, type the word Sample to bring up the customer we’re analyzing. That should show our sample customer. Click the customer.

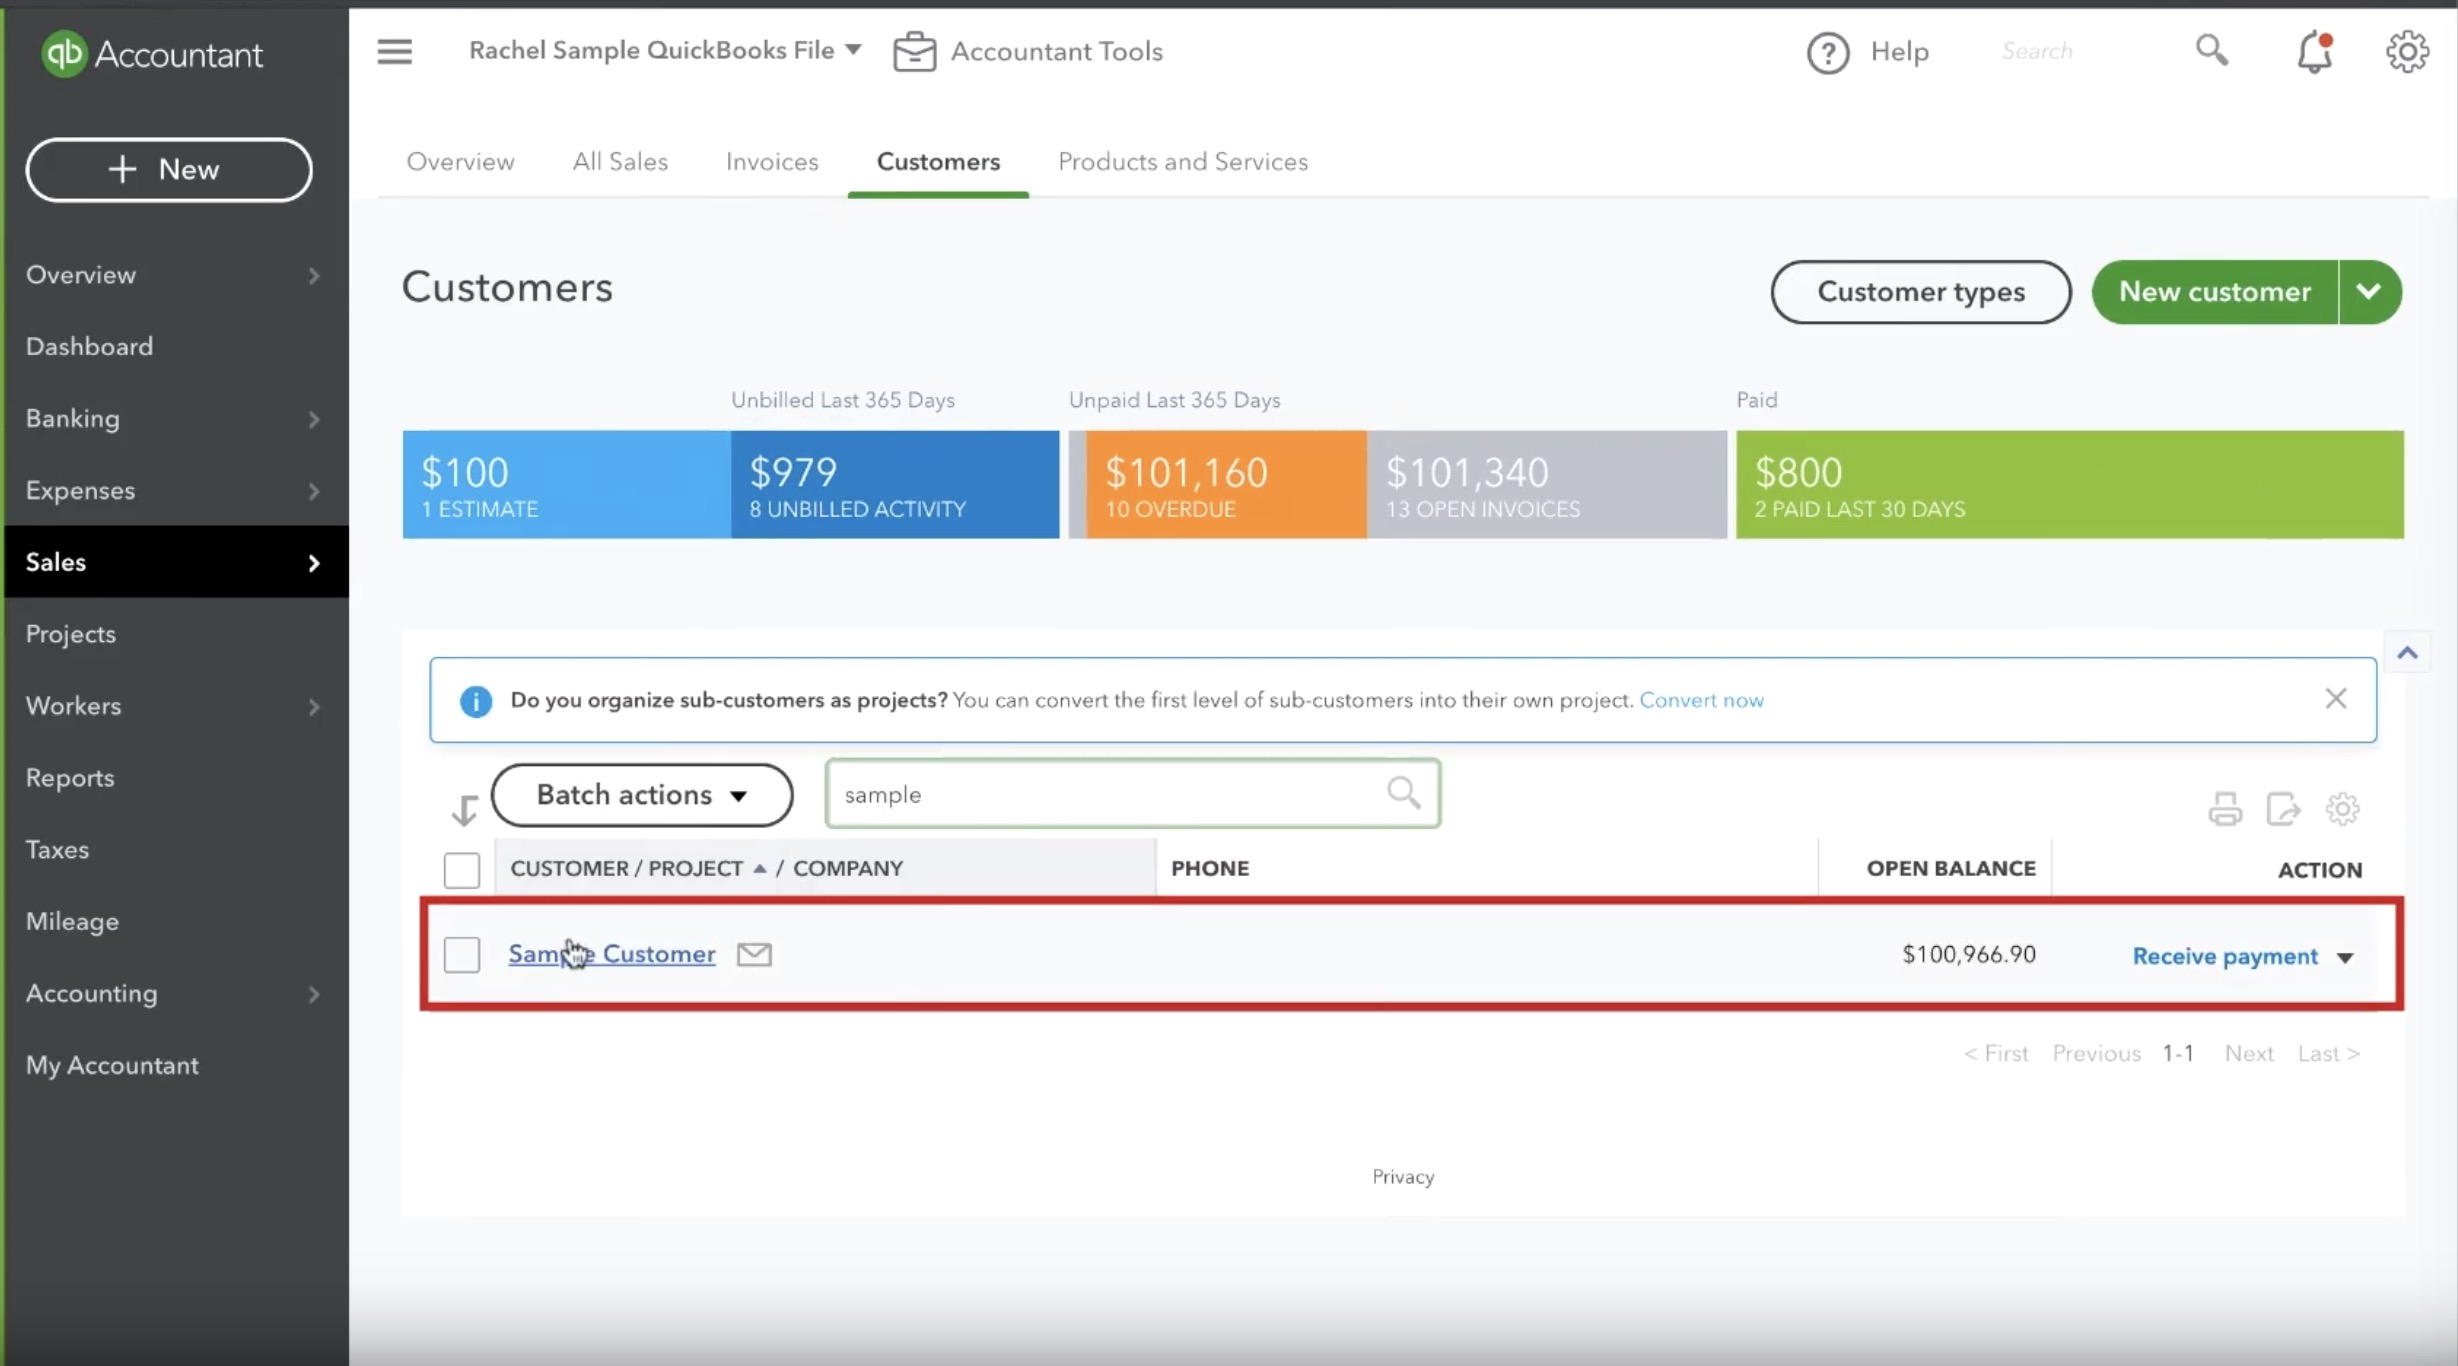
Now, we can have a look at our transactions. In this case, we’re interested in the transactions on 2/18/20, and we can see only one invoice and one payment. There’s no unnecessary sales receipt.
So now you know how to create invoices, mark payments, create sales receipts and then rectify any mistakes you may have made in the process.
☕ If you found this helpful you can say “thanks” by buying me a coffee…
https://www.buymeacoffee.com/gentlefrog
If you would like to see a video tutorial of these exact steps, see the video below.


5 Responses
I relish, lead to I found just what I used to be having a look
for. You’ve ended my four day lengthy hunt! God Bless you
man. Have a great day. Bye
Oh, thank you thank you thank you. I’ve been tearing my hair out over this.
Happy to help!
If I delete a sales receipt from QuickBooks Online, since I use their payment processing, will it automatically refund the credit card used to make the payment, or will it just create a credit in QuickBooks for that particular customer?
Hi Rick,
Deleting a sales receipt in QBO will not automatically refund your customer’s credit card. You’ll need to process the refund through QuickBooks payments. It also will not create a credit in QBO. You’ll need to record the refund yourself, https://www.youtube.com/watch?v=WPkilY2FaJQ
-Jess