In this tutorial, you’ll learn how to manually enter a receipt into QuickBooks Canada.
This method is similar to other versions of QuickBooks but there are minor differences in the Canadian version.
Quick Instructions:
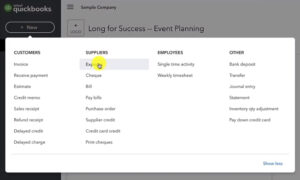
- Click the +New button above the left side menu
- Under Supplies click Expense
- Fill in the fields as needed
- Click save and close
Manually Entering a Receipt
Use this method for an expense that was not automatically downloaded through bank feeds.
To enter your expense click the +New button above the left side menu.
Under Suppliers select Expense.
Only use Cheque if you actually paid with an cheque. Otherwise use Expense.
Expense lets you choose different payment accounts like your credit card, checking, cash accounts, etc.
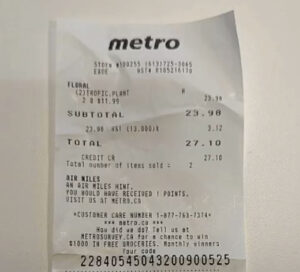
For this example, I’m creating this expense from a printed receipt for 2 plants purchased from Metro and paid for with a credit card:
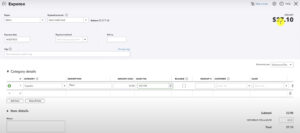
I fill in the fields in QuickBooks as needed:
- Payee: Metro
- Payment account: Visa Credit Card
- Payment date: 2/16/22
Payment method, ref. no and Tags aren’t necessary.
Under Category details, I enter the plants as supplies. For sales tax, I find that on the receipt between Subtotal and Total as HST.
This is what it looks like in QuickBooks:
You now know how to manually enter an expense into QuickBooks Canada. If you have any questions please ask them in the comments. Or click the green button below to schedule a free consultation.
☕ If you found this helpful you can say “thanks” by buying me a coffee…
https://www.buymeacoffee.com/gentlefrog
If you’d like to watch me walk through this process check out the video below:

