Are you managing your accounting firm with QuickBooks Online Accountant? Then you know how crucial it is to have the right team members on board.
Whether you’re welcoming new talent to your squad or it’s time to part ways with a team member, the process is easy.
In this blog post, you’ll learn the essential steps for adding and removing team members in QuickBooks Online Accountant.
Quick Instructions:
Add a Team Member
- Click Team in the left side menu
- Click the Add User button in the upper-right corner
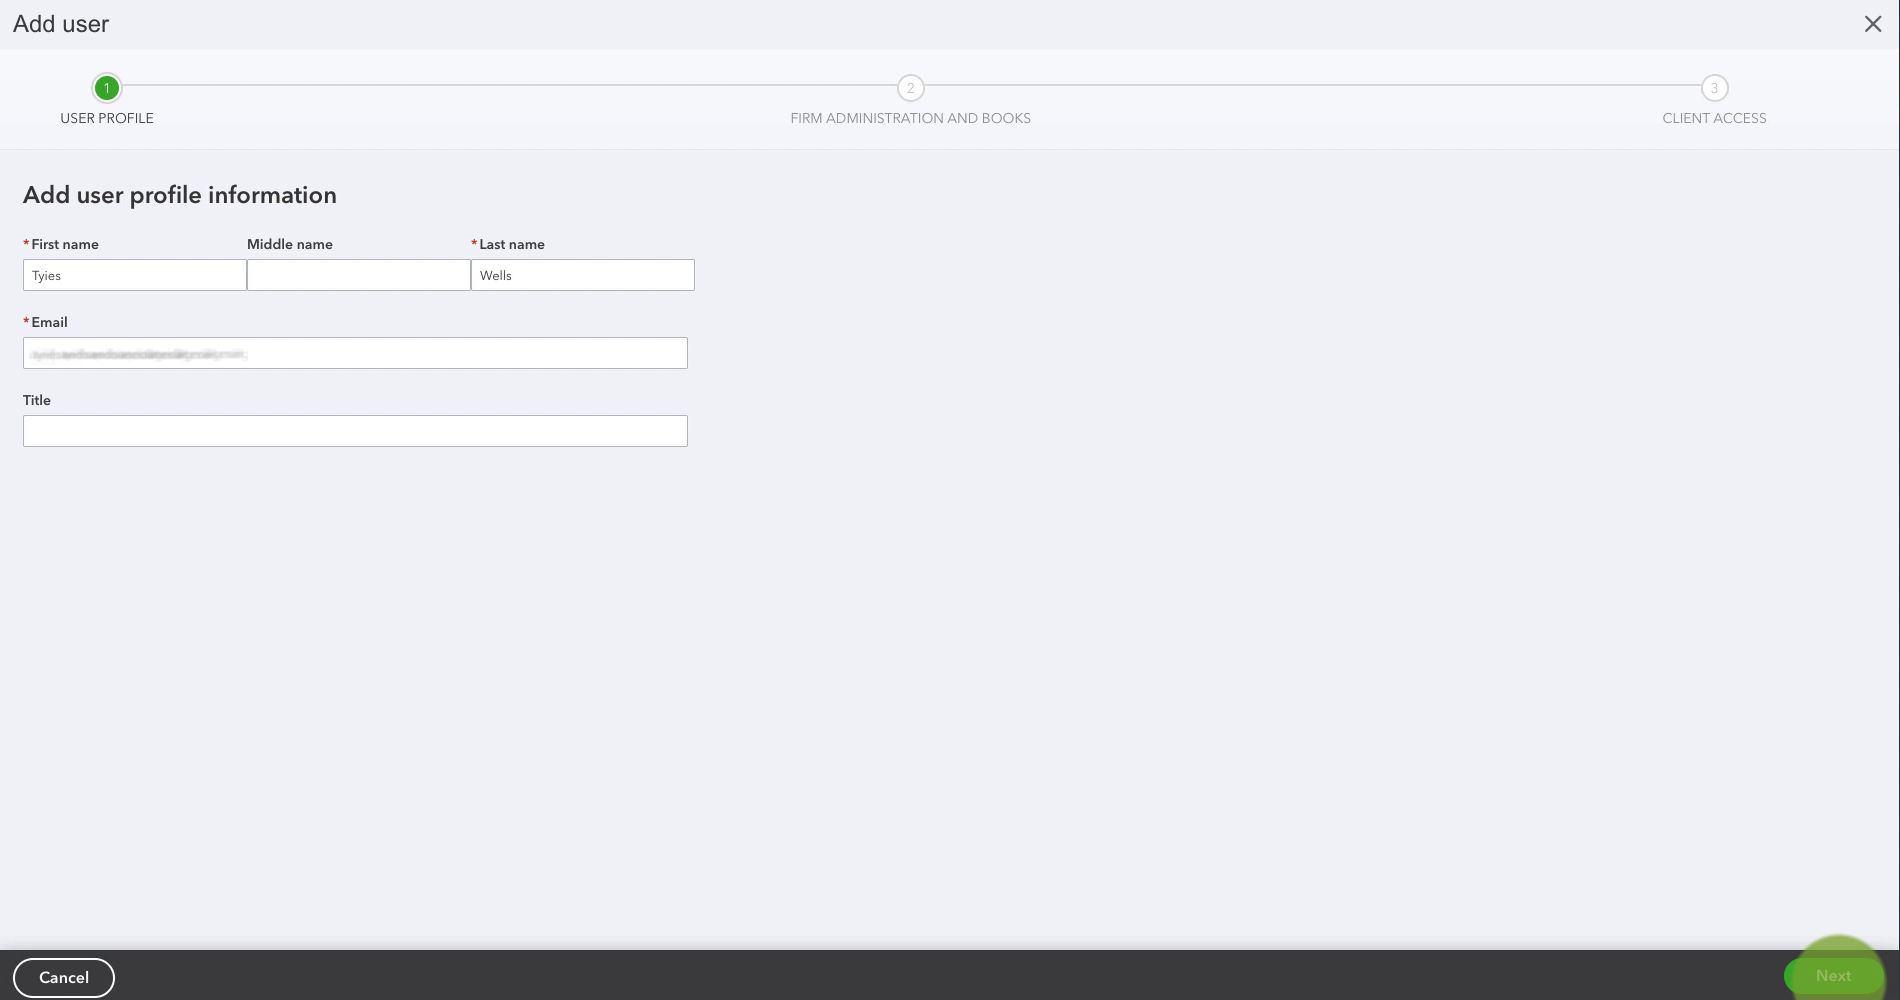
- Fill in the user profile information
- Click Next
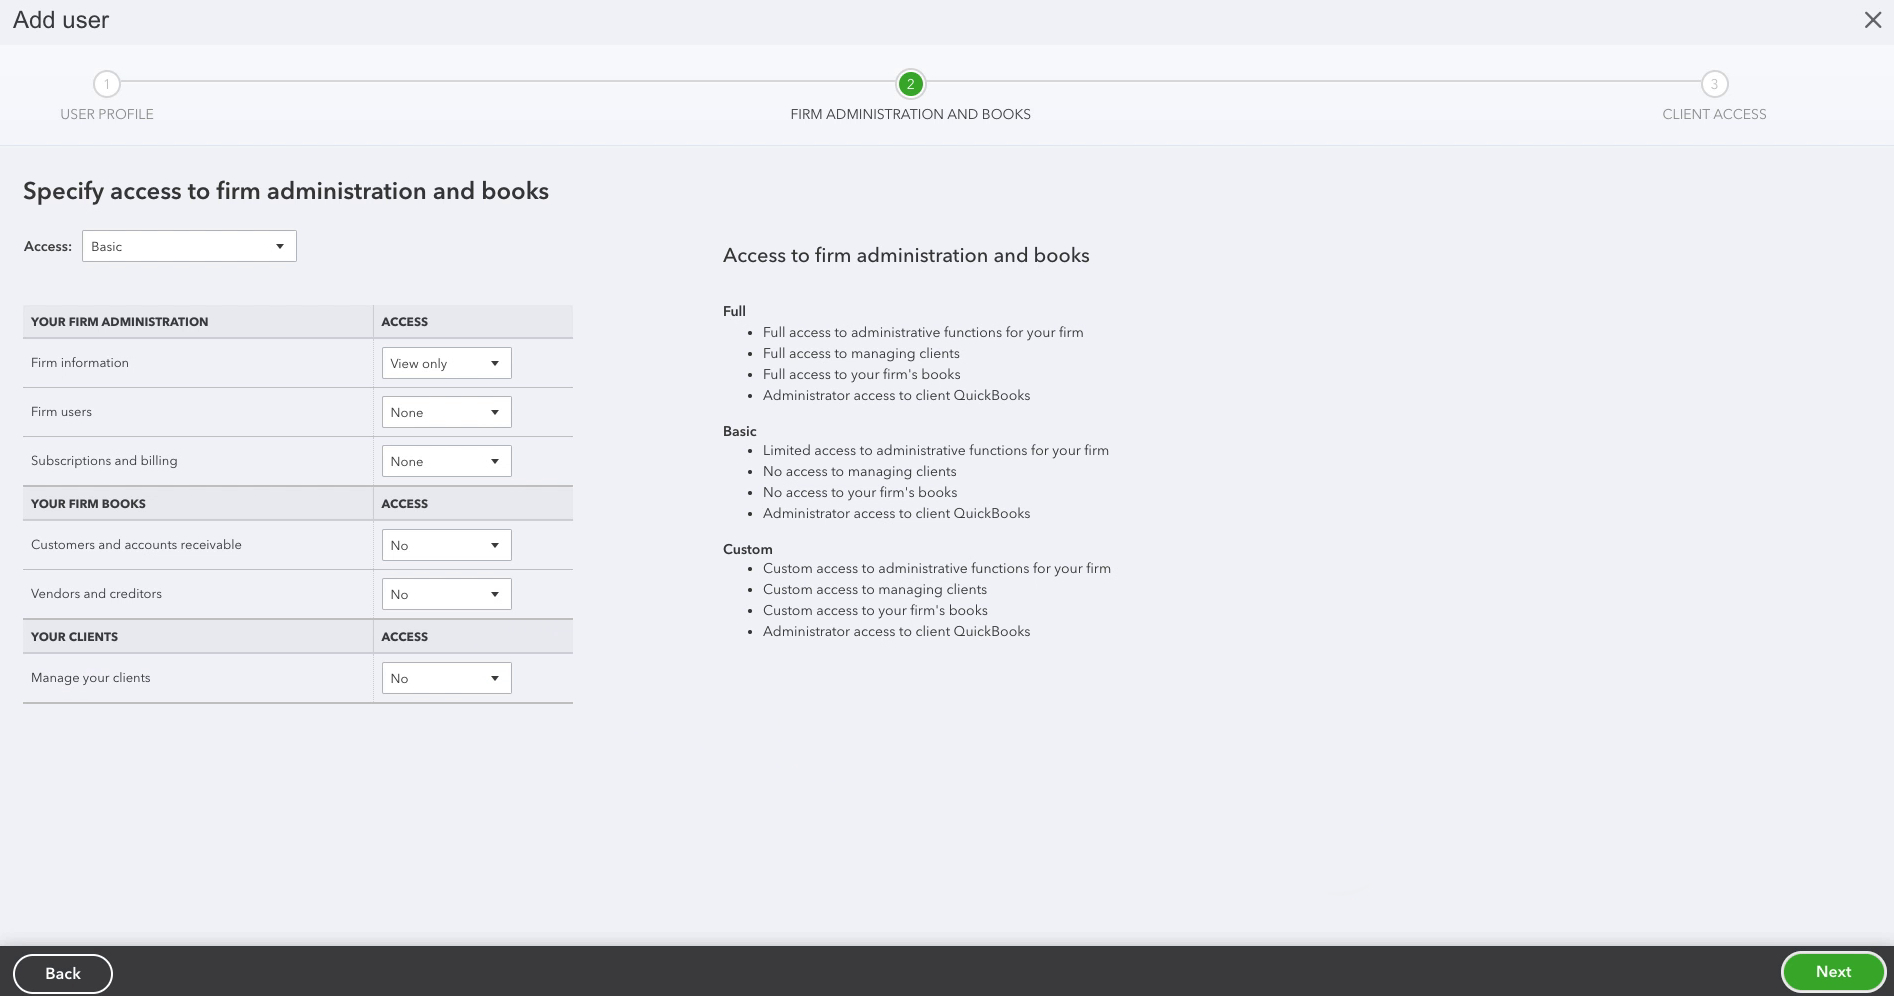
- Specify the user’s access to your firm administration and books
- Click Next
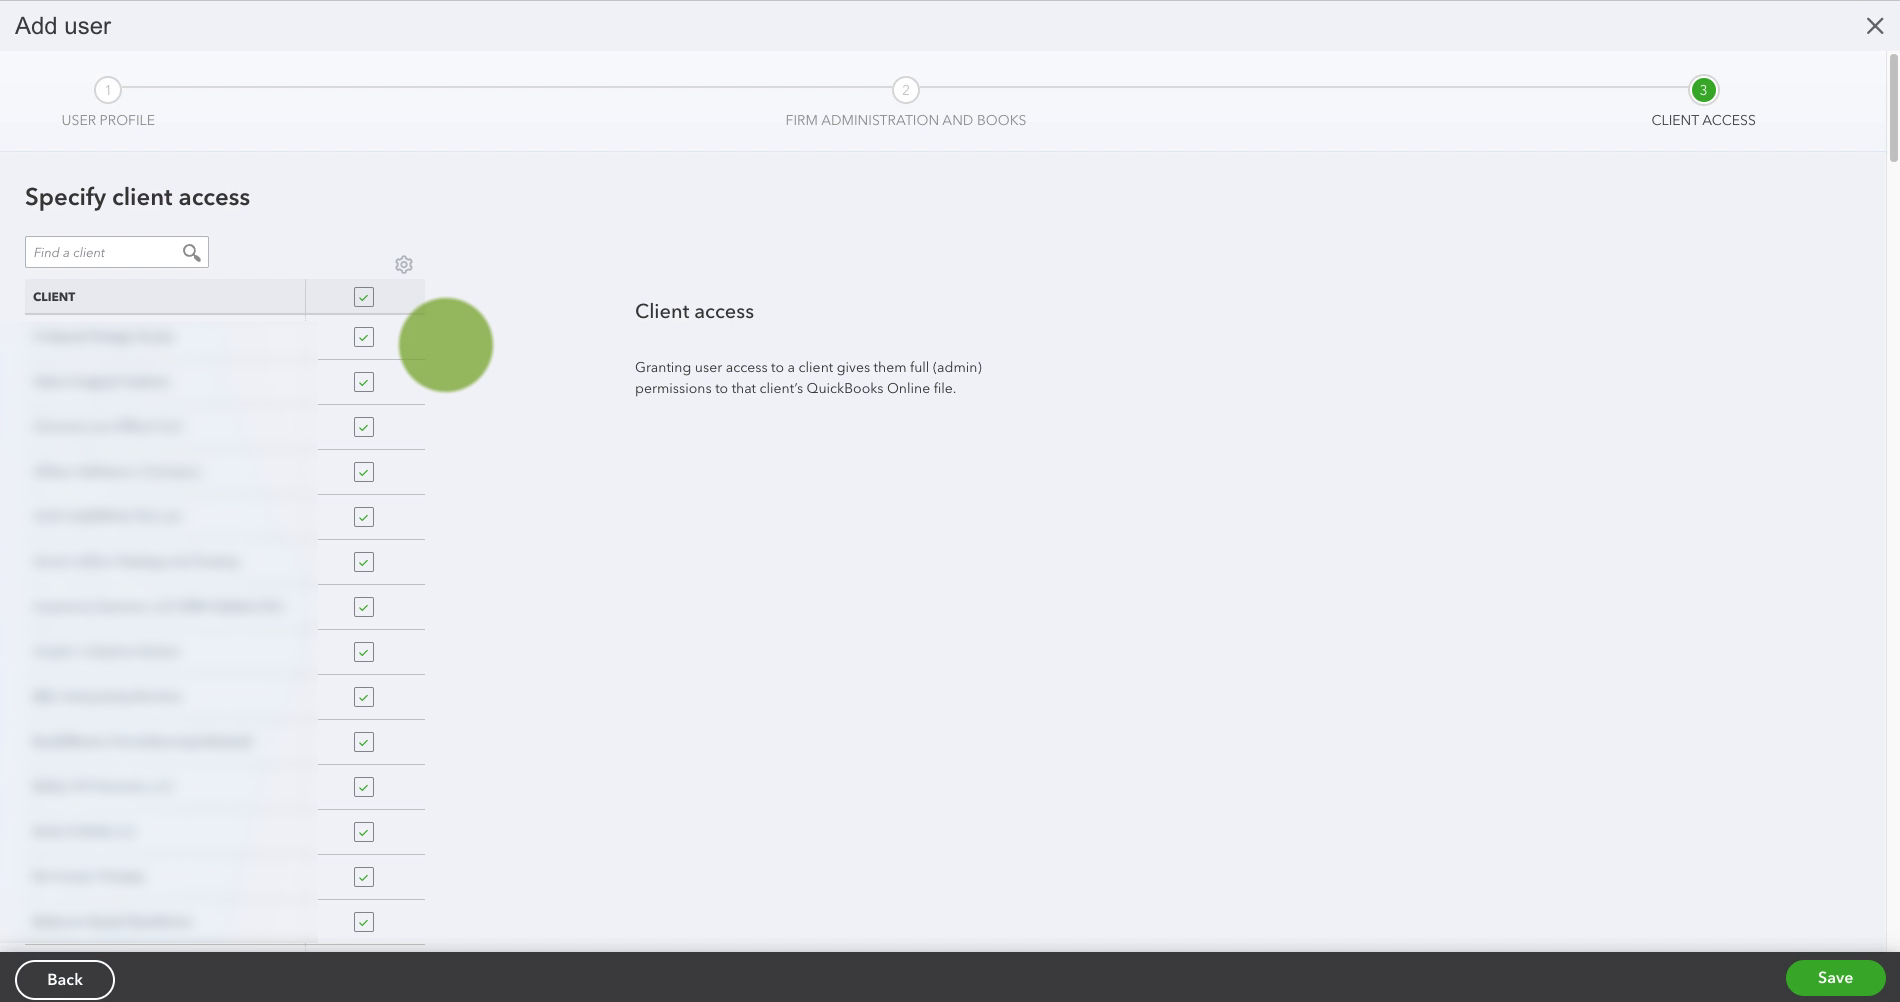
- If giving the user access to all clients click Save.
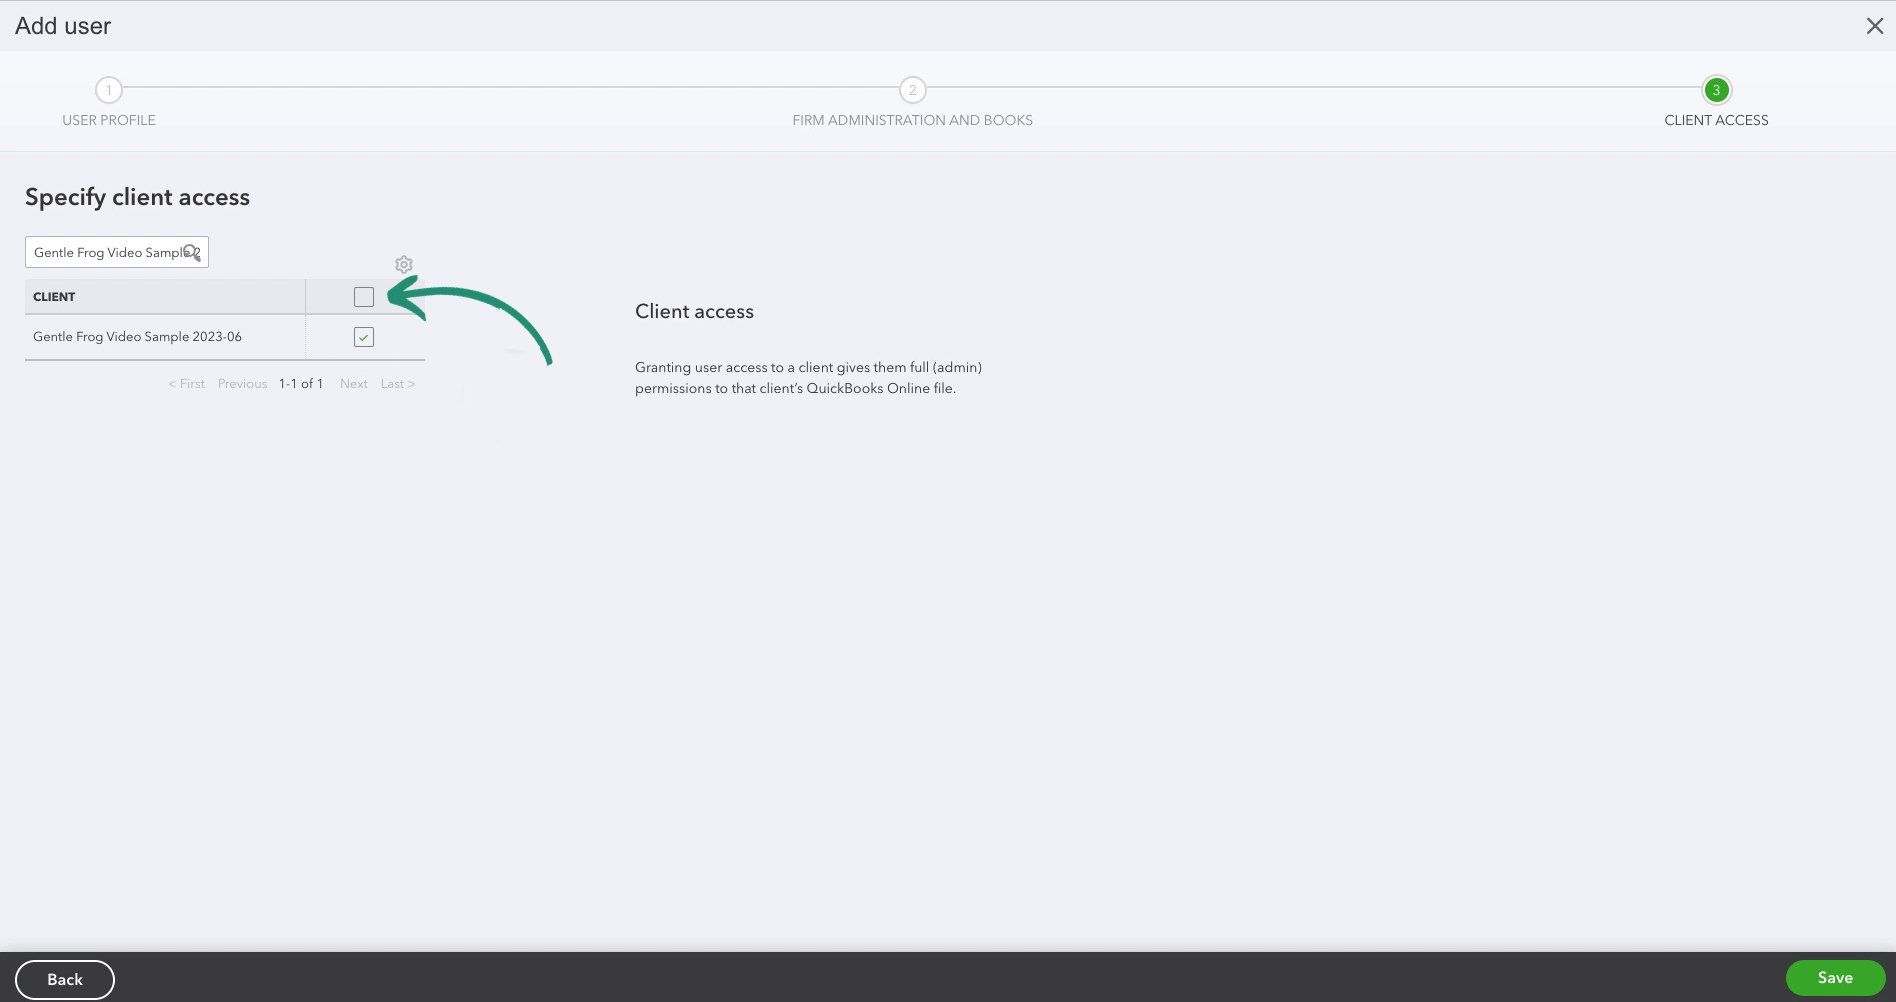
If giving this user access to certain clients, uncheck the box at the top of the client list.- Search for and check off the clients you are giving this user access to
- Click Save
Remove a Team Member
- Click Team in the left side menu
- Search for the team member you’re removing
- Click Edit in the ACTION column
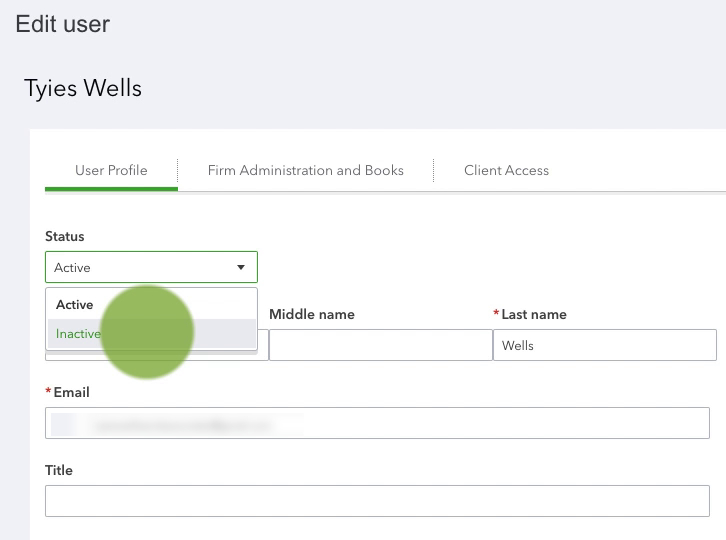
- Select Inactive from the Status drop-down menu
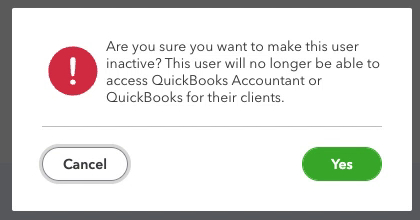
- Click Yes on the warning message
Keep reading for a complete walkthrough with screenshots:
How to Add a Team Member
When logged into QBO Accountant click on Team in the left-side menu.
This will open your list of Team members.
Click the Add User button in the upper-right corner.
In the Add user profile information section enter the new team member’s name and email address. Then click Next in the lower right corner.
Next, you have the option to specify the new user’s access to your firm administration and books.
Generally, you’re going to want users to have the least amount of access as possible. You don’t want your team members or contract bookkeepers to see your business QuickBooks file, only the clients they will be working on.
When you’re ready click the Next button in the lower right corner.
The last screen is where you select which clients this user will have access to.
It defaults to giving the user access to ALL clients. Uncheck the checkbox at the very top of the client list to deselect all clients.
You can then use the search box to find the client/s you want to give them access to and check them off individually.
When you’ve selected the clients your new team member has access to, click the green Save button in the lower right corner.
It’s as simple as that!
Your new team member will receive an email letting them know you invited them to join your account.
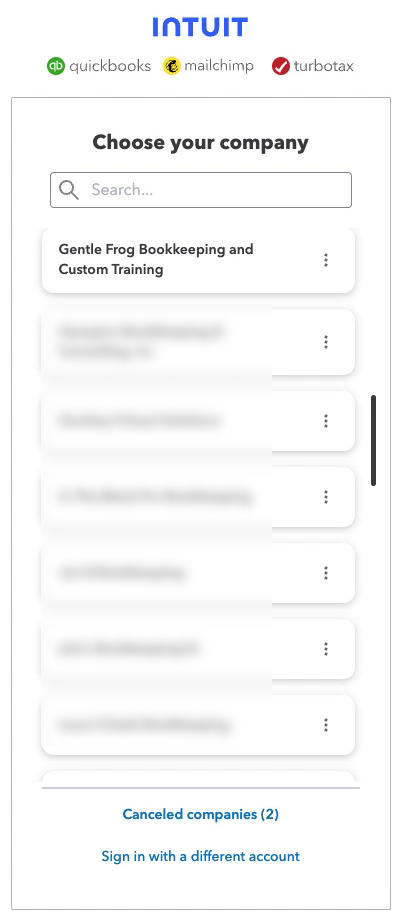
Going forward when the team member logs into QuickBooks they’ll pick whether they are signing into their own QuickBooks account or yours. It will look something like this (this is my login screen with many companies):
How to Remove a Team Member
There’s going to come a time when you have to let a team member go. Whether they outgrow you or you outgrow them, you’ll need to remove them from your QuickBooks Accounting account.
In the left side menu click Team.
On the Team screen search for the member you’d like to remove.
Under ACTION click Edit.
This will take you to a screen where you can see the same information you saw when adding a team member. The User Profile, Firm Administration and Books, and Client Access.
In the User Profile tab click the Status drop-down and select Inactive.
A warning pop-up appears letting know that this will make the user no longer able to access your account/clients.
Click the Yes button.
It will update the team member, remove their access, and remove them from your list of team members.
You now know how to add or remove a team member from QuickBooks Accountant. Scroll down if you’d like to watch a video walkthrough.
☕ If you found this helpful you can say “thanks” by buying me a coffee… https://www.buymeacoffee.com/gentlefrog
If you have questions about team member access in QuickBooks Accountant click the green button below to schedule a free consultation.


