
In today’s blog post, I’m going to take my Bank of America – Alaska Airlines Credit Card and download all of the transactions to my QuickBooks 2019 for Mac file.
To begin, I’ll start by clicking Banking at the top of my screen and then click Online Banking Setup.
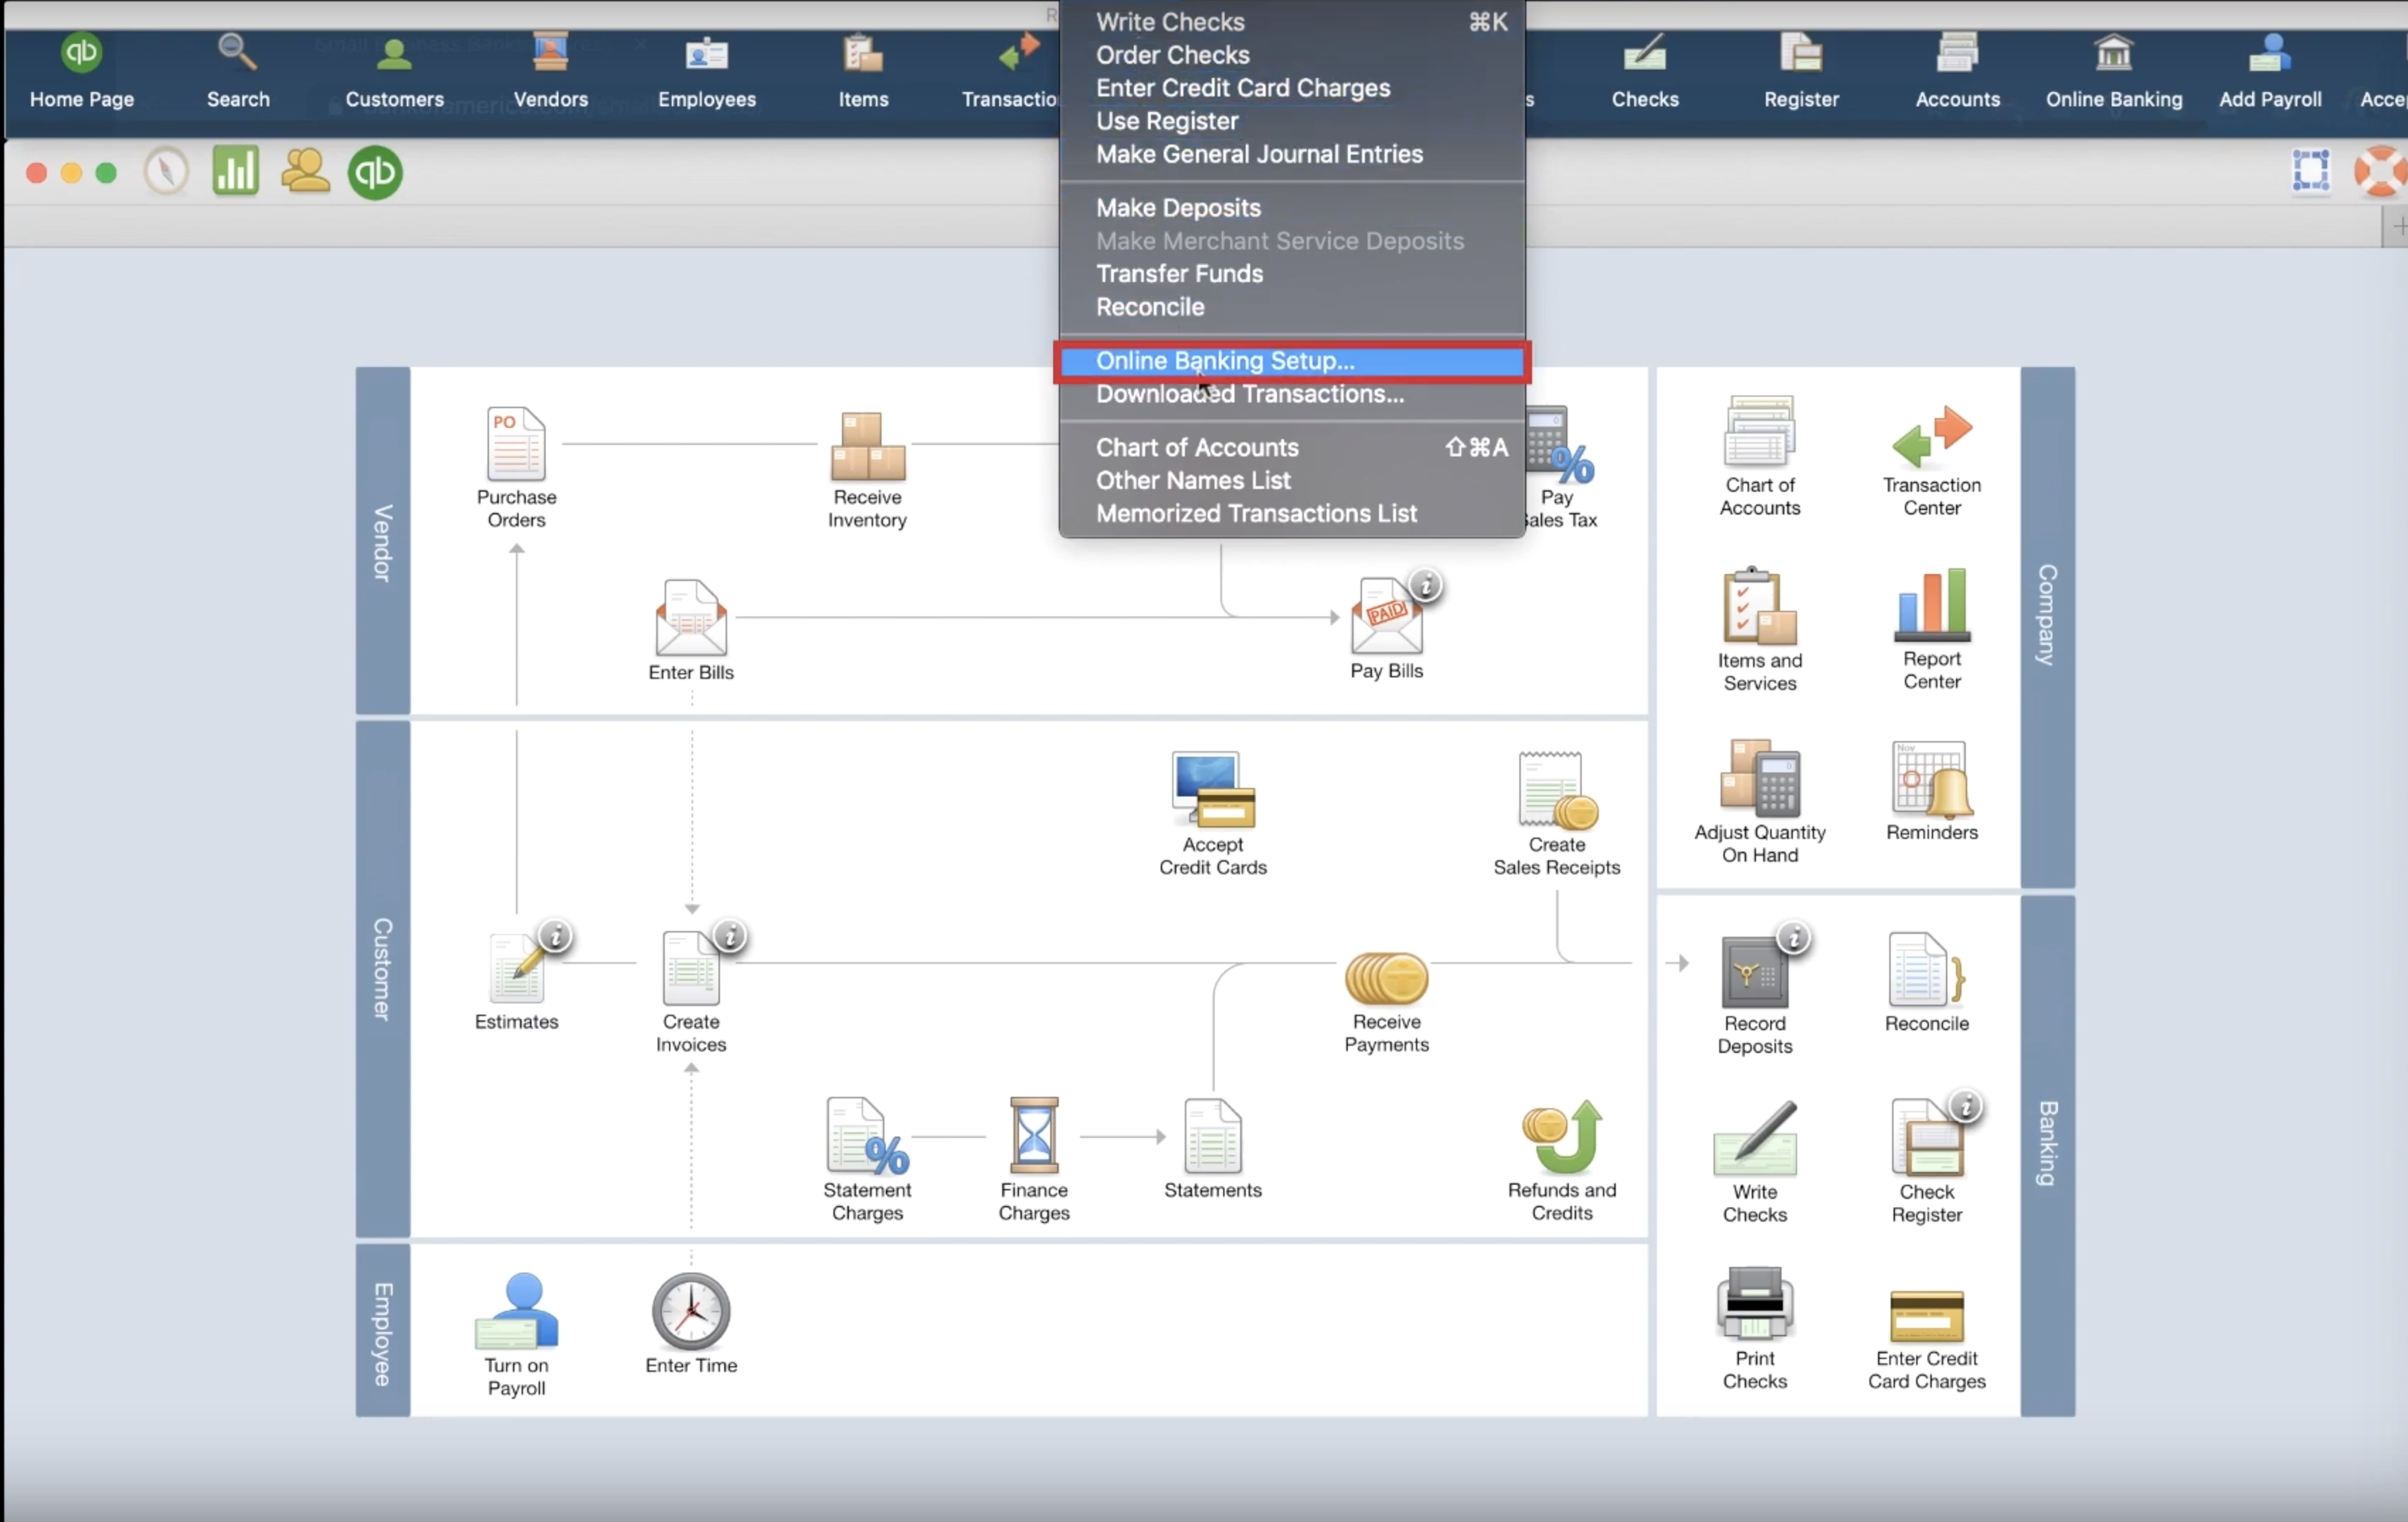
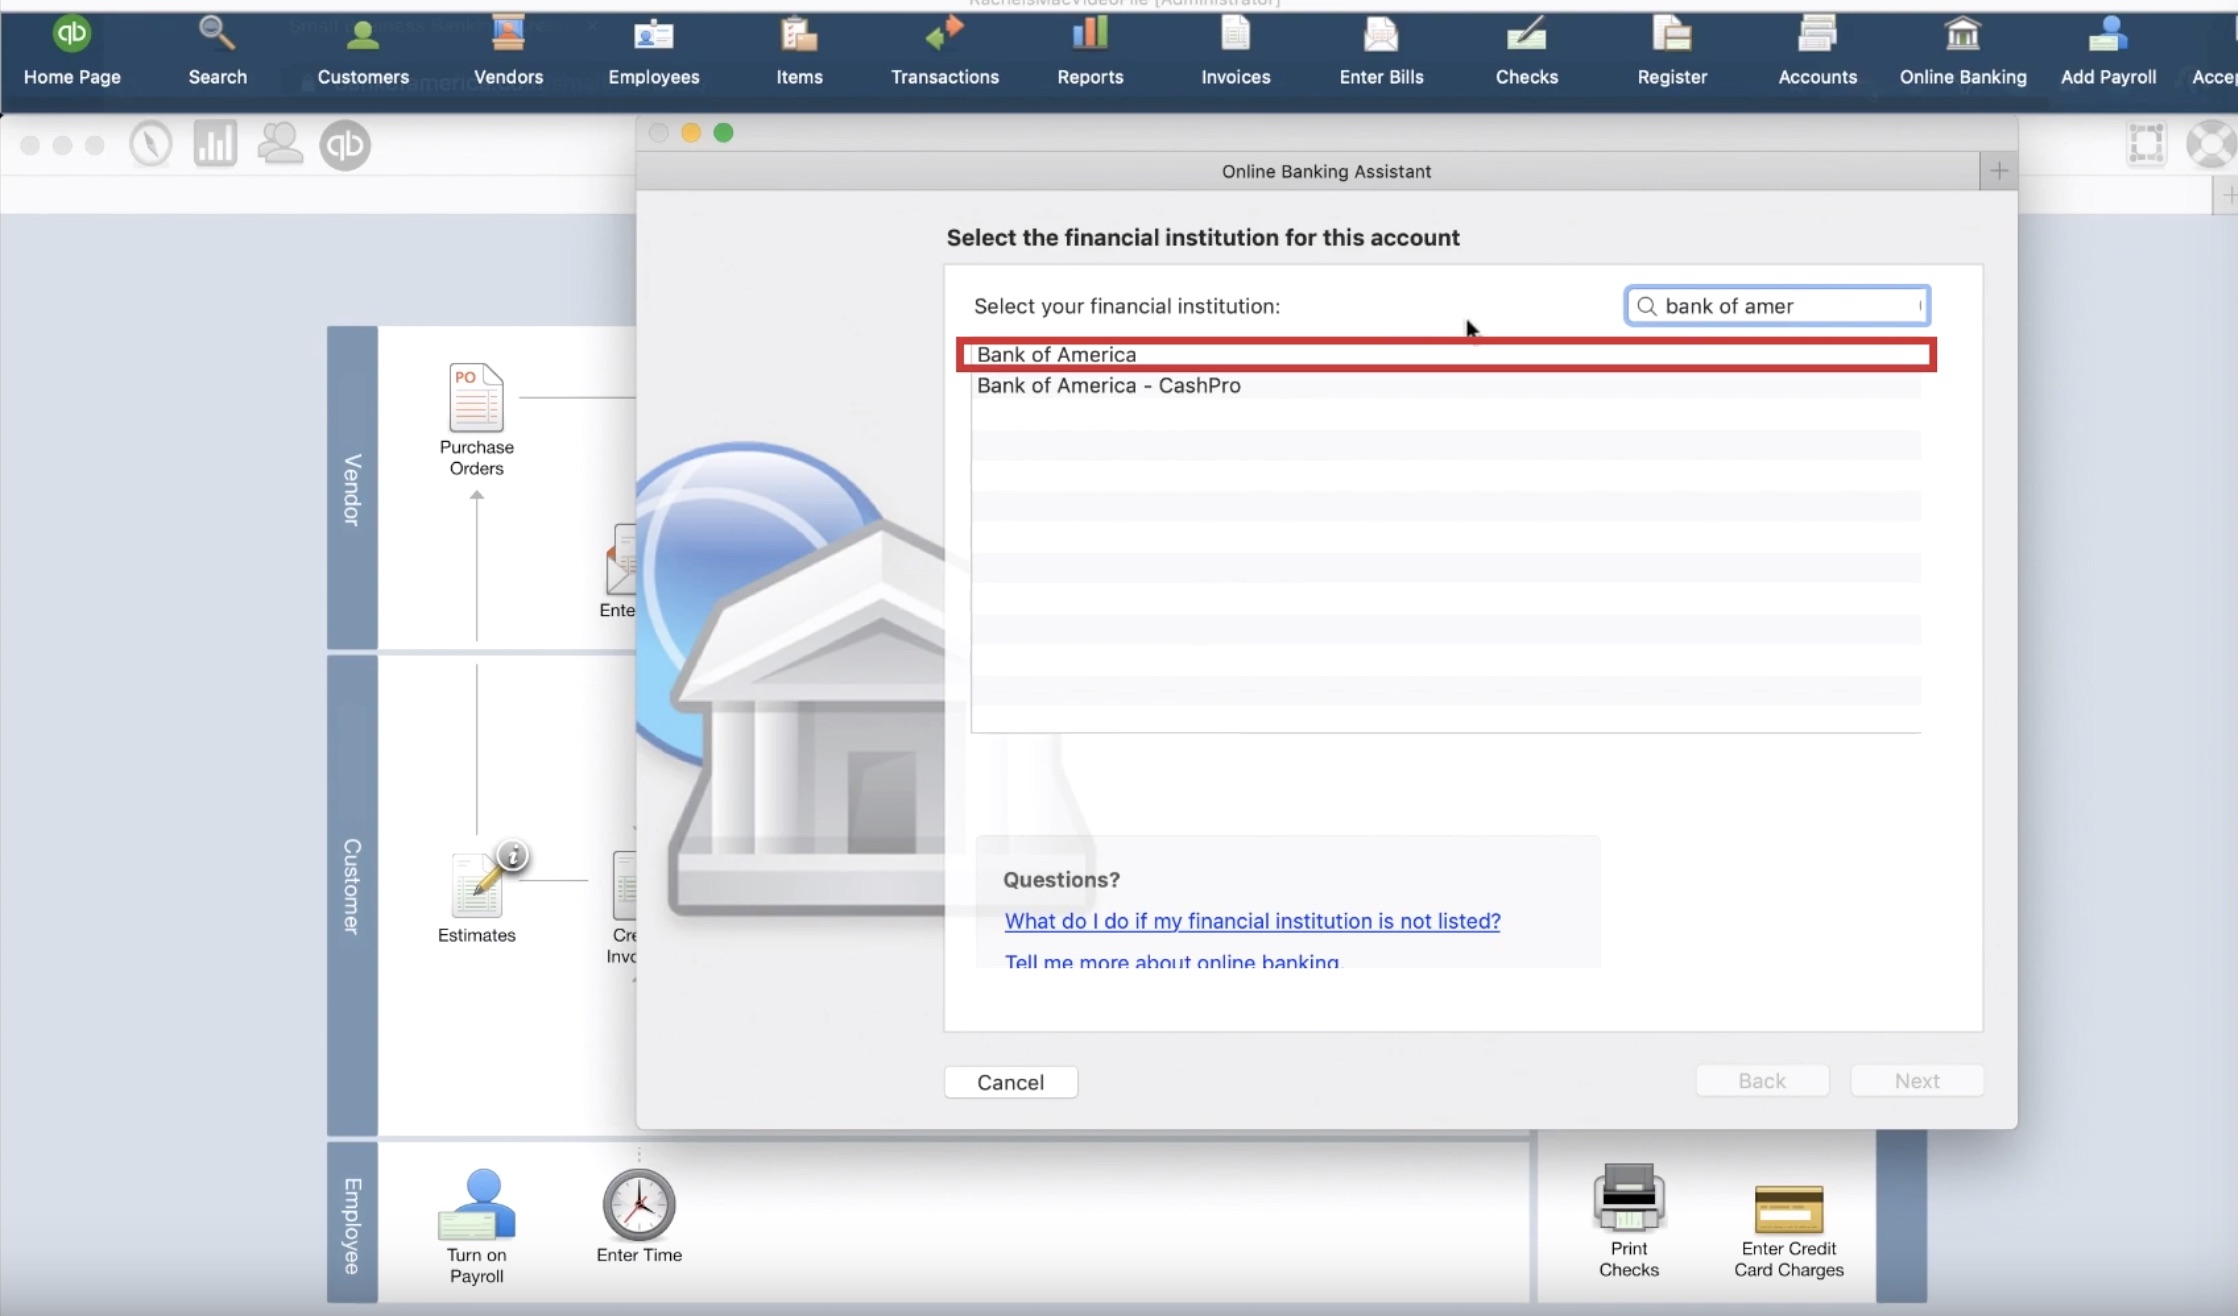
Clicking that menu-item will now bring up a screen titled Online Banking Assistant. How you use this page may vary slightly because I don’t expect you to use the same bank and credit card. For my example, I’m using Bank of America. To quickly navigate to that item, we use the search bar and begin typing in the name of our bank. Once we find our bank, select it, and click next.
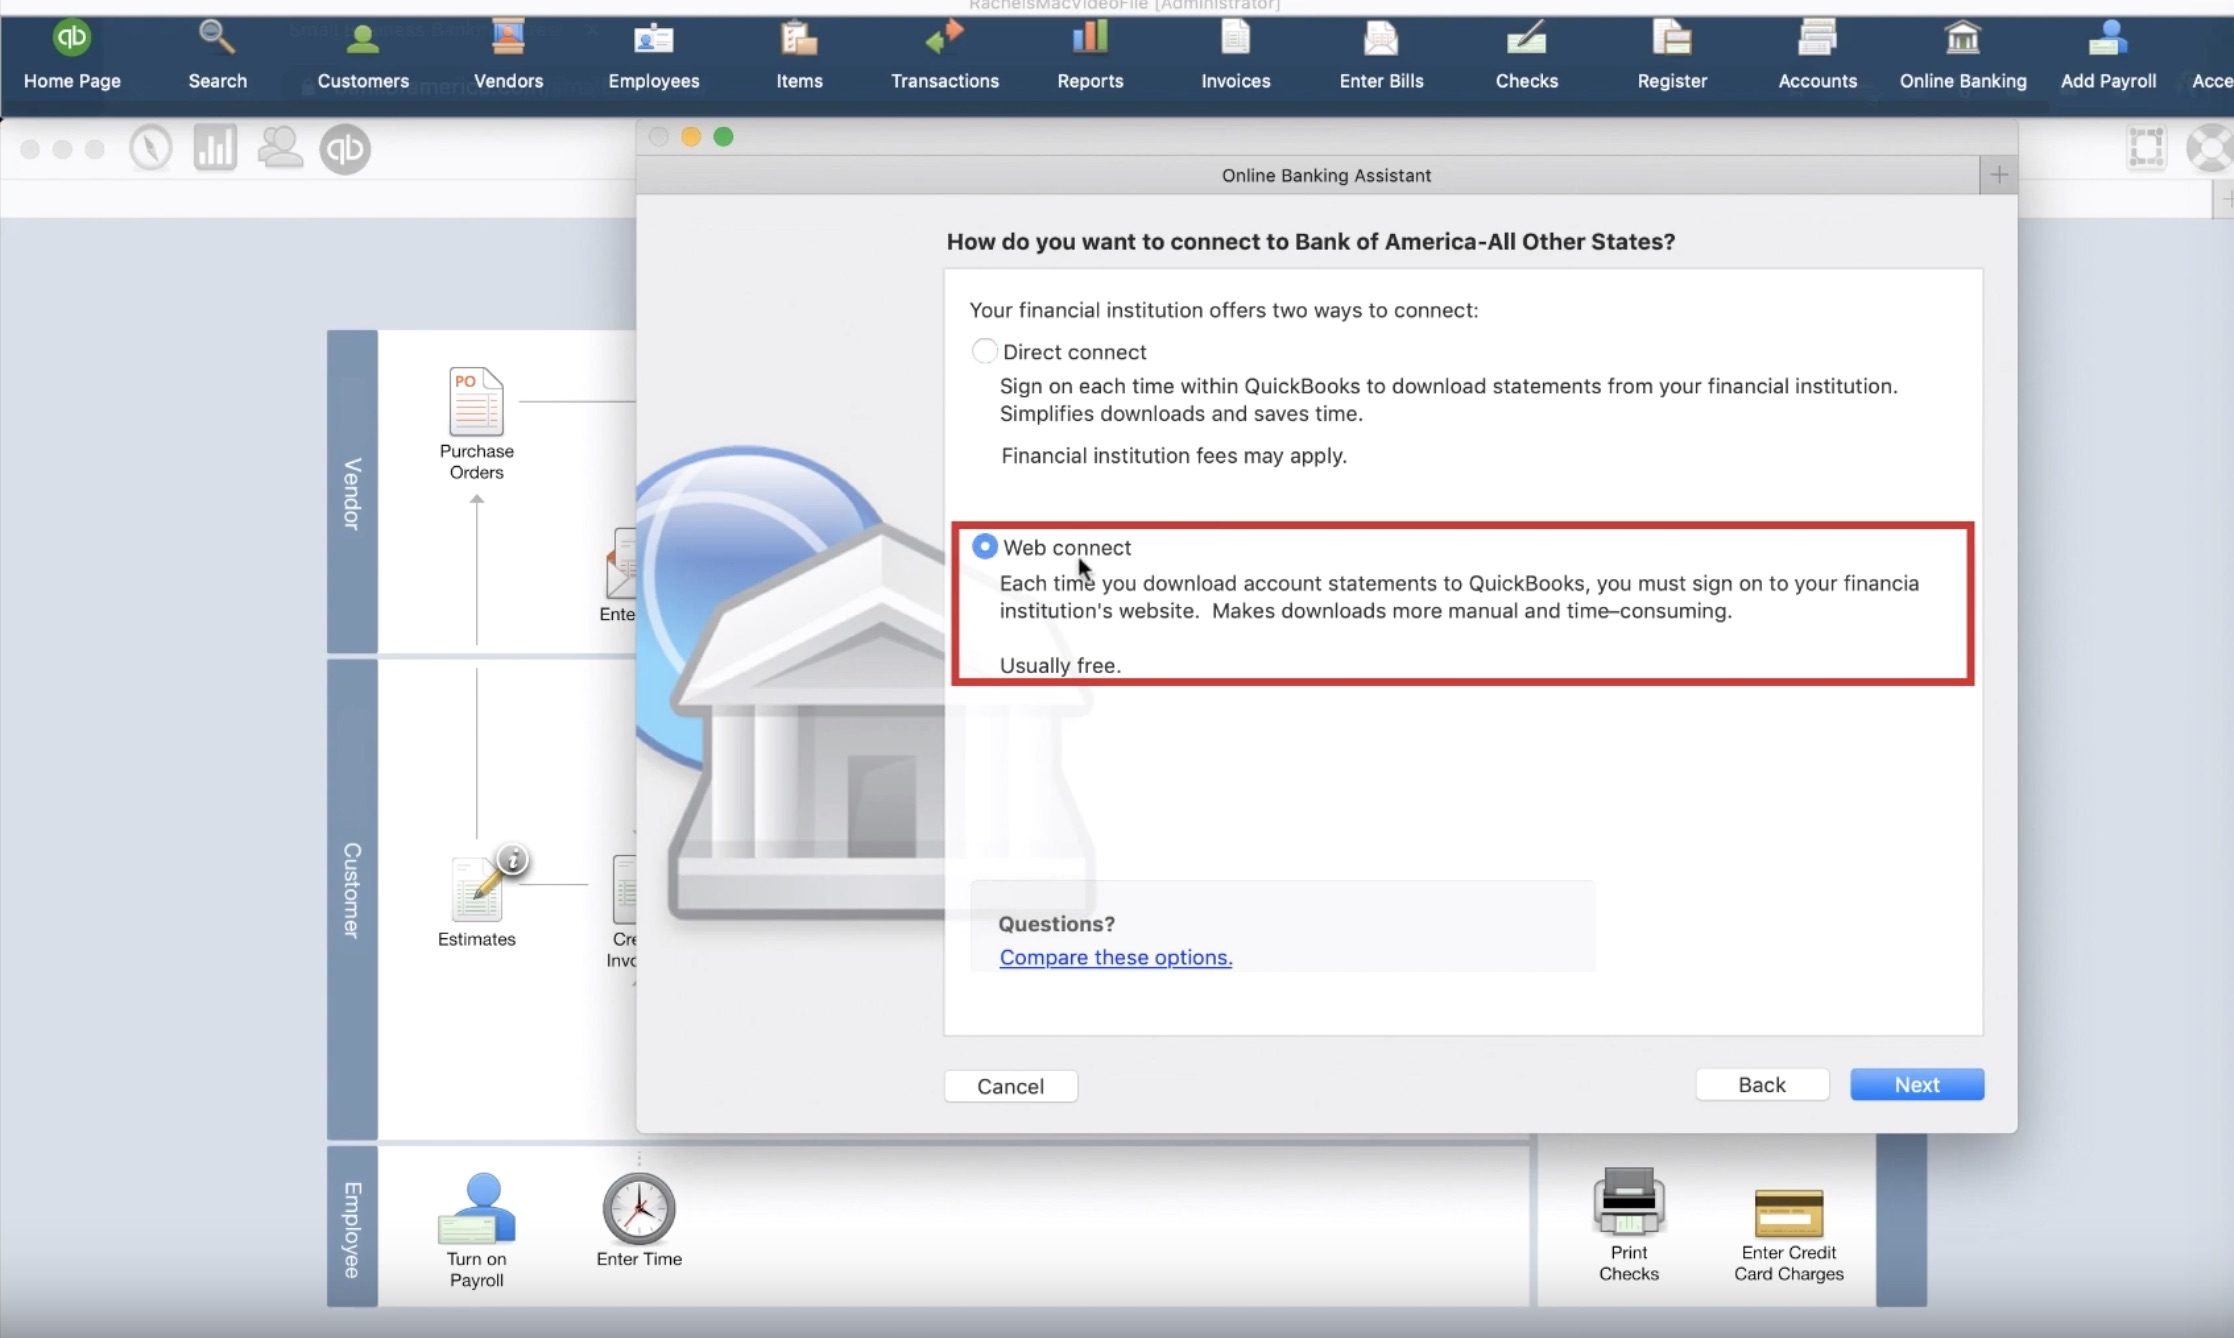
On the next screen, we need to give QuickBooks some instruction on how to perform the synchronization between your bank and your QuickBooks file. The two options are Web Connect and Direct Connect. The Direct Connect option allows a more persistent connection that can save time. Web Connect will require a log-in through your bank account’s website each time you want to download the transactions. For this example, we’re going to use Web Connect.
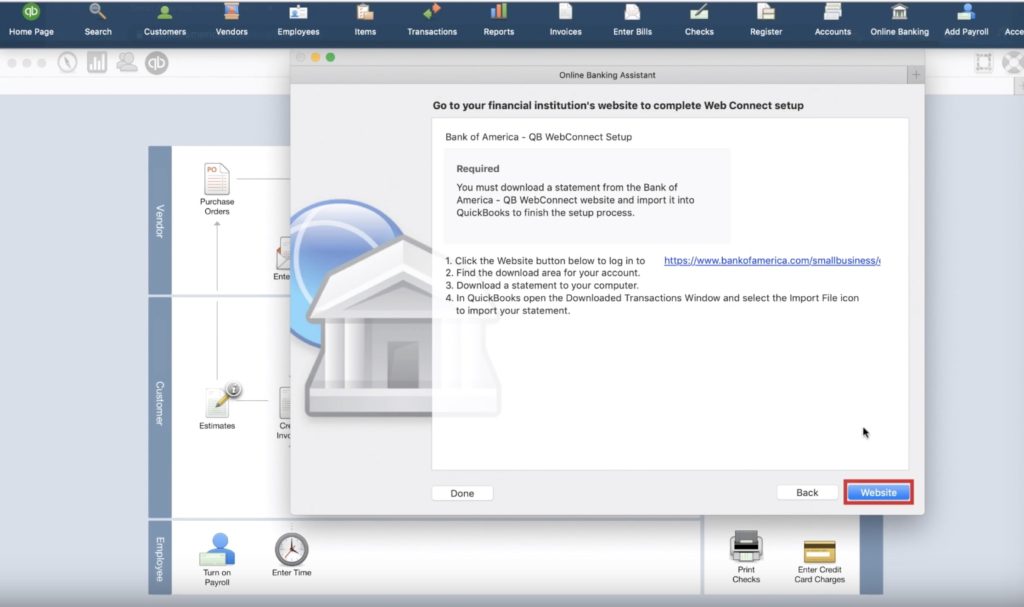
Now that’s we’ve selected Web Connect, the screen will prompt us by saying we need to download the transactions from our bank. Replacing the Next button will be a button labeled “Website,” and QuickBooks will open the web page where we download the transactions.
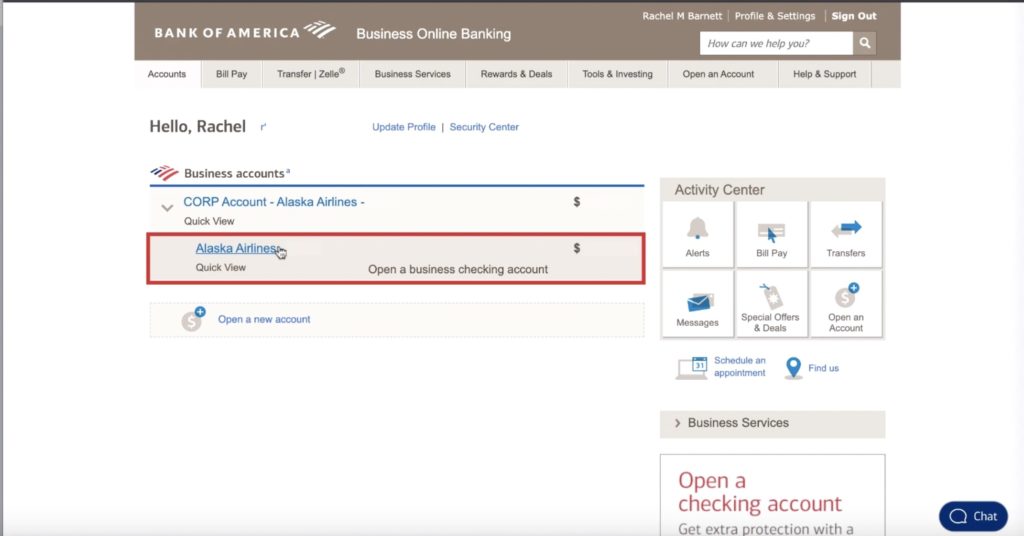
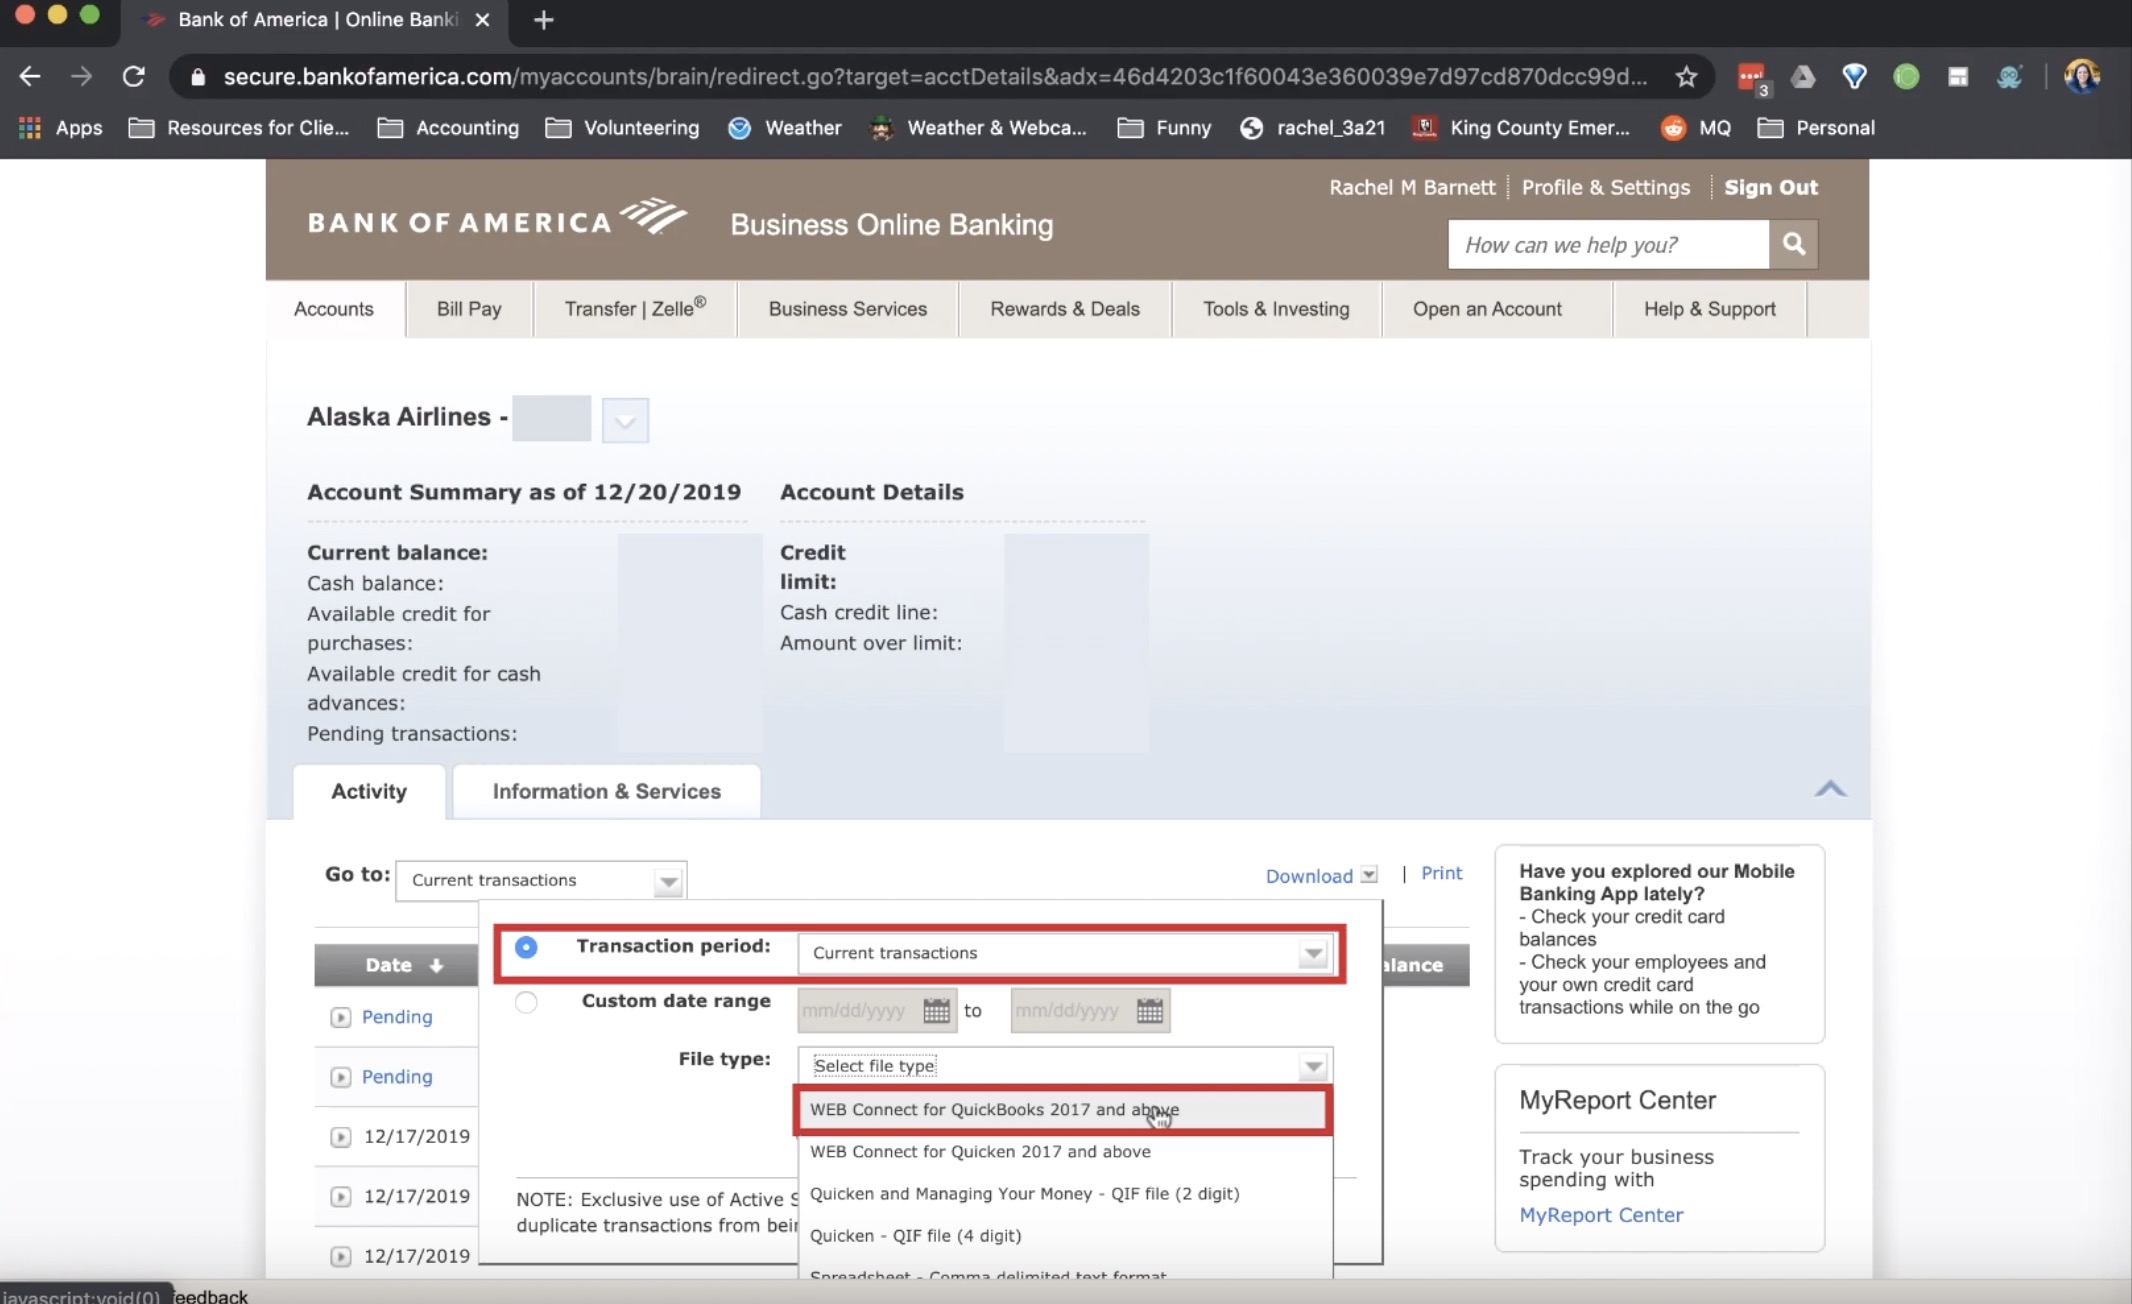
Once we’re on Bank of America’s website and logged in to our account, we’ll need to grab a download of the transactions we plan on importing. To do that, select the Credit Card we’ll be downloading, click the download button on the middle right-hand side of the screen. Clicking that download button will prompt us to enter the Transaction Period as well as the file type. The file type we’re interested in here is a WEB Connect for QuickBooks 2017 and Above file. Lastly, we click Download Transactions, and a file will be saved to our computer locally.


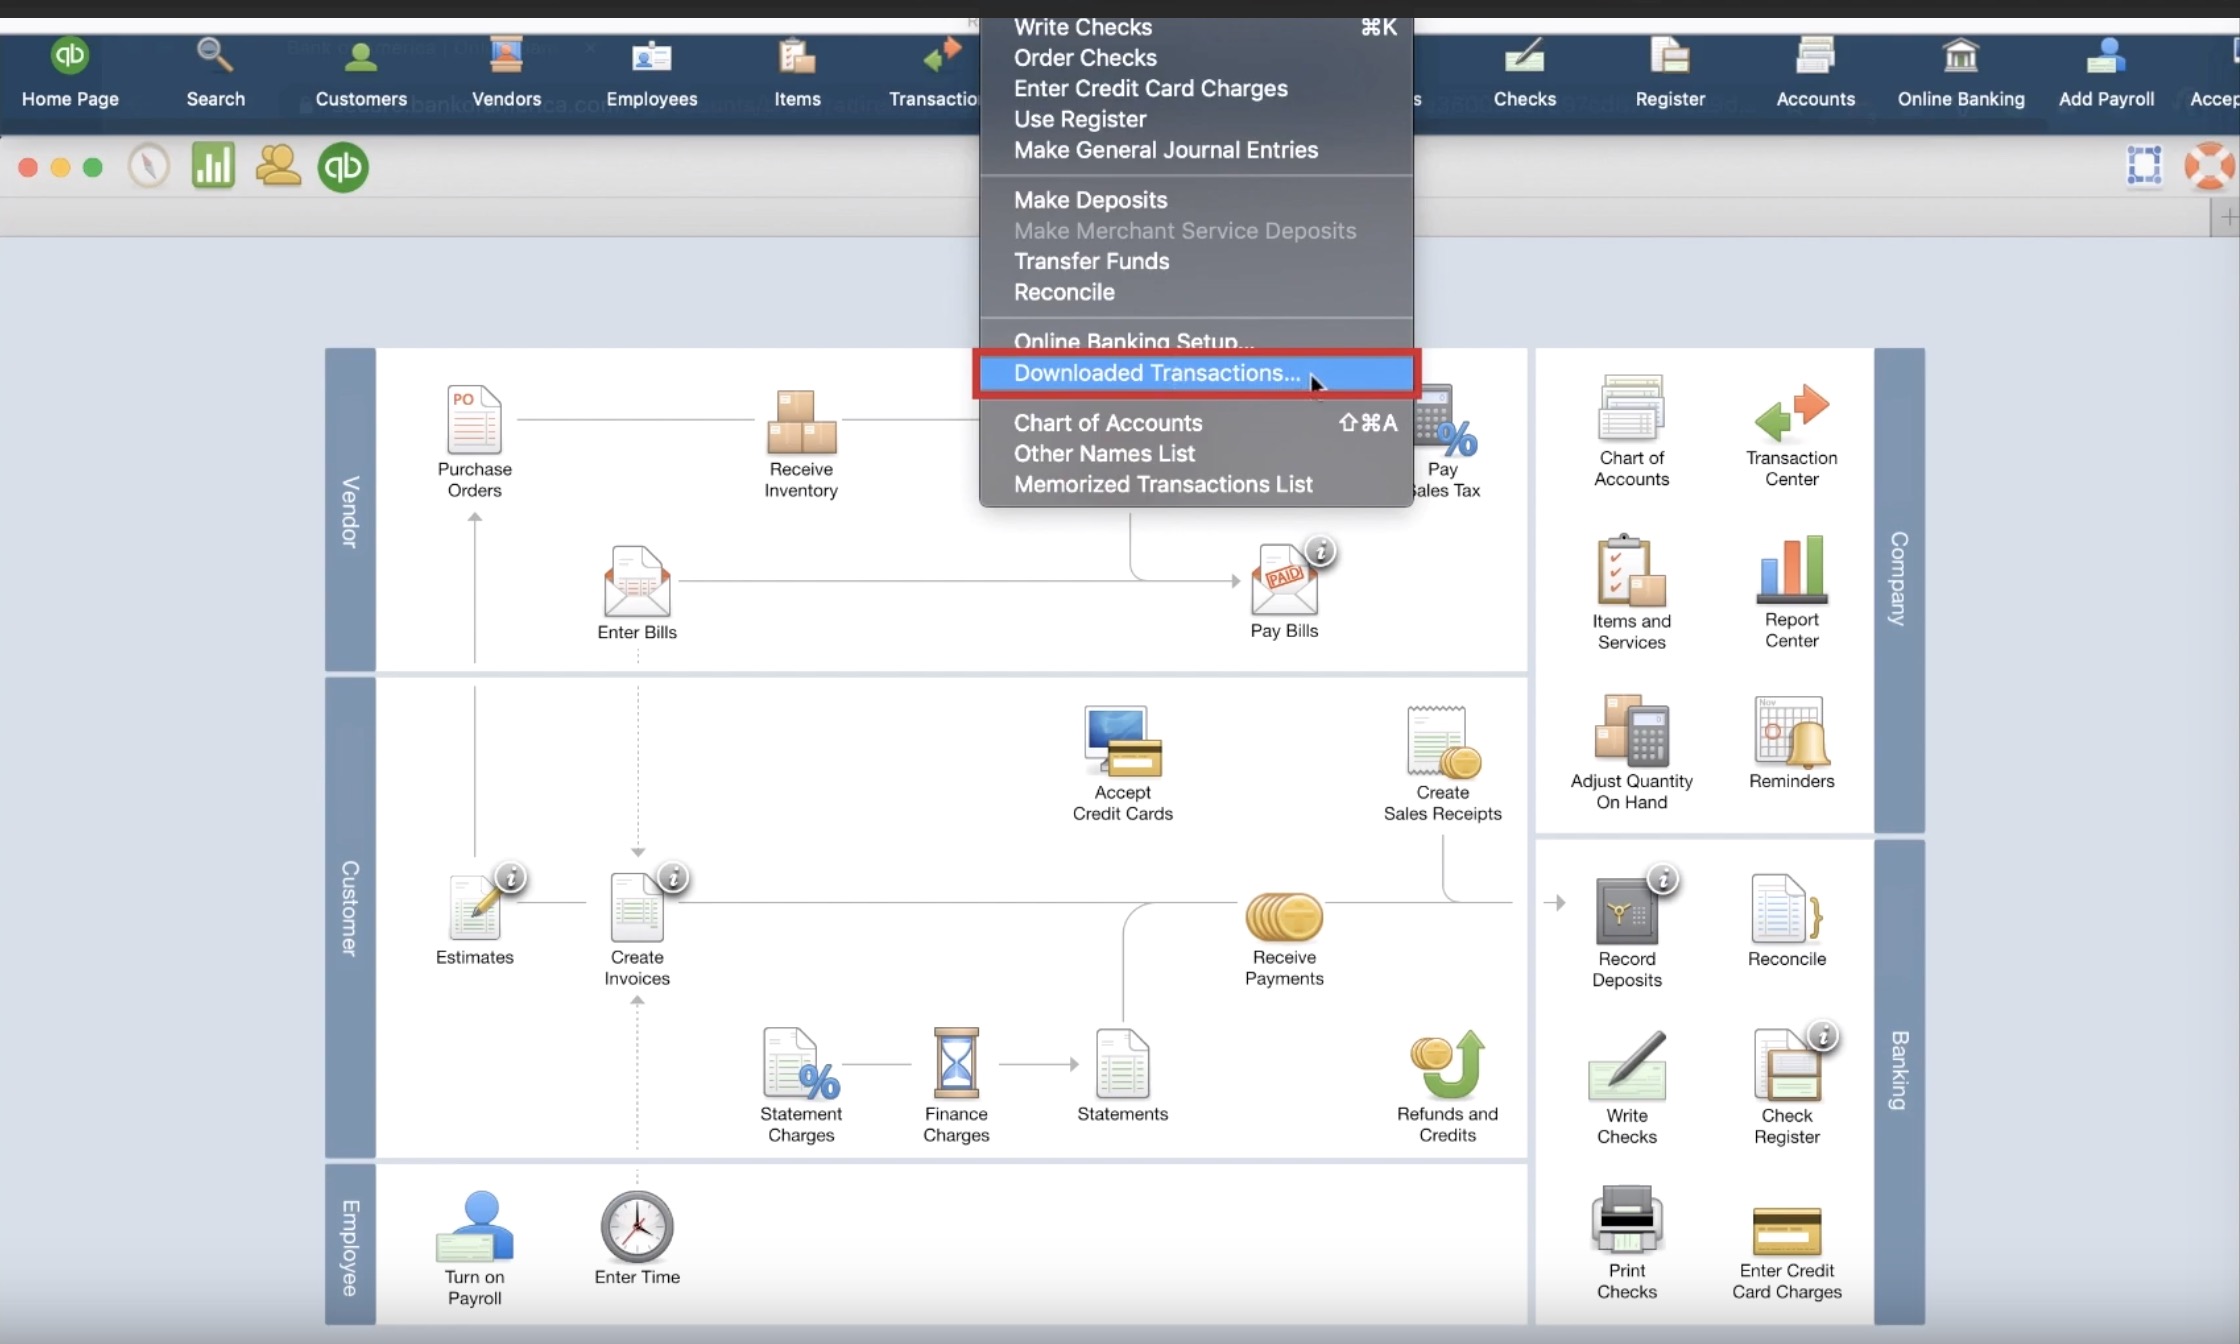
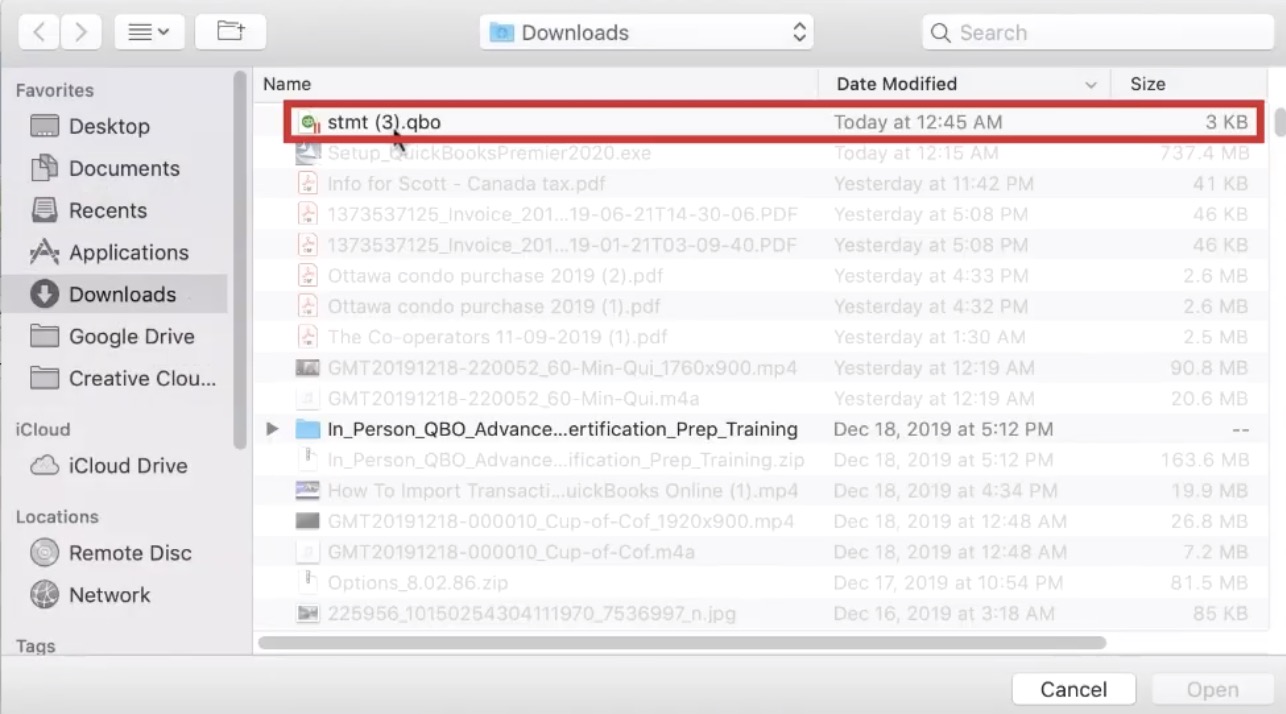
The next step now is to get these transactions into our QuickBooks file. We’ll start by clicking Banking at the top of the screen and then selecting Downloaded Transactions. In the Downloaded Transactions screen, we’re going to click on the paper and right-arrow to initiate the import of the file.

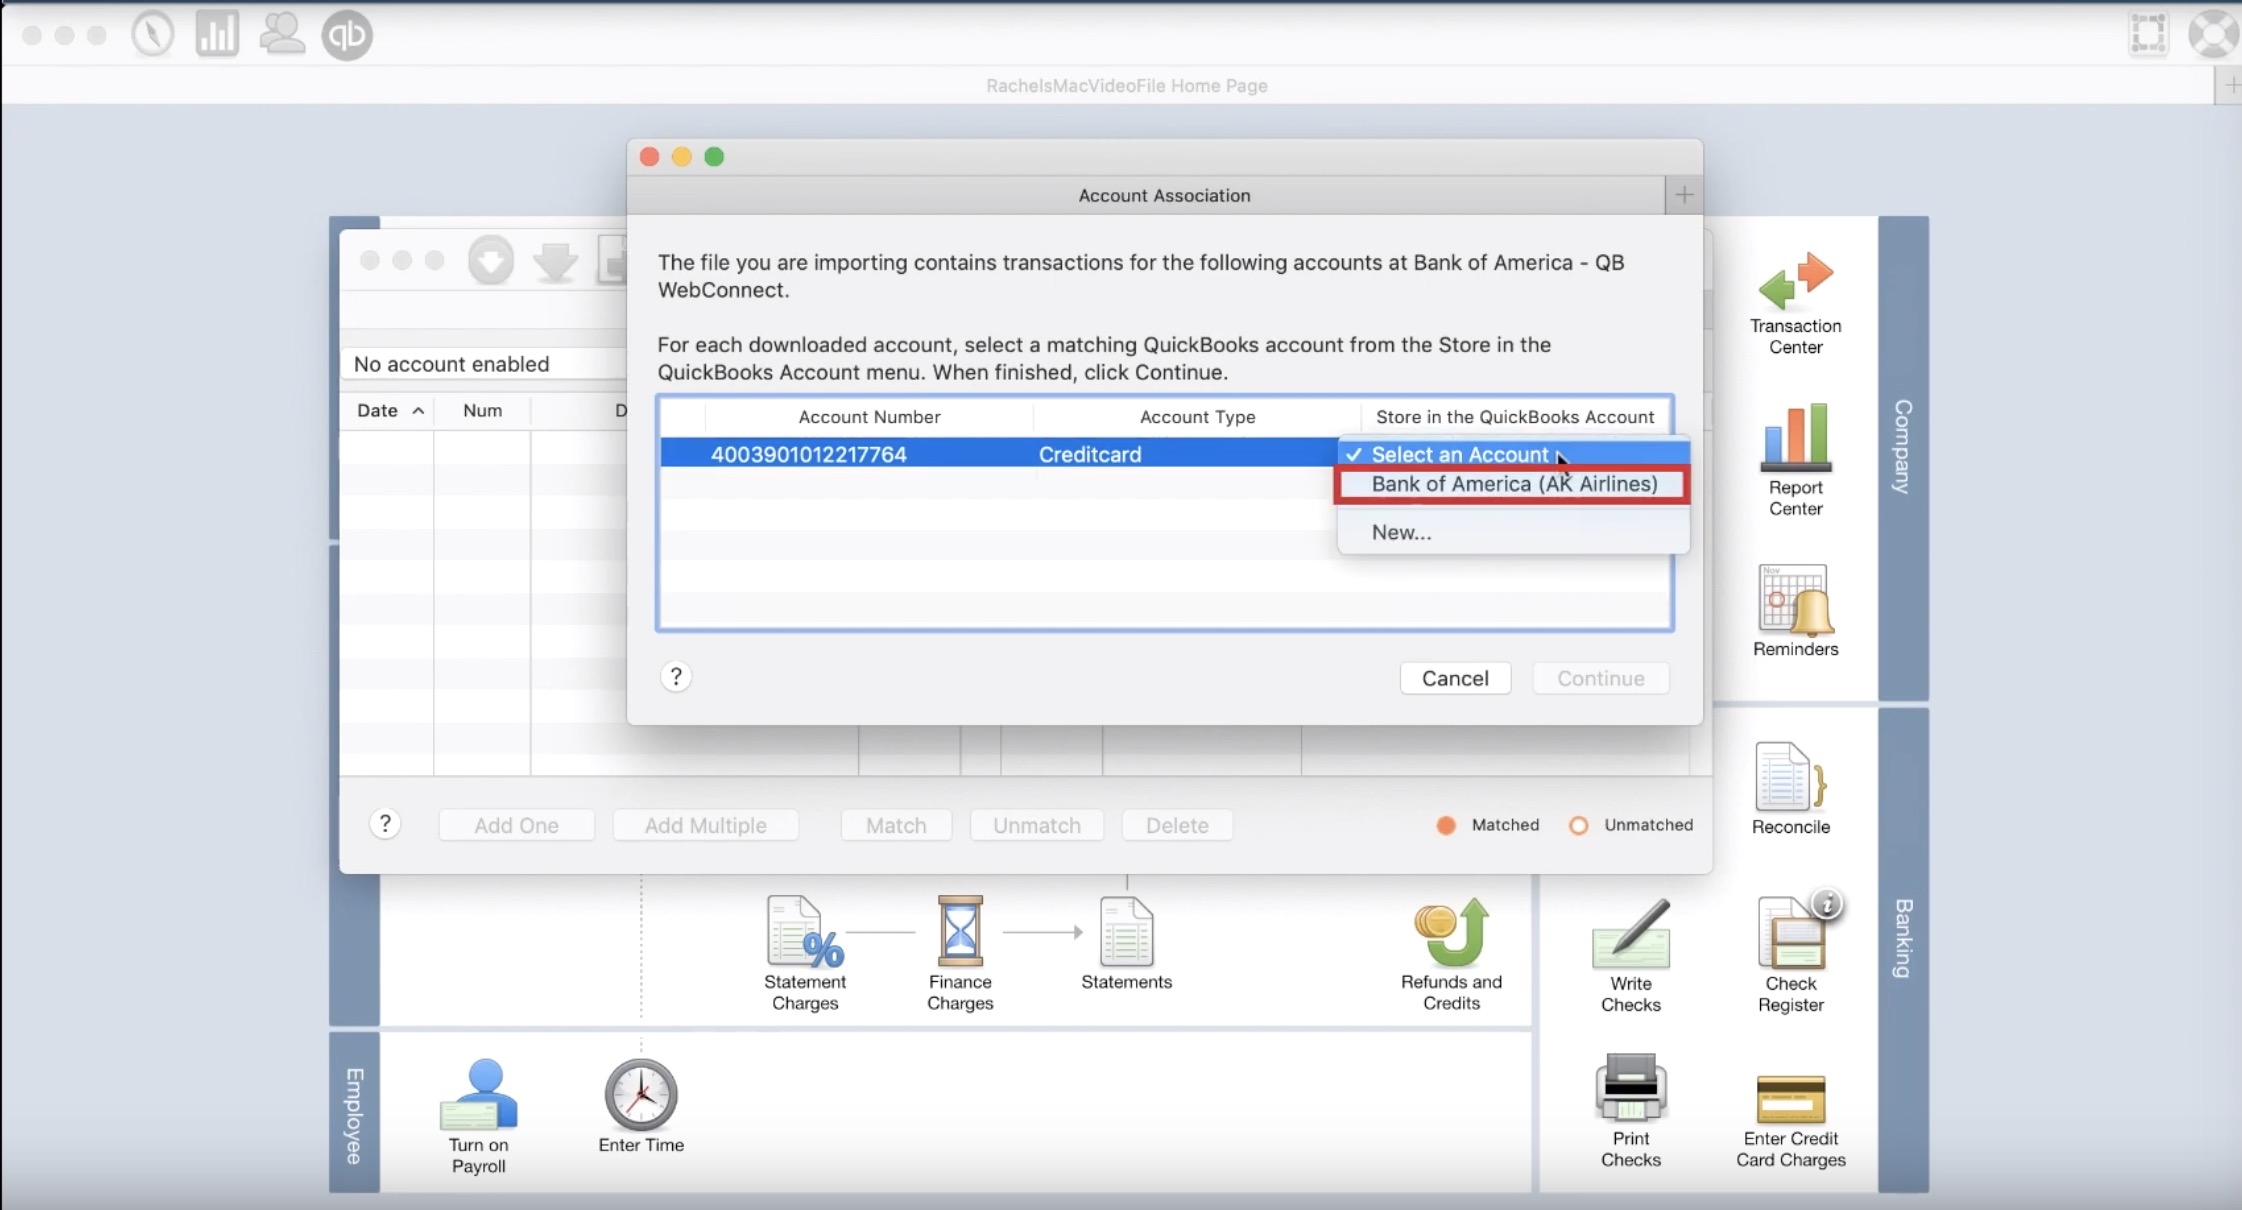
Next, we need to associate the newly imported transactions with an account in QuickBooks. When we opened the file, QuickBooks pulled some data off of the file regarding the account number and type. Now we need to tell QuickBooks which account we want to use. And in this case, it’s the account titled Bank of America (AK Airlines).
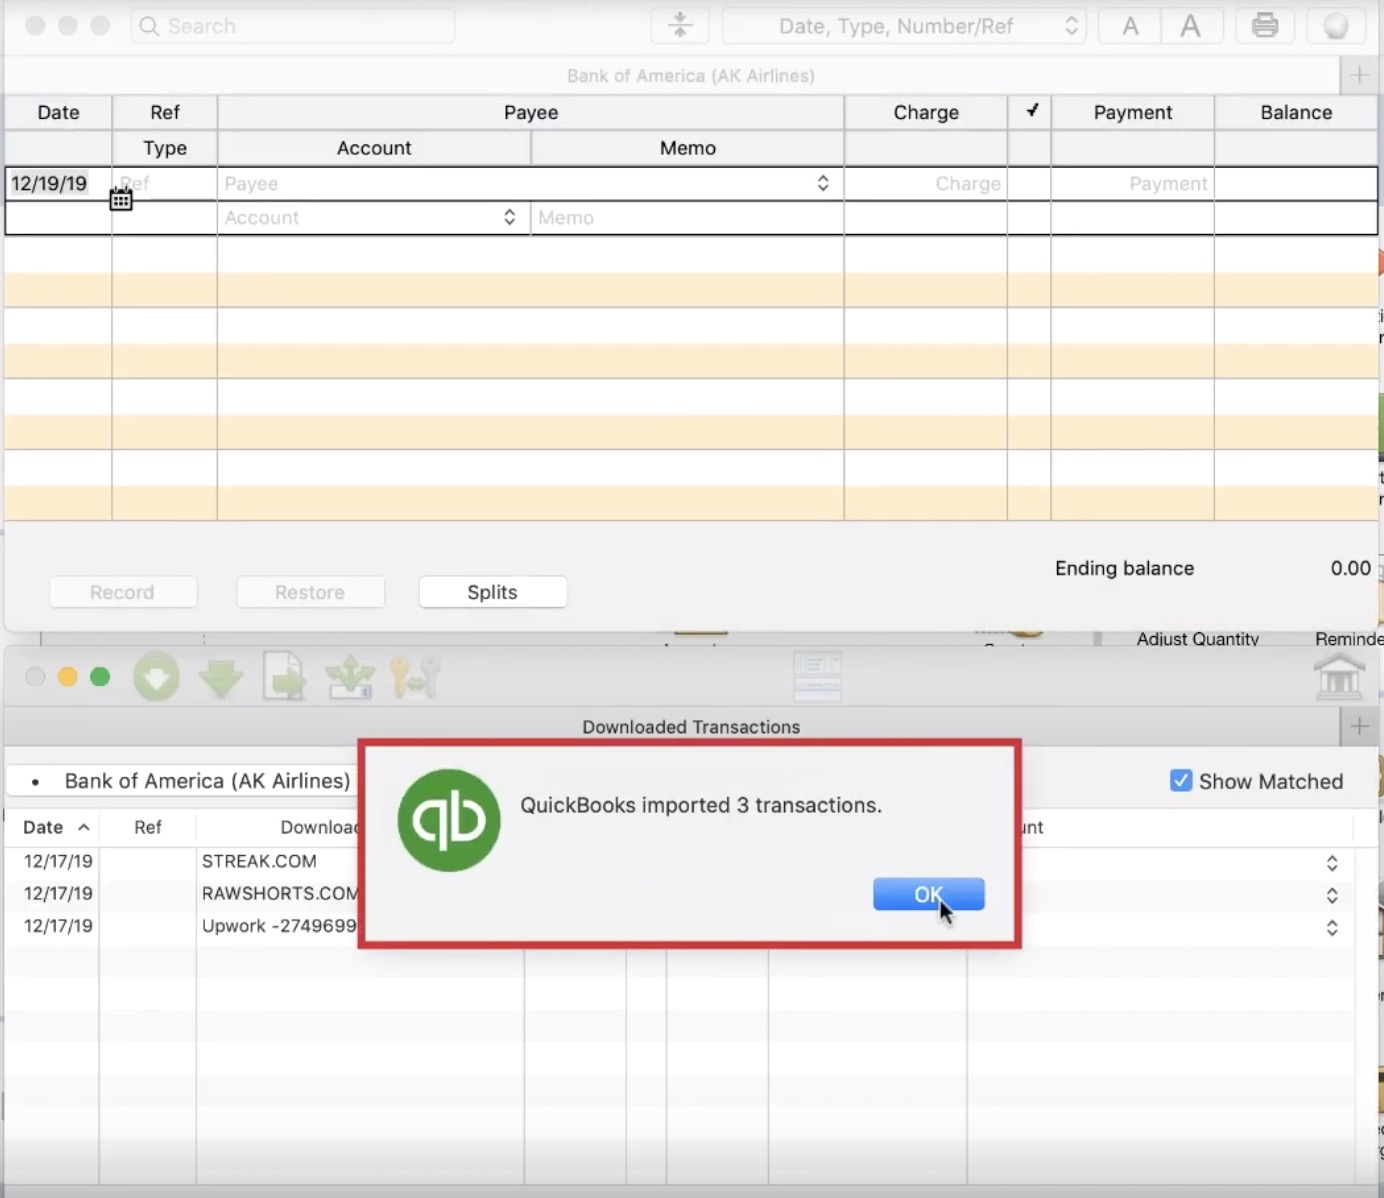
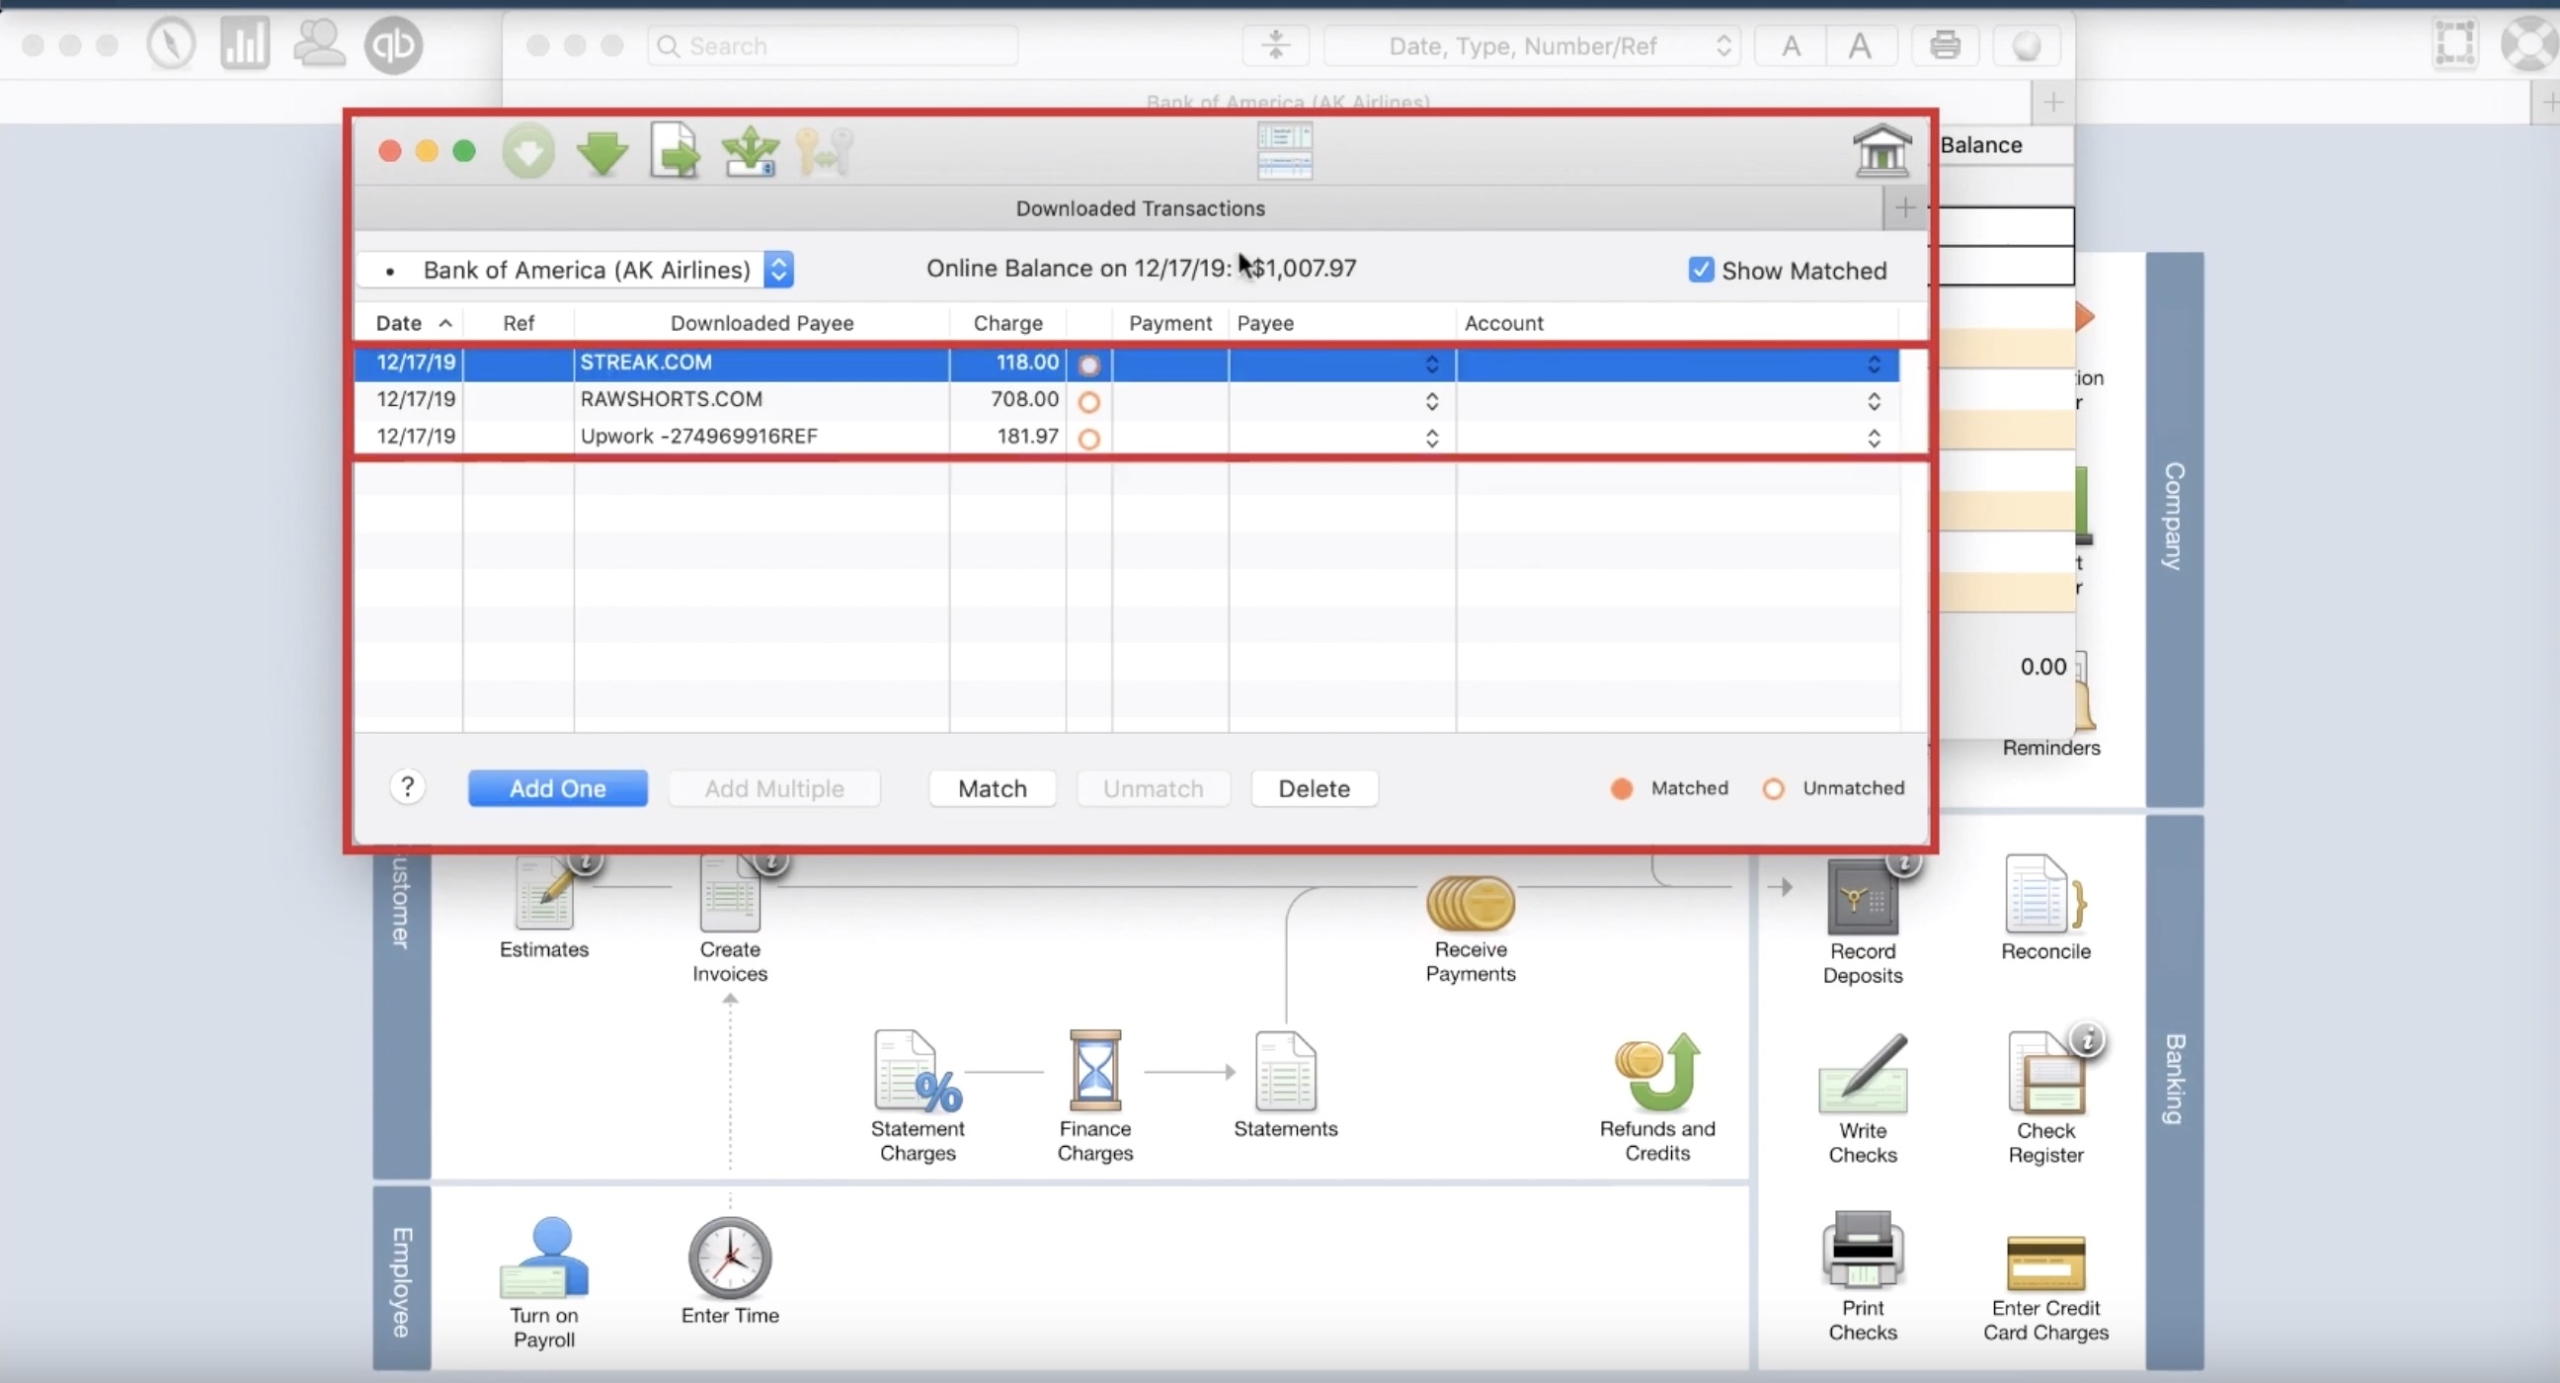
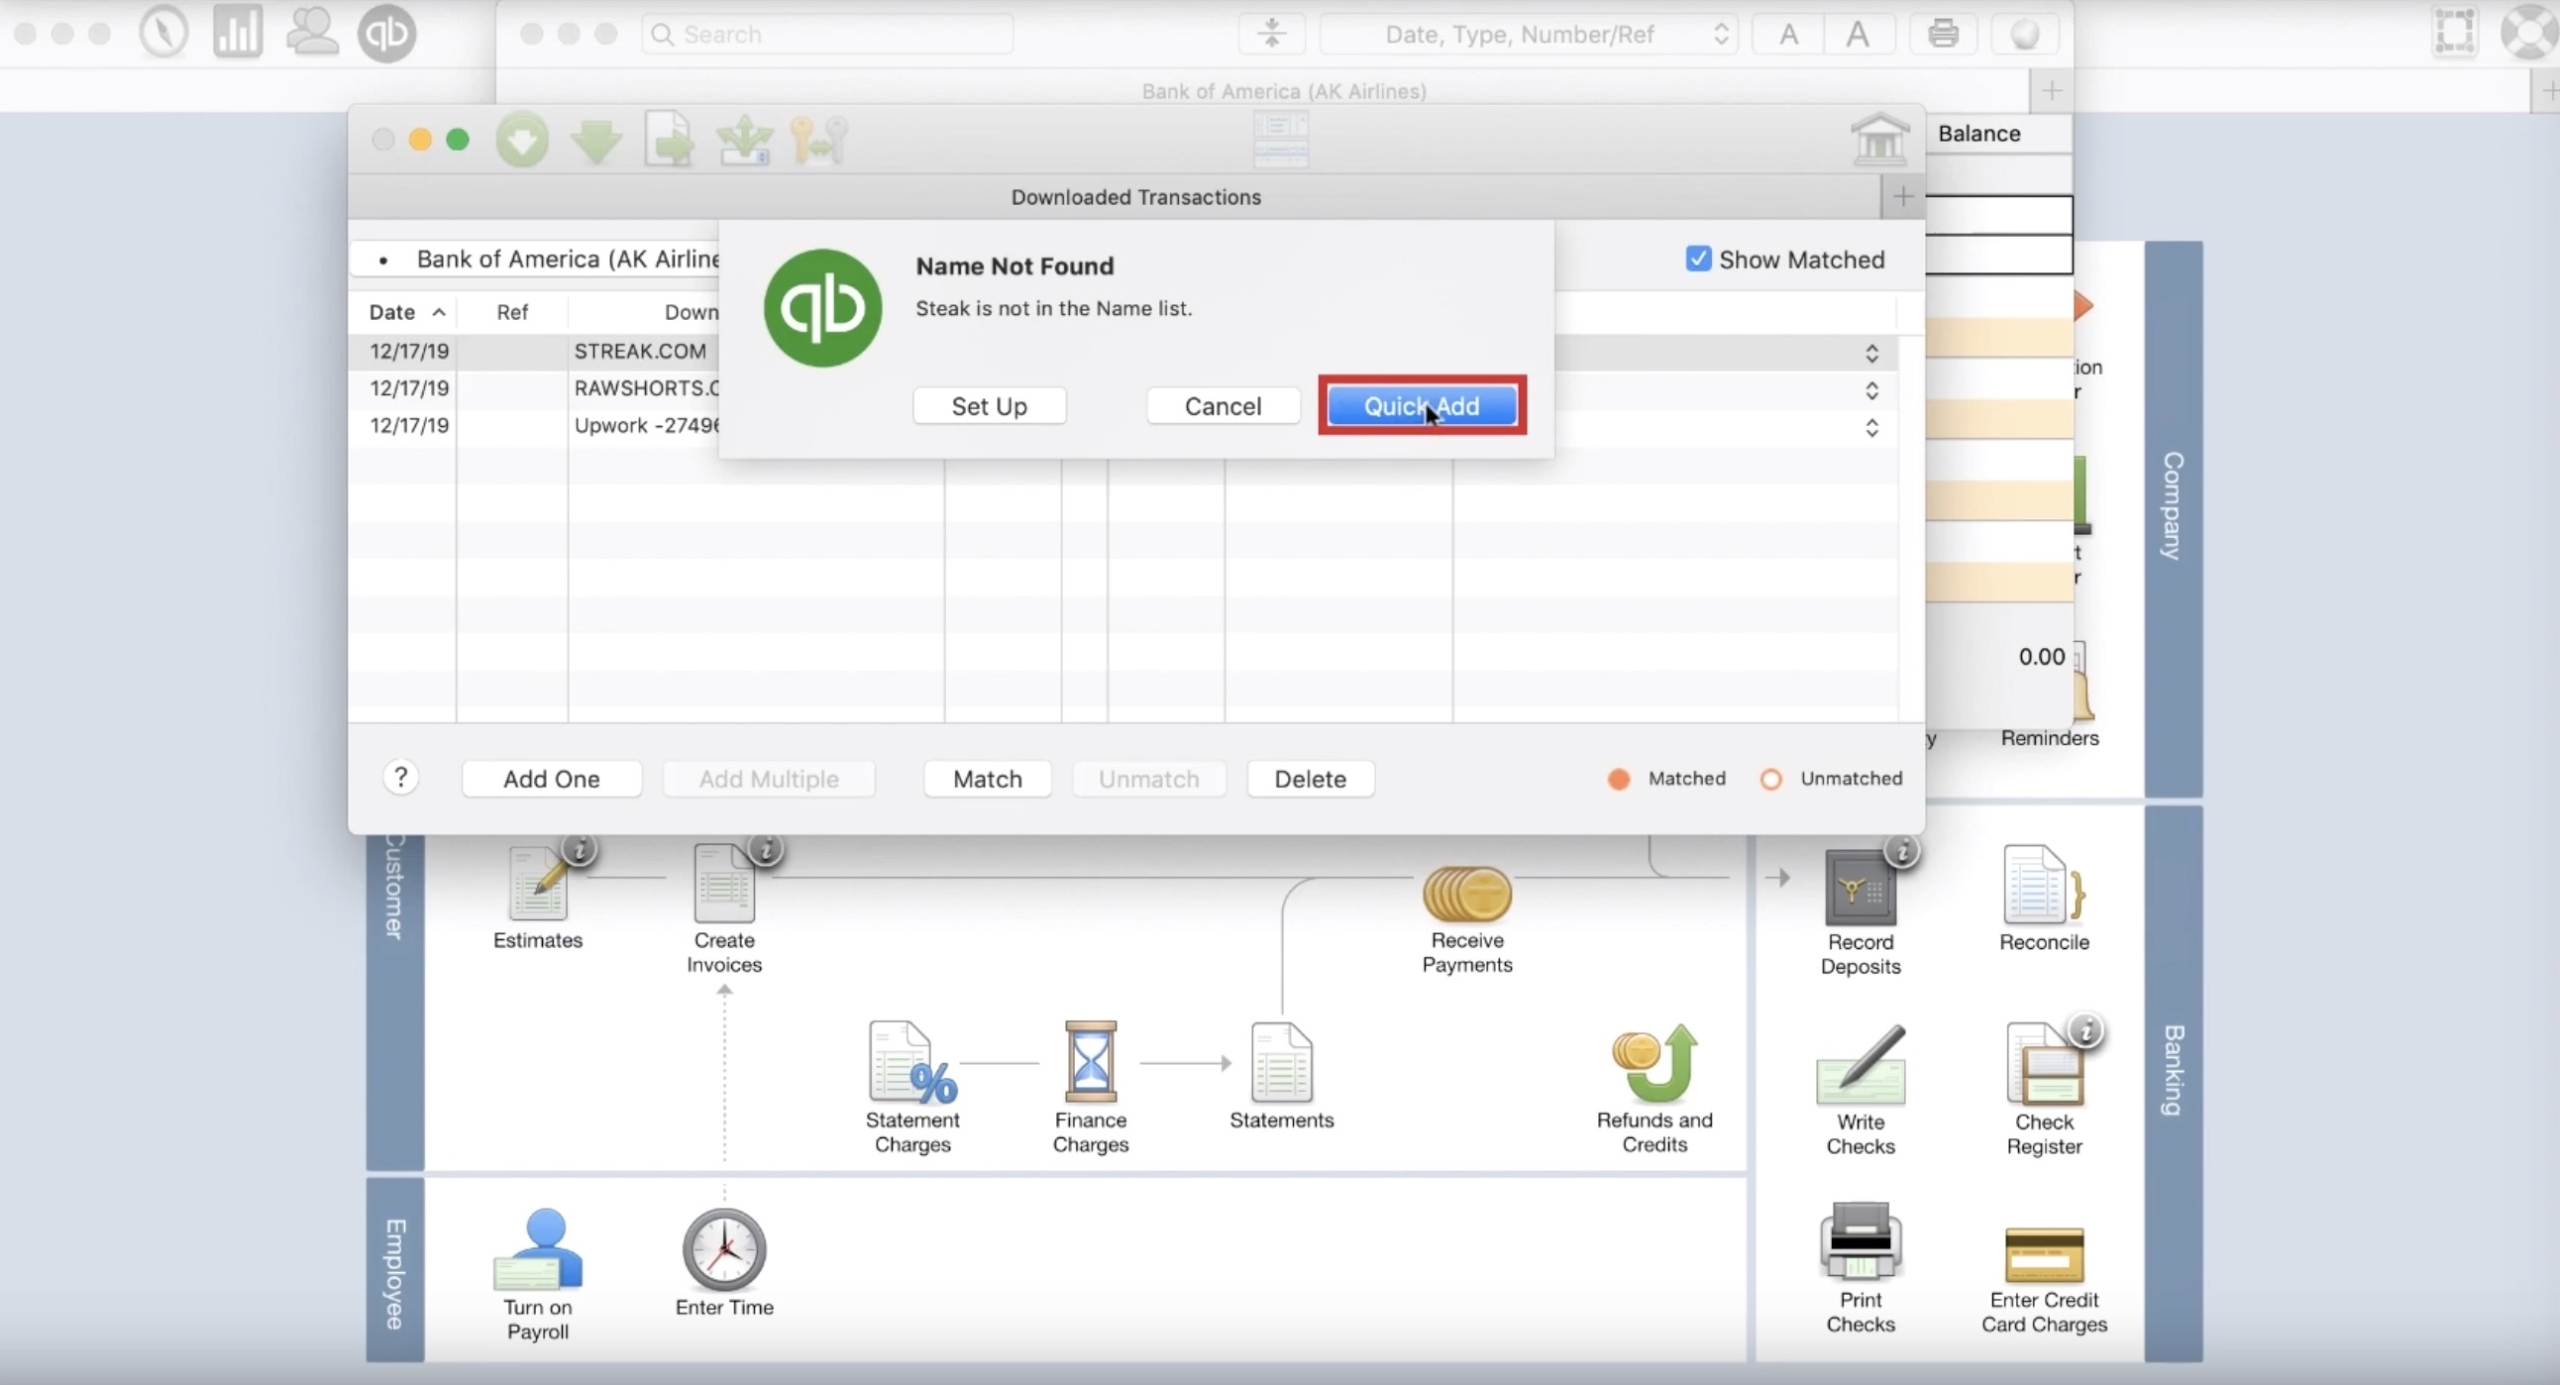
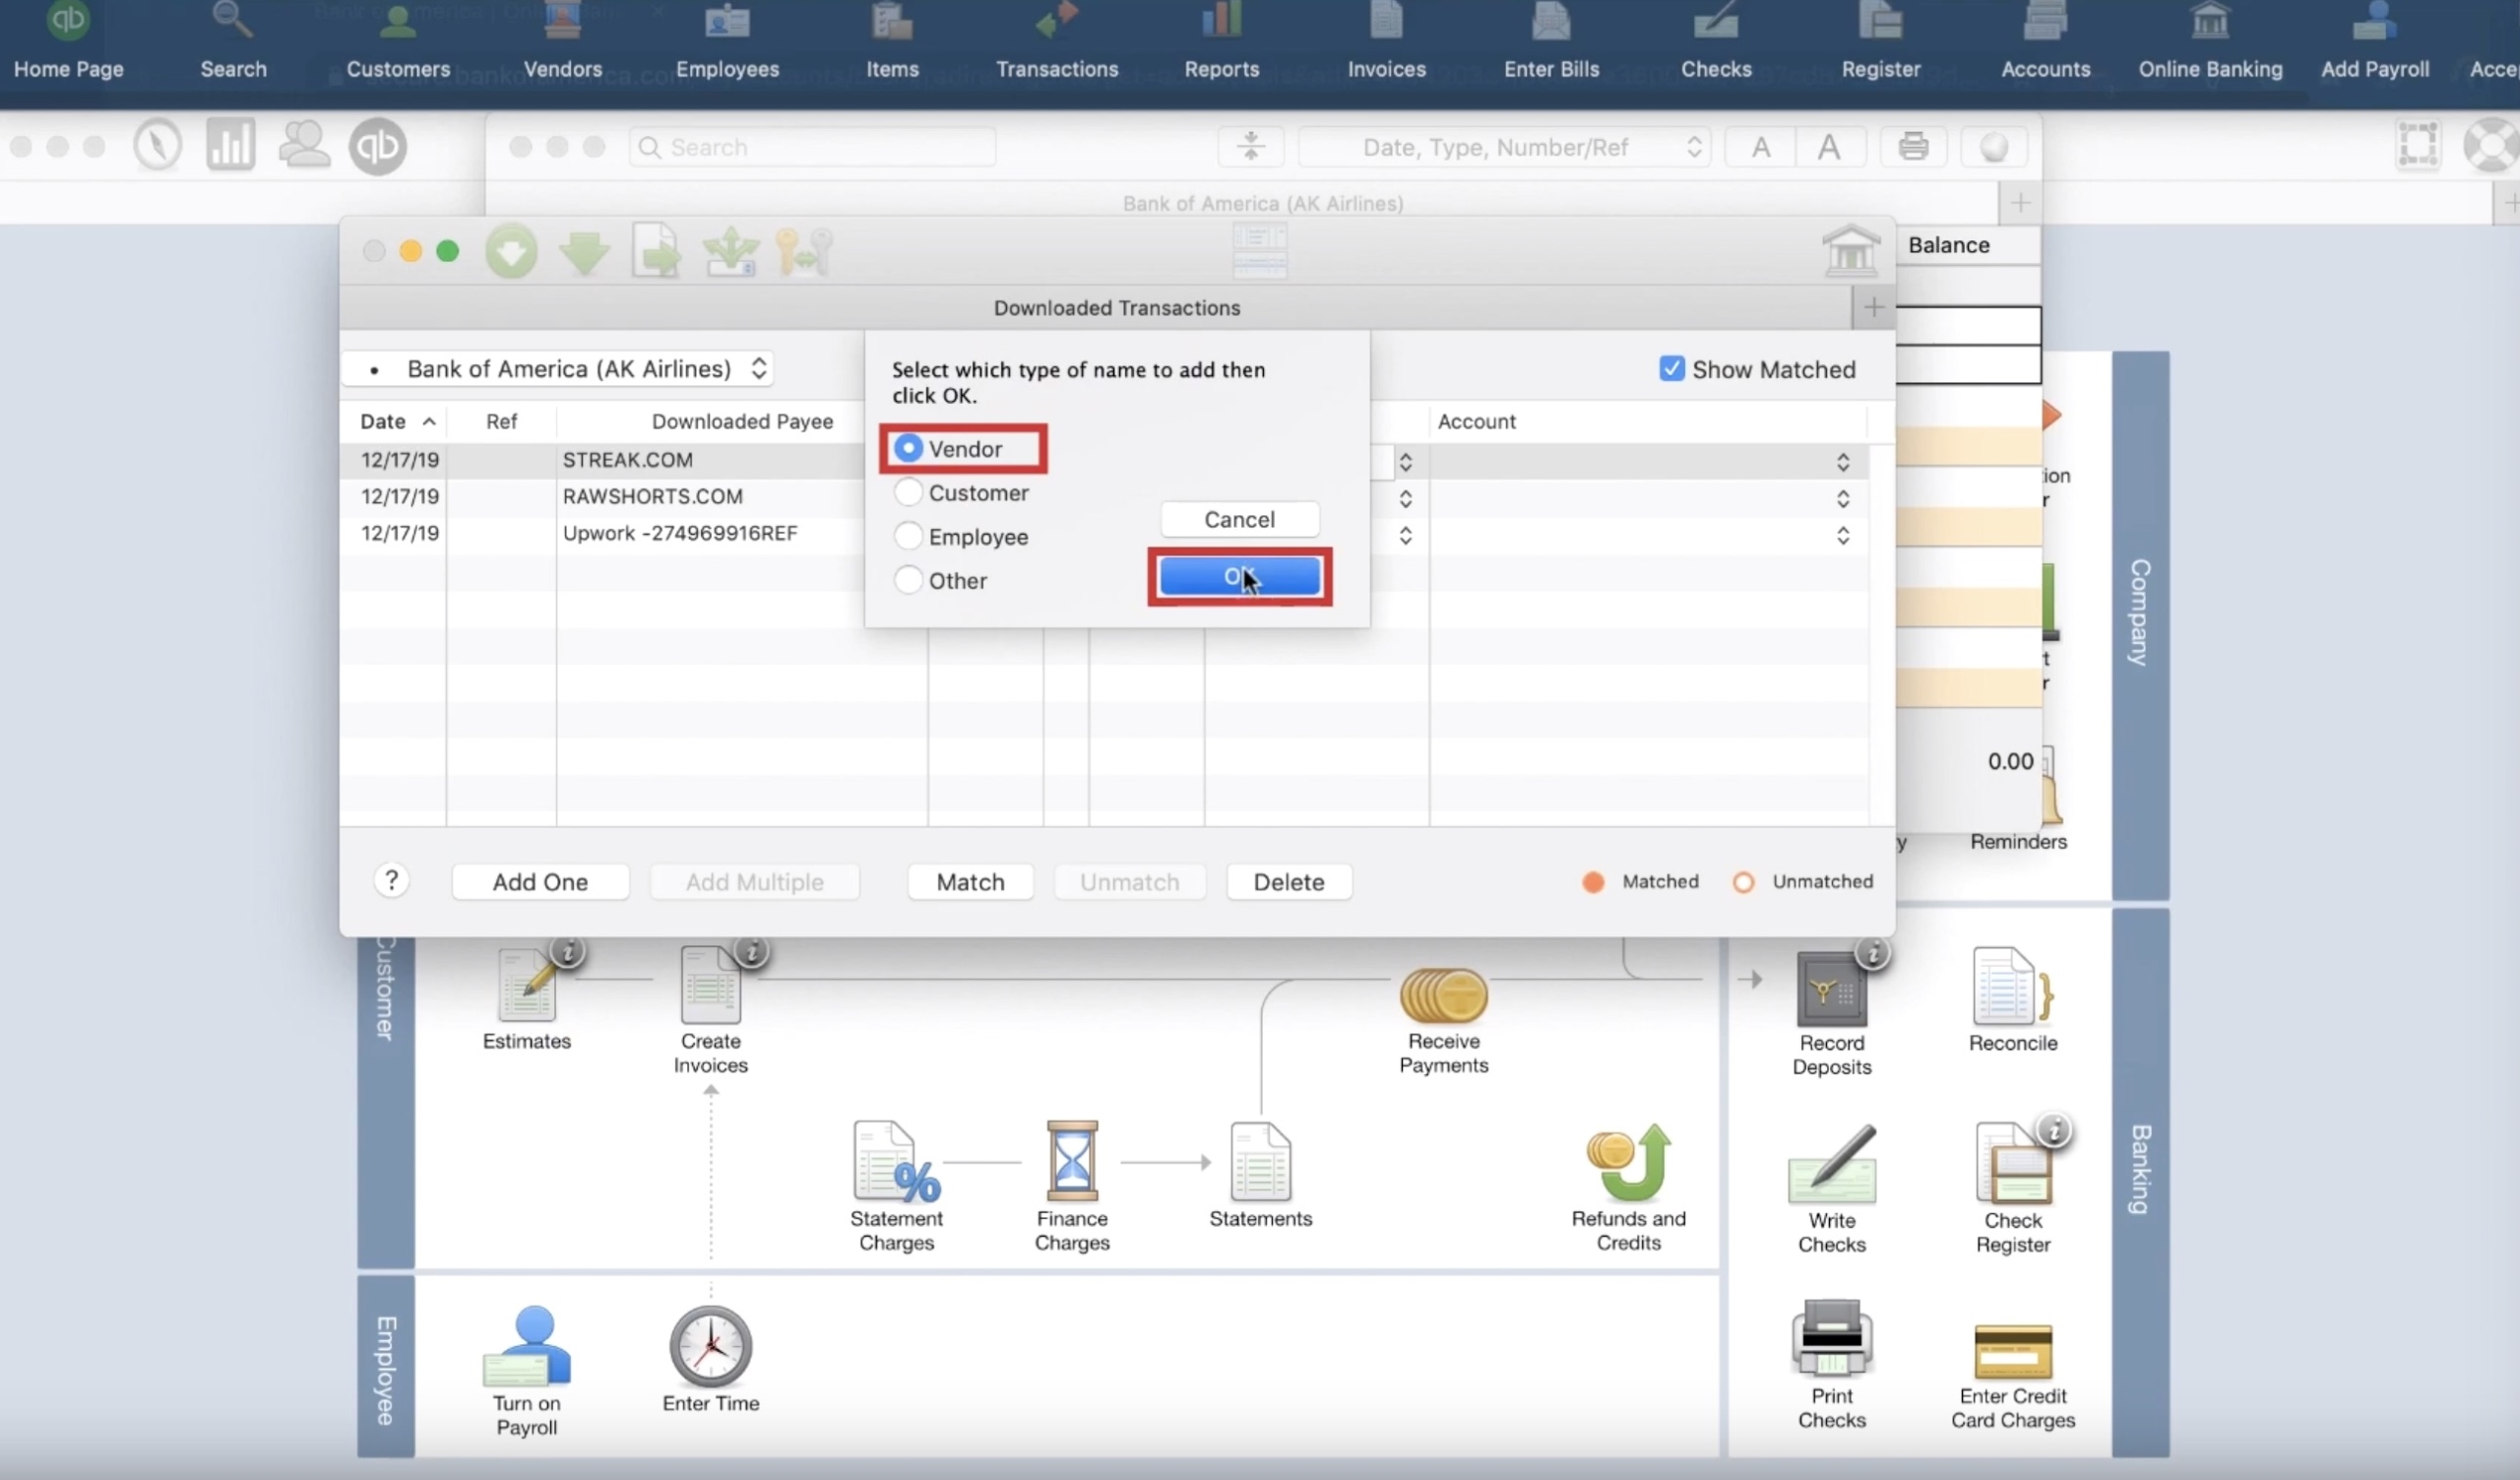
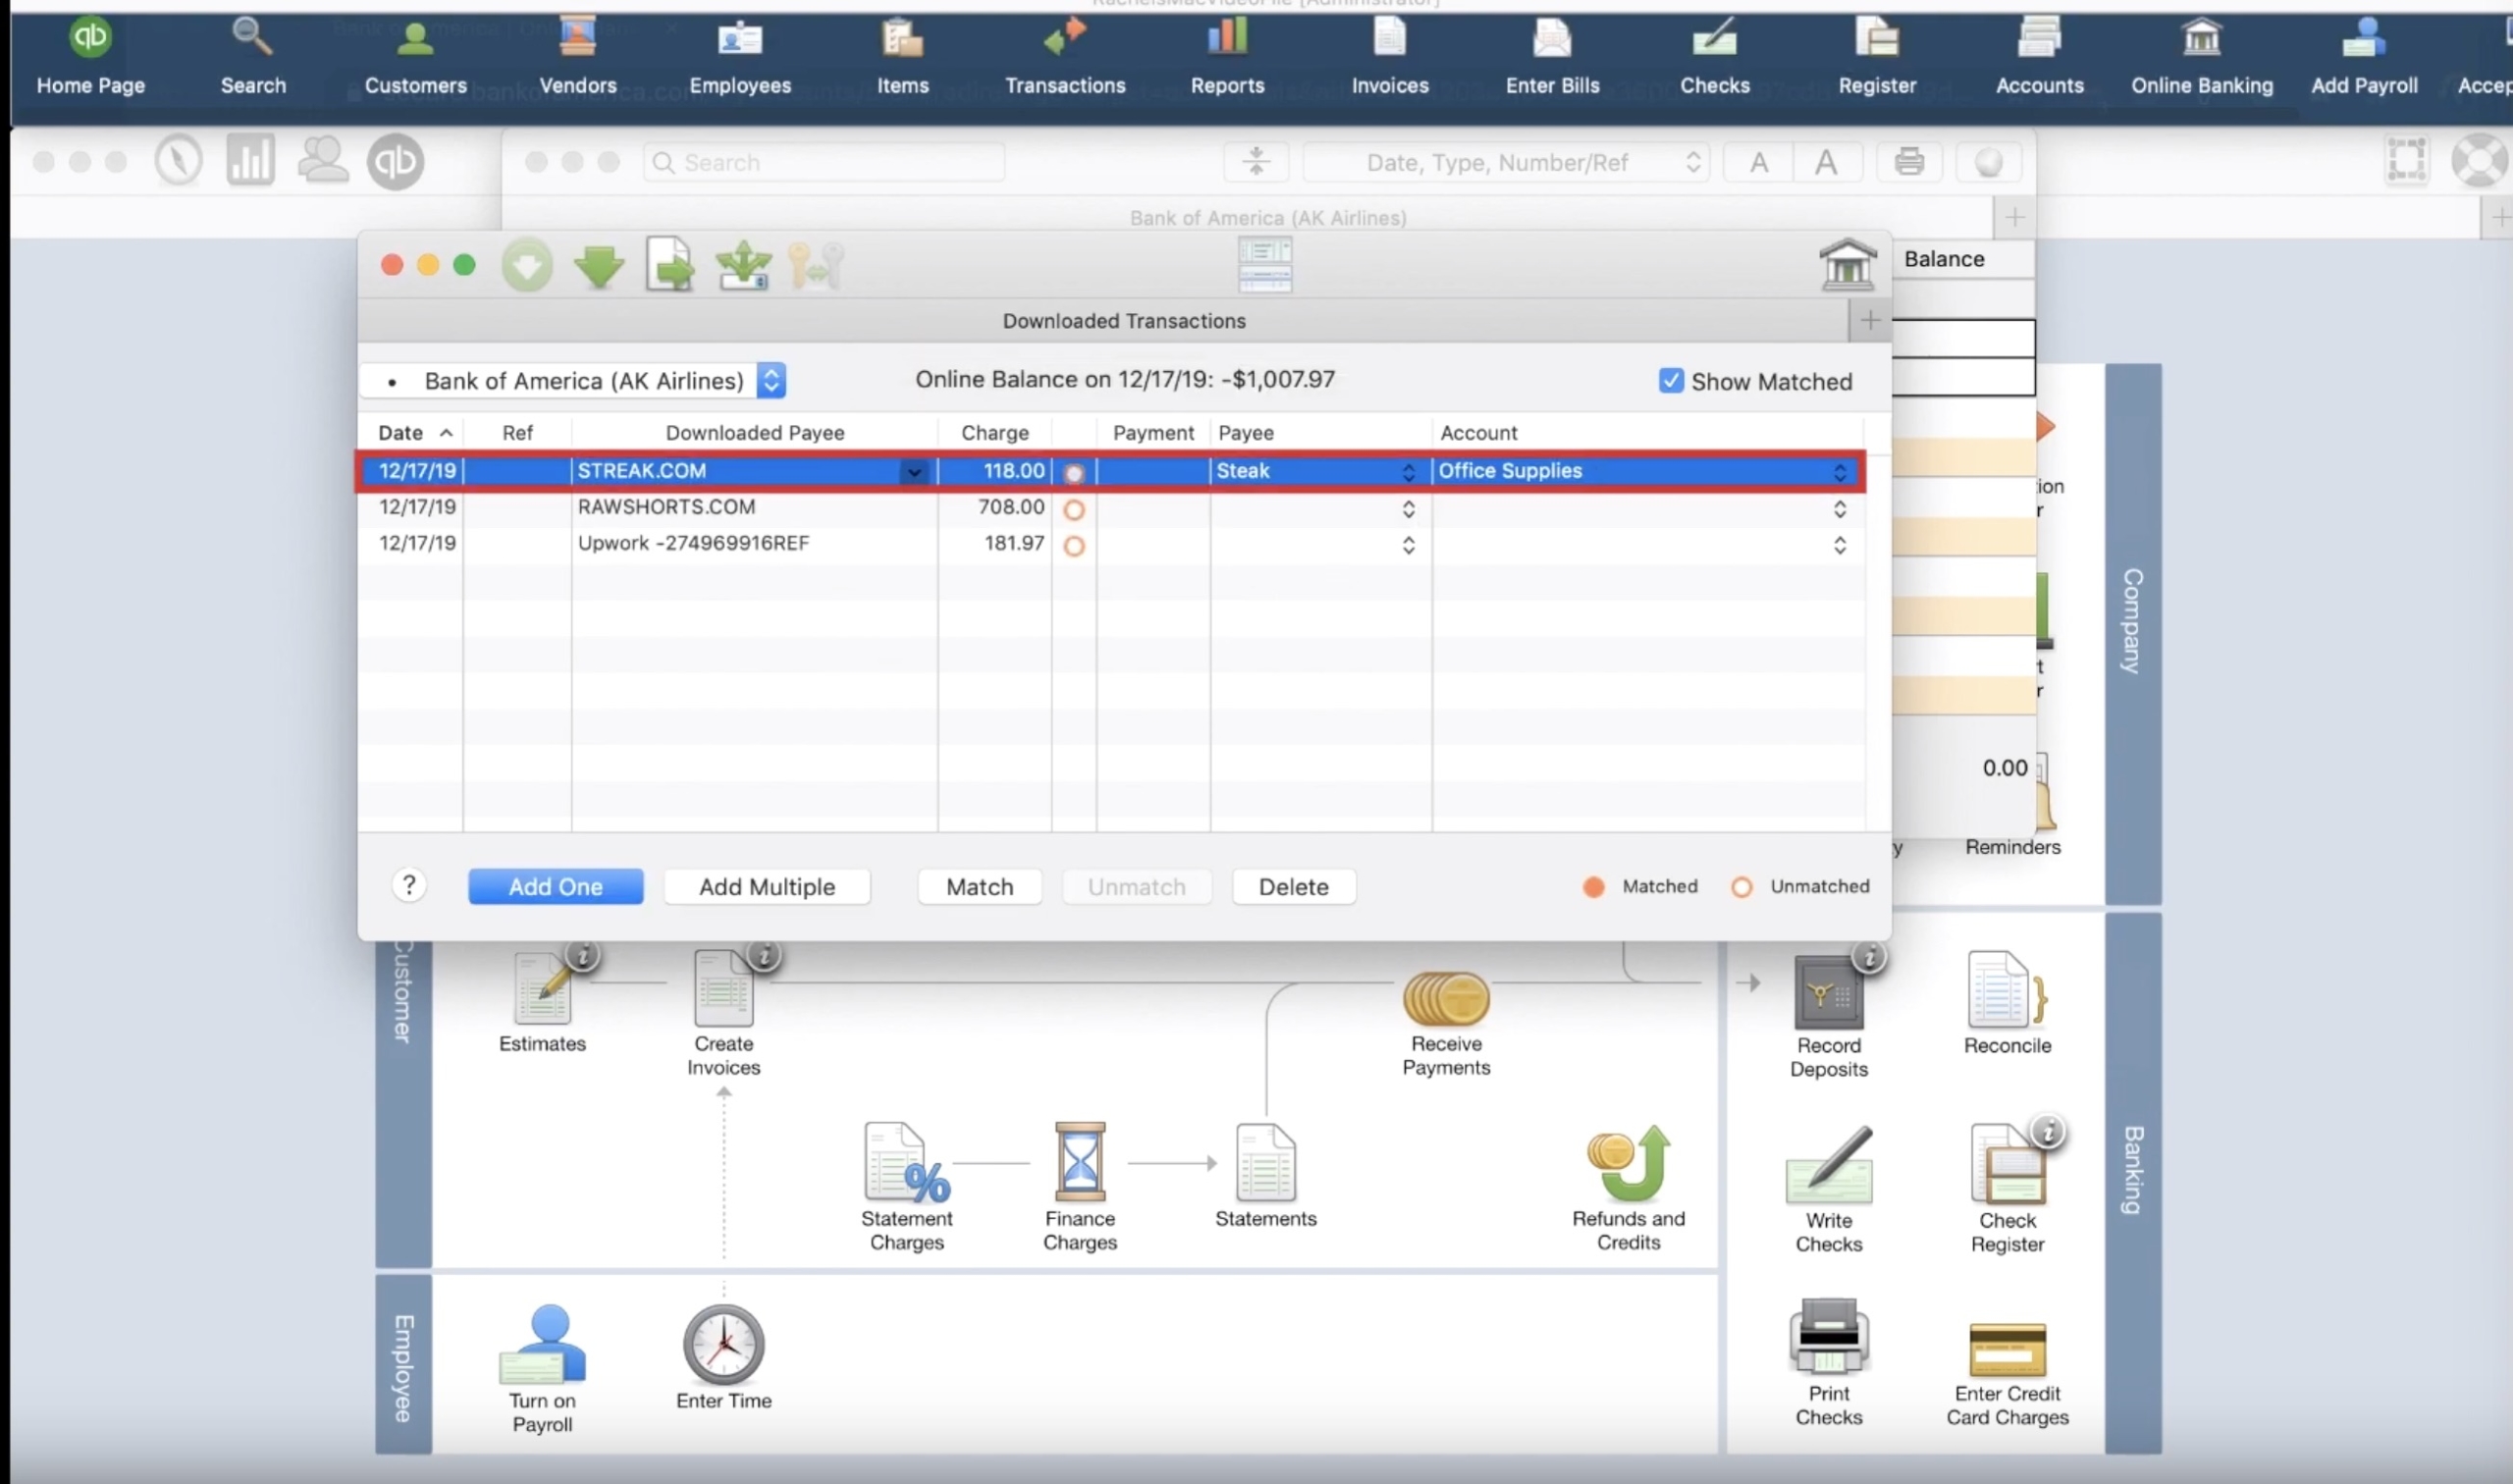
Now all of our transactions are imported and assigned to a QuickBooks account, we’ll need to do a little housekeeping to add information to the transactions we’ve imported. In the first screenshot below, you’ll see that the file we imported contained three transactions. The downloaded transactions will appear in the following screen but will not have all the information required to make them useful in QuickBooks. For each item, we need to select the Payee and Account. So for the first, we’ll use the payee of Streak and notice that that payee does not exist in our system. QuickBooks knows exactly how to handle this situation and will prompt us to “Quick Add” the payee. The only other thing we need to tell QuickBooks is that Streak is a vendor, and then we click OK. Next, we click Account and tell QuickBooks how to classify the transaction, and this one is Office Supplies. Follow these steps for all the transactions you import.
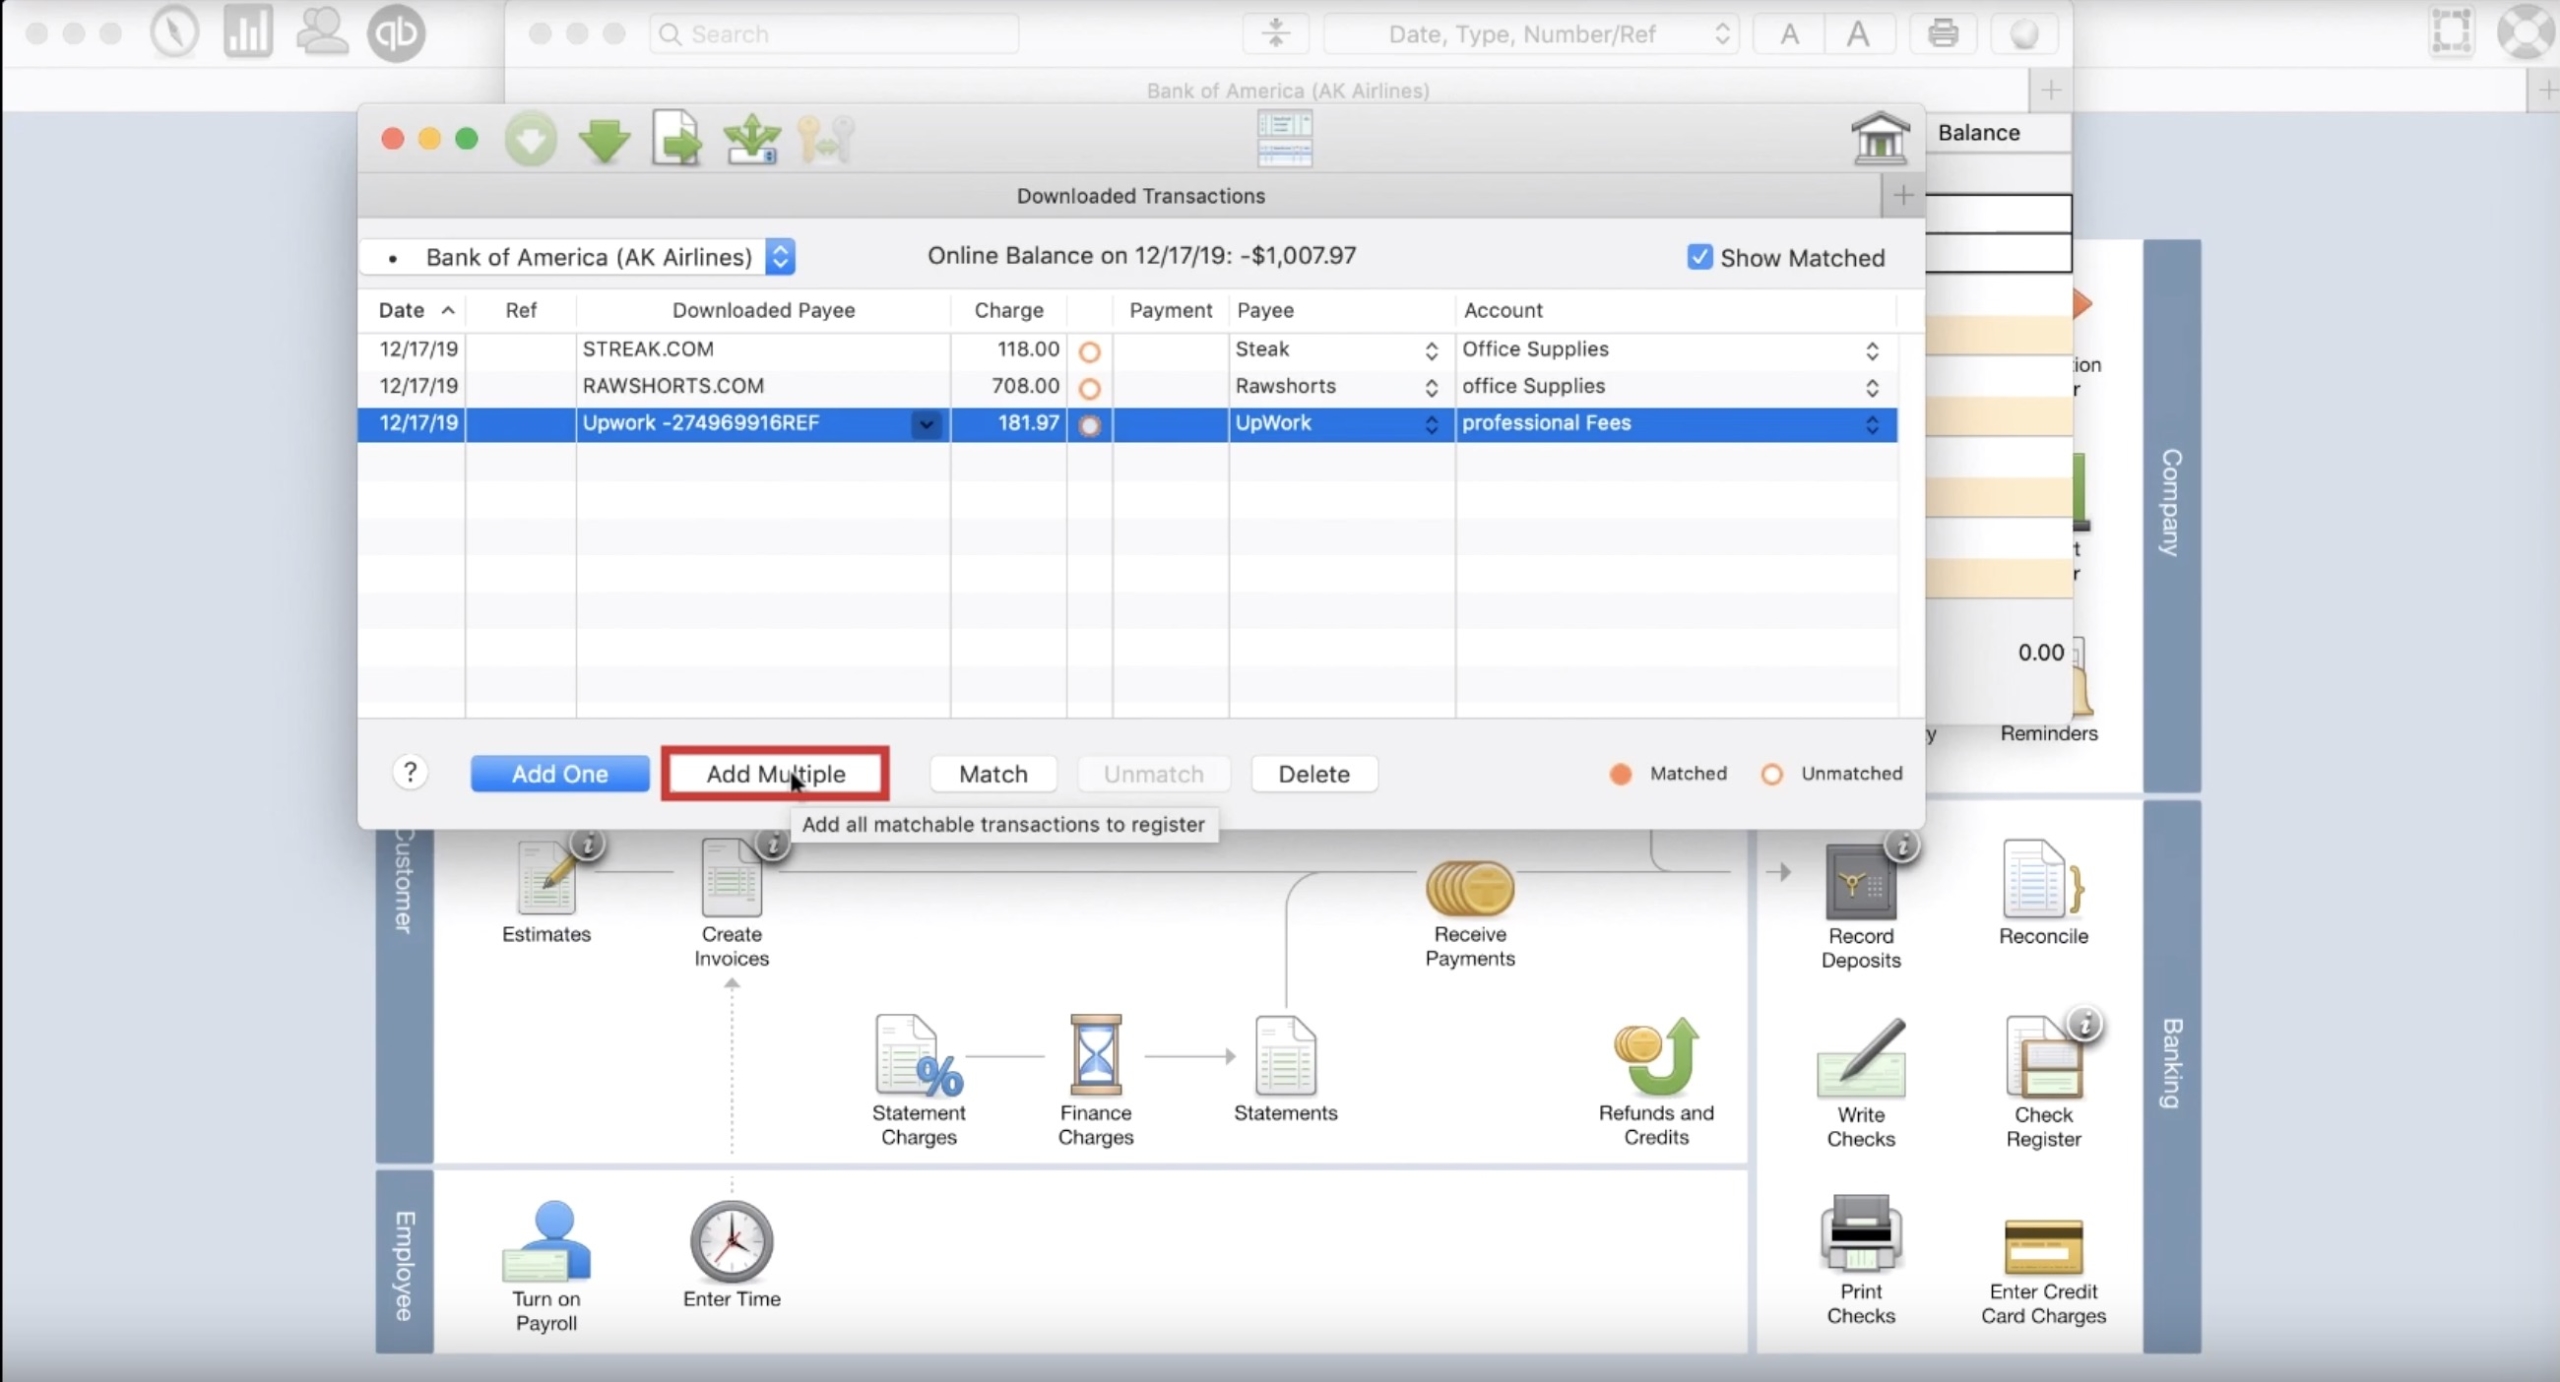
We’ve imported the Transactions and assigned the payee and account; now, we have to finalize all this data by clicking “Add Multiple.”
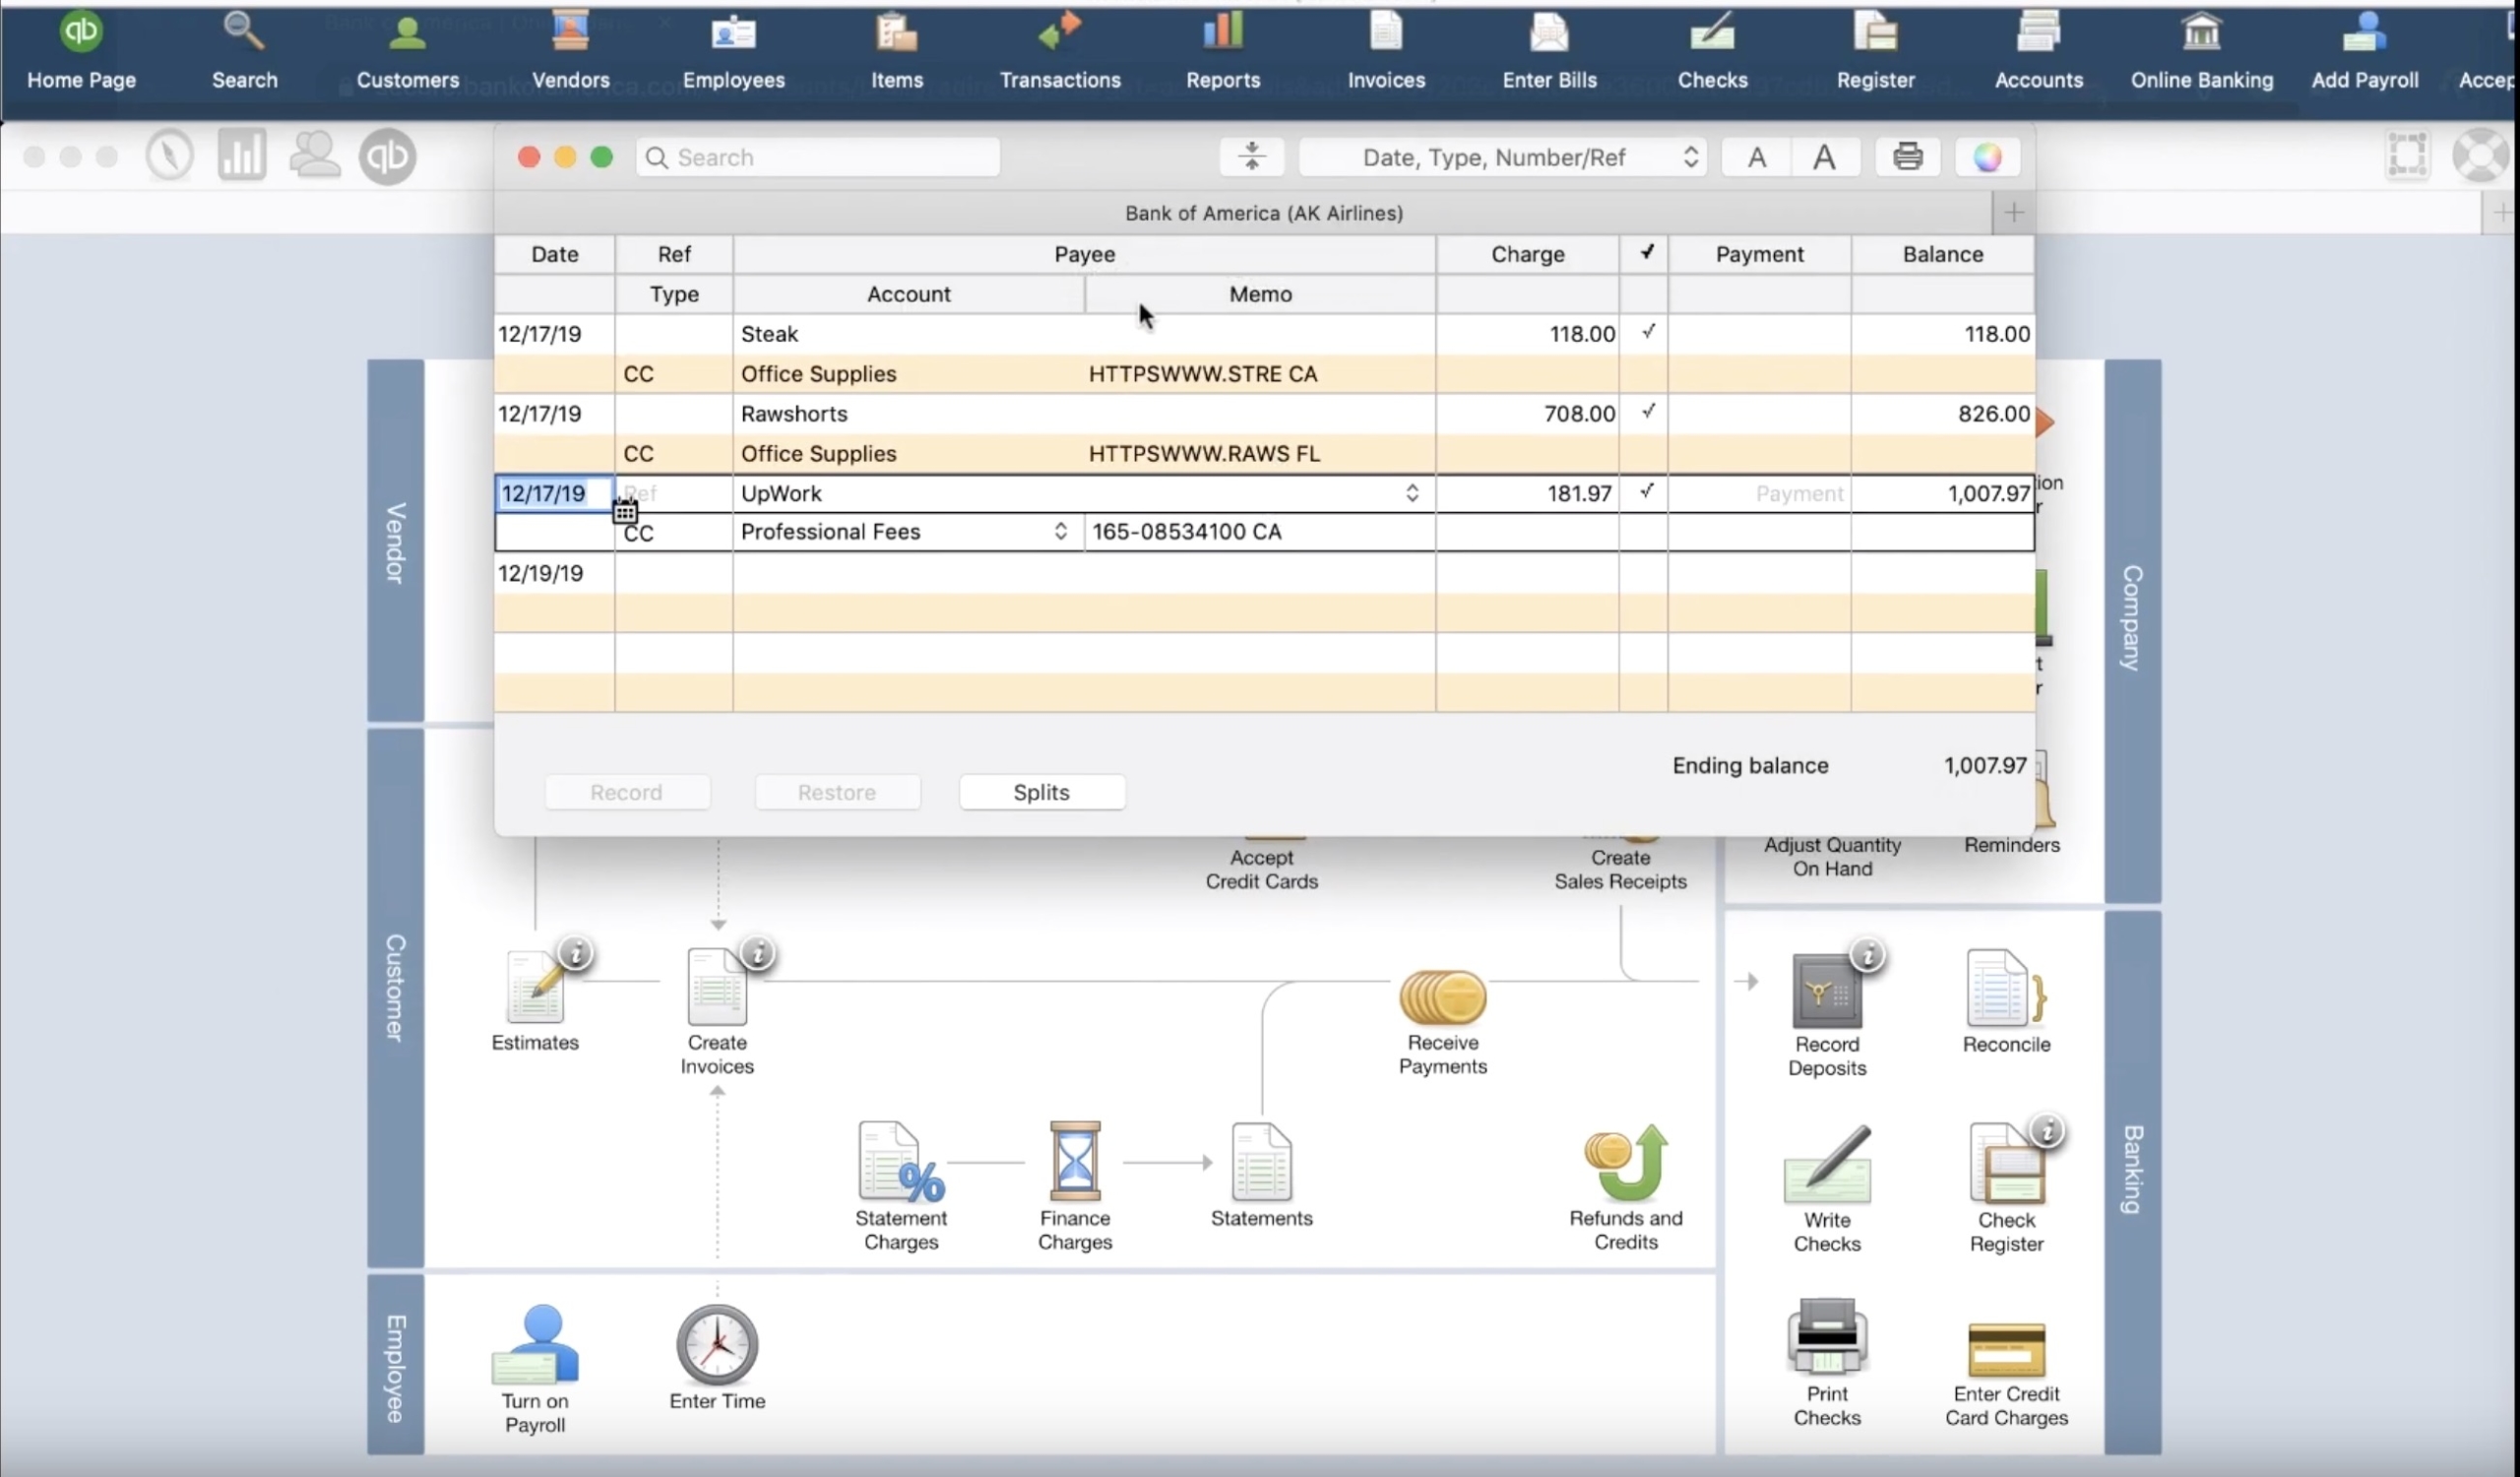
Finally, the last step of this whole process is to check our work. To do that, we look at the Register for the credit card and confirm all the data is correct.
Thank you so much for reading our blog. If you have further questions, please set up a time to meet with Rachel by clicking the green button below.
☕ If you found this helpful you can say “thanks” by buying me a coffee…
https://www.buymeacoffee.com/gentlefrog
And if you want to see a video tutorial on how to execute these steps, watch the video below.


One Response
Great content! Super high-quality! Keep it up! 🙂