How to Create an Invoice in Freshbooks

Written By

In this blog post, I’ll show you how to create an invoice in Freshbooks.

Unbilled Time

If you scroll down in the Freshbooks dashboard you’ll come across your unbilled time.

Viewing unbilled time in Freshbooks

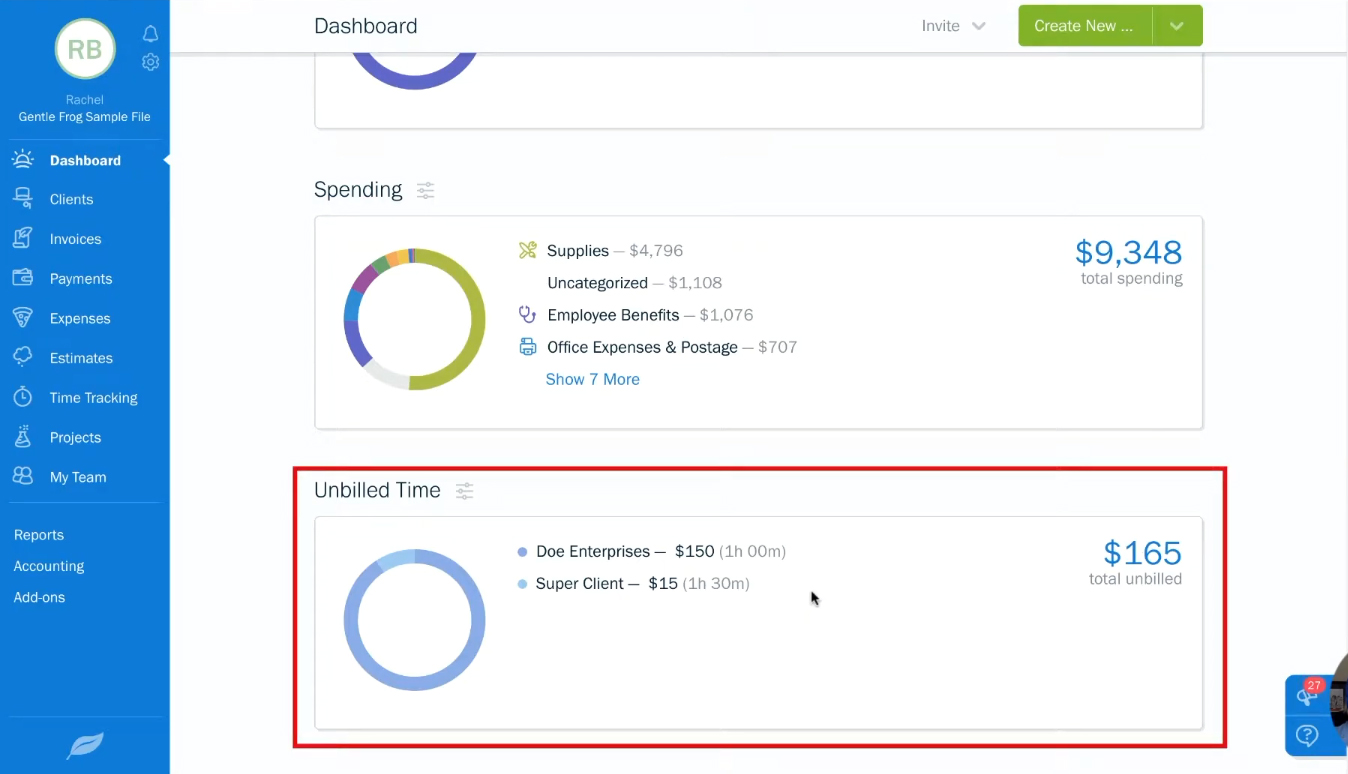
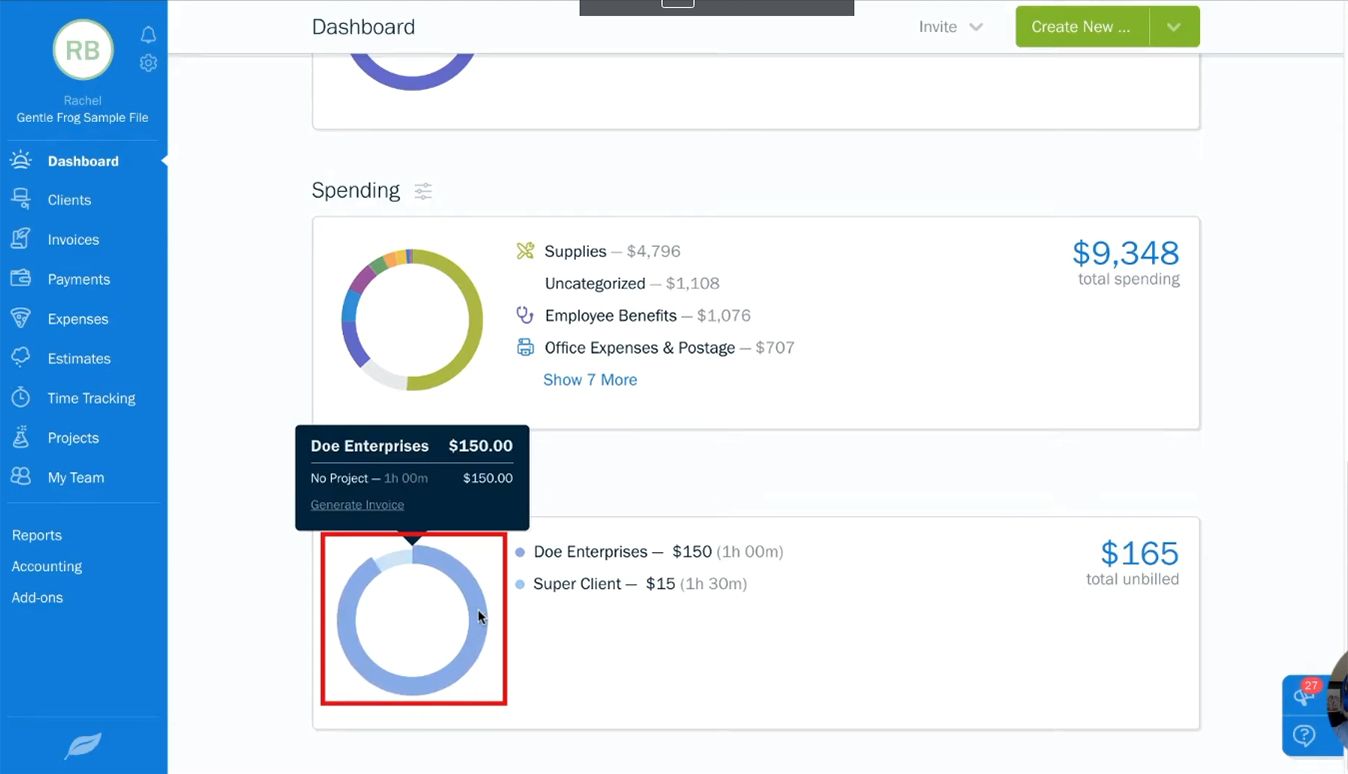
In this example, I have $165 of unbilled time from two clients. If you hover over the different colors in the circle graph it’ll show you details for each client. 

Viewing unbilled time by client in Freshbooks on the dashboard.

Generating an Invoice

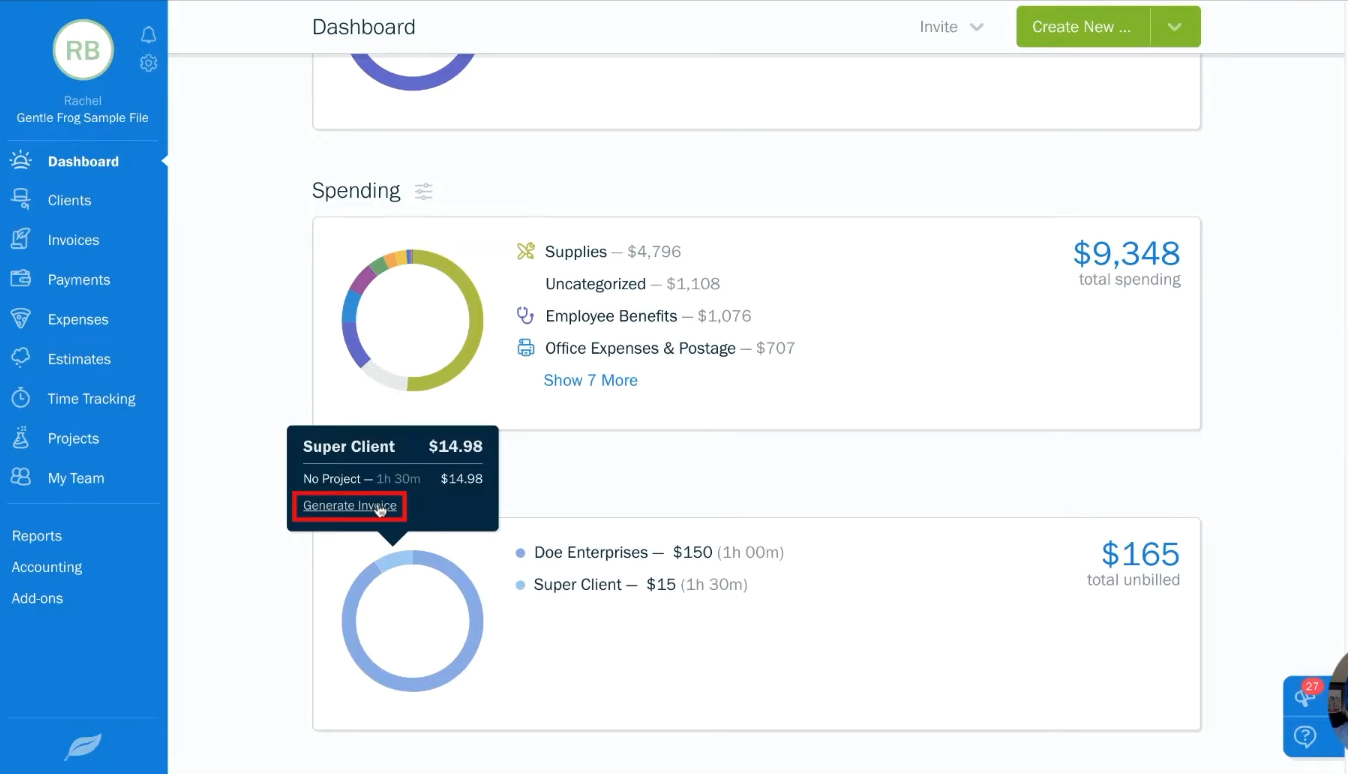
Click on the color associated with the client you’d like to create an invoice for. Then click on the Generate Invoice link.

Generate invoice from unbilled time in Freshbooks.

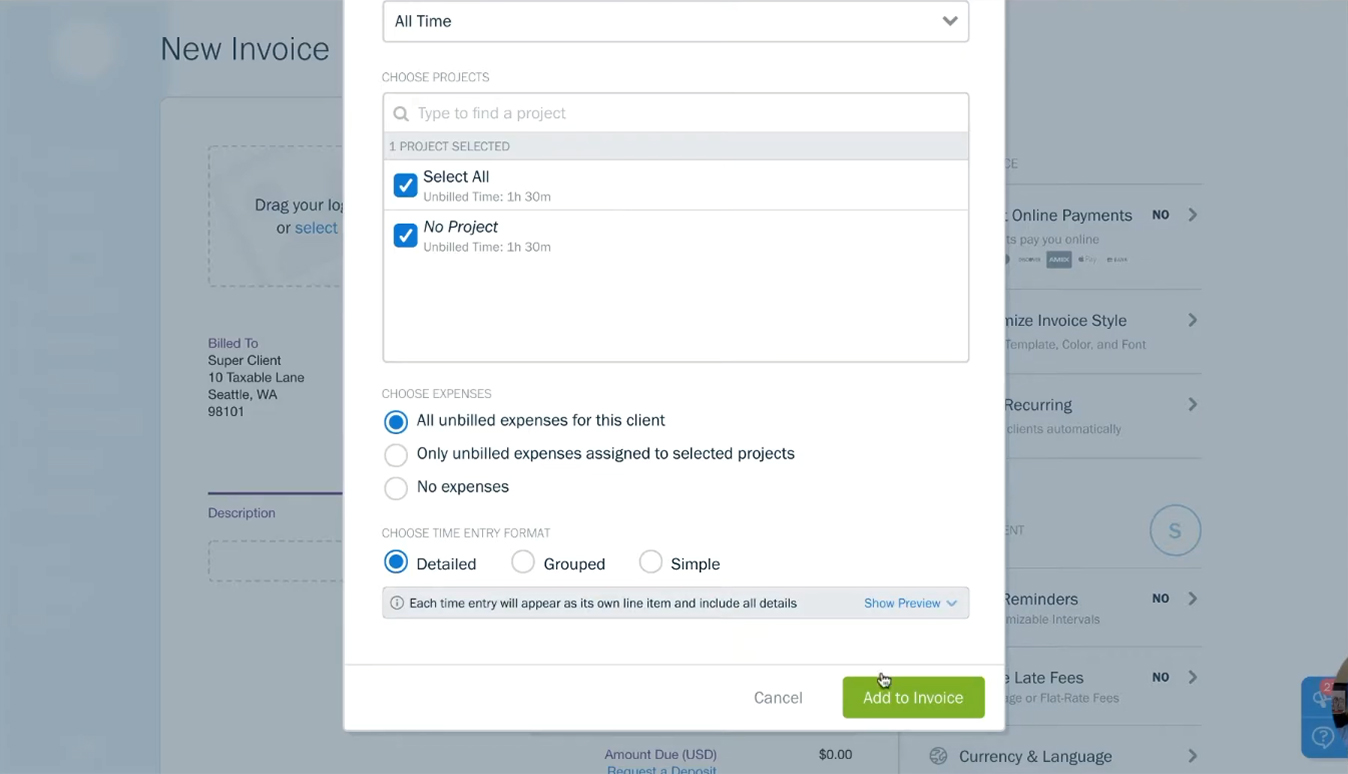
A pop-up will appear showing you the unbilled time and expenses for the client you selected.

It will show you each unbilled project you have with that client and you can select which ones you’d like to bill.

Reviewing unbilled time for a client in Freshbooks

You also have the option to bill expenses:

  • All unbilled expenses for the client
  • Only unbilled expenses assigned to selected projects
  • No expenses

There are also options for the format of the time entry:

  • Detailed
  • Grouped
  • Simple

In my example, I don’t have any expenses to bill, only time.  I’ll select the Detailed entry format because I have notes on my timesheet.

When you’re done making your selections click the green Add to Invoice button.

Selecting time and expenses to add to an invoice in Freshbooks

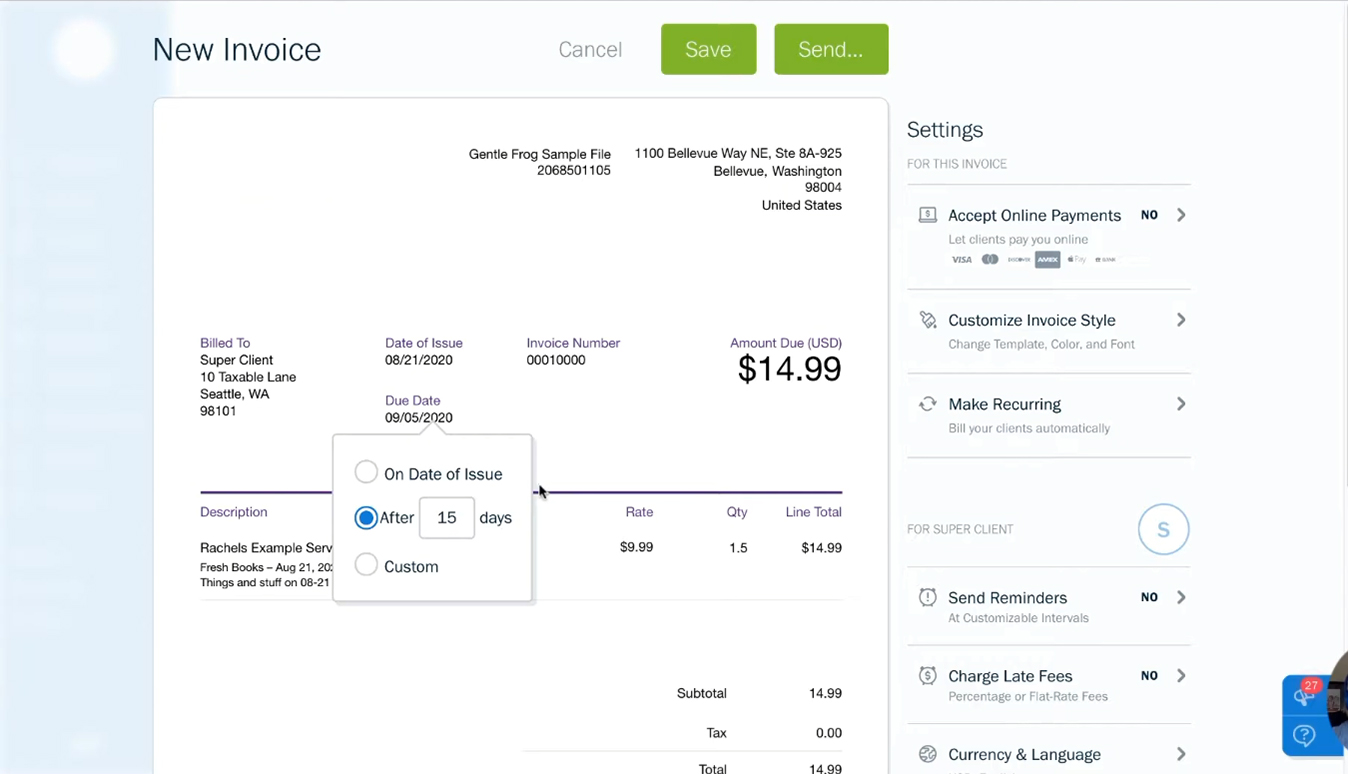
Freshbooks will now give you a pre-filled invoice. You can click on any of the pre-filled fields to make changes. For example, you might want to change the Due Date.

Changing the due date in a new invoice in Freshbooks.

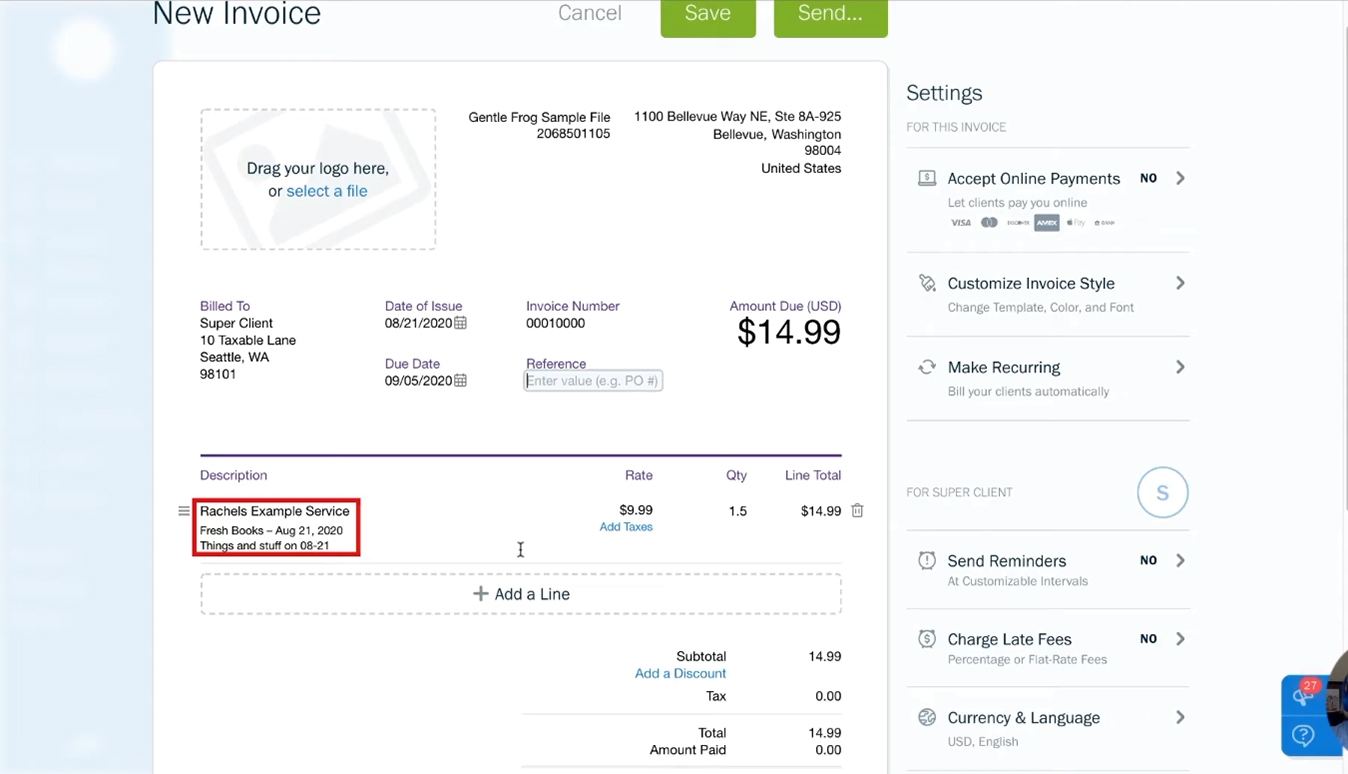
You can see the note I entered in my timesheet in the Description field. This is because I selected the Detailed time entry format. Other time entry formats will appear differently.

Adding a new line to an invoice in Freshbooks

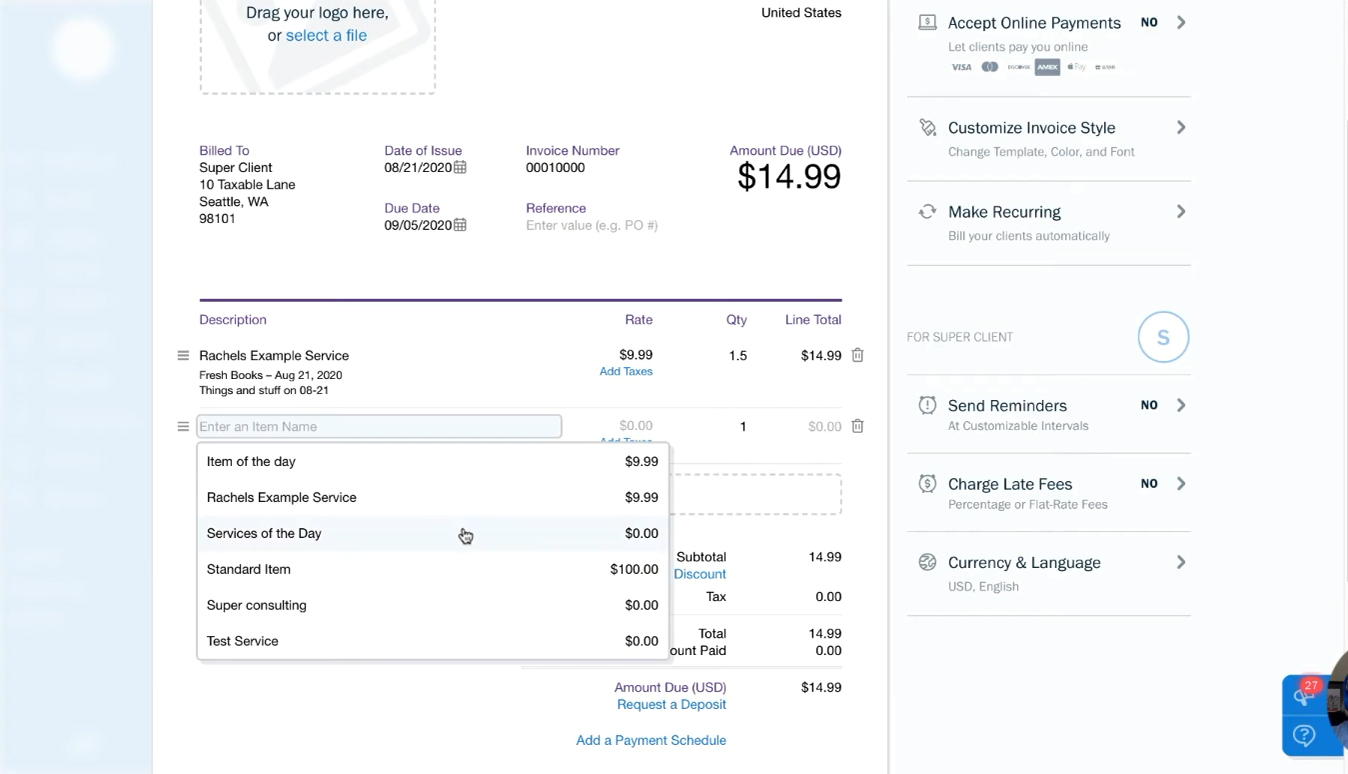
If you need to add a new line (for time you forgot to enter) you click the big + Add a Line button. A new empty line will appear where you can select an item/service to add.

Add a line to a new invoice in Freshbooks.

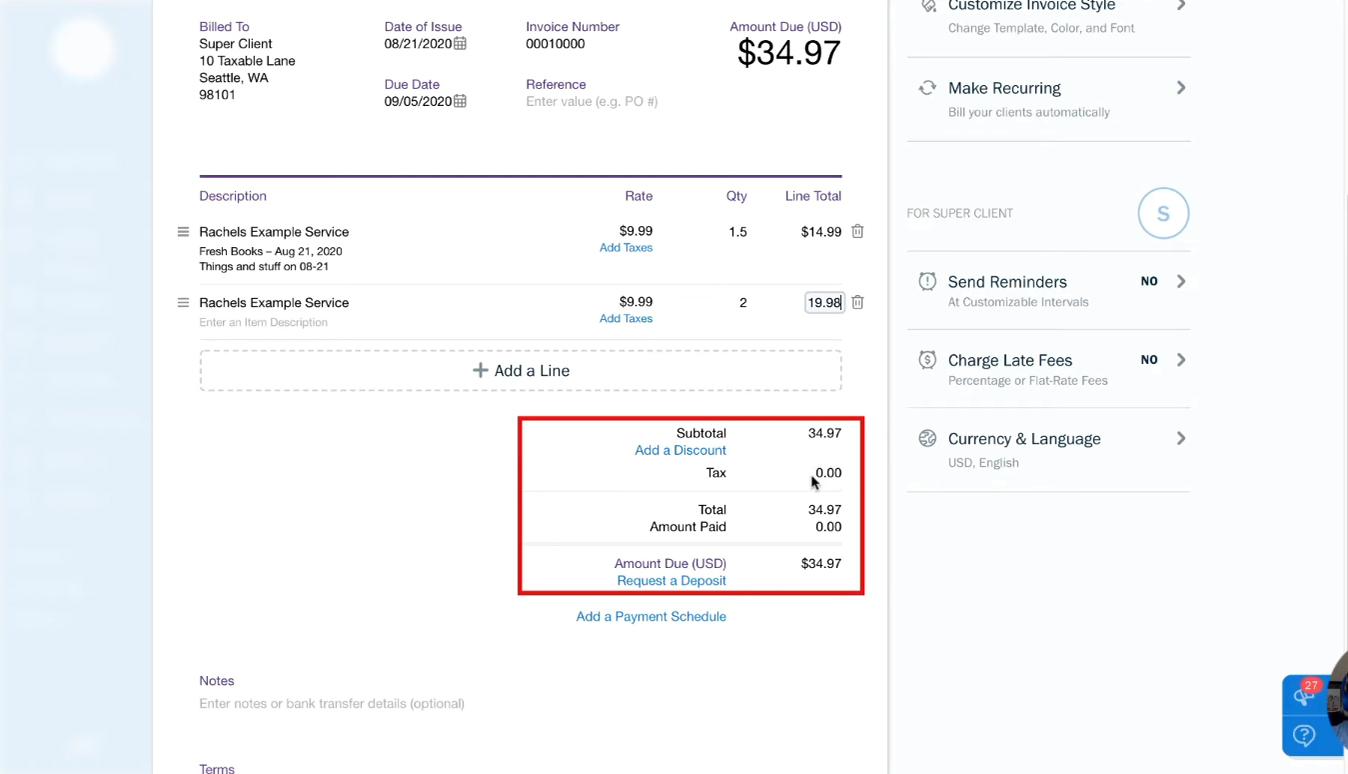
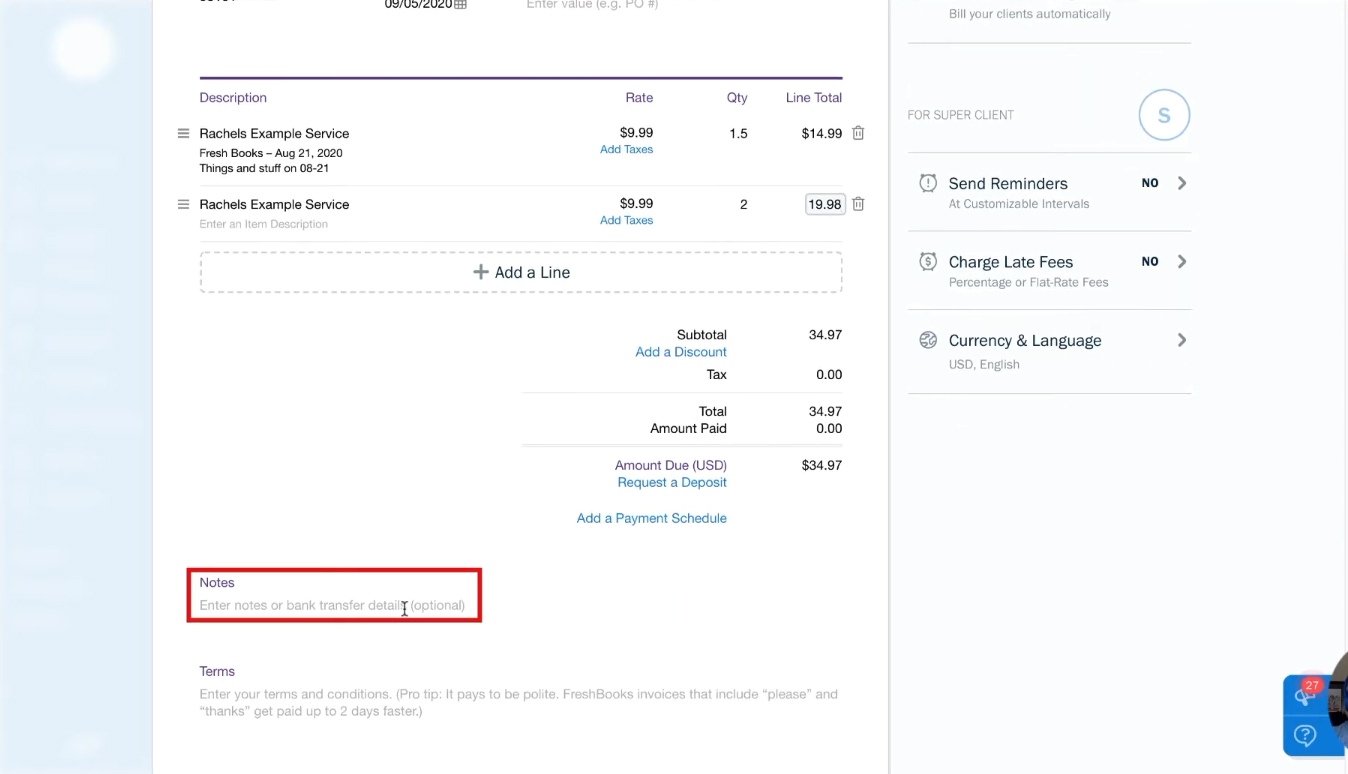
At the bottom of the invoice you’ll see the Subtotal, tax if applicable, amount paid (if the client partially paid already), and the amount due.

Viewing the subtotal and totals in an invoice in Freshbooks.

At the bottom of the invoice there’s sections for Notes or Terms. You can enter these if you’d like.

Notes field in a Freshbooks Invoice

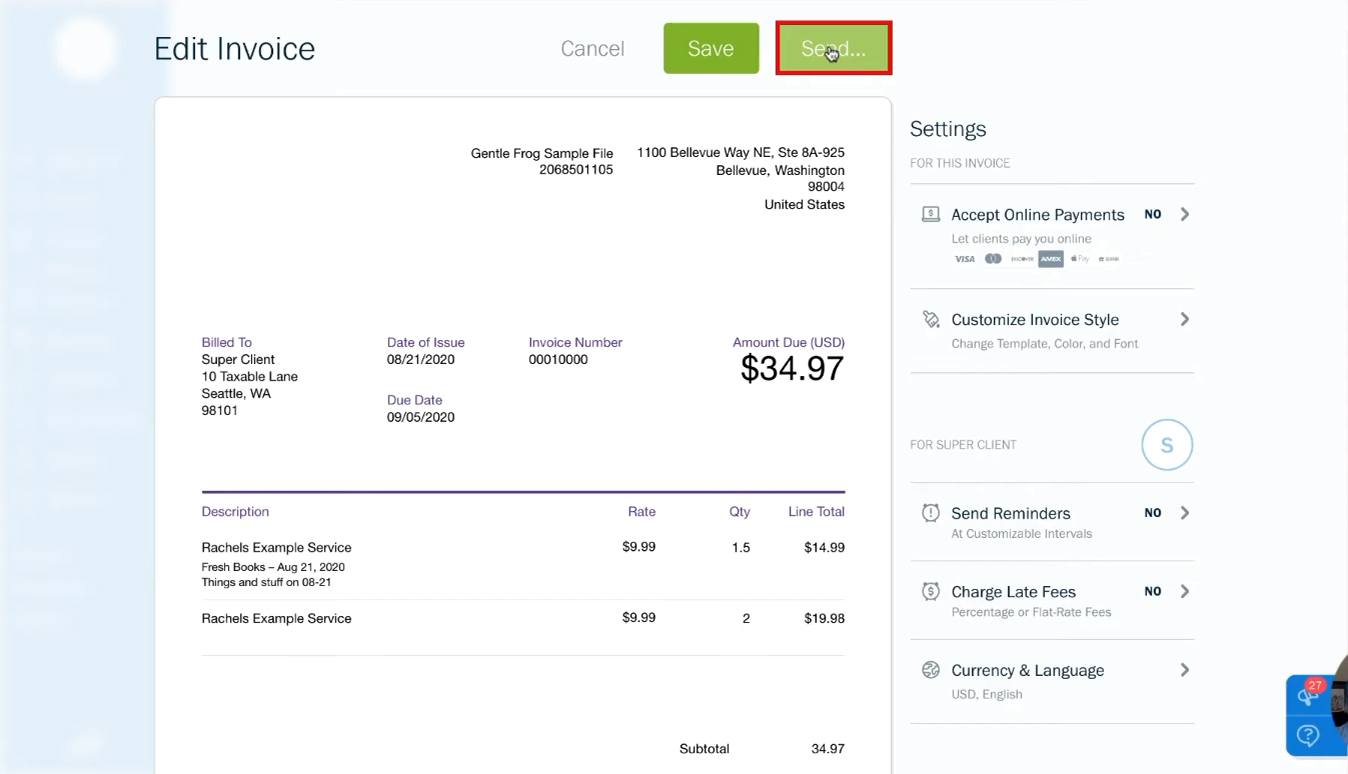
Once you’ve double-checked that everything in your invoice is correct and the way you’d like it. You can send the invoice to your client by clicking the green Send button at the top of the screen.

Sending an invoice in Freshbooks

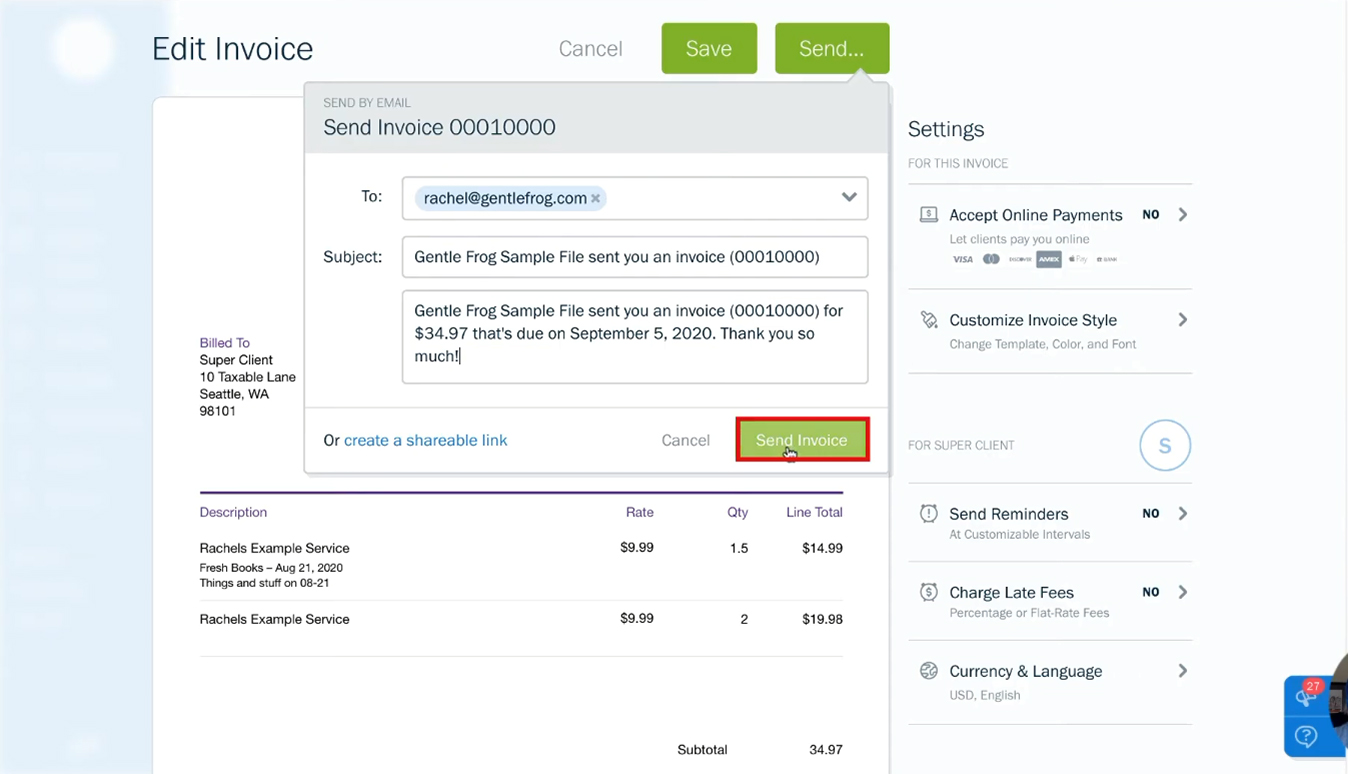
A pop-up will appear where you can enter who the invoice is sending to, the subject of the email they’ll receive, and the body of the invoice. When you’re ready click the Send Invoice button to send the invoice to your client.

Sending an invoice by email in Freshbooks

That’s how easy it is to send clients invoices from within Freshbooks.

☕ If you found this helpful you can say “thanks” by buying me a coffee…
https://www.buymeacoffee.com/gentlefrog

If you’d like to watch me walk through the process of creating an invoice in Freshbooks check out the video below:

Need some one-on-one QuickBooks assistance?
Share Now

This content is for information purposes only and should not be considered legal, accounting, or tax advice, or a substitute for obtaining such advice specific to your business. Additional information and exceptions may apply. Applicable laws may vary by state or locality. No assurance is given that the information is comprehensive in its coverage or that it is suitable in dealing with a customer’s particular situation. Gentle Frog, LLC does not have any responsibility for updating or revising any information presented herein. Accordingly, the information provided should not be relied upon as a substitute for independent research. Gentle Frog, LLC does not warrant that the material contained herein will continue to be accurate, nor that it is completely free of errors when published. Readers and viewers should verify statements before relying on them.

Leave a Reply

Your email address will not be published. Required fields are marked *

Read similar articles

How to Use the New QuickBooks Online Invoice Layout (2024)

Learn how to Use the new QuickBooks Online invoice layout.

Have a QuickBooks / Bookkeeping Question?

Let me know what you’d like to see in future videos, blog posts, and courses.

Review Your QuickBooks

Are you a small business owner struggling to make sense of your QuickBooks data?

  • Discover how to spot costly mistakes in your bookkeeping and fix them quickly and easily.

  • Save time and money by streamlining your bookkeeping process and reducing errors.

  • Learn how to identify trends in your financial data so you can make smarter business decisions.

  • Get organized and stay on top of your finances by tracking expenses, managing receipts, and closing your books effectively.

Sign up now for this free mini-course and start mastering the essential bookkeeping skills that every small business owner needs to succeed!

FREE Mini Course

Sign up now and enjoy the peace of mind that comes with knowing your bookkeeping is accurate, up-to-date, and free from costly errors.

We won’t send spam. Unsubscribe at any time.