In this tutorial, I’ll show you two different ways to apply a discount to an invoice in QuickBooks Canada.
Quick Instructions:
Method #1:
- Click the +New button in the upper-left corner
- In the CUSTOMERS column select Invoice
- Use the Discount drop-down to select the discount type
- Enter amount
Method #2:
Create a discount service:
- Click the Gear icon in the upper-right corner
- In the LISTS column select Products and Services
- Click the green New button on the right
- Select Service
- Fill in the service creation screen
- Name: Name your discount whatever you’d like
- Description: Enter a description
- Income account: Select the appropriate account for your business
- Sales price/rate: Leave blank
- Sales Tax: Leave blank
- Click the green Save and close button
Apply your discount service to an invoice:
- Click the +New button in the upper-left corner
- In the CUSTOMERS column select Invoice
- Add the products/services you’re selling on the invoice
- Add your Discount service with a negative amount
- Apply the appropriate Sales Tax to your invoice
Adding a Discount To an Invoice – Method #1
For the first method, I’m going to show you how to add a discount directly to an invoice.
First, we’ll create a new invoice by clicking the +New button in the upper left corner. Select Invoice in the CUSTOMERS column.
In the lower right-hand corner of the invoice is a Discounts drop-down.
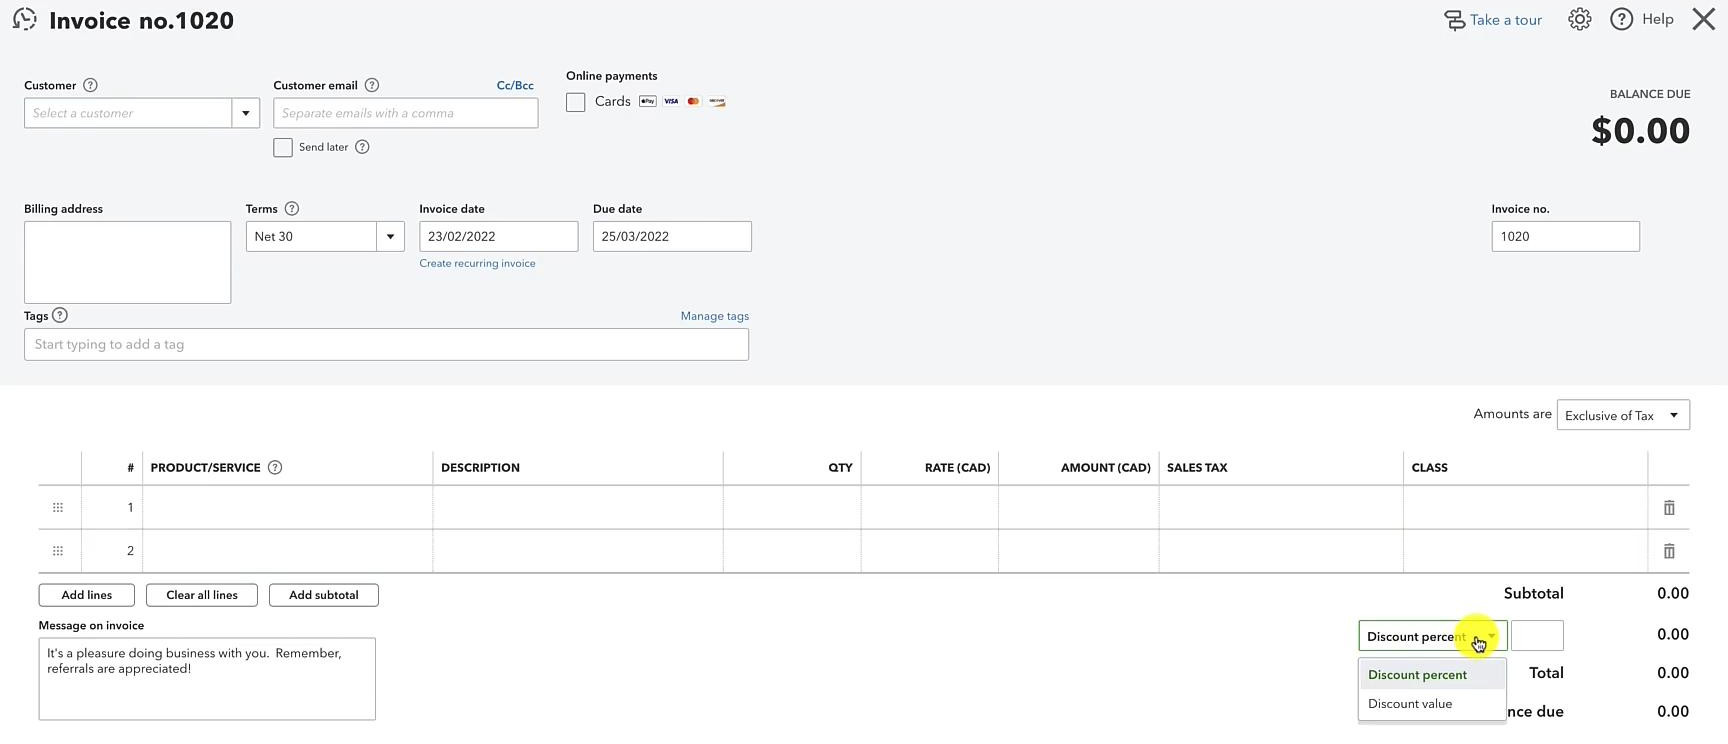
From this drop-down, you can add a percentage or value discount to your invoice.
A value discount is a set amount, like $10 off.
Discount Applied Directly an invoice on the Profit and Loss Report
Now you know one way to add a discount to an invoice. Let’s see how this looks on your Profit and Loss report.
Click the Gear icon in the upper-right-hand corner. In the YOUR COMPANY column select Account and settings.
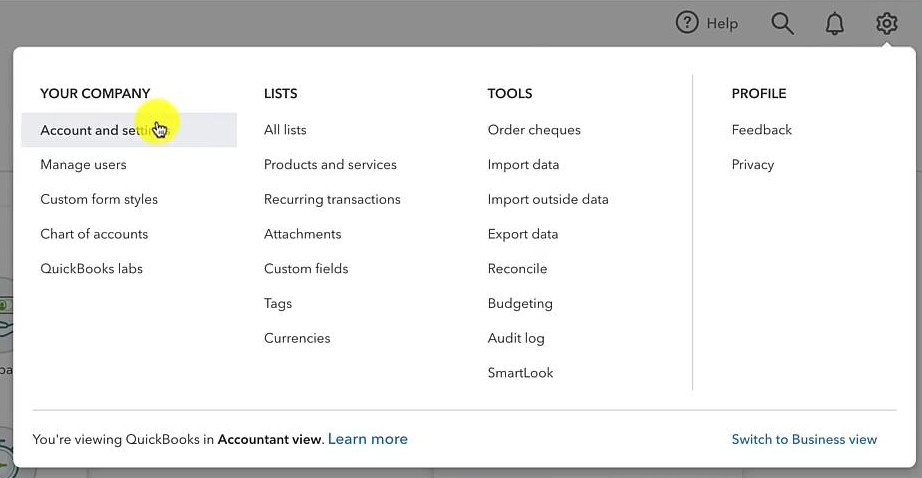
On the left-hand side click Advanced.
In the Chart of accounts section, you’ll see a “Discount account” and to the right of that “Discount given.”
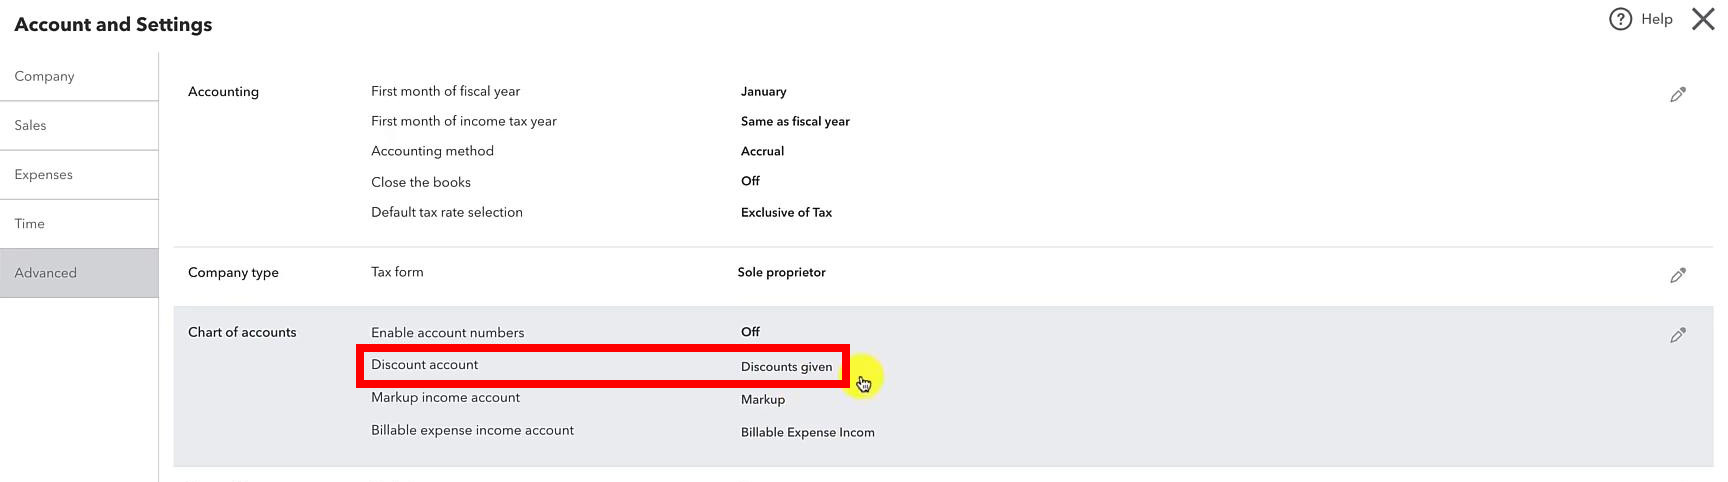
If you wanted discounts to appear in a different account you do that. Clicking the pencil to the right allows you to edit. Click the drop-down next to “Discount account” and you can change it to a different account.
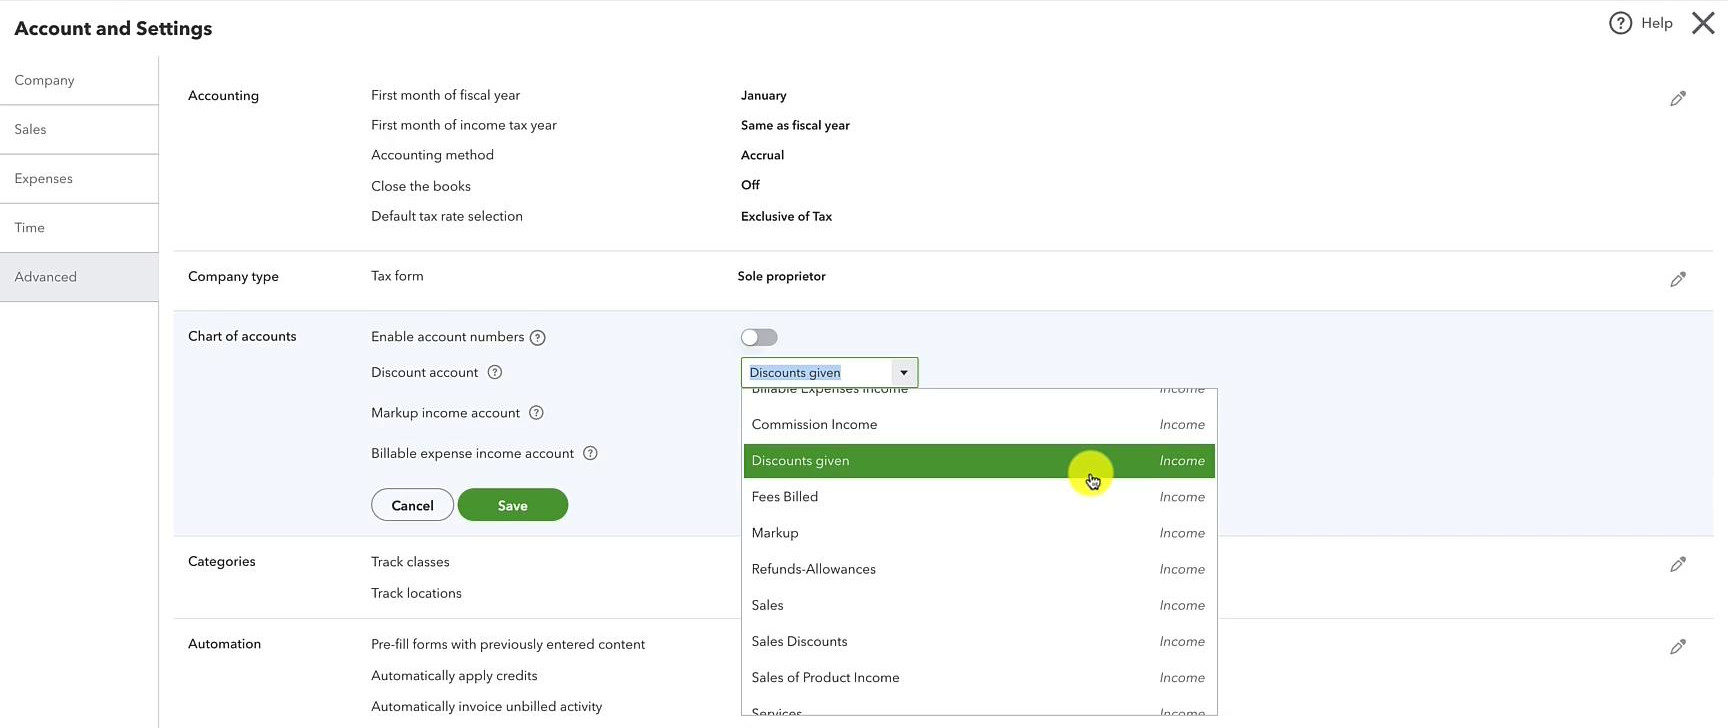
You’ll notice the “Discounts given” account is an Income account. This means when you view your Profit and Loss you’ll see Discounts given under income as a negative number.
Creating a Discount Product/Service – Method #2
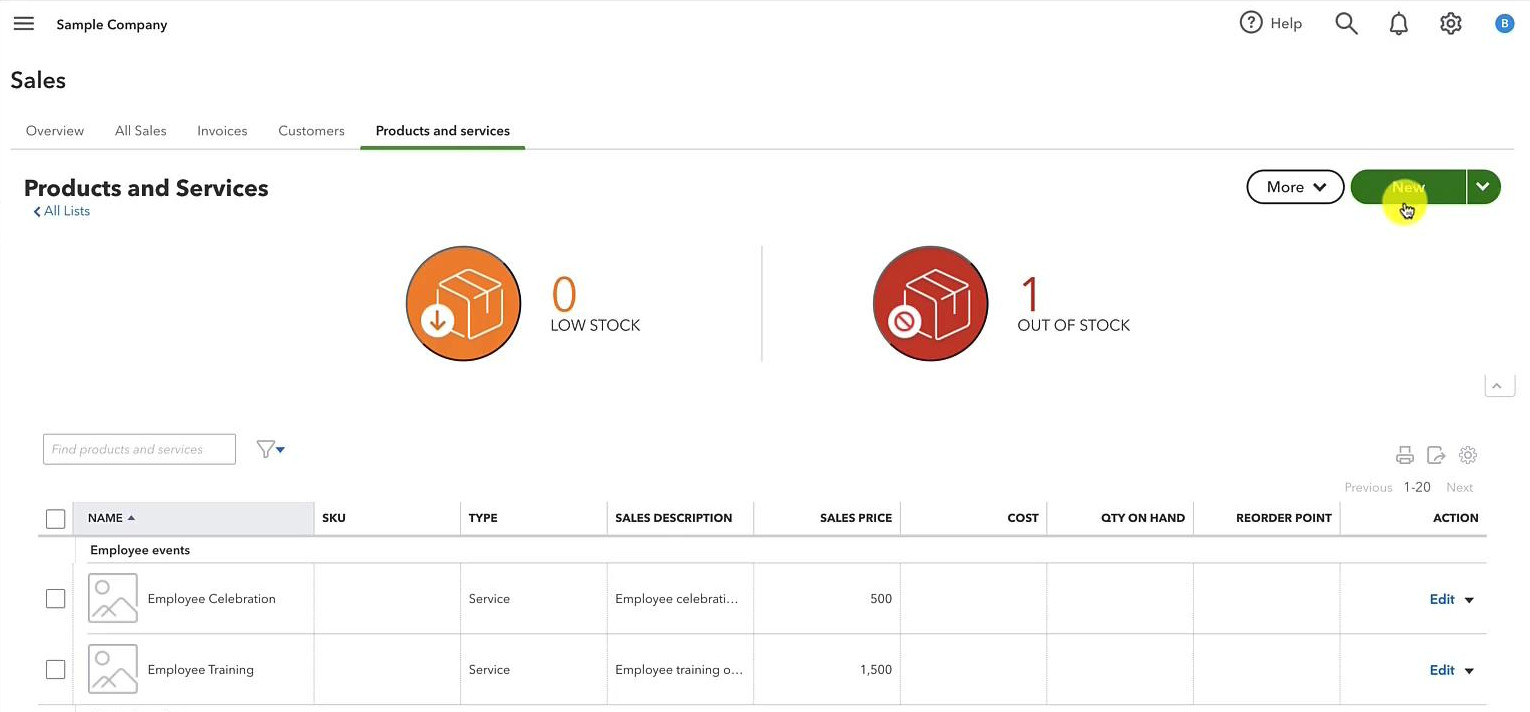
For the second method, we’ll create a discount product/service.
To create this click the gear in the upper-right-hand corner and select Products and Services in the LISTS column.
Click the green New button on the right.
And then select Service.
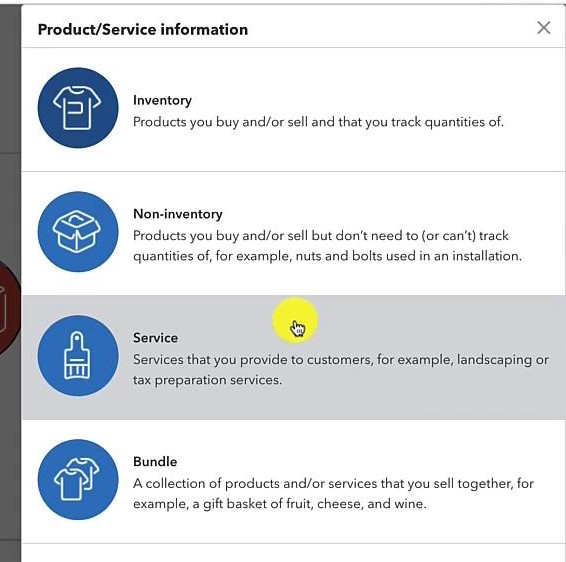
This will opens the Service creation screen.
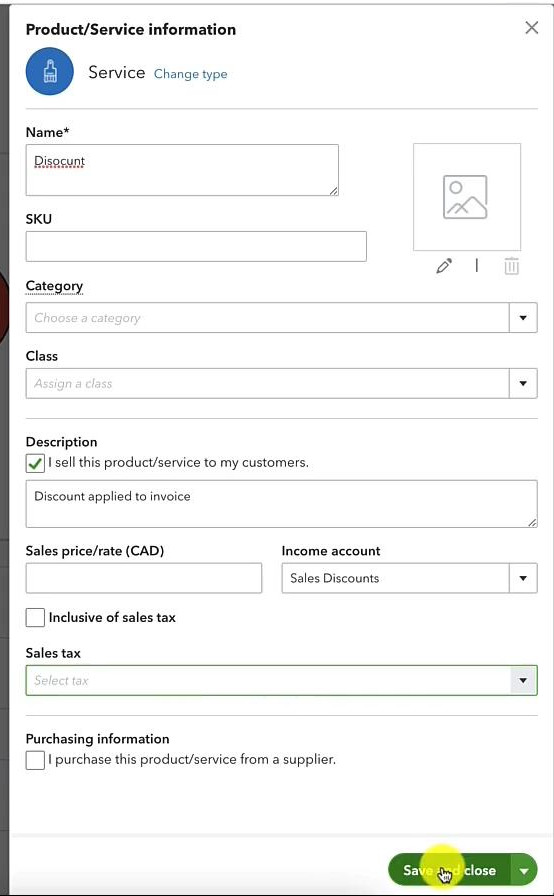
We’ll name this service “Discount” and skip SKU, Category, and Class.
For description, we’ll enter “discount applied to invoice.” Leave the Sales price/rate blank that way it’ll be blank when you add it to an invoice.
For Income account, we can select whatever account we’d like. For this example, I’m using “Sales Discounts.” You can choose whatever account is appropriate for your business.
Leave Sales tax blank if you sell to people in different provinces.
Click the Save and close button when you’re finished.
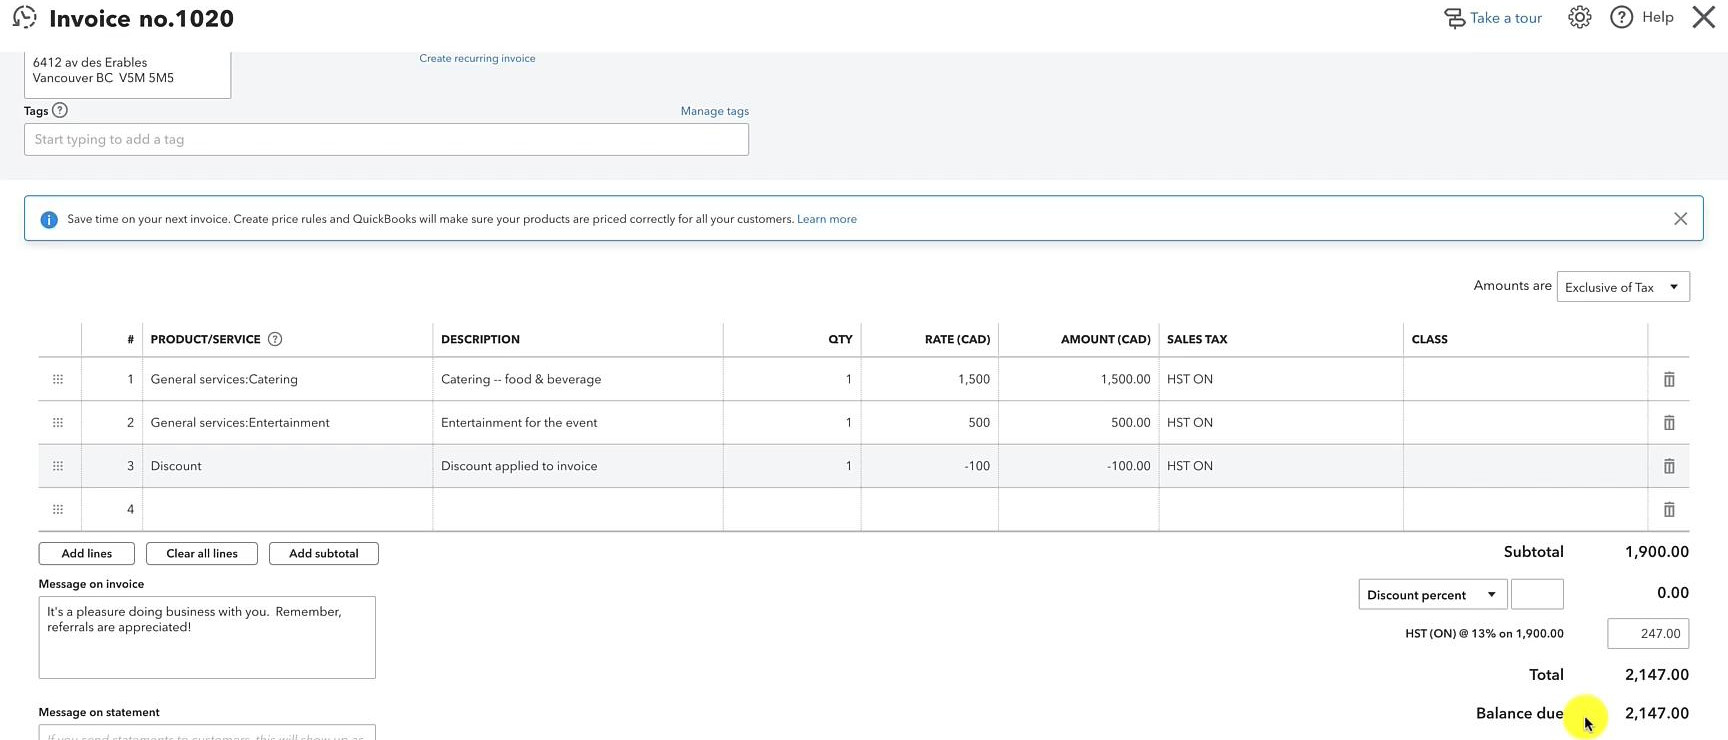
Let’s go back to an invoice and apply our new Discount service.
To do this:
- Add the products/services you’re selling to the invoice
- Add your Discount service with a negative Amount
- Apply the appropriate Sales Tax
Here’s an example of what this looks like:
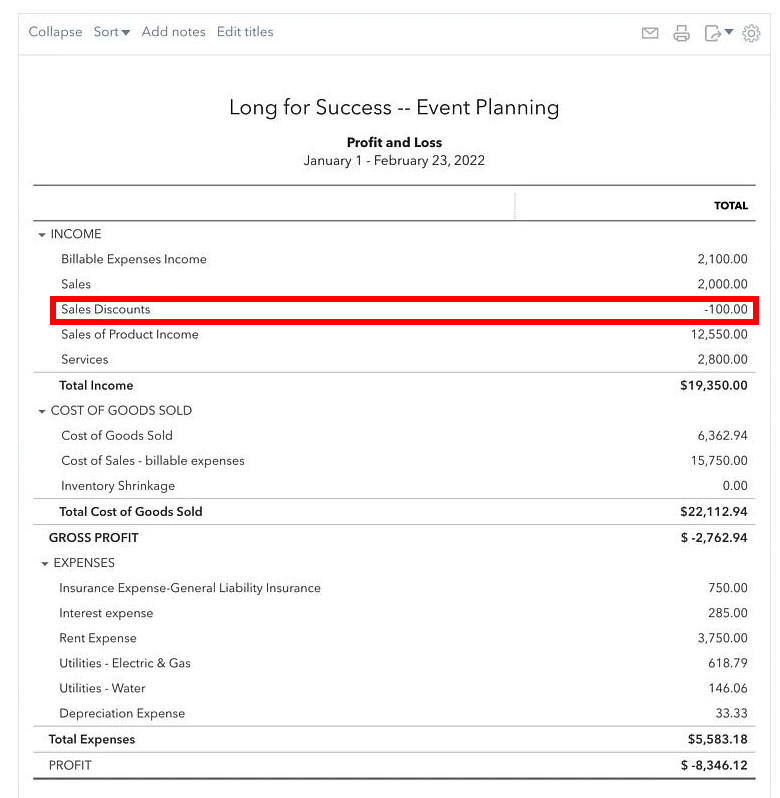
Discount Service on the Profit and Loss Report
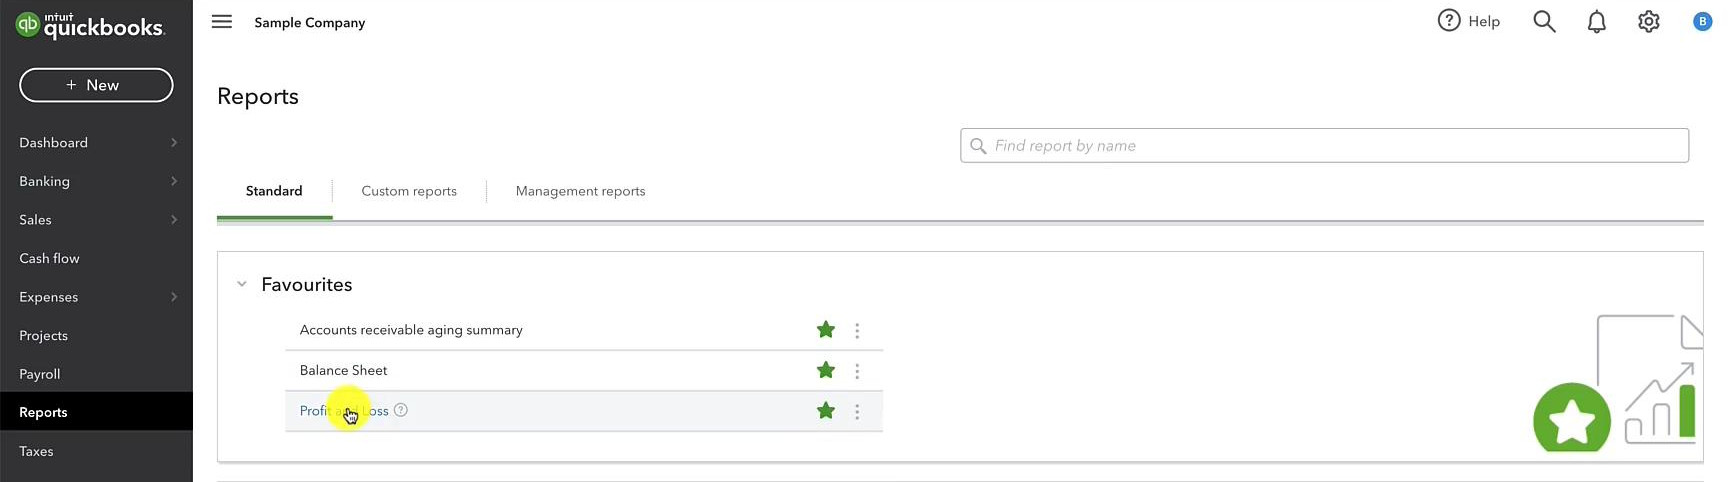
Let’s see how this looks on the Profit and Loss report.
In the left-hand menu click Reports. Then select the Profit and Loss report.
The Sales Discounts shows up as a negative amount under INCOME in my Profit and Loss report, as expected:
You now know how to add discounts to invoices in QuickBooks Canada.
☕ If you found this helpful you can say “thanks” by buying me a coffee…
https://www.buymeacoffee.com/gentlefrog
Below is a video if you prefer to watch me show you how to do this.
If you have any questions about applying discounts to orders or need any help with your QuickBooks click the green button below to schedule a free consultation.