A delayed charge is a charge that gets billed to a customer at a later date.
It’s a “non-posting” transaction that will not affect your reporting. You can use delayed charges to record future transactions you know will happen without affecting your Accounts Receivable.
Quick Instructions:
Create a delayed charge:
- Click the +New button in the upper left corner
- Click Delayed charge under CUSTOMERS
- Fill in the Delayed Charge screen
- Click Save and close
Apply to an Invoice:
- Delayed charges appear on the right after selecting a customer
- Click Add on the charge you’d like to apply to the invoice
Keep reading for a complete walkthrough with screenshots:
How to Create a Delayed Charge
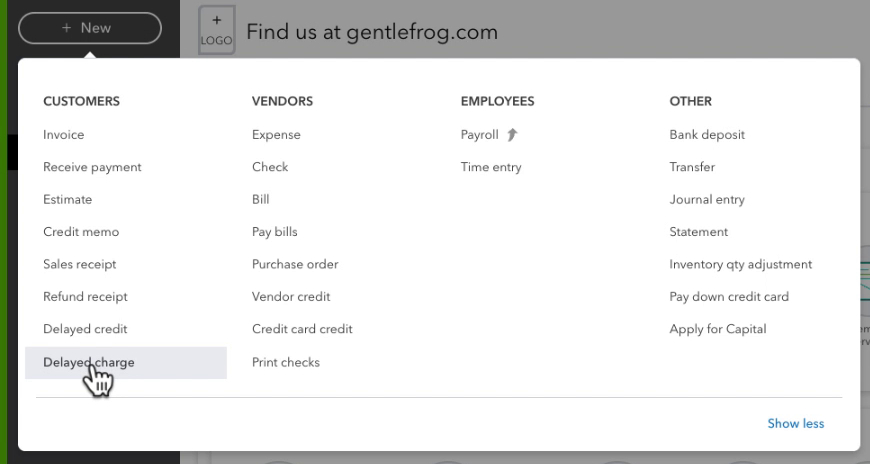
Click the +New button in the upper left corner then, click Delayed charge at the bottom of the CUSTOMERS column.
The Delayed Charge screen looks like a simplified invoice. Your only options are…
- Customer
- Delayed Charge Date
- Delayed Charge no. (optional)
- Tags (optional)
Add products/services like you would on an invoice.
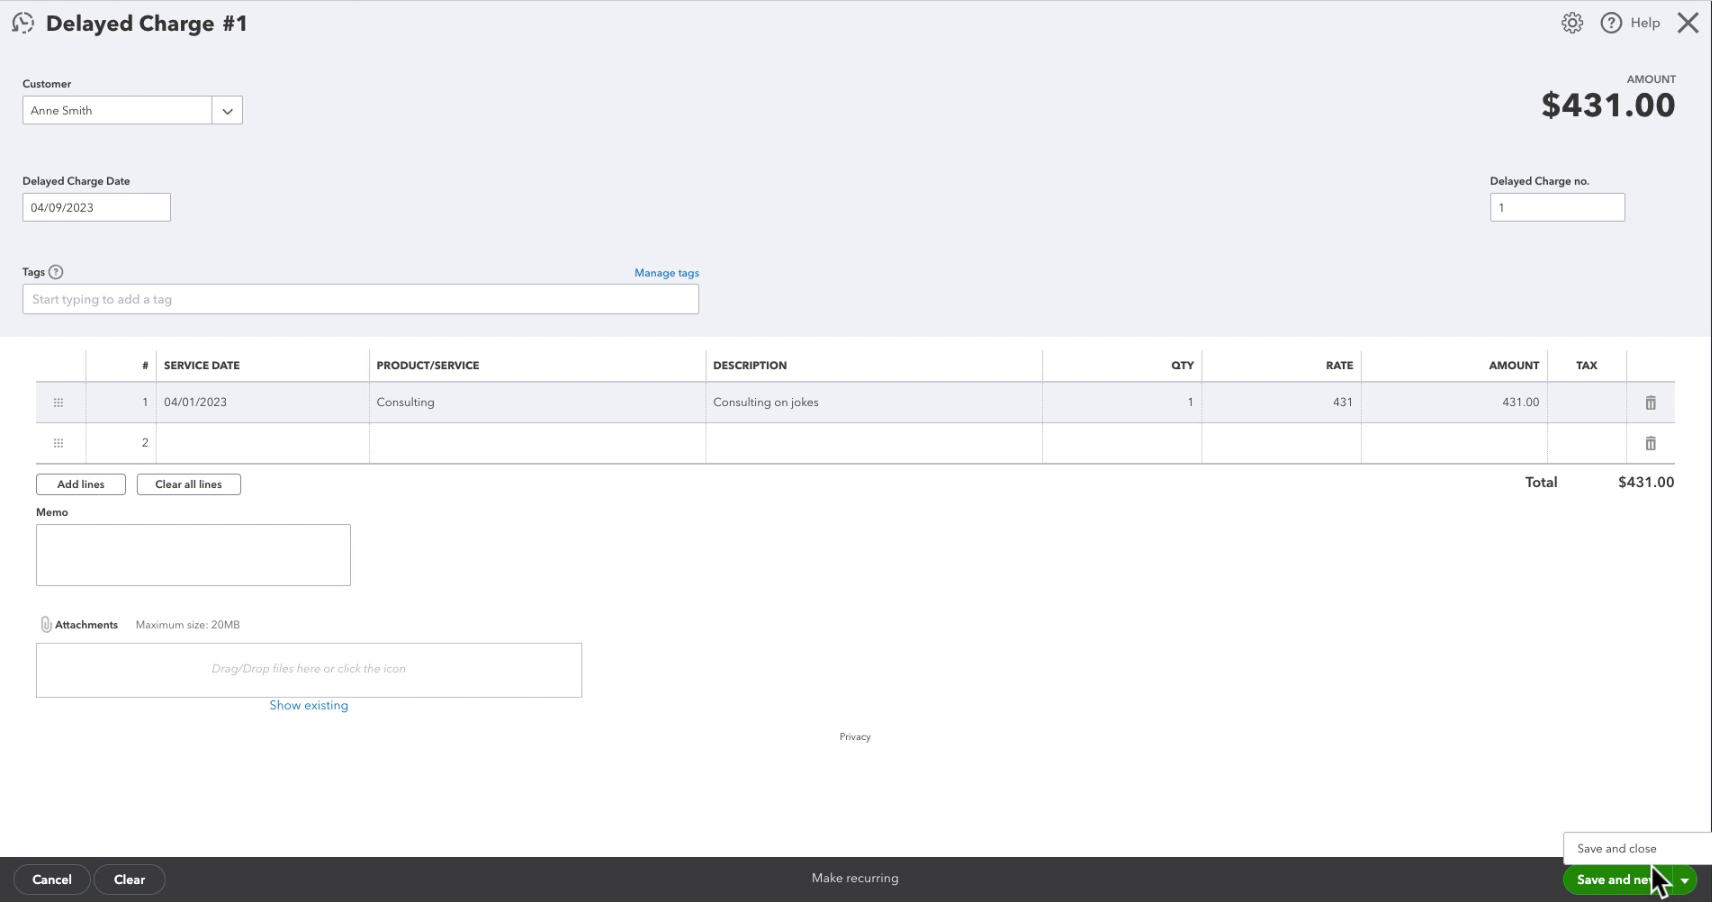
When finished, click the green Save and Close button.
Once you’ve created your charge, you can add it to a future invoice.
Add a Delayed Charge to an Invoice
Delayed charges appear on your invoices’ right after selecting the customer.
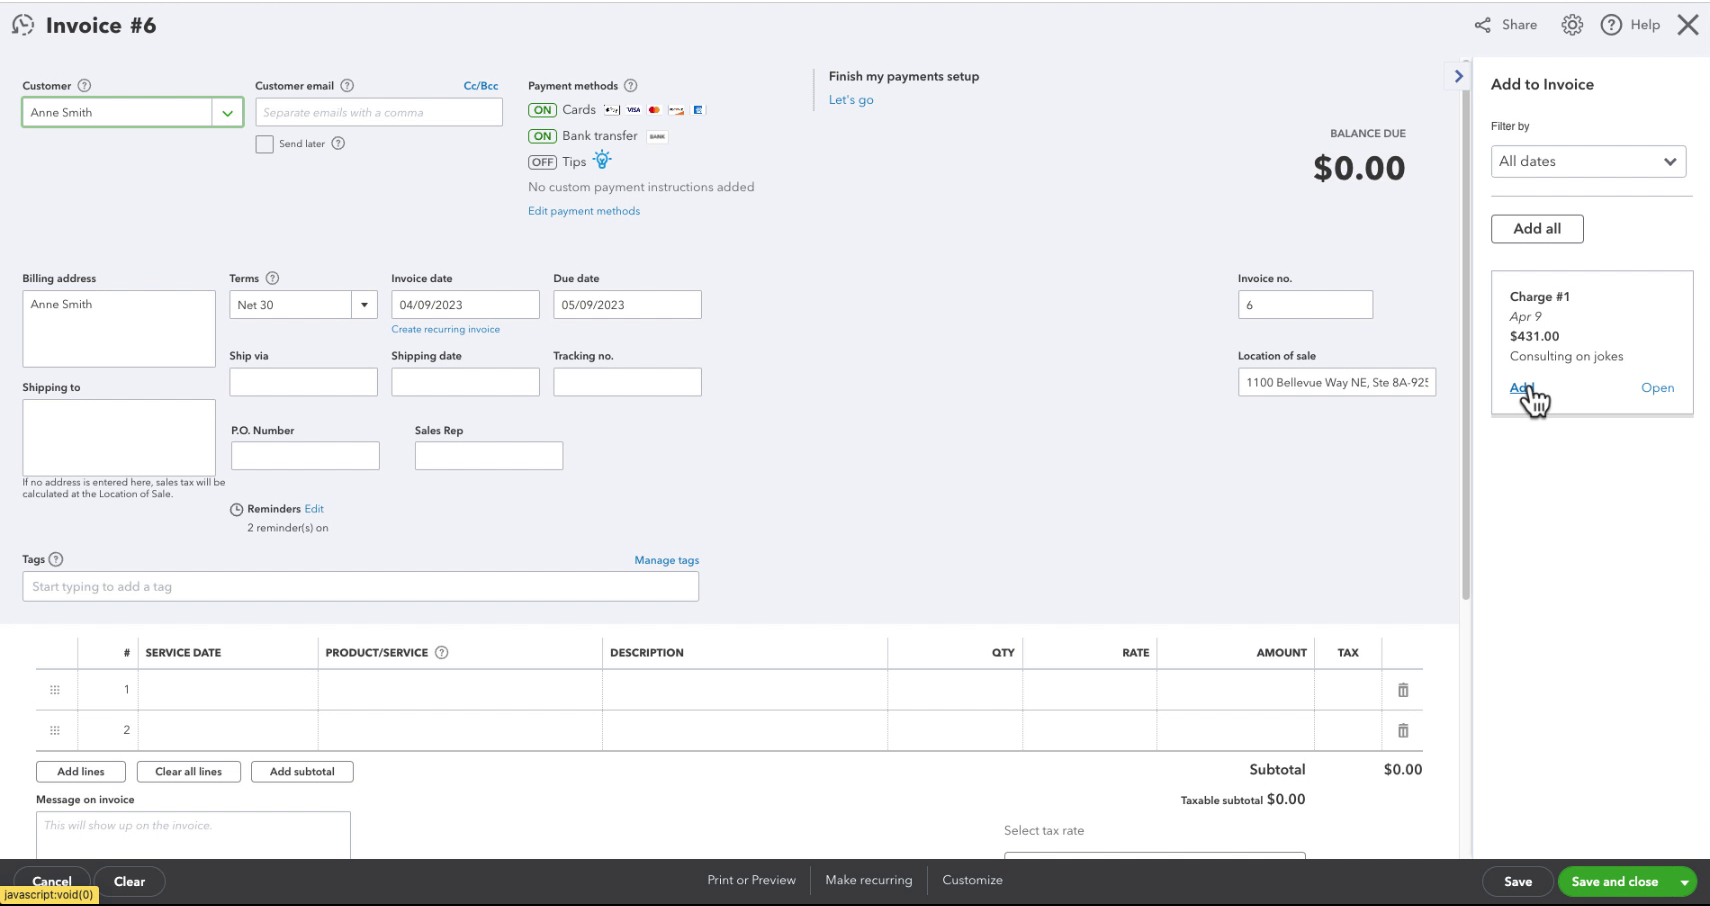
Click the Add link on the charge to add it to the invoice. Finish adding any other products/services to the invoice and save when ready.
Delayed Charge in a Customer’s Account
Delayed charges appear in a customer’s transaction list with a type of Charge.

In the example above, the highlighted charge’s status is Closed because it’s been applied to an invoice. The charge above is Open because it’s not been added to an invoice yet.
You’ll see the Linked Invoice at the top when you open a closed charge. Clicking on the link shows you the invoice’s date and number.

You can click on the date to open the linked invoice.
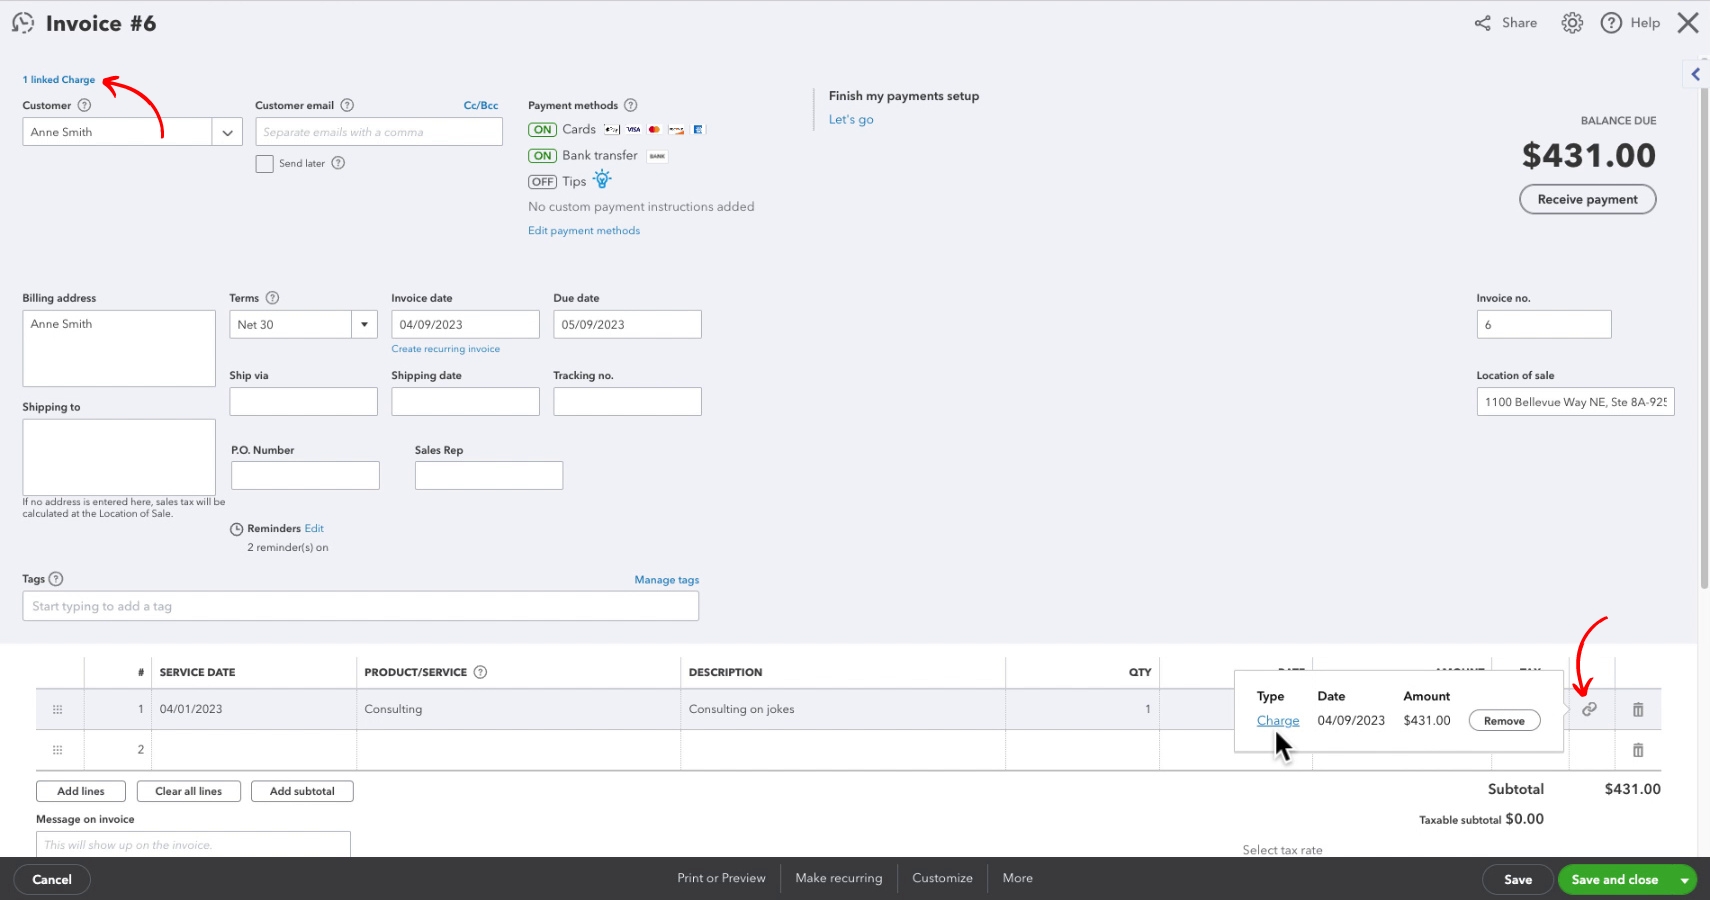
The invoice has a link showing any linked charges at the top (just like the charge had a link to the invoice). You’ll also see a little chain link icon for any product/service linked to a charge. You can click that icon to show you information for the charge it’s linked to.
You now know how to create a delayed charge in QuickBooks Online and add it to an invoice. Check out the video below if you’d like to watch a walkthrough.
☕ If you found this helpful you can say “thanks” by buying me a coffee… https://www.buymeacoffee.com/gentlefrog
If you have questions about delayed charges in QuickBooks Online click the green button below to schedule a free consultation.