How to Customize the Invoice Template in QuickBooks Premier – Part 1

Written By

This is part one of a QuickBooks tutorial where I show you how to create a custom invoice template in QuickBooks Premier.

Quick Instructions:

  1. Click the Create Invoice icon on the Home Page
  2. Select the Formatting menu
  3. Click Customize Data Layout in the Formatting menu
  4. Click the blue Make a Copy button on the Locked Template pop-up
  5. Check off which options you want to appear on the screen or the printed invoice

Keep reading for full instructions with screenshots.

Let’s start by taking a look at your current invoice template.

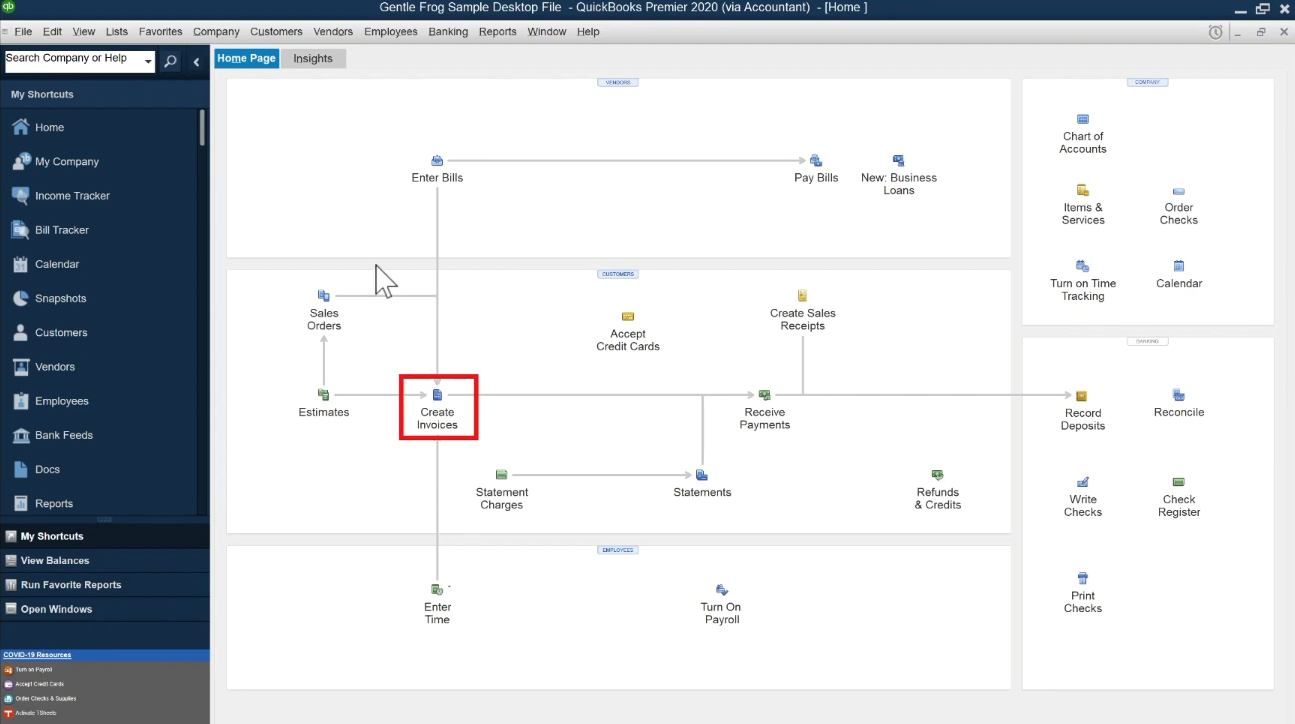
On the Home Page click on the Create Invoices icon.

Create Invoice icon on QuickBooks Premier Home Page

On the Invoice page’s menu click Print -> Preview.

Selecting Print preview for an invoice in QuickBooks Premier.

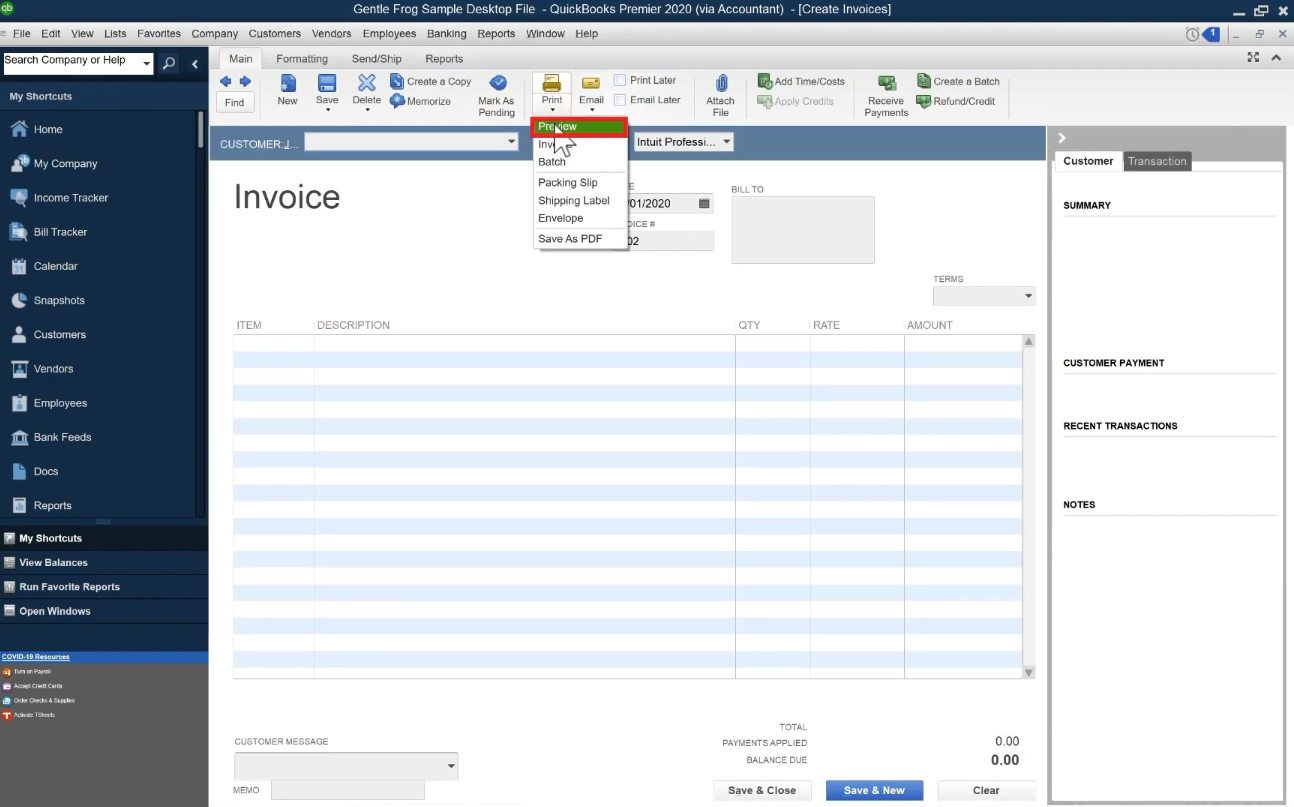
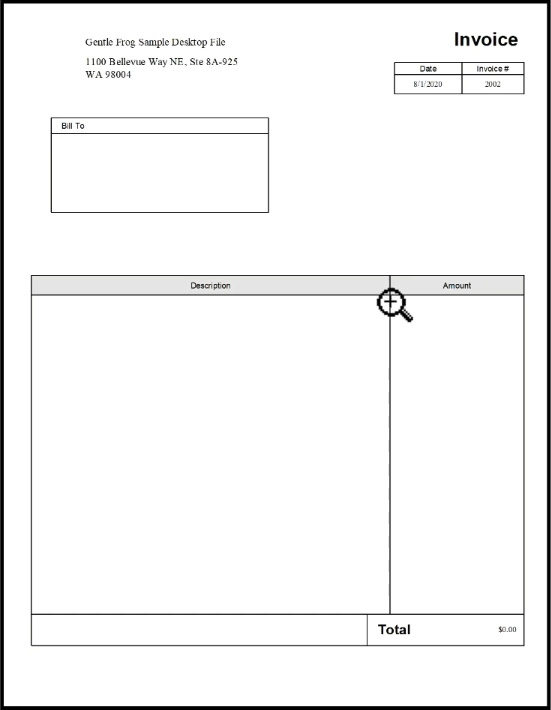
This will open a preview of what your invoice currently looks like.

In my example you can see the address in the upper left-hand corner isn’t formatted correctly. And the Total box at bottom doesn’t line up with the Amount field.

Print preview of the invoice template in QuickBooks Premier.

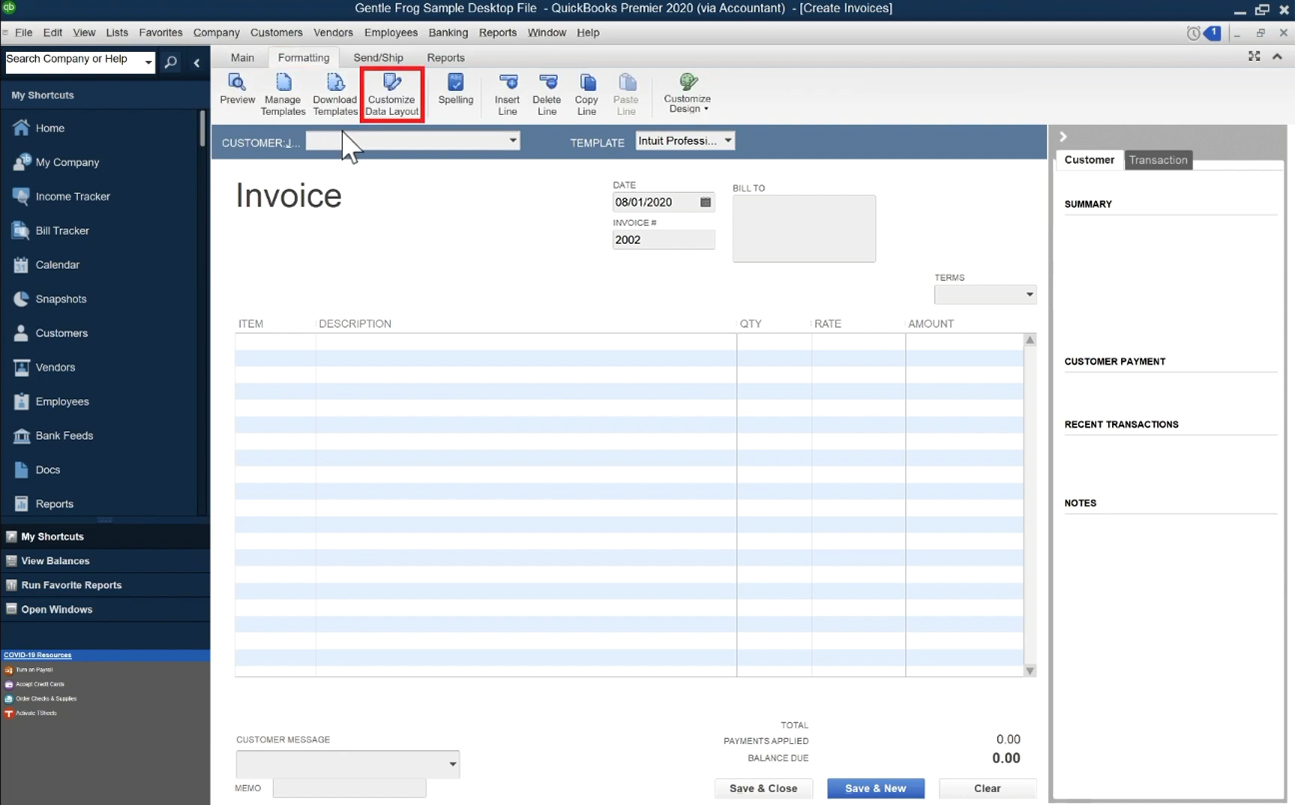
To customize your template, on the Invoice screen, select the Formatting menu. Then click Customize Data Layout.

Customize Data Layout in the QuickBooks Premier Formatting menu of an invoice.

A pop-up will appear letting you know you can’t edit the default template but you can make a copy that you can edit. Click the blue Make a Copy button to continue.

In the Additional Customization pop-up you’ve got several tabs with different options.

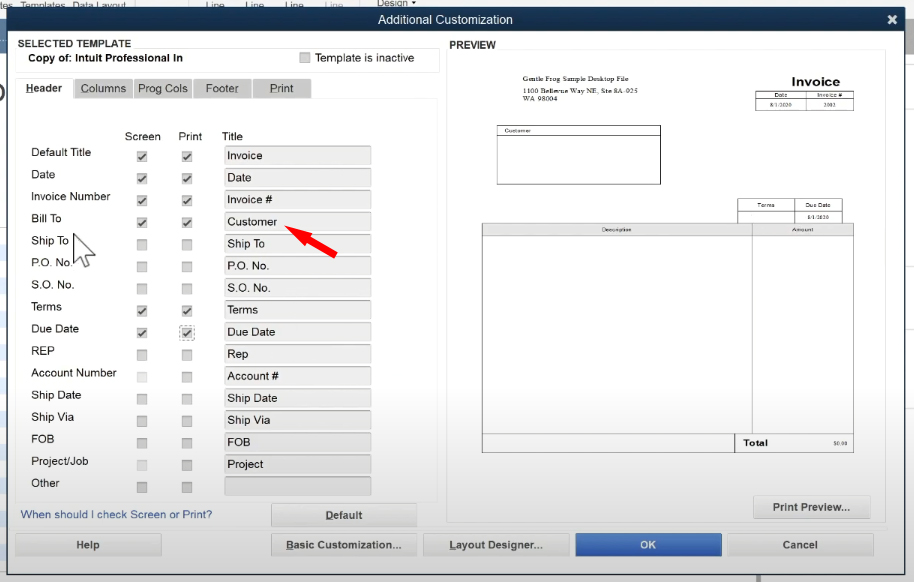
The first tab is the Header.

There are two columns of checkboxes next to the different options, “Screen” and “Print.” This allows you to see certain items on the screen as you’re editing an invoice. Versus what will appear when you print an invoice for your client.

The Title column lets you edit the next that appears for that option. In my example I’ve changed “Bill To” to “Customer.”

Editing a Title in the invoice customization in QuickBooks Premier.

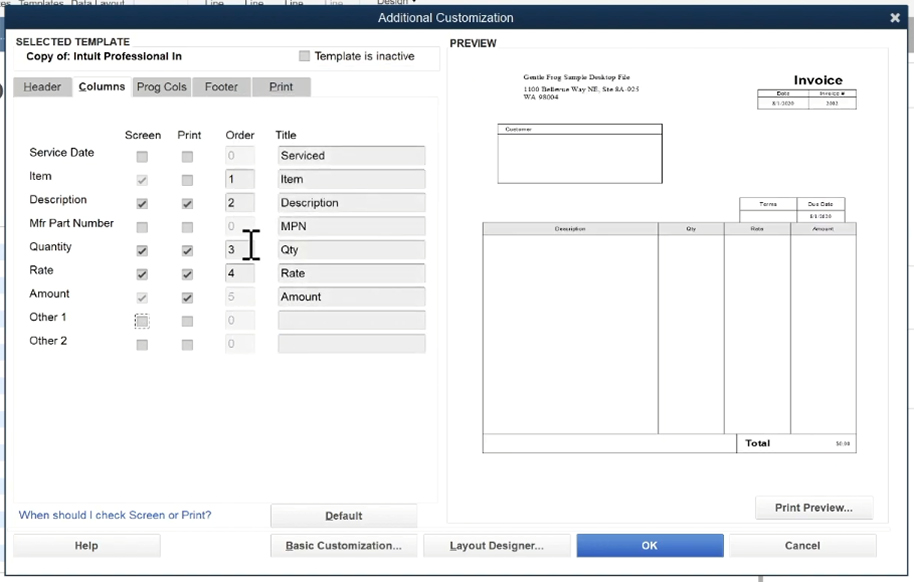
The second tab is Columns. In the original preview I only had the Description and Amount columns.

I’m going to add the Quantity and Rate columns to my template.

Columns tab in the invoice customization in QuickBooks Premier.

The third tab “Prog Cols” is for your sales order columns. I’m going to ignore this one.

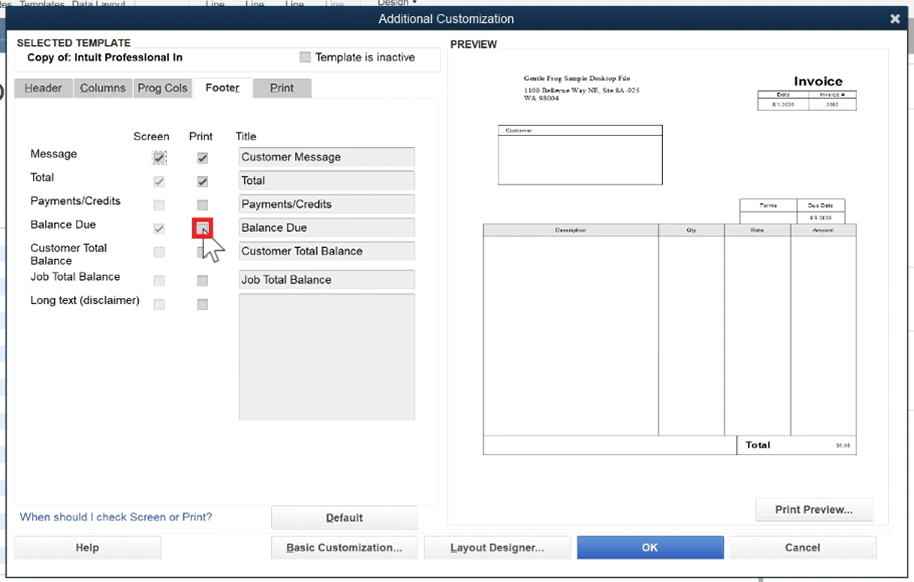
The fourth tab is the Footer. I’m not going to make any changes to this one. But, you might want to add Balance Due if you have clients who make payments so you can show them how much is left to pay.

Balance Due in the Footer section of the invoice customization in QuickBooks Premier

That’s the end of part one. In part two we’ll go over the layout designer where we can get everything lined up.

☕ If you found this helpful you can say “thanks” by buying me a coffee…
https://www.buymeacoffee.com/gentlefrog

If you’d like to watch me walk through this process check out the video below:

Need some one-on-one QuickBooks assistance?
Share Now

This content is for information purposes only and should not be considered legal, accounting, or tax advice, or a substitute for obtaining such advice specific to your business. Additional information and exceptions may apply. Applicable laws may vary by state or locality. No assurance is given that the information is comprehensive in its coverage or that it is suitable in dealing with a customer’s particular situation. Gentle Frog, LLC does not have any responsibility for updating or revising any information presented herein. Accordingly, the information provided should not be relied upon as a substitute for independent research. Gentle Frog, LLC does not warrant that the material contained herein will continue to be accurate, nor that it is completely free of errors when published. Readers and viewers should verify statements before relying on them.

Leave a Reply

Your email address will not be published. Required fields are marked *

Read similar articles

Understanding the Dates on a Credit Card Statement

Learn how to understand the dates on your credit card statements so you can get the right statements to your bookkeeper.

Have a QuickBooks / Bookkeeping Question?

Let me know what you’d like to see in future videos, blog posts, and courses.

Review Your QuickBooks

Are you a small business owner struggling to make sense of your QuickBooks data?

  • Discover how to spot costly mistakes in your bookkeeping and fix them quickly and easily.

  • Save time and money by streamlining your bookkeeping process and reducing errors.

  • Learn how to identify trends in your financial data so you can make smarter business decisions.

  • Get organized and stay on top of your finances by tracking expenses, managing receipts, and closing your books effectively.

Sign up now for this free mini-course and start mastering the essential bookkeeping skills that every small business owner needs to succeed!

FREE Mini Course

Sign up now and enjoy the peace of mind that comes with knowing your bookkeeping is accurate, up-to-date, and free from costly errors.

We won’t send spam. Unsubscribe at any time.