
In this blog post, you’ll learn how to create a customer statement in QuickBooks Desktop.
For this example, I’m using QuickBooks Premier 2022.
Quick Instructions:
- In the top menu, click Customers -> Create Statements…
- Enter a Statement Date
- Select a Statement Period date range
- Under SELECT CUSTOMERS select One Customer
- Find your customer in the drop-down list
- Click Print to print out a copy to mail. Or, click E-mail to e-mail a copy of the statement to your customer
Keep reading for a complete walkthrough with screenshots:
Why Create a Statement?
Let’s look at an example of when you might need to create a statement.
Below is a list of transactions from my make-believe customer “Sally The Customer.”
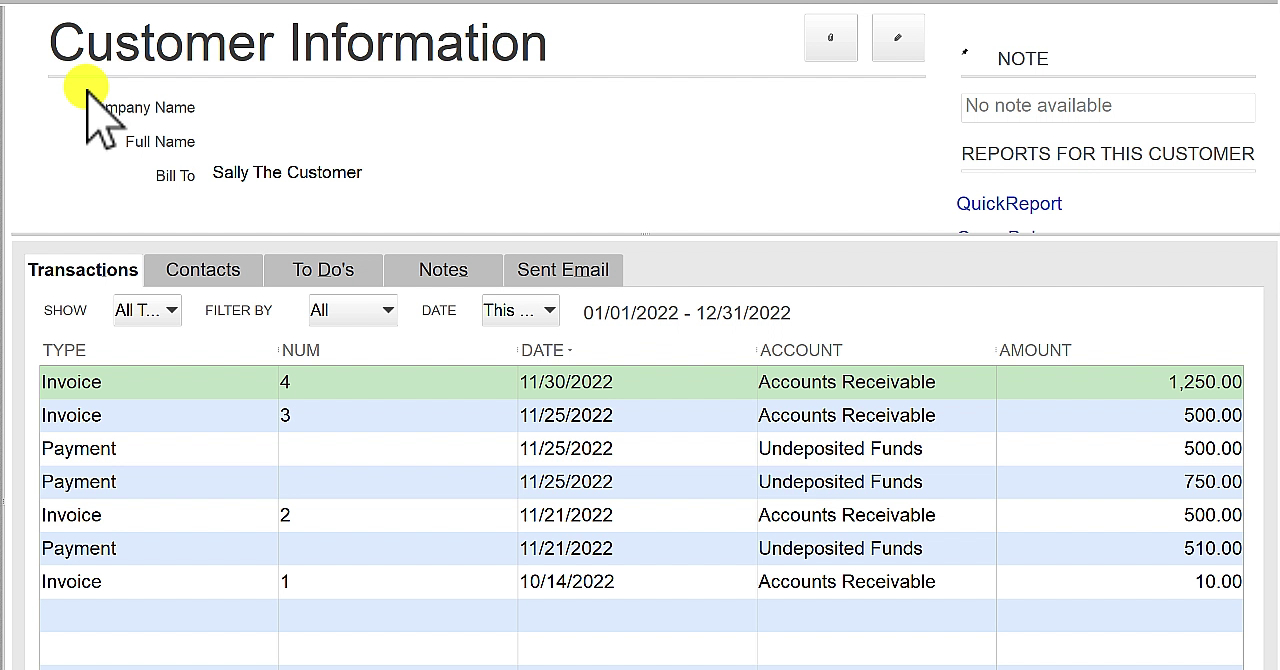
On 11/25/22, Sally prepaid $750.
On 11/30/22, Sally was invoiced for $1,250, but she only owes $500 because she already paid $750.
Here’s what the invoice looks like with the prepayment applied:
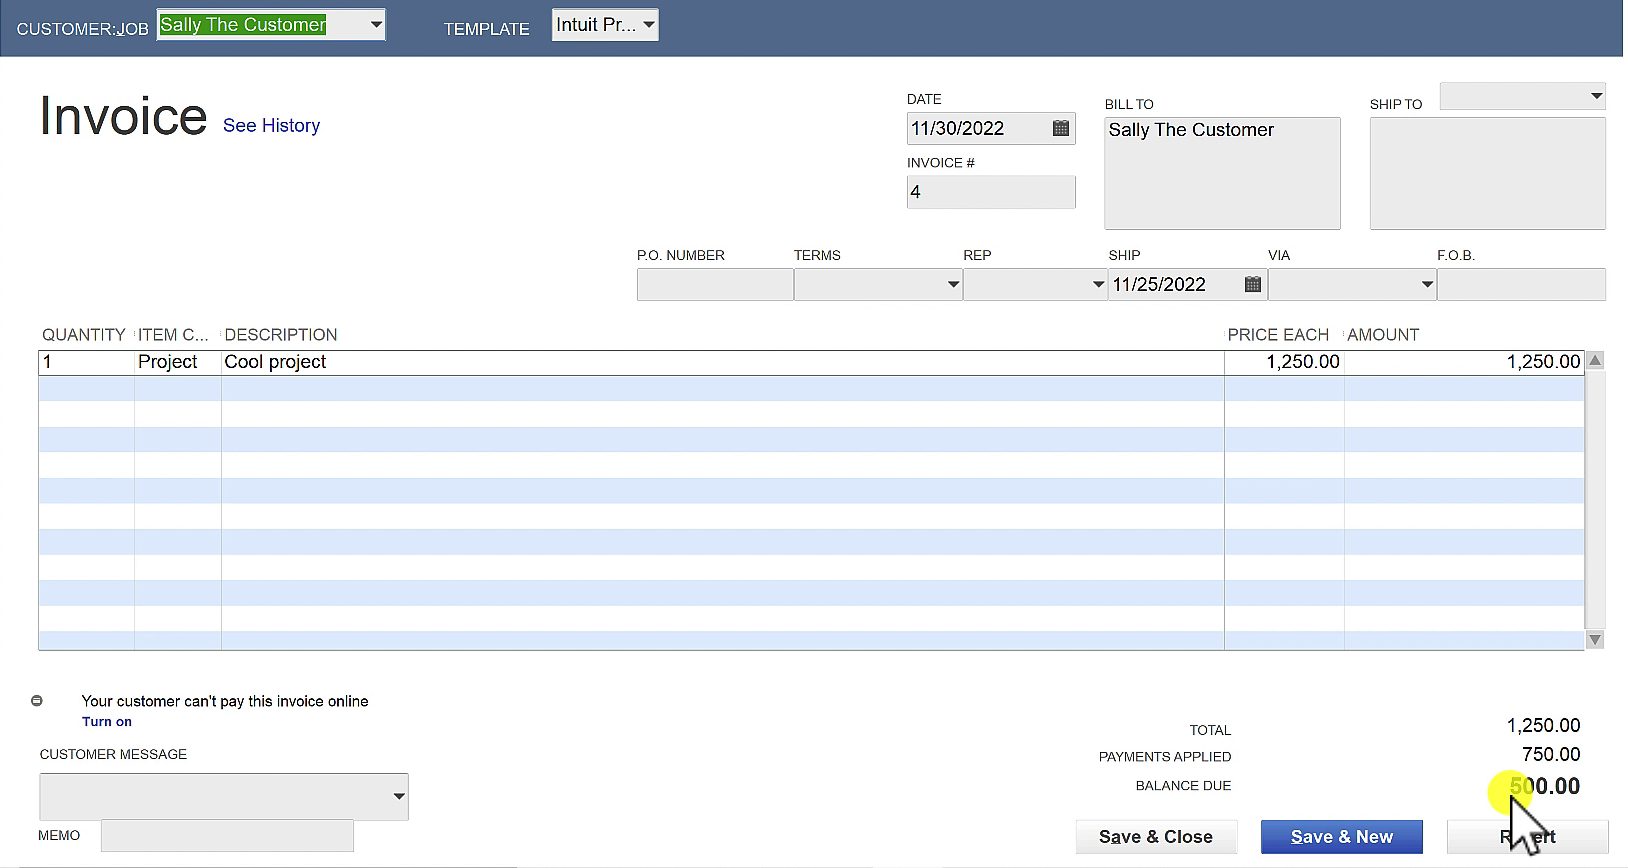
Sally may see this invoice and ask for a list of her invoices and payments that led up to her owing $500. To do that, we create a statement.
Create a Customer Statement
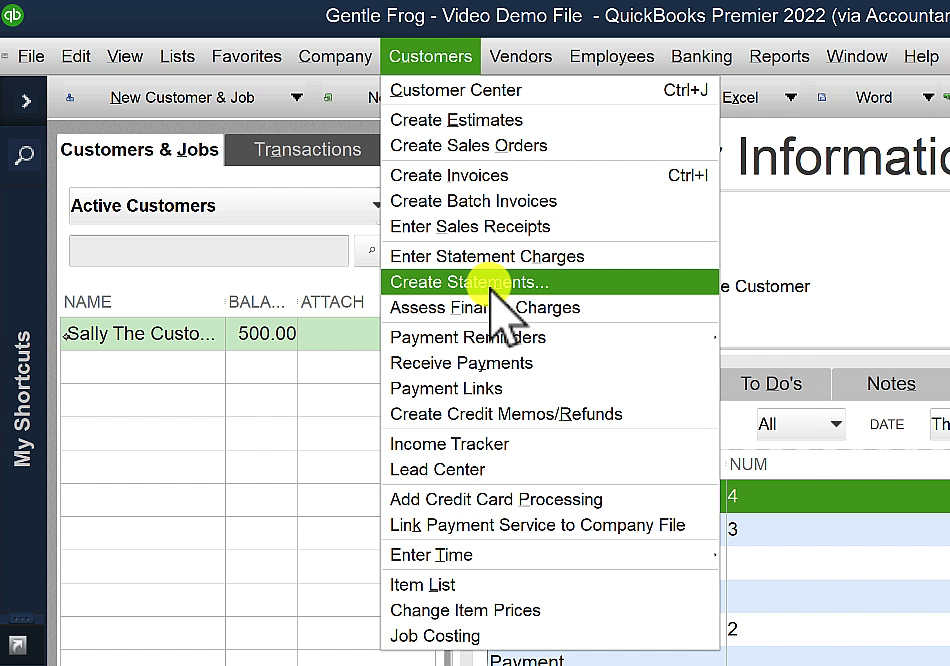
To create a statement for a customer, click Customers in the top menu. Then click Create Statements…
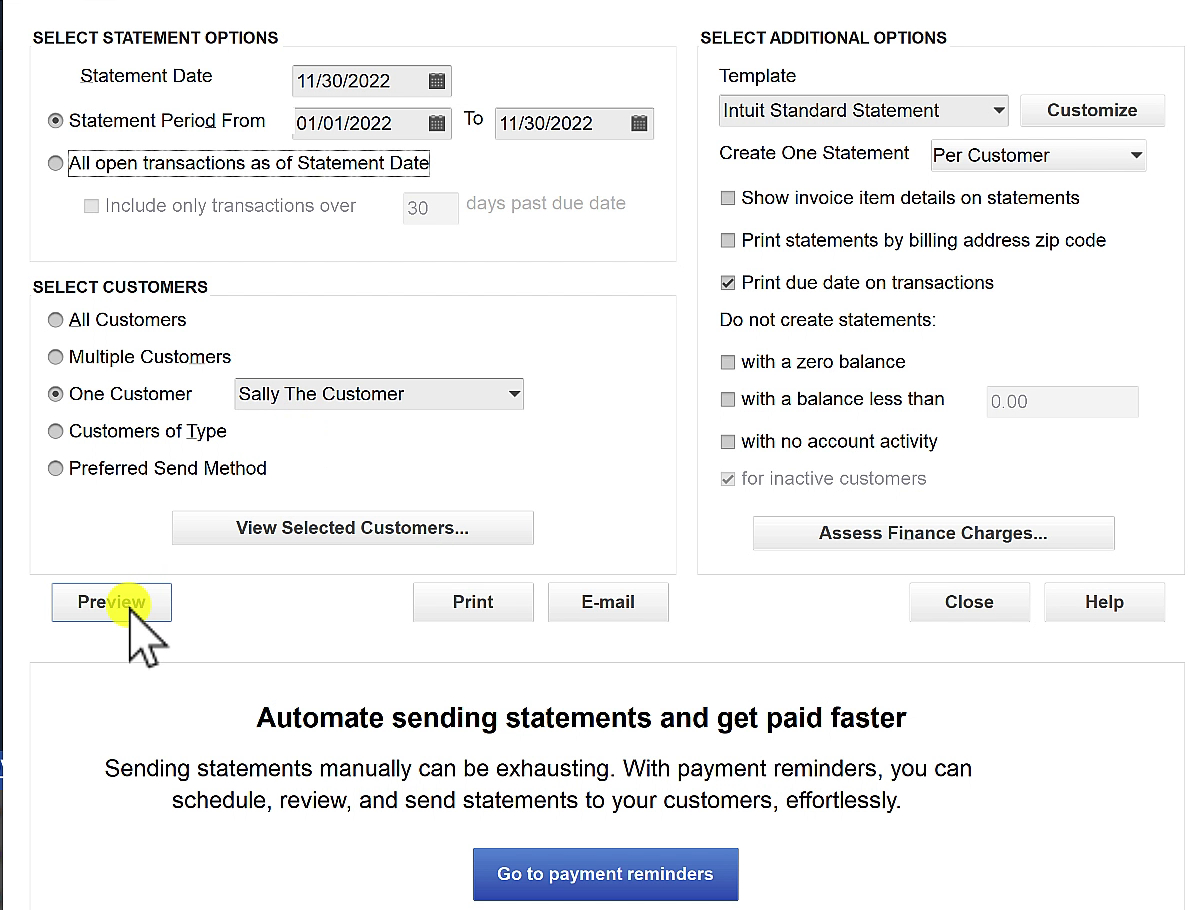
Enter a Statement Date. Select a Statement Period date range.
Under SELECT CUSTOMERS, select One Customer and find your customer from the drop-down.
Click Preview to see what the invoice will look like before sending.
Previewing is a good way to double-check that you’re sending the customer the requested information. Here’s the preview of my statement for Sally the Customer:
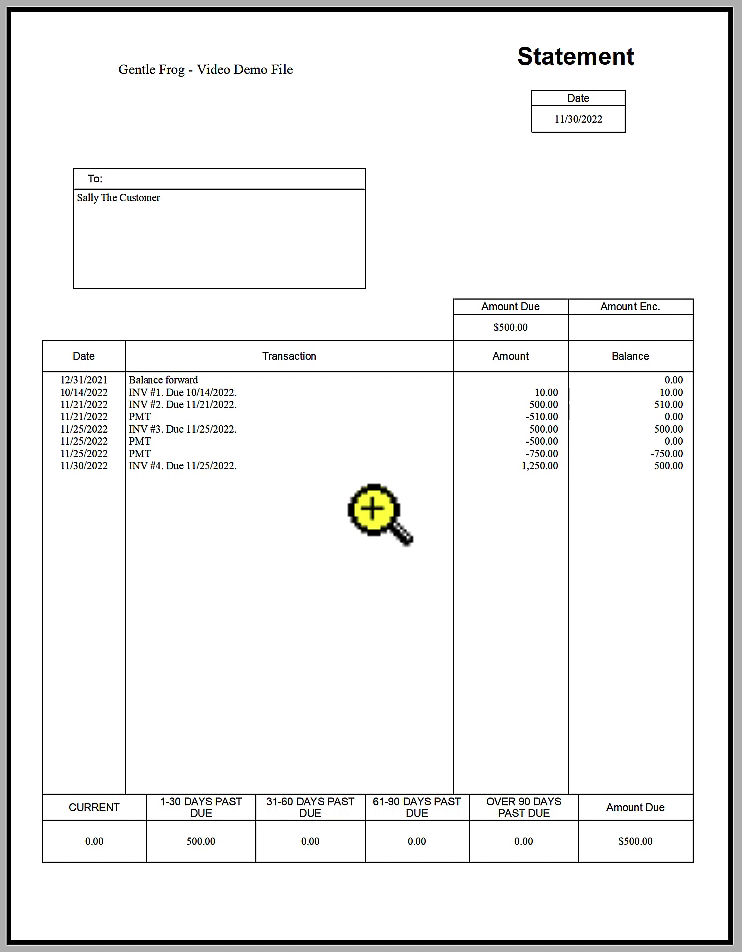
The statement shows a running balance on the right and the amount due at the bottom. Sally can now see how she came to owe me $500.
Click Close to return to the Create Statement screen.
You can click Print to print out a copy to mail. Or click E-mail to e-mail a copy of the statement to your customer.
Edit the Statement Template
You may have noticed that the statement preview above is incredibly boring.
You can edit the template to fit the look of your business.
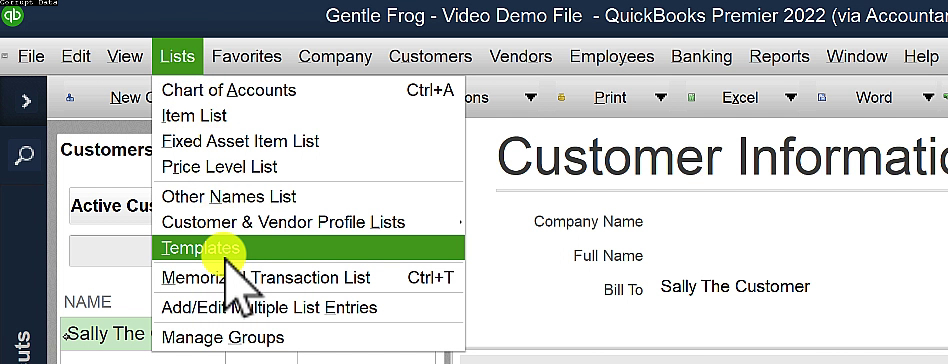
To do this, click Lists in the top menu and select Templates.
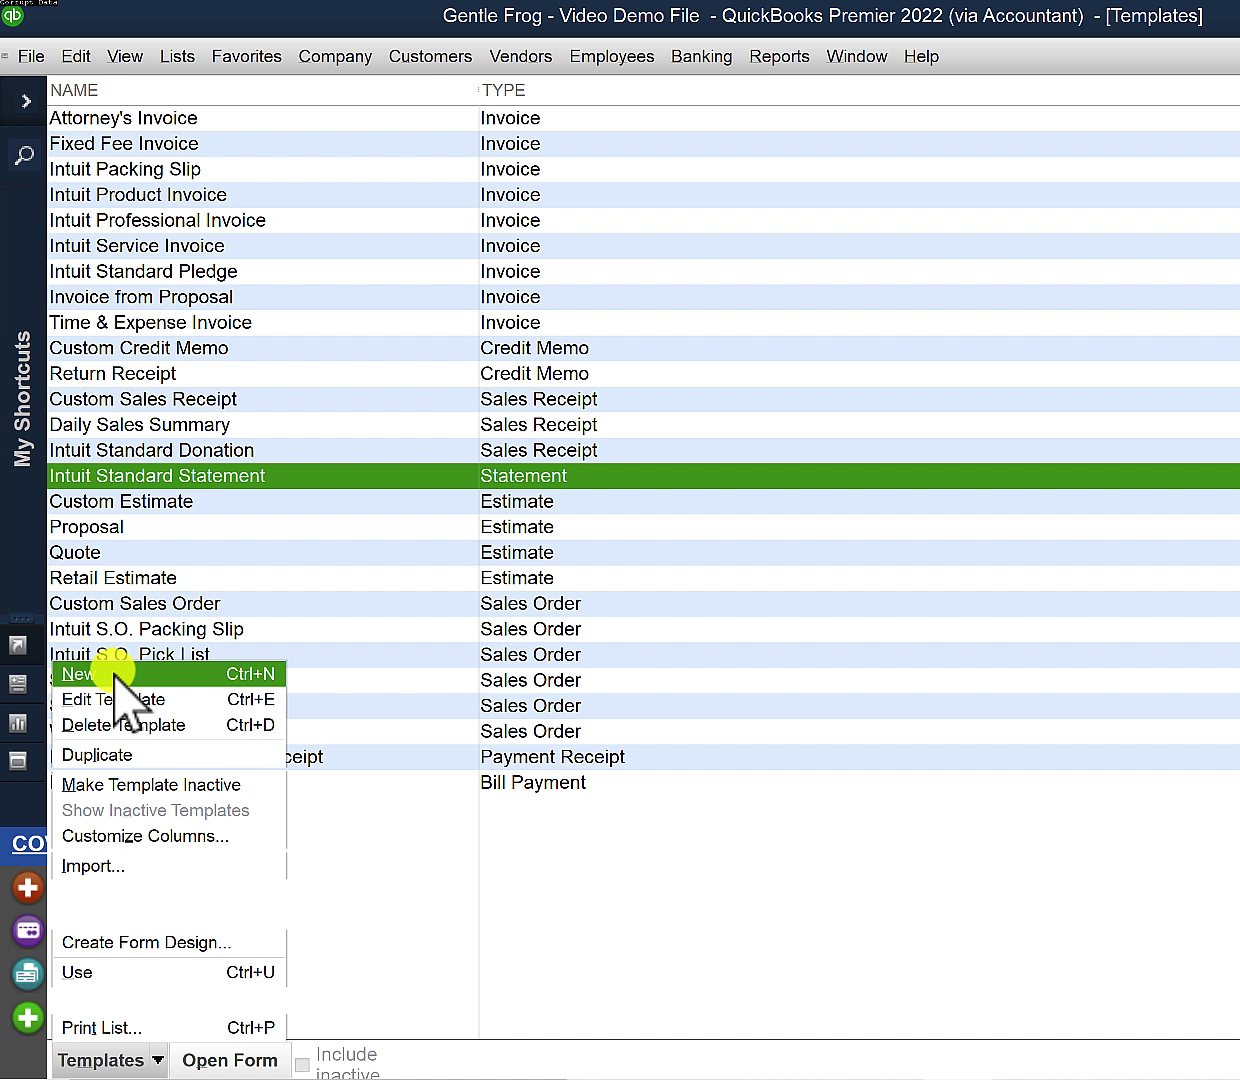
On the Templates screen, click the Templates menu at the bottom and select New.
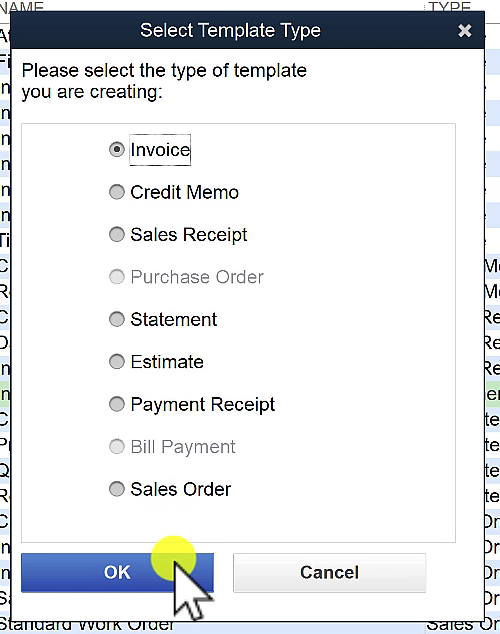
Then select Statement and click OK.
You can edit this new template in any way you like without messing up the default template.
You can change colors, add or remove information, and even add a logo. There are all kinds of fun ways you can spruce up your templates.
You now know how to create a customer statement in QuickBooks Desktop.
☕ If you found this helpful, you can say “thanks” by buying me a coffee… https://www.buymeacoffee.com/gentlefrog
Below is a video if you prefer to watch a walkthrough.
If you have questions about statements in QuickBooks Desktop, click the green button below to schedule a free consultation.


2 Responses
I’m using QuickBooks Desktop Pro 2023
I select the all open transactions to statement date, and I select the customer for whom I need the statement.
When I click on the Preview button or the Print button nothing happens.
If I click on the email button I get a warning box saying no statements have been created .
Any insights would be appreciated
Hi George,
It sounds like you’re doing everything right. This is a question for QBDT support: https://quickbooks.intuit.com/learn-support/en-us/help-article/account-management/contact-quickbooks-desktop-support/L9d0ZUCrC_US_en_US
-Jess