Managing bank statements can be a bit overwhelming, especially if you’re dealing with PDFs and need to import transactions into QuickBooks Online (QBO).
Thankfully, Hubdoc easily converts PDF bank statements into a CSV format that you can upload into QBO.
In this guide, I’ll walk you through the step-by-step process of using Hubdoc to convert your PDF bank statements and import them into QuickBooks.
Quick Instructions:
- Log into Hubdoc
- Click the Upload Documents button at the top of the screen
- Click Bank Statement Upload
- Browse to your file
- When completed, close the Upload pop-up
- Find your statement in the All tab
- Select Bank and File Format in the BANK STATEMENT EXTRACTION box on the right
- Click Generate CSV
- Click Download
- Import CSV into QuickBooks Online
Keep reading for a complete walkthrough with screenshots:
Convert PDF Bank Statement to CSV
The first step is to upload the PDF of your bank statement to Hubdoc.
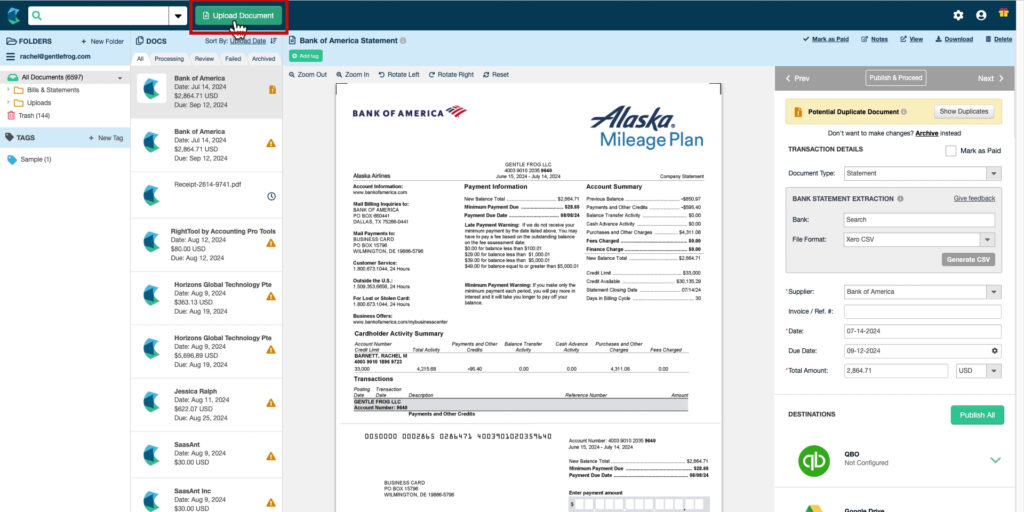
Log into Hubdoc and click the green Upload Document button at the top of the screen.
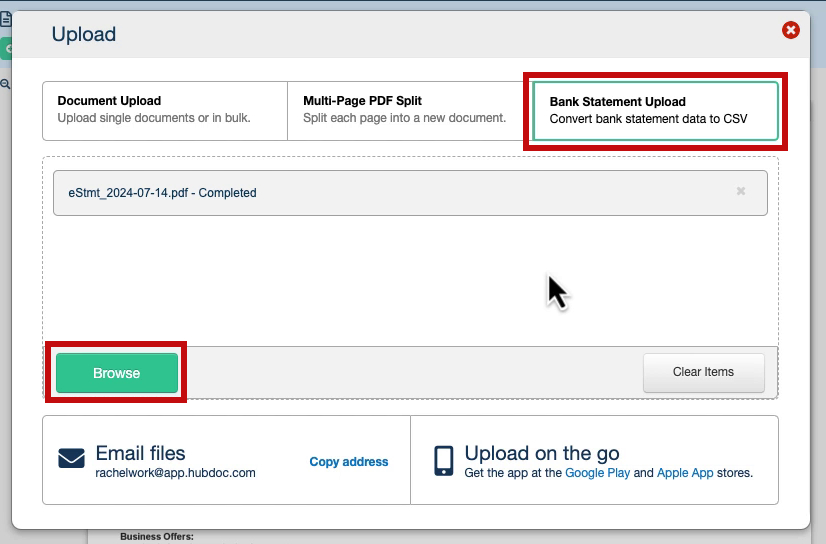
In the Upload pop-up, click the Bank Statement Upload box. Click Browse and find the statement. When it’s finished, click the X in the corner to close the pop-up.
Once uploaded, Hubdoc will begin processing the document. Depending on the size of your bank statement, this process could take a few minutes.
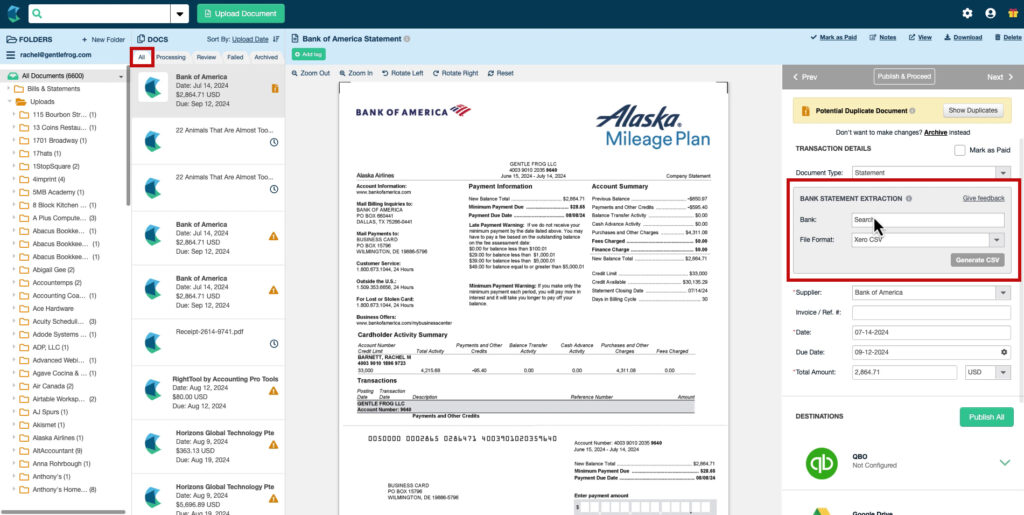
Once Hubdoc processes the PDF, you’ll find it in the All tab.
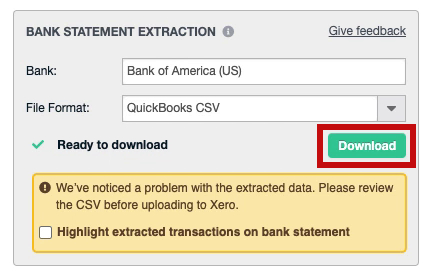
When you click on a statement in the list of documents, it will appear in the middle of the screen. On the far right, look for the gray BANK STATEMENT EXTRACTION box.
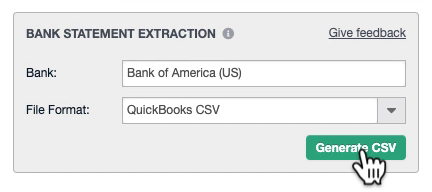
In the Bank drop-down, select the bank that issued the statement. In the File Format drop-down, select QuickBooks CSV. Then click the Generate CSV button.
This could take about a minute.
I got an orange box warning me of problems with the extracted data.
Whether you get a warning or not, click the green Download button to download the CSV file.
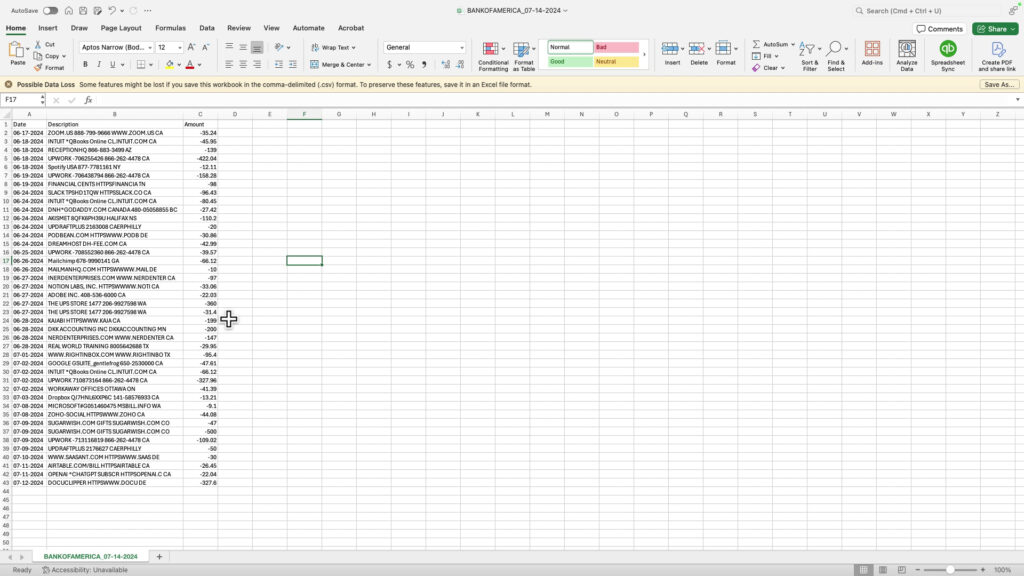
Below is the bank statement I converted. It contains all the purchases, but it’s missing any payments. This could be why I got the warning message shown above:
Import Into QuickBooks Online
Now that I’ve got a CSV, I will upload these transactions into QuickBooks Online.
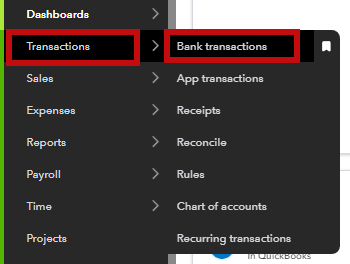
Within QuickBooks click Transactions -> Bank transactions in the left side menu.
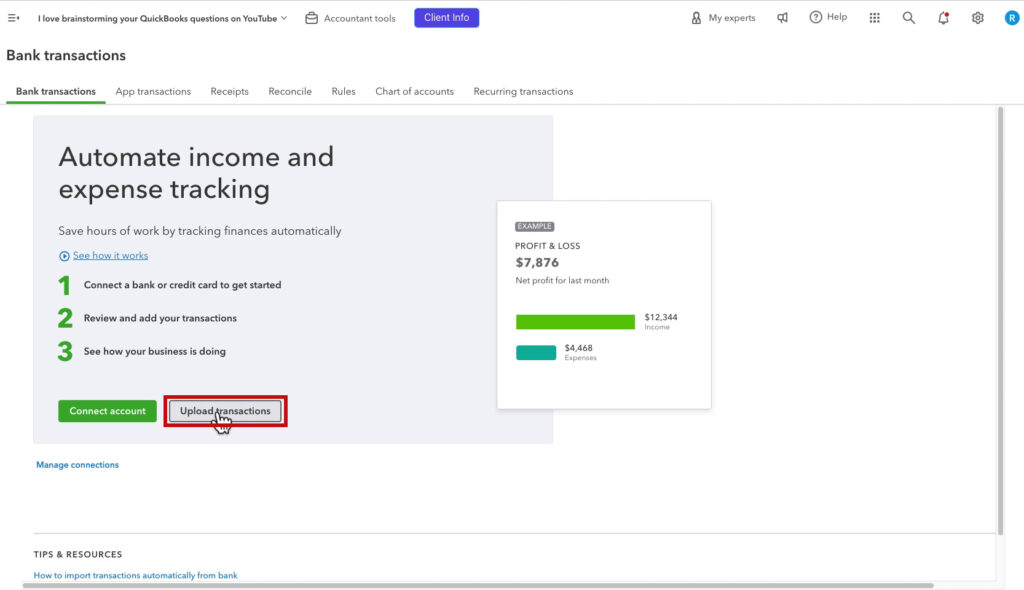
No Connected Accounts
If you don’t have bank accounts connected yet, click the Upload transactions button.
Connected Bank Accounts
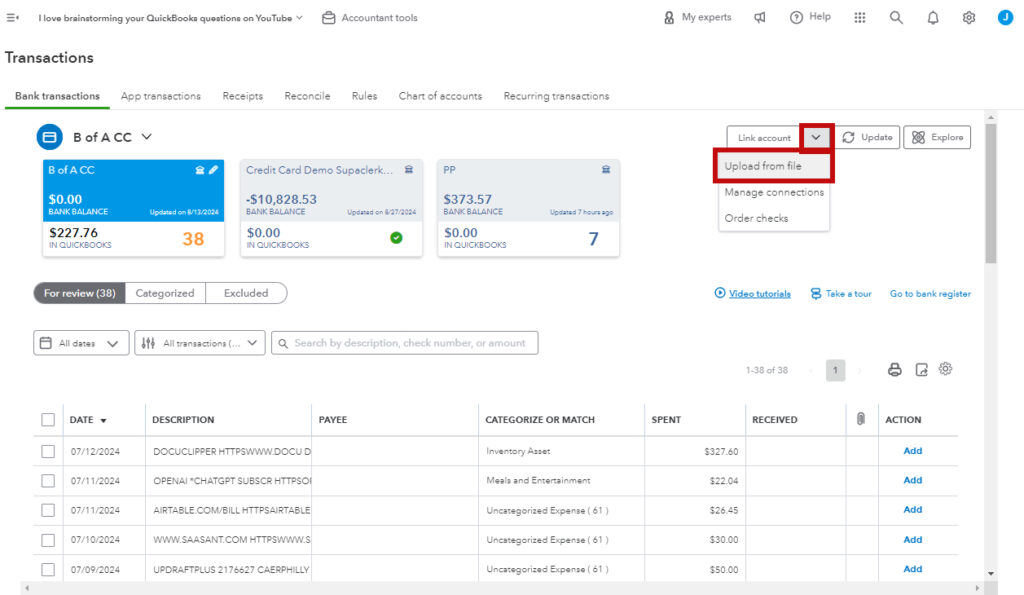
If you have bank accounts connected to QuickBooks, click the drop-down arrow next to Link account on the right.
Select Upload from file.
Manually Upload Your Transactions
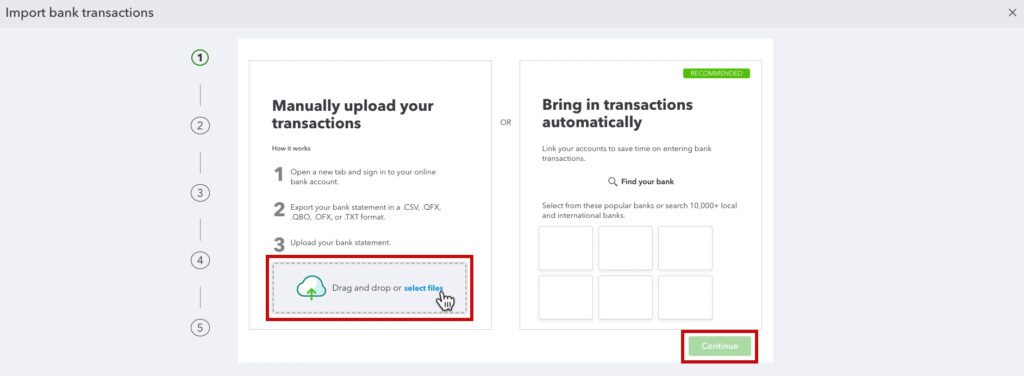
Step 1 is to drag and drop or navigate to your file using the Manually upload your transactions box. Then click Continue.
In step 2, select the correct QuickBooks Account from the drop-down menu, then click Continue.
In Step 3-1, check that everything in the drop-down boxes is correct.
In Step 3-2, check that the columns match the QuickBooks fields.
Then click Continue.
Step 4 shows you a list of the transactions.
Take note of the radio buttons at the top. Keep original values and Reverse all values.
These are purchases, so negatives are correct, and I’ll select Keep original values.
Note: If you select the wrong one, exclude all the imported transactions and re-upload them, making sure to select the opposite radio button next time.
Click the checkbox at the top to select all transactions or check off individual transactions you want to import. Then click Continue.
Click Yes on the pop-up that shows how many transactions are importing. Then click Done in step 5.
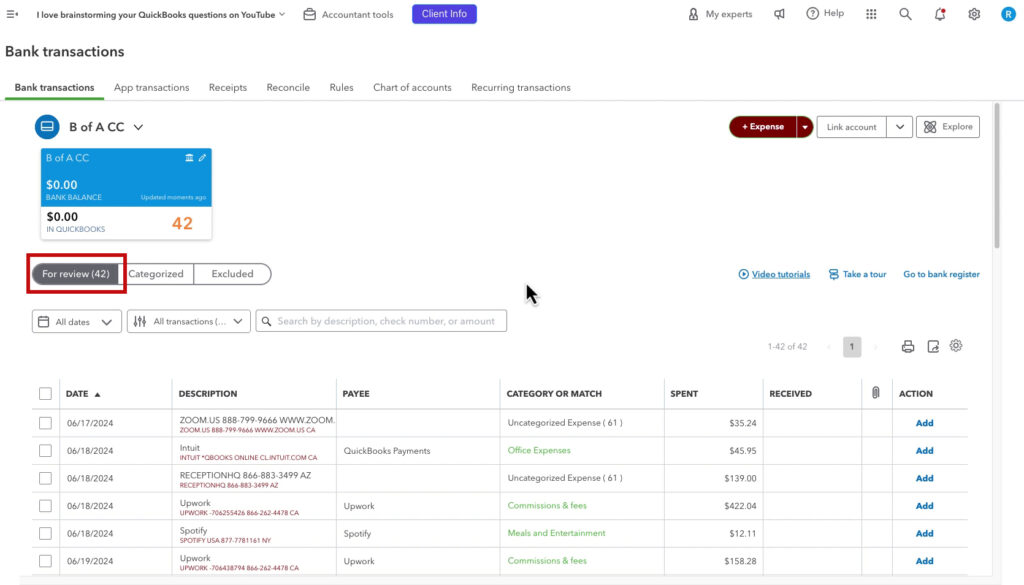
Your transactions are now imported and will be listed under For review.
Scroll down if you’d like to watch a video walkthrough of this process.
☕ If you found this helpful, you can say “thanks” by buying me a coffee… https://www.buymeacoffee.com/gentlefrog
If you have questions about importing transactions into QuickBooks Online, click the green button below to schedule a free consultation.

