In this tutorial, I’ll show you how to apply a prepayment to an invoice in QuickBooks Canada.
We’ll go over how to create the prepayment, how to create the invoice, and then how to connect them.
Quick Instructions:
Receive prepayment:
- In the upper left corner click +New
- Click Receive payment in the CUSTOMERS column
- Fill in the Receive Payments screen
- Prepayment date: Date the prepayment was received
- Payment method: How the payment was received
- Reference no. : Optional
- Deposit to: which of your bank accounts this money is being deposited into
- Amount received: the amount of the prepayment
- Click Save and close
Apply prepayment to invoice:
- Click the Receive Payment button within the invoice
- Check off the invoice under Outstanding Transactions
- Check off the prepayment under Credits
- Make sure PAYMENT amount for the invoice equals the prepayment amount
- AMOUNT RECEIVED should equal $0.00
- Click Save and close
Receiving a Payment in QBO Canada
To receive the payment click the + New button in the upper left-hand corner. Then select Receive payment in the CUSTOMERS column.

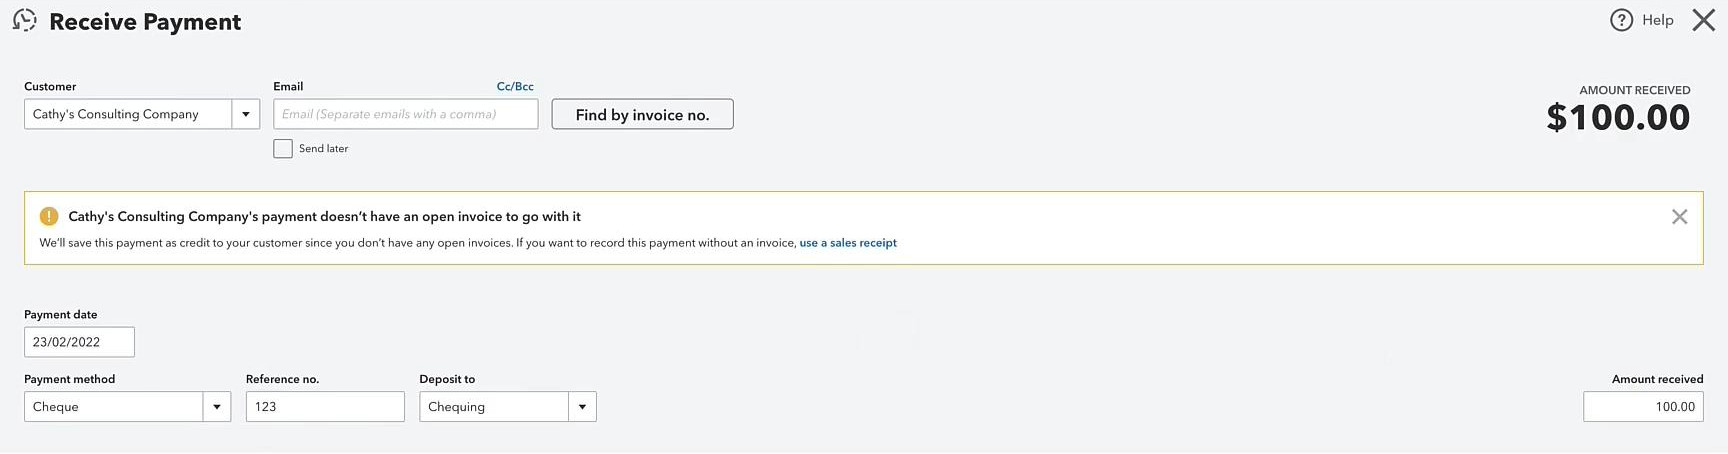
On the Receive Payment screen select your customer. If the customer doesn’t have any open invoices you’ll see the following “warning” message:

You can ignore this warning as we’re entering a prepayment so we’re aware there’s no invoice, yet.
Continue filling in the fields on the page:
- Prepayment date: Date the prepayment was received
- Payment method: How the payment was received
- Reference no. : Optional
- Deposit to: which of your bank accounts this money is being deposited into
- Amount received: the amount of the prepayment
Here’s an example:
Click the green Save and Close button in the lower right-hand corner.
You’ll see a pop-up warning you that you didn’t select any invoices. Click the green Save as a credit button.
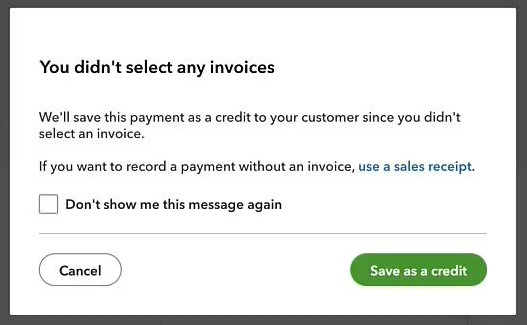
This will create the credit that we will later apply to the invoice.
Creating an Invoice in QBO Canada
Now let’s create that invoice. Click the + New button in the upper left-hand corner and select Invoice in the CUSTOMERS column.

Fill in the Invoice screen selecting the Customer who you received the prepayment from.
Here’s an example:
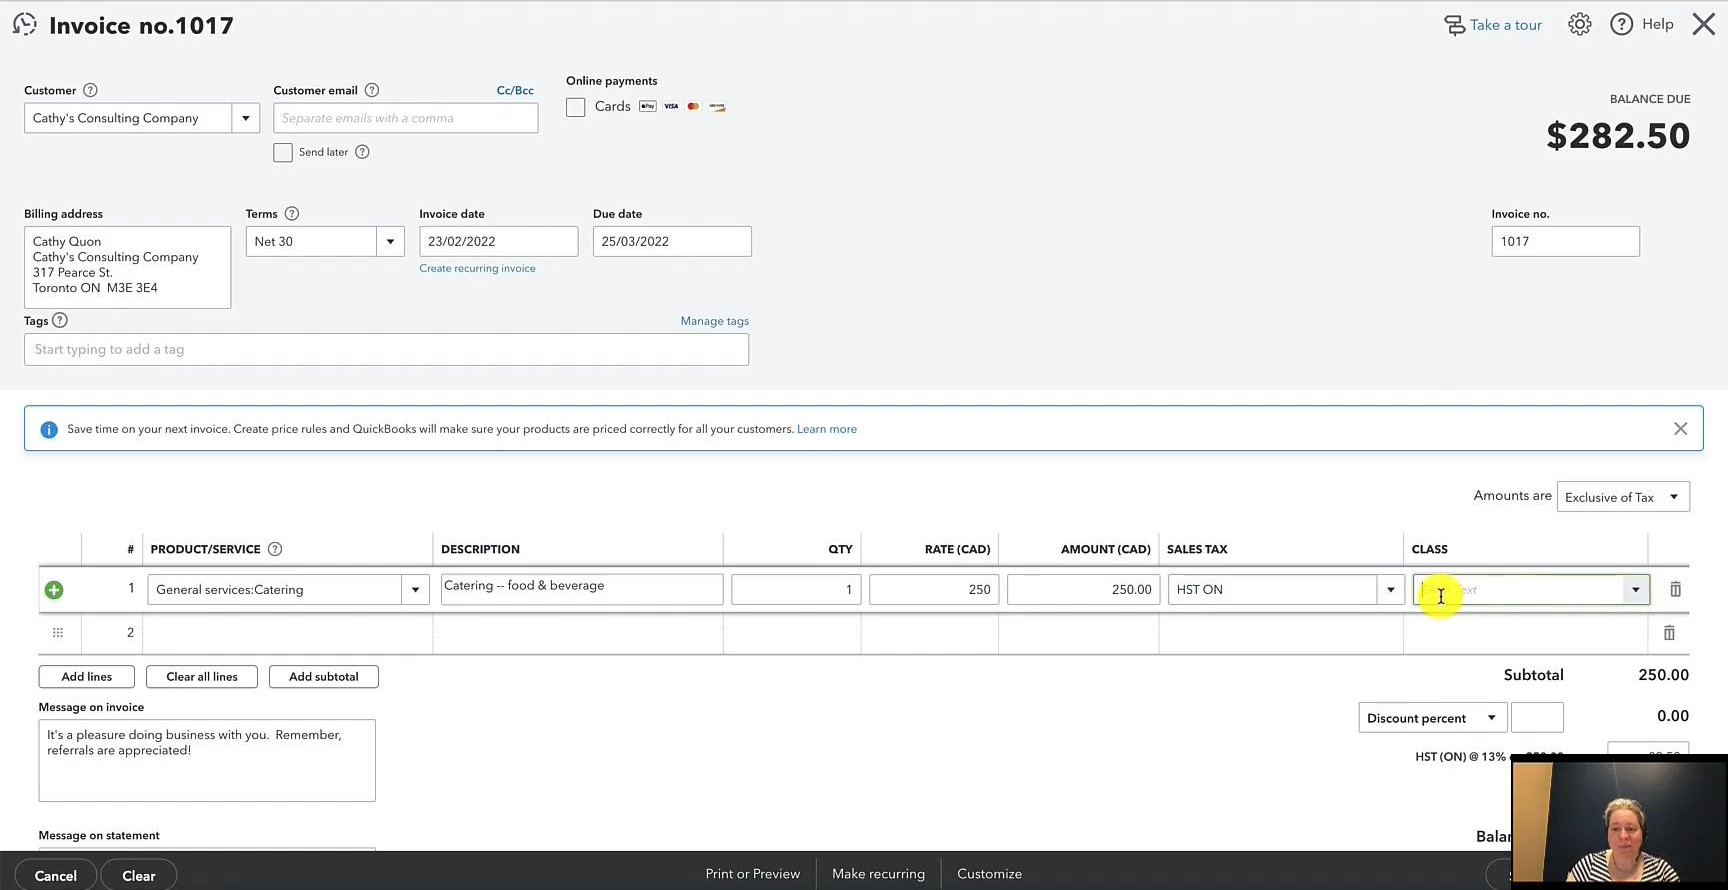
Click Save and close when you’re finished.
Prepayments in Reports
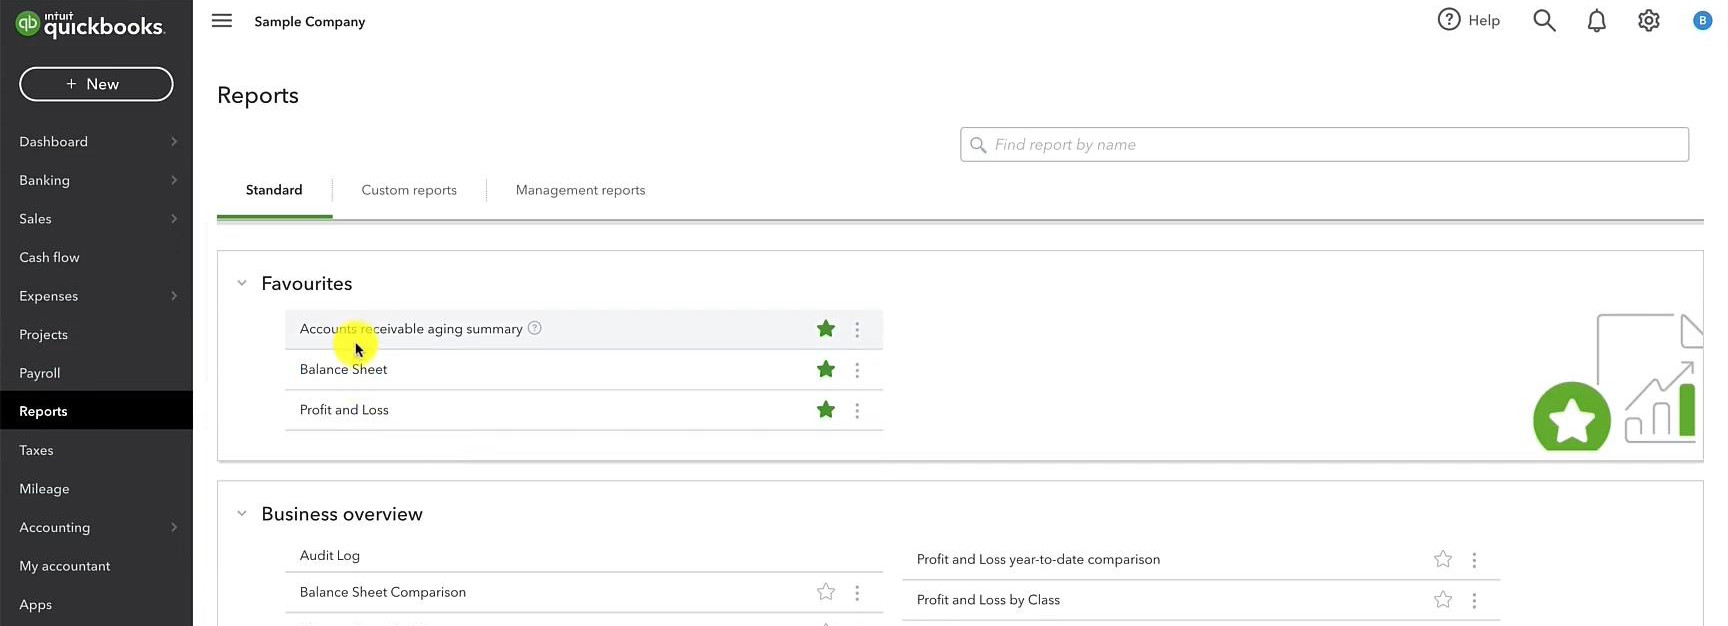
Let’s see what a prepayment looks like in the QuickBooks reports.
Click Reports in the left-hand menu and select Accounts receivable aging summary.
In my examples, I had a prepayment of $100 and then an invoice for $282.50. This report correctly shows that my client owes $182.50.
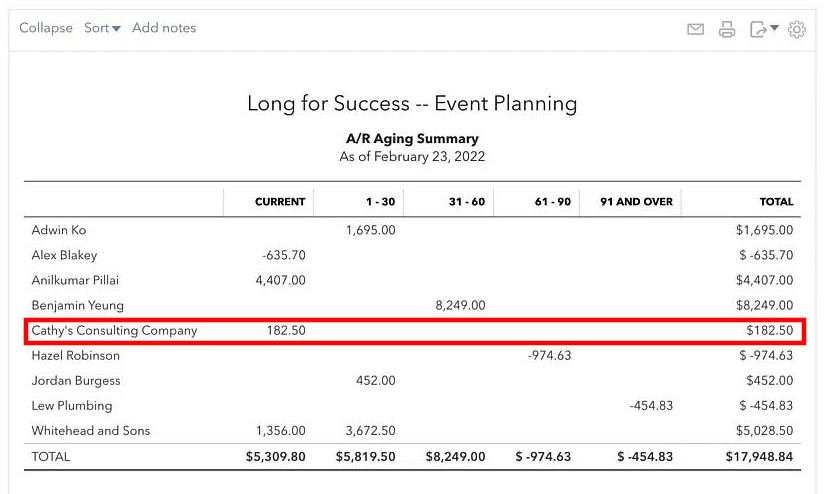
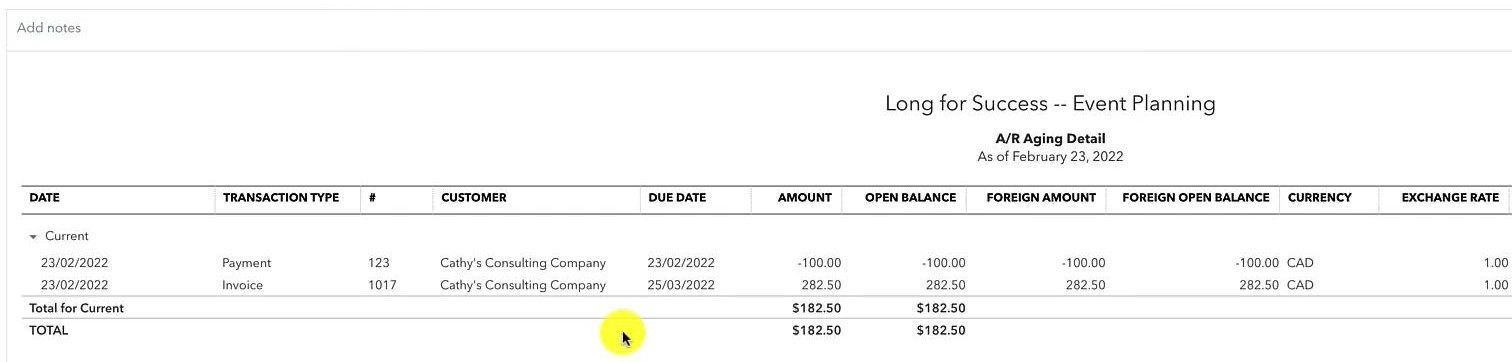
If I click on the amount it shows both the prepayment and invoice, but they’re not yet connected.
Connecting a Payment to an Invoice
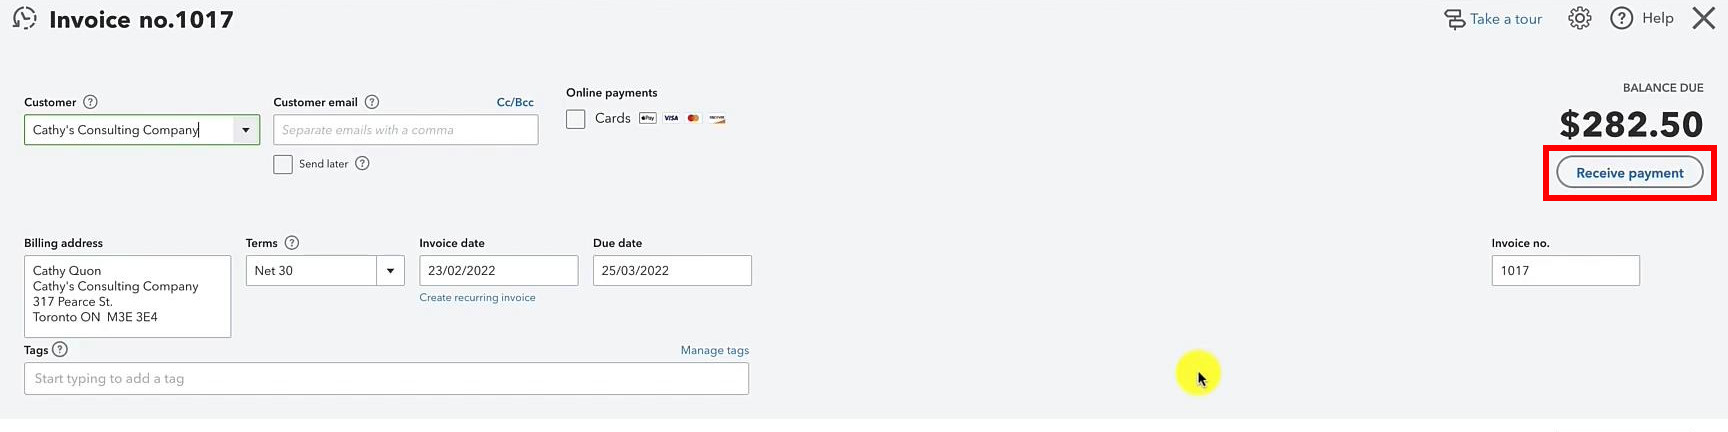
If I click on the invoice it has a balance due of $282.50 because the prepayment has not yet been applied.
To apply the payment click the Receive payment button below the balance due.
If you have more than one open invoice or more than one prepayment you’ll see them all listed on this screen.
Make sure you have the correct invoice and prepayment checked.
In the PAYMENT field for the invoice make sure the amount matches the prepayment amount. It likely will not match and will need to be updated.
If everything is correct the AMOUNT RECEIVED in the upper right-hand corner should show $0.00. This is because you are not collecting any money. You’re simply connecting the existing payment and invoice.
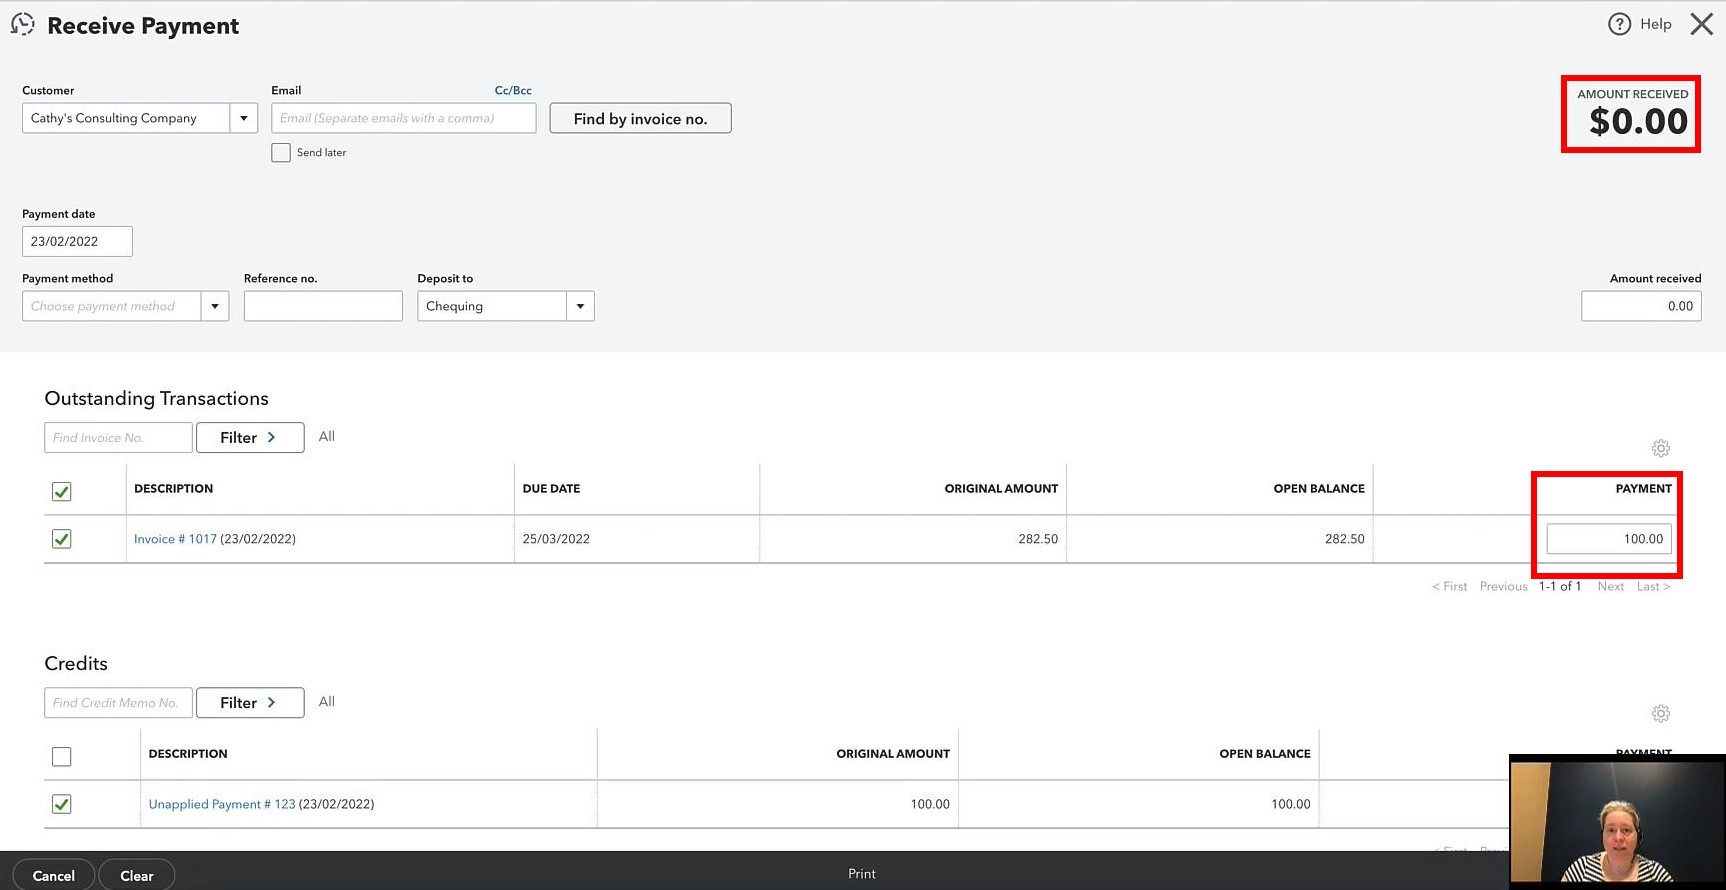
When you’re ready click the Save and close button.
You’ll now only see the Invoice in the A/R Aging Detail Report.

If you view the invoice it will show an updated balance due and below the Receive payment button, it will show 1 payment.
You can click on the 1 payment to see the amount and payment no.

You now know how to enter a prepayment into QuickBooks Canada and then apply it to an invoice.
☕ If you found this helpful you can say “thanks” by buying me a coffee…
https://www.buymeacoffee.com/gentlefrog
Below is a video if you prefer to watch me show you how to do this.
If you have any questions about prepayments in QuickBooks Canada click the green button below to schedule a free consultation.