In this tutorial, I’ll show you how to use the Xenett AutoReview app to bulk add payee names to QuickBooks Online.
Quick Instructions:
- Within the AutoReview app click Entries w/o Name under Review and Resolve
- Select transactions you’d like to edit
- Click Select Name in the menu that appears across the top of the screen
- Search for the Name you’d like to add to the selected transactions
- If the Name is in QuickBooks click the Save button to apply to transactions
- If the Name is not QuickBooks click Add New
- Enter Name and Type and click the Submit button
- Click the Save button to apply to selected transactions
What is Xenett AutoReview?
Xenett AutoReview is an app that works with QuickBooks to make it easy for you to review and check for errors.
With AutoReview you can:
- Easily create new rules
- Fix issues with existing rules
- Find missing entries
- Create new vendors
- Find misclassified transactions
- Find duplicate transactions
- Find unapplied payments
- Find unclassified transactions
- And more!
Next, we’ll go over how to find transactions with missing payees. Then use AutoReview to add those new payees to QuickBooks.
How to Find Missing Payees in QuickBooks Online
You can find missing payess in QuickBooks Online using the Expenses by Vendor Summary report.
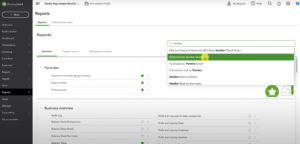
You can find this report by clicking Reports in the left side menu then searching for “vendor.”
If you have transactions without a payee you’ll see a “Not Specified” vendor name.
When you click on the amount in the TOTAL column for Not Specified you’ll see a list of individual transactions. These transactions all have a blank NAME field.
You could click on these transactions individually and add the payee. But if you have a lot of them it’s much easier to use an AutoReview.
Adding Payees to QuickBooks Online Transactions Using AutoReview
It’s very easy to find transactions without payee/names in AutoReview and bulk fix them.
Within AutoReview in the left side menu under Review and Resolve you’ll see Entries w/o Name.
That number to the right is how many transactions you have in QuickBooks without a Name.
When you click on Entries w/o Name it will show a list of all transactions without a Name.
On the left side of the transaction list are radio buttons. You can select transactions and you’ll see fields appear at the top of your screen.
In this tutorial, we’re only working with Select Name.
When you click on that field a search box will appear. Here you can search through your existing list of vendor/customer names. 
If the vendor/customer you want isn’t already in QuickBooks you can click Add New to create them within AutoReview.
This opens the Add Payee pop-up where you can enter the Name and Type (vendor, customer, or employee).
Click the Submit button to save/add the new Payee.
Now you’ll see the Name you entered in the Select Name field across the top of the screen. Click the Save button and it will add this Payee to all the transactions you’ve selected.
When it finishes saving the screen will update and the number of Entries w/o Name will be lower.
In my example I now have zero:
You can now go back into QuickBooks and find transactions associated with your new Payee.
Congratulations! You now know how to bulk add Names in QuickBooks Online using the AutoReview App.
If you have any questions on using this app or adding Payees to QuickBooks please ask in the comments. Or click the green button below to schedule a free consultation.
☕ If you found this helpful you can say “thanks” by buying me a coffee…
https://www.buymeacoffee.com/gentlefrog
If you’d like to watch me walk through this process check out the video below:


