Have you ever needed to issue a refund to a customer in QuickBooks Desktop?
In this example, we’re going to use QuickBooks Desktop 20017 to create an invoice, create a credit memo, and then refund that credit memo.
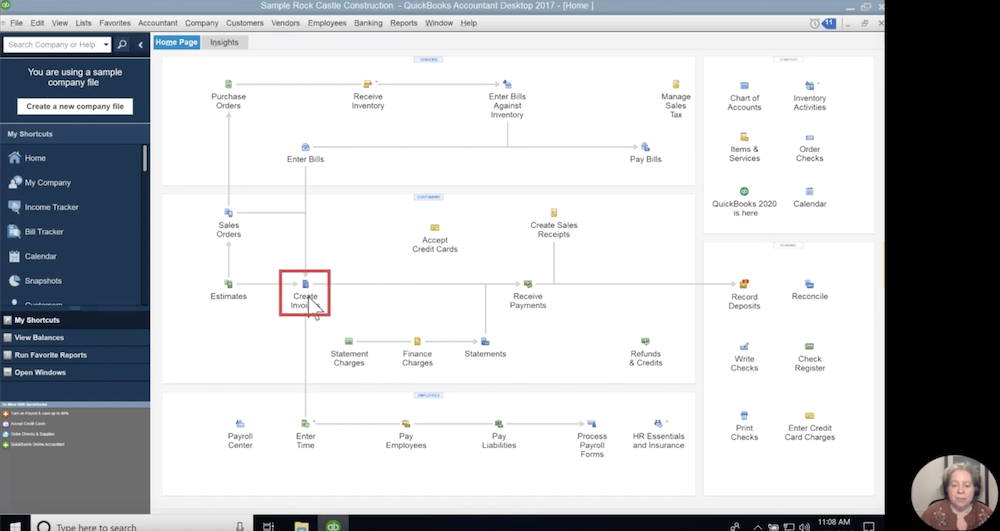
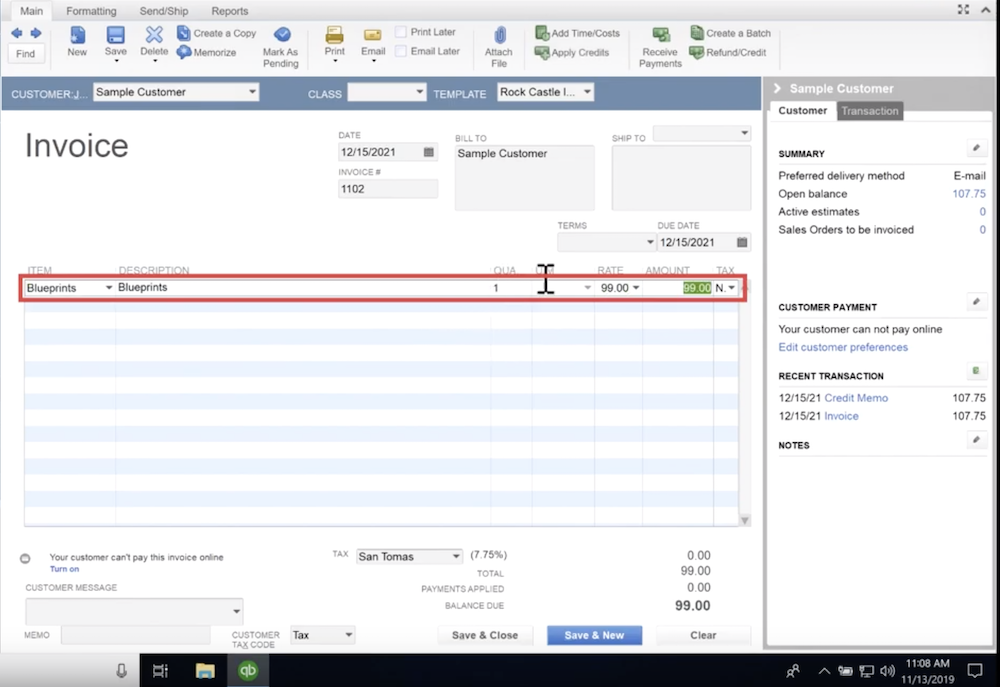
Step 1) Create an Invoice
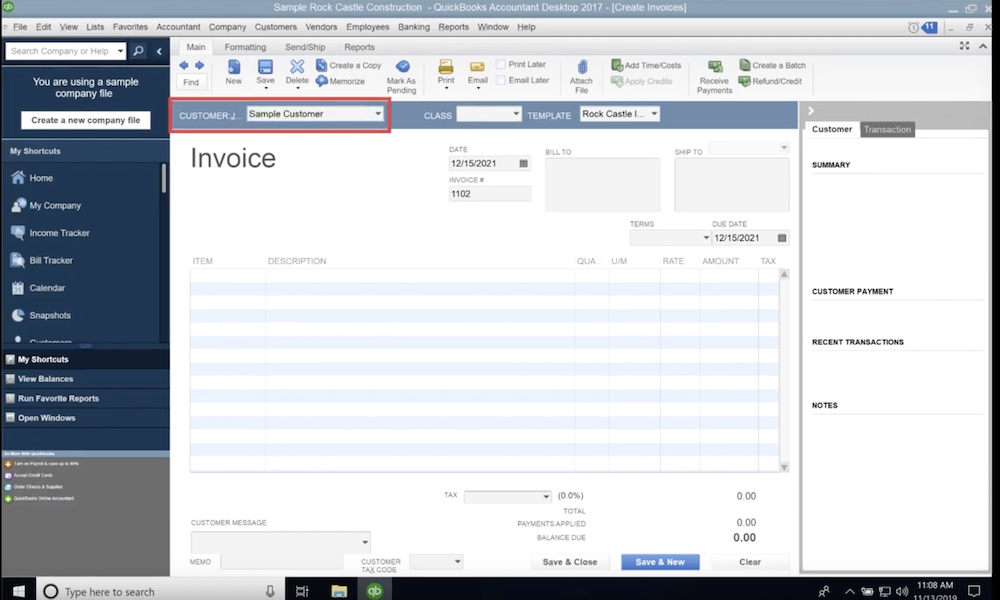
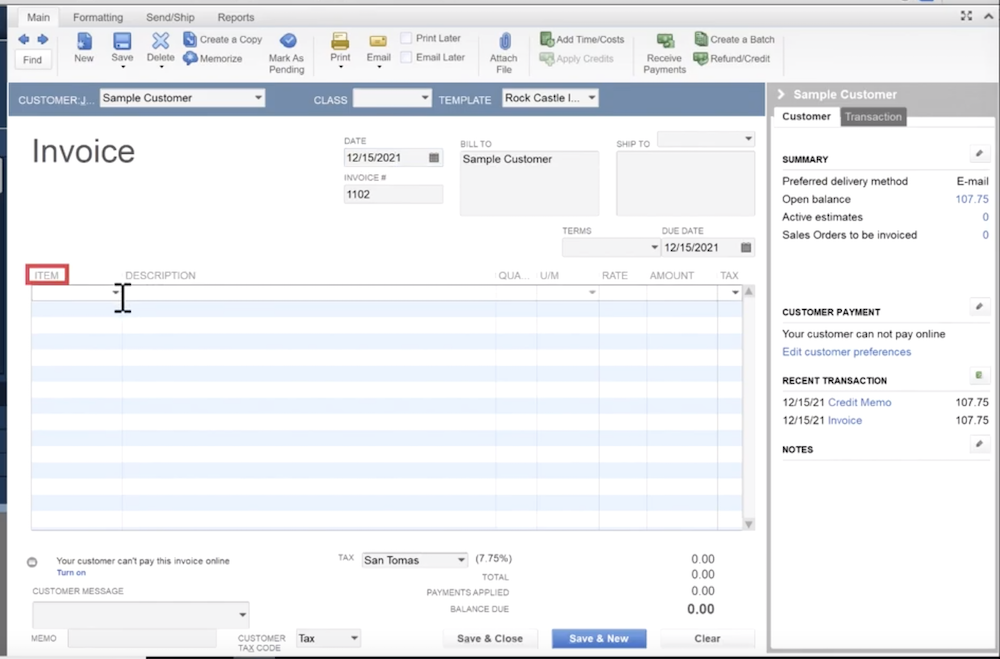
Creating an invoice is straight forward in QuickBooks Desktop. We first navigate to our home screen, locate the button titled “Create Invoices,” and then click it to bring us to our next screen. After we click that button, we’ll need to select the customer from the drop-down list. For this tutorial, we’ll be using Sample Customer. Now, we navigate to the line items and begin filling out the information about what we’ve hypothetically sold to the sample customer. Select the item “Blueprints.” At this point, the description should be auto-populated, and we’ll be left to fill out the quantity, the unit price, and select whether or not the item is taxable. Enter “1” for the quantity, “99” for the price, and select the drop-down box item “taxable.” Finally, we click save and close, which will create the invoice record.

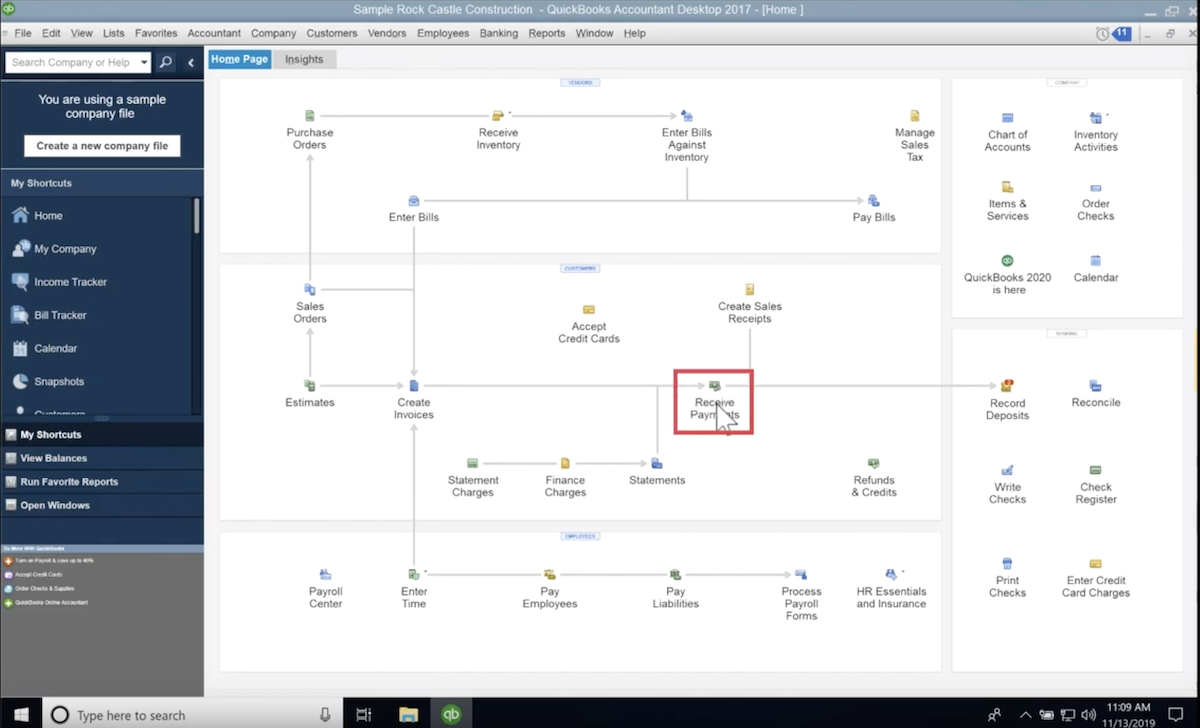
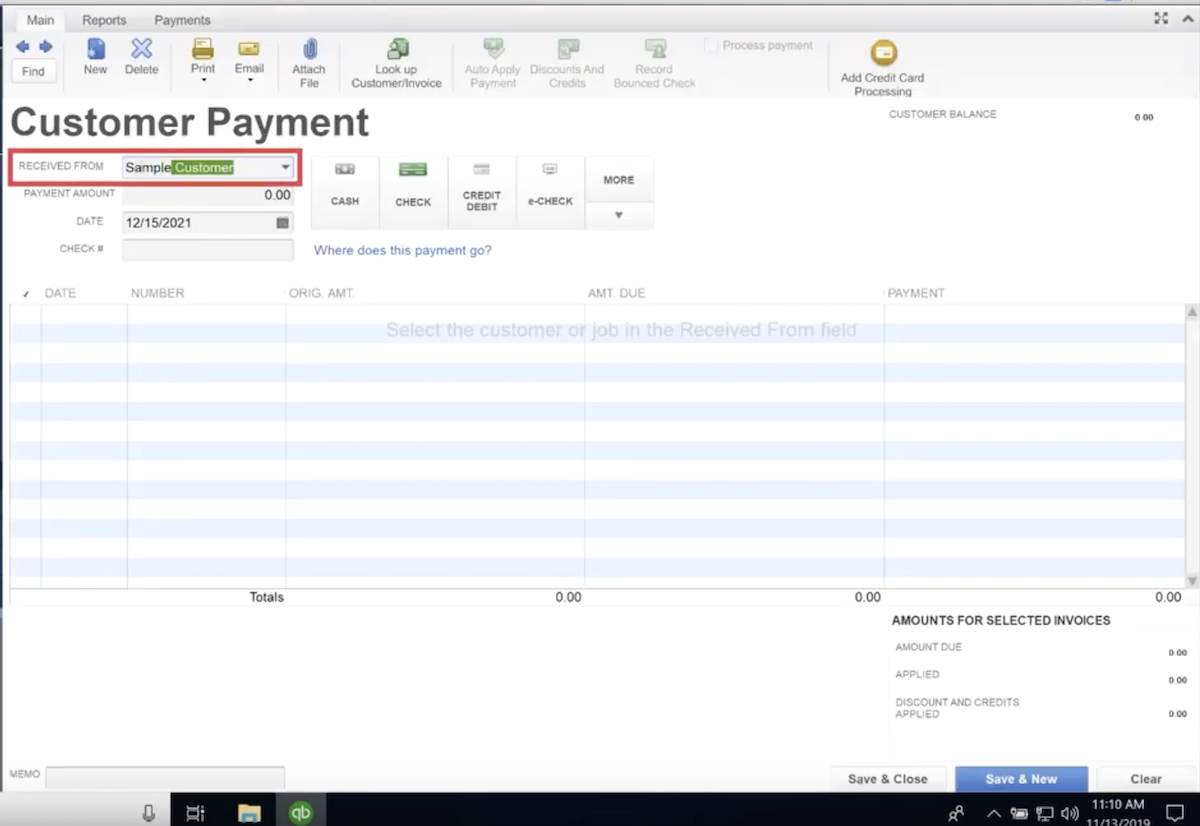
Step 2) Mark Payment Received
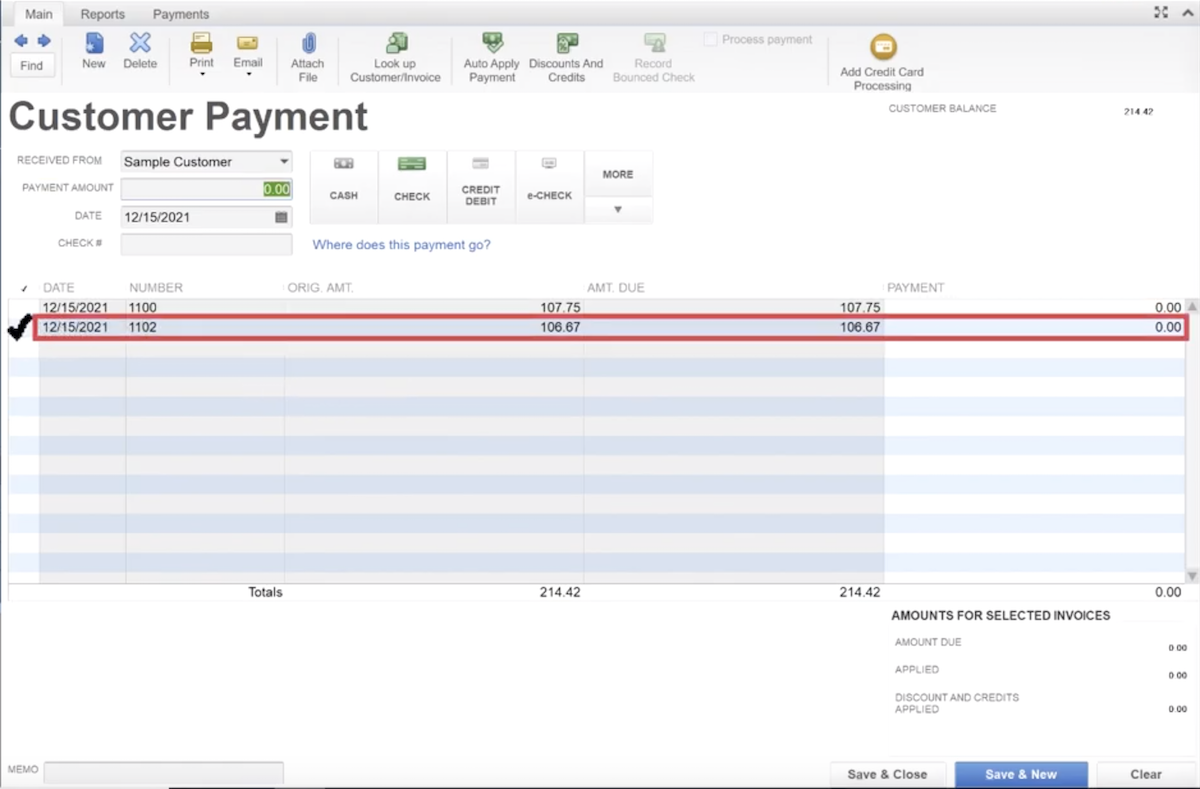
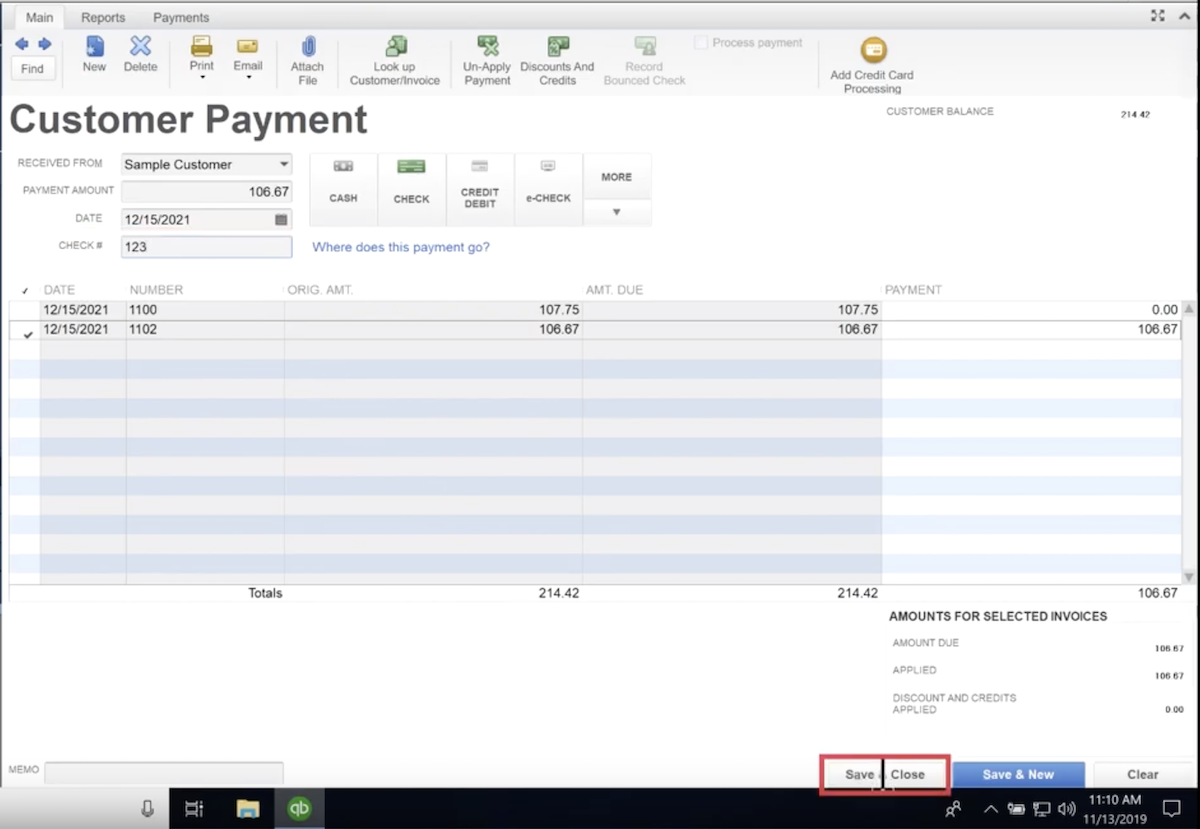
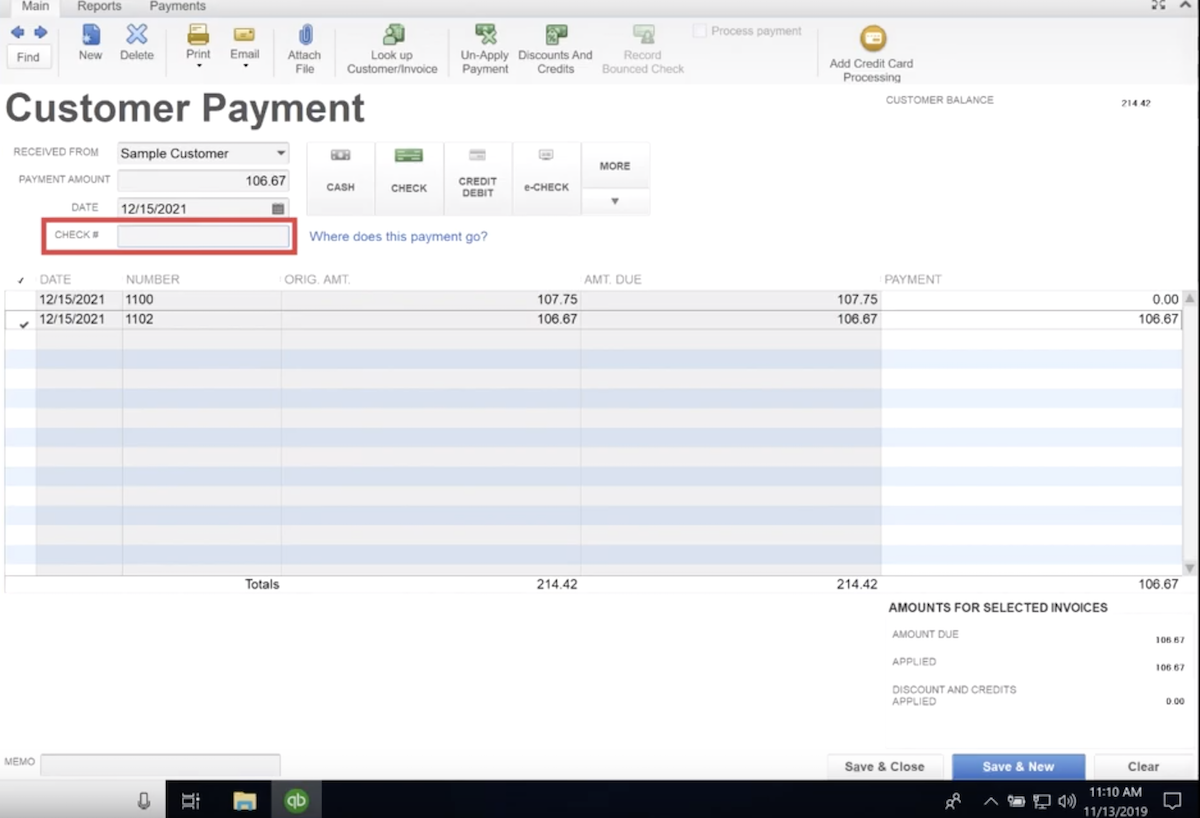
Now that our invoice is in the system, we’re going to mark the money as received. To do this, navigate to the home screen and click “Receive Payments.” On the next screen, we will be prompted for some inputs that will allow QuickBooks to track the payment accurately. So the first thing we do is type in our customer name in the proper dialog box. In this example, that was “Sample Customer.” Once we do that, all of that customer’s payments will populate in the box occupying the lower second half of the screen. Look for the payment with the matching invoice number, check the box on the far left hand to mark it as paid, fill out the correct check number, and then click save and close.
Step 3) Refund the money
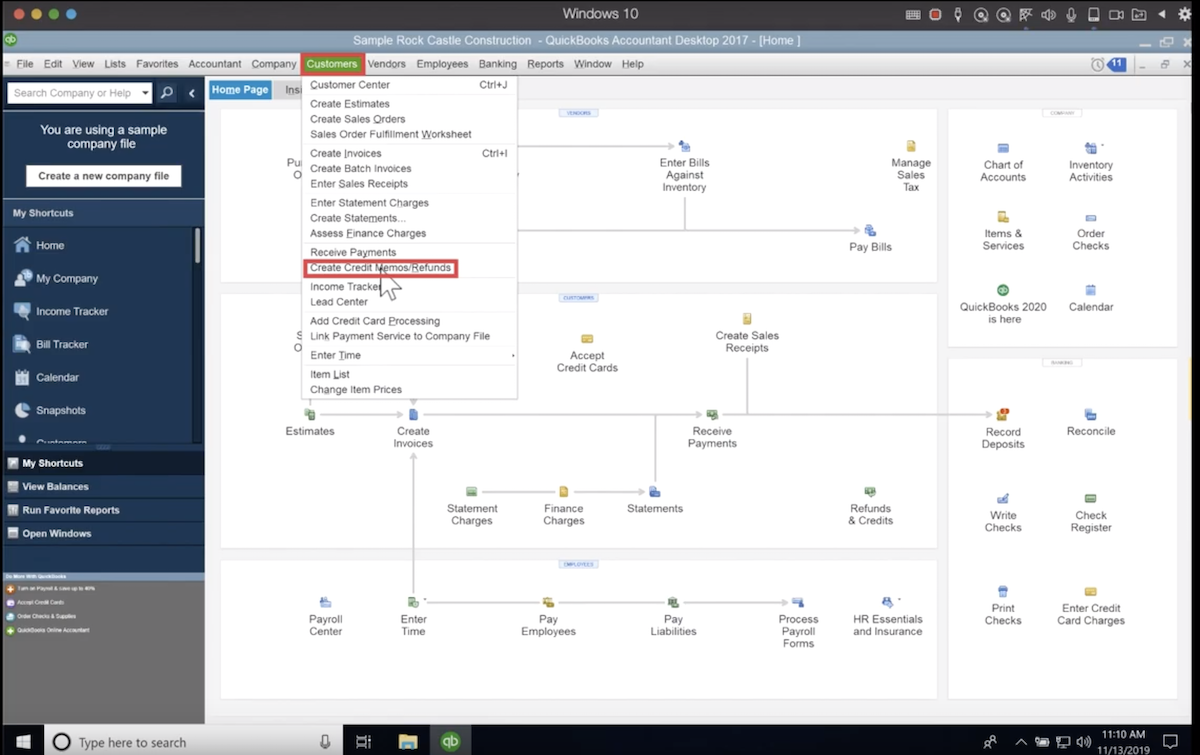
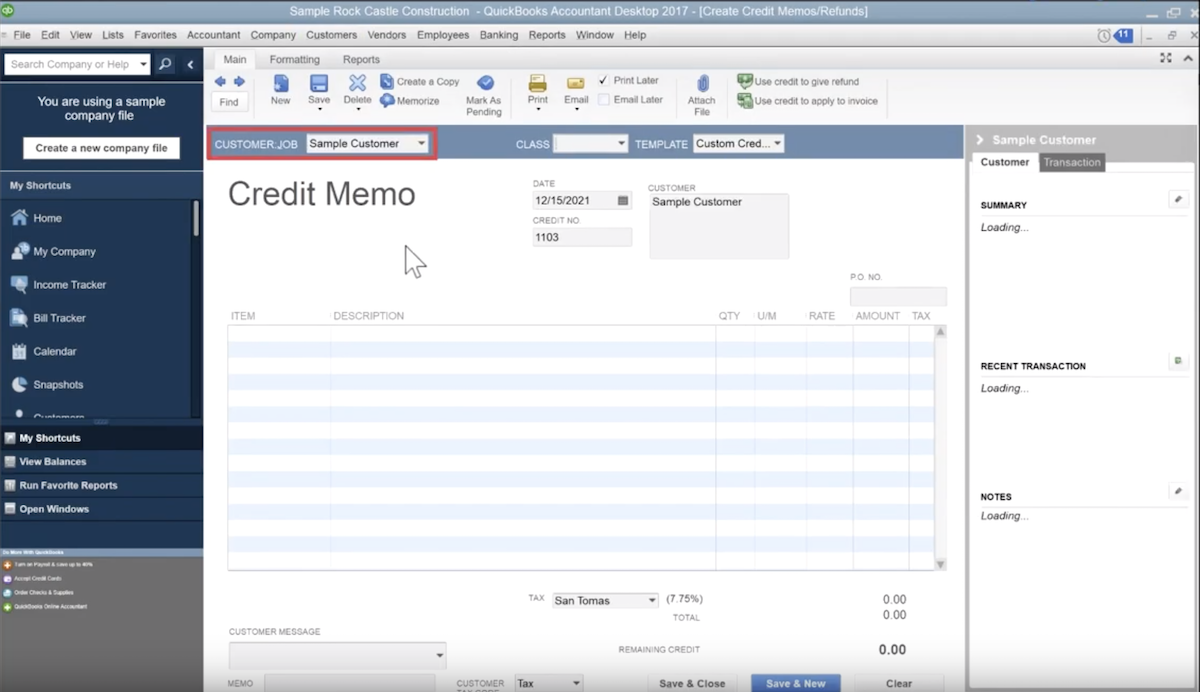
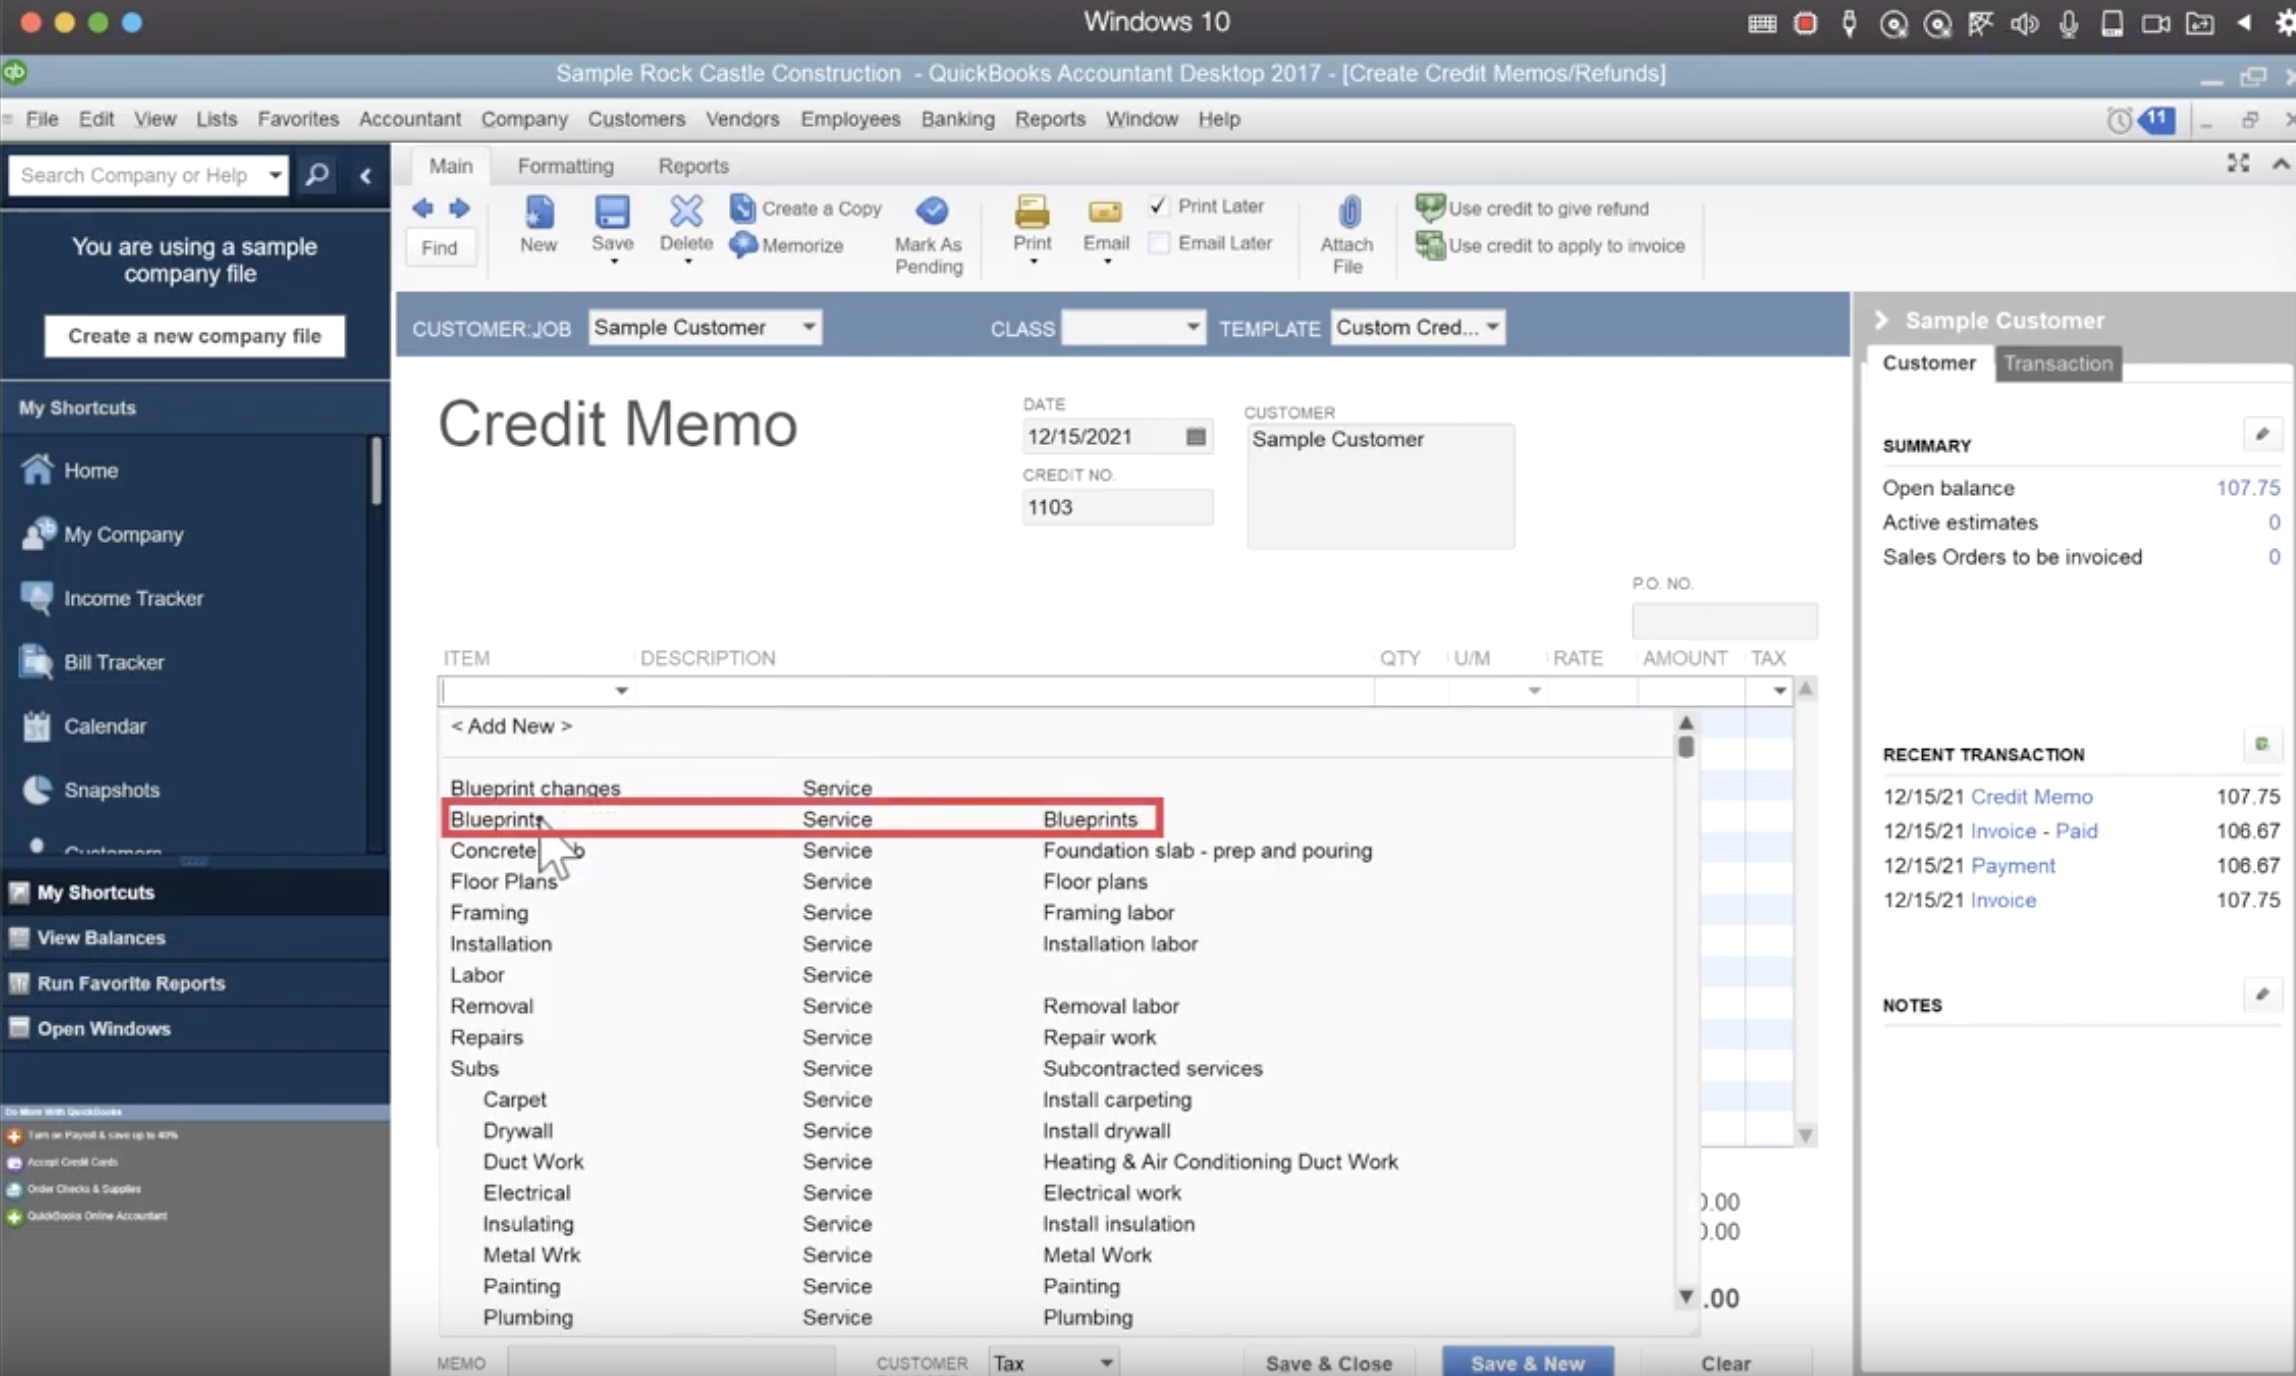
Let’s now assume that some time has passed by, and the customer was not satisfied with the blueprints, or they ordered them by mistake and now what a refund. We’ll start by navigating to the main menu in the top toolbar, click the “Customers” drop-down menu, and then “Create Credit Memo.” On the next screen, we’ll need to select the appropriate customer, and in this case, it is Sample Customer. We then go to the line items below and tell QuickBooks what we are refunding. Scroll down the list of options until you can see the item “Blueprints.” Once you have picked the item you want to refund, you must input the price, quantity, and tax. Once that is done, click save and close on the screen. This time, clicking save and close is going to yield a slightly different result. A new dialog box will pop up and prompt you for some information. You will need to tell QuickBooks how to handle the credit. There are three options:
- Retain as available credit
- Give a refund
- Apply to an invoice
For this example, we’ll give them a refund. The first option, “retain as available credit,” would be used if we planned on applying the credit to a future invoice. Giving a refund does what it says and sends the customer money. And “apply to an invoice” will take the refund and pay off some outstanding existing invoice.
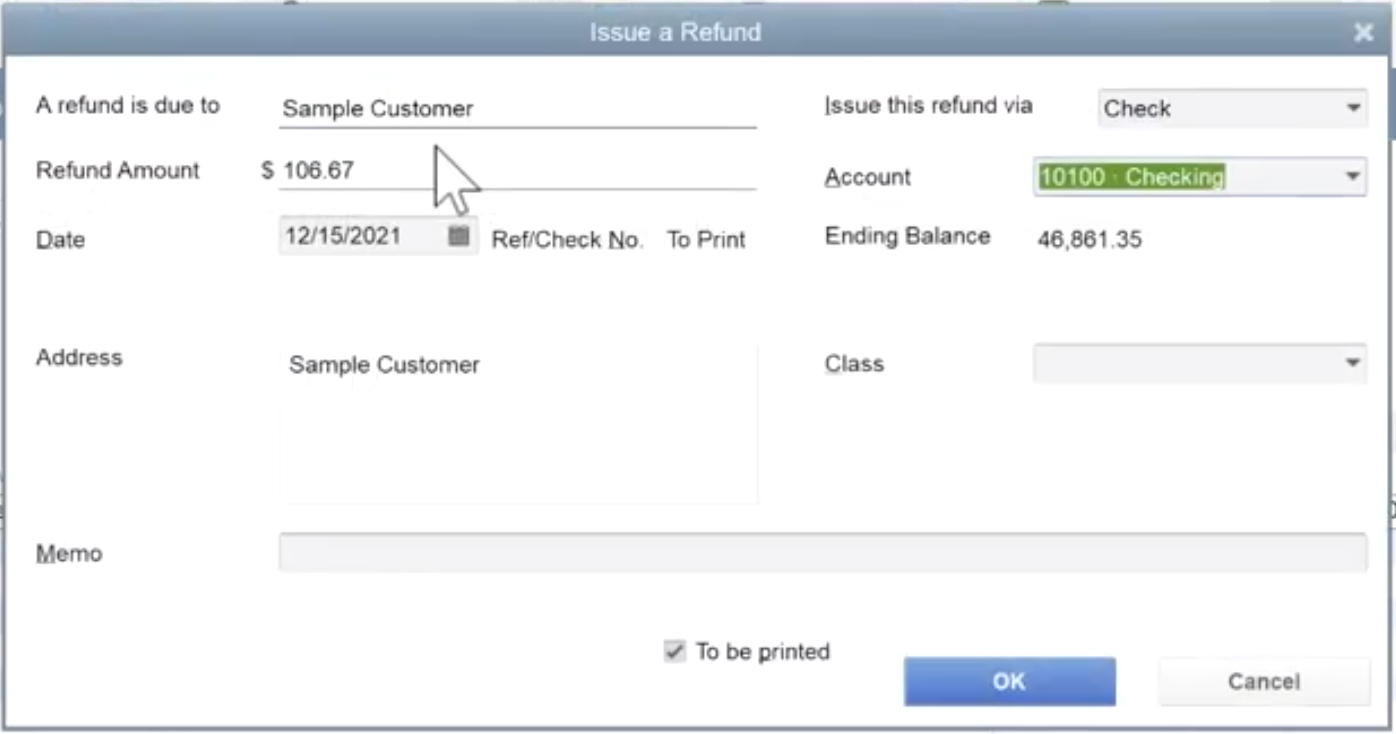
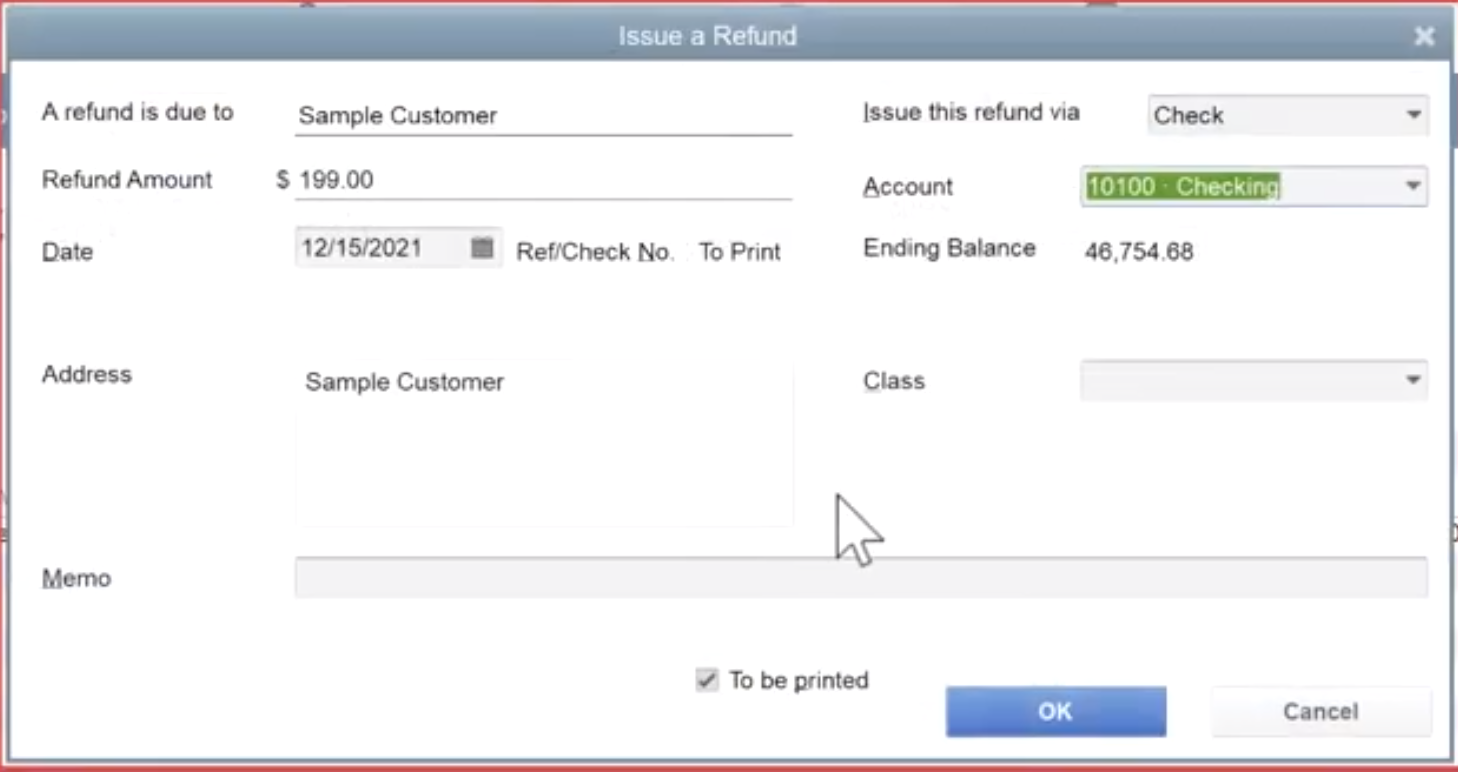
Once we click “OK,” then the next screen will automate the process of sending the customer a refund. Fill out the customer information, and finally, we will need to tell QuickBooks how we would like to handle the check’s delivery. If we check the box titled “To be printed” then QuickBooks will print the check out using our premade templates, and we will be able to mail it to the customer. If that box is unchecked, we can write the check by hand and enter the reference number from our checkbook. In this example, we’ll leave the box unchecked and enter the check number of “234” and click “OK.”
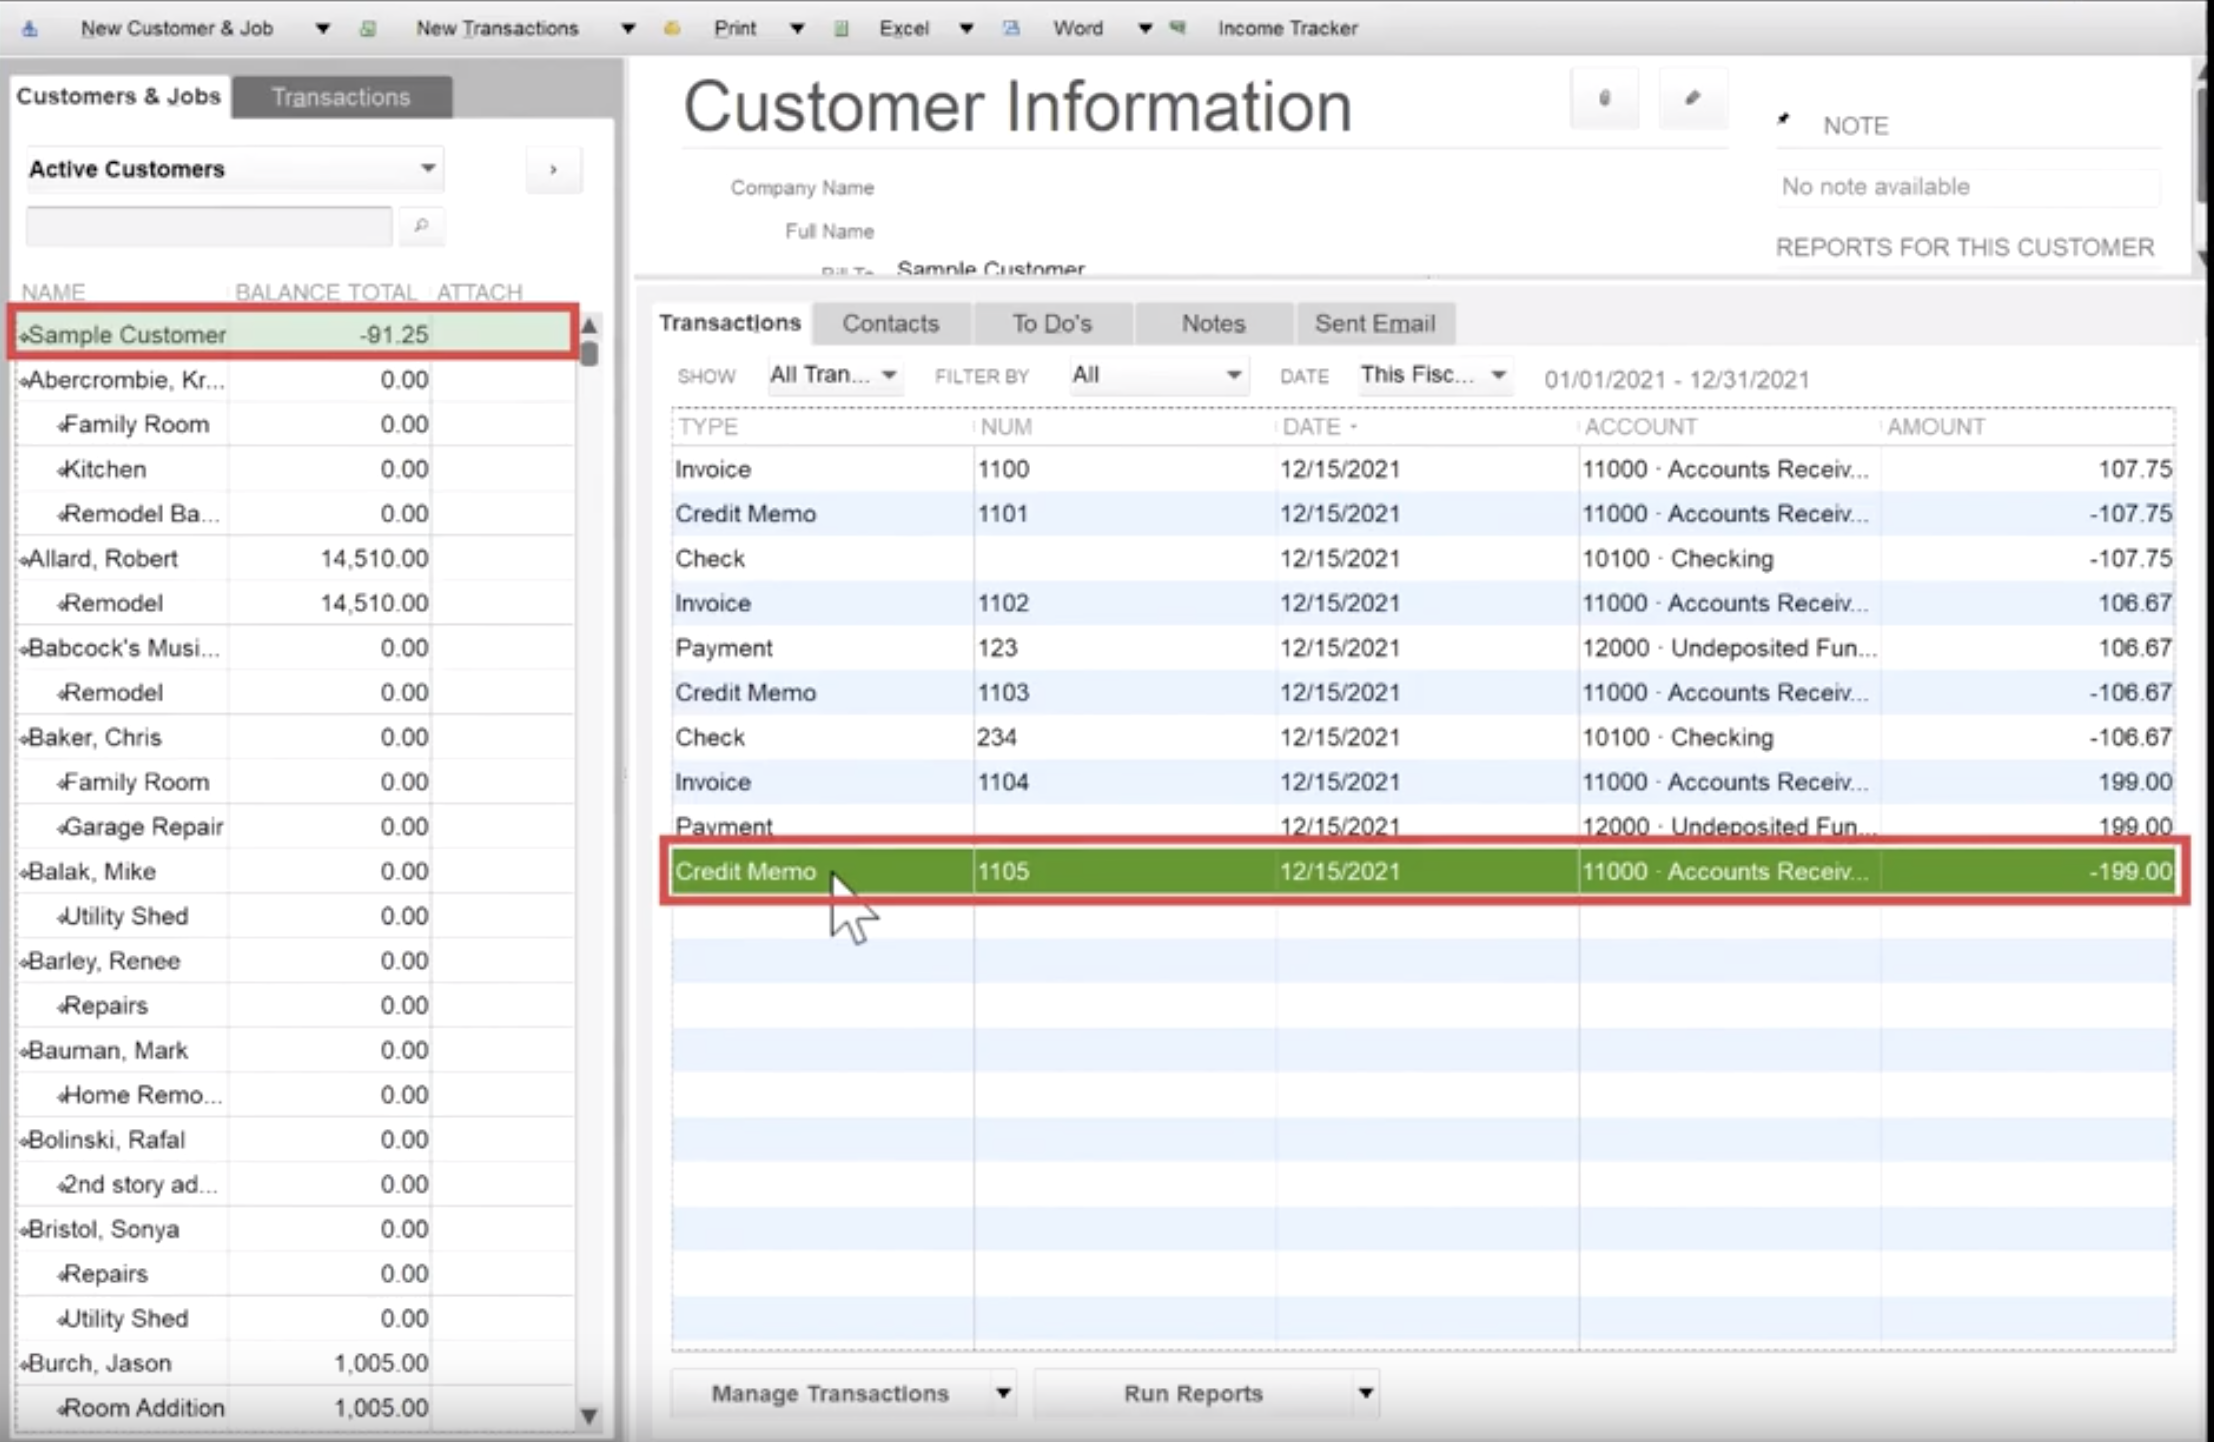
As bookkeepers, we always strive for accuracy. To make sure the credit memo in our books is correct, let’s double-check our work. To check that the credit memo was refunded, follow these steps:
- From the home page, click Customers
- Select Sample Customer
- View the Transactions for the customer
- Confirm the Invoice, payment, credit memo, and refund check have all been entered.

Finished
And that is all there is to it. The main takeaway is that these transactions have four parts.
- Invoices that are paid
- Payments that are given
- Credit memos which undo invoices
- refunds which undo the payments
An Alternate Method
If you recall, before we entered the check number of 234, we were given the option on how we would like to handle the refund. We selected “Give a Refund,” but there were two other options, “Apply to an Invoice” and “Retain as an Available Credit.” Let’s explore how to retain that refund as a credit and then apply that credit to an invoice at a later time.
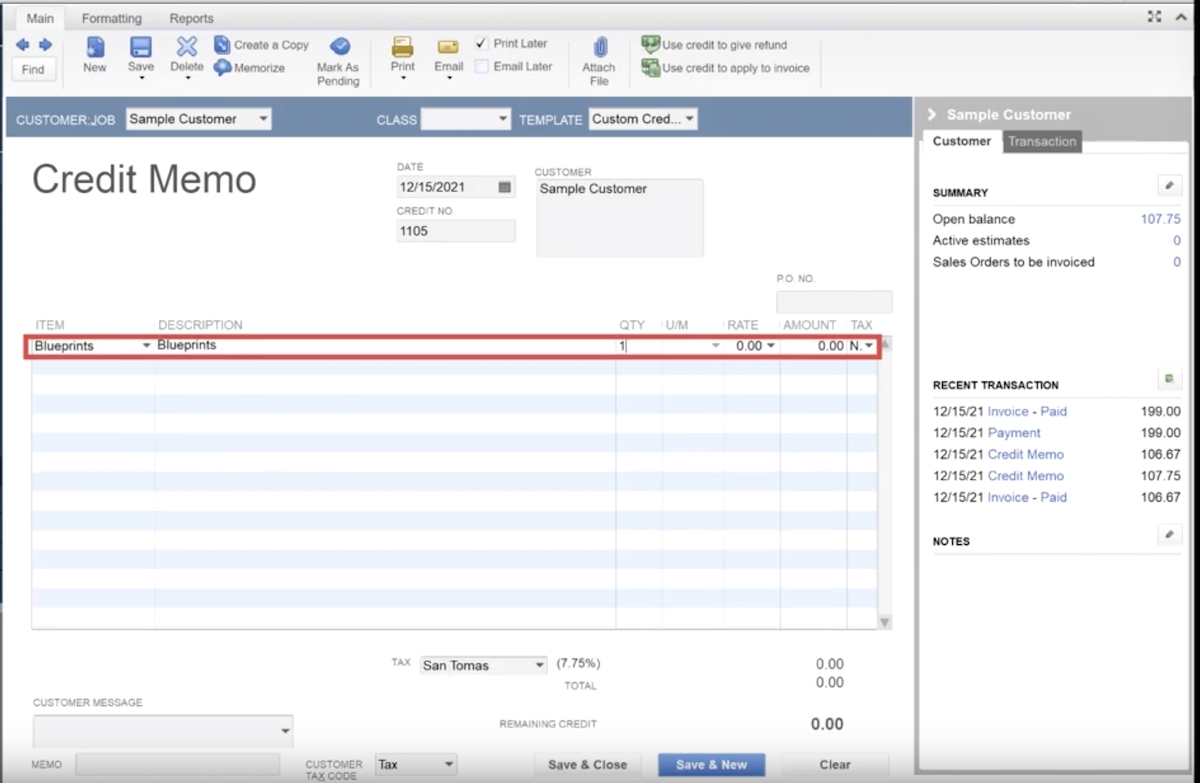
Let’s first set up the refund. For this option, we’ll assume we sold a $199 set of blueprints and those were returned.
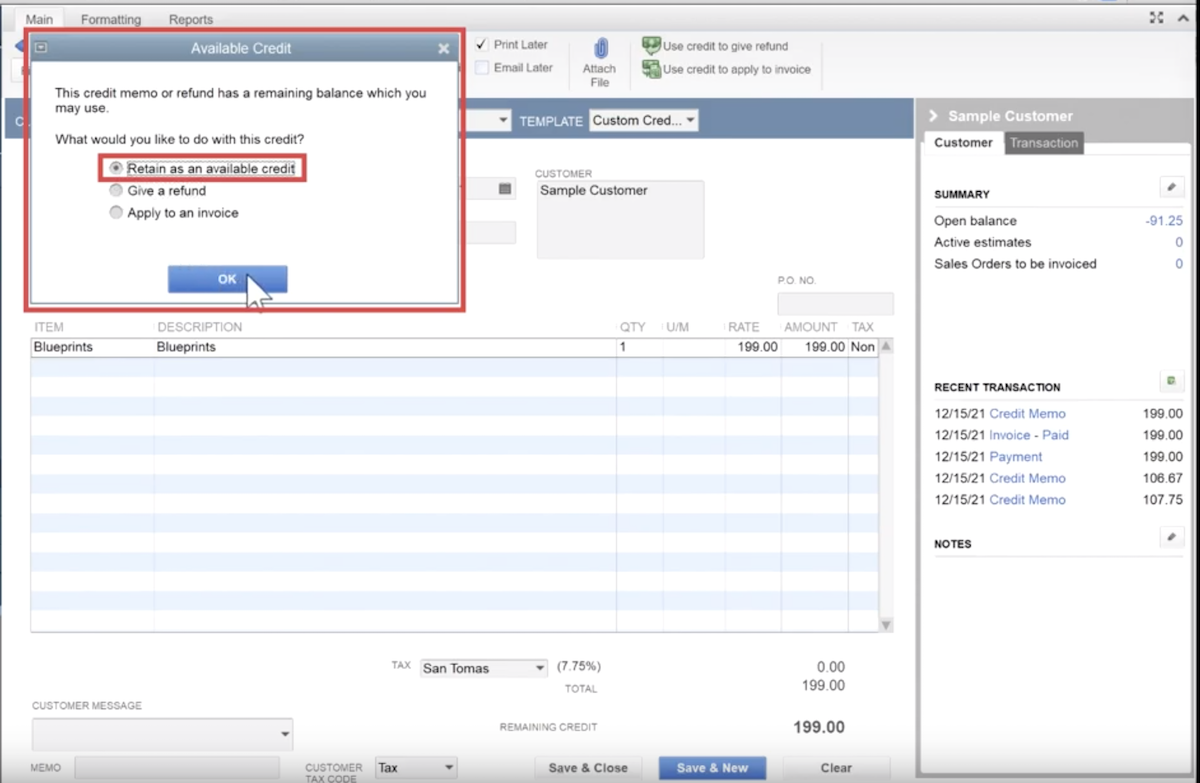
We then click Save and Close to bring up the next dialog box. Here is where we select Retain as an Available Credit and then hit OK.
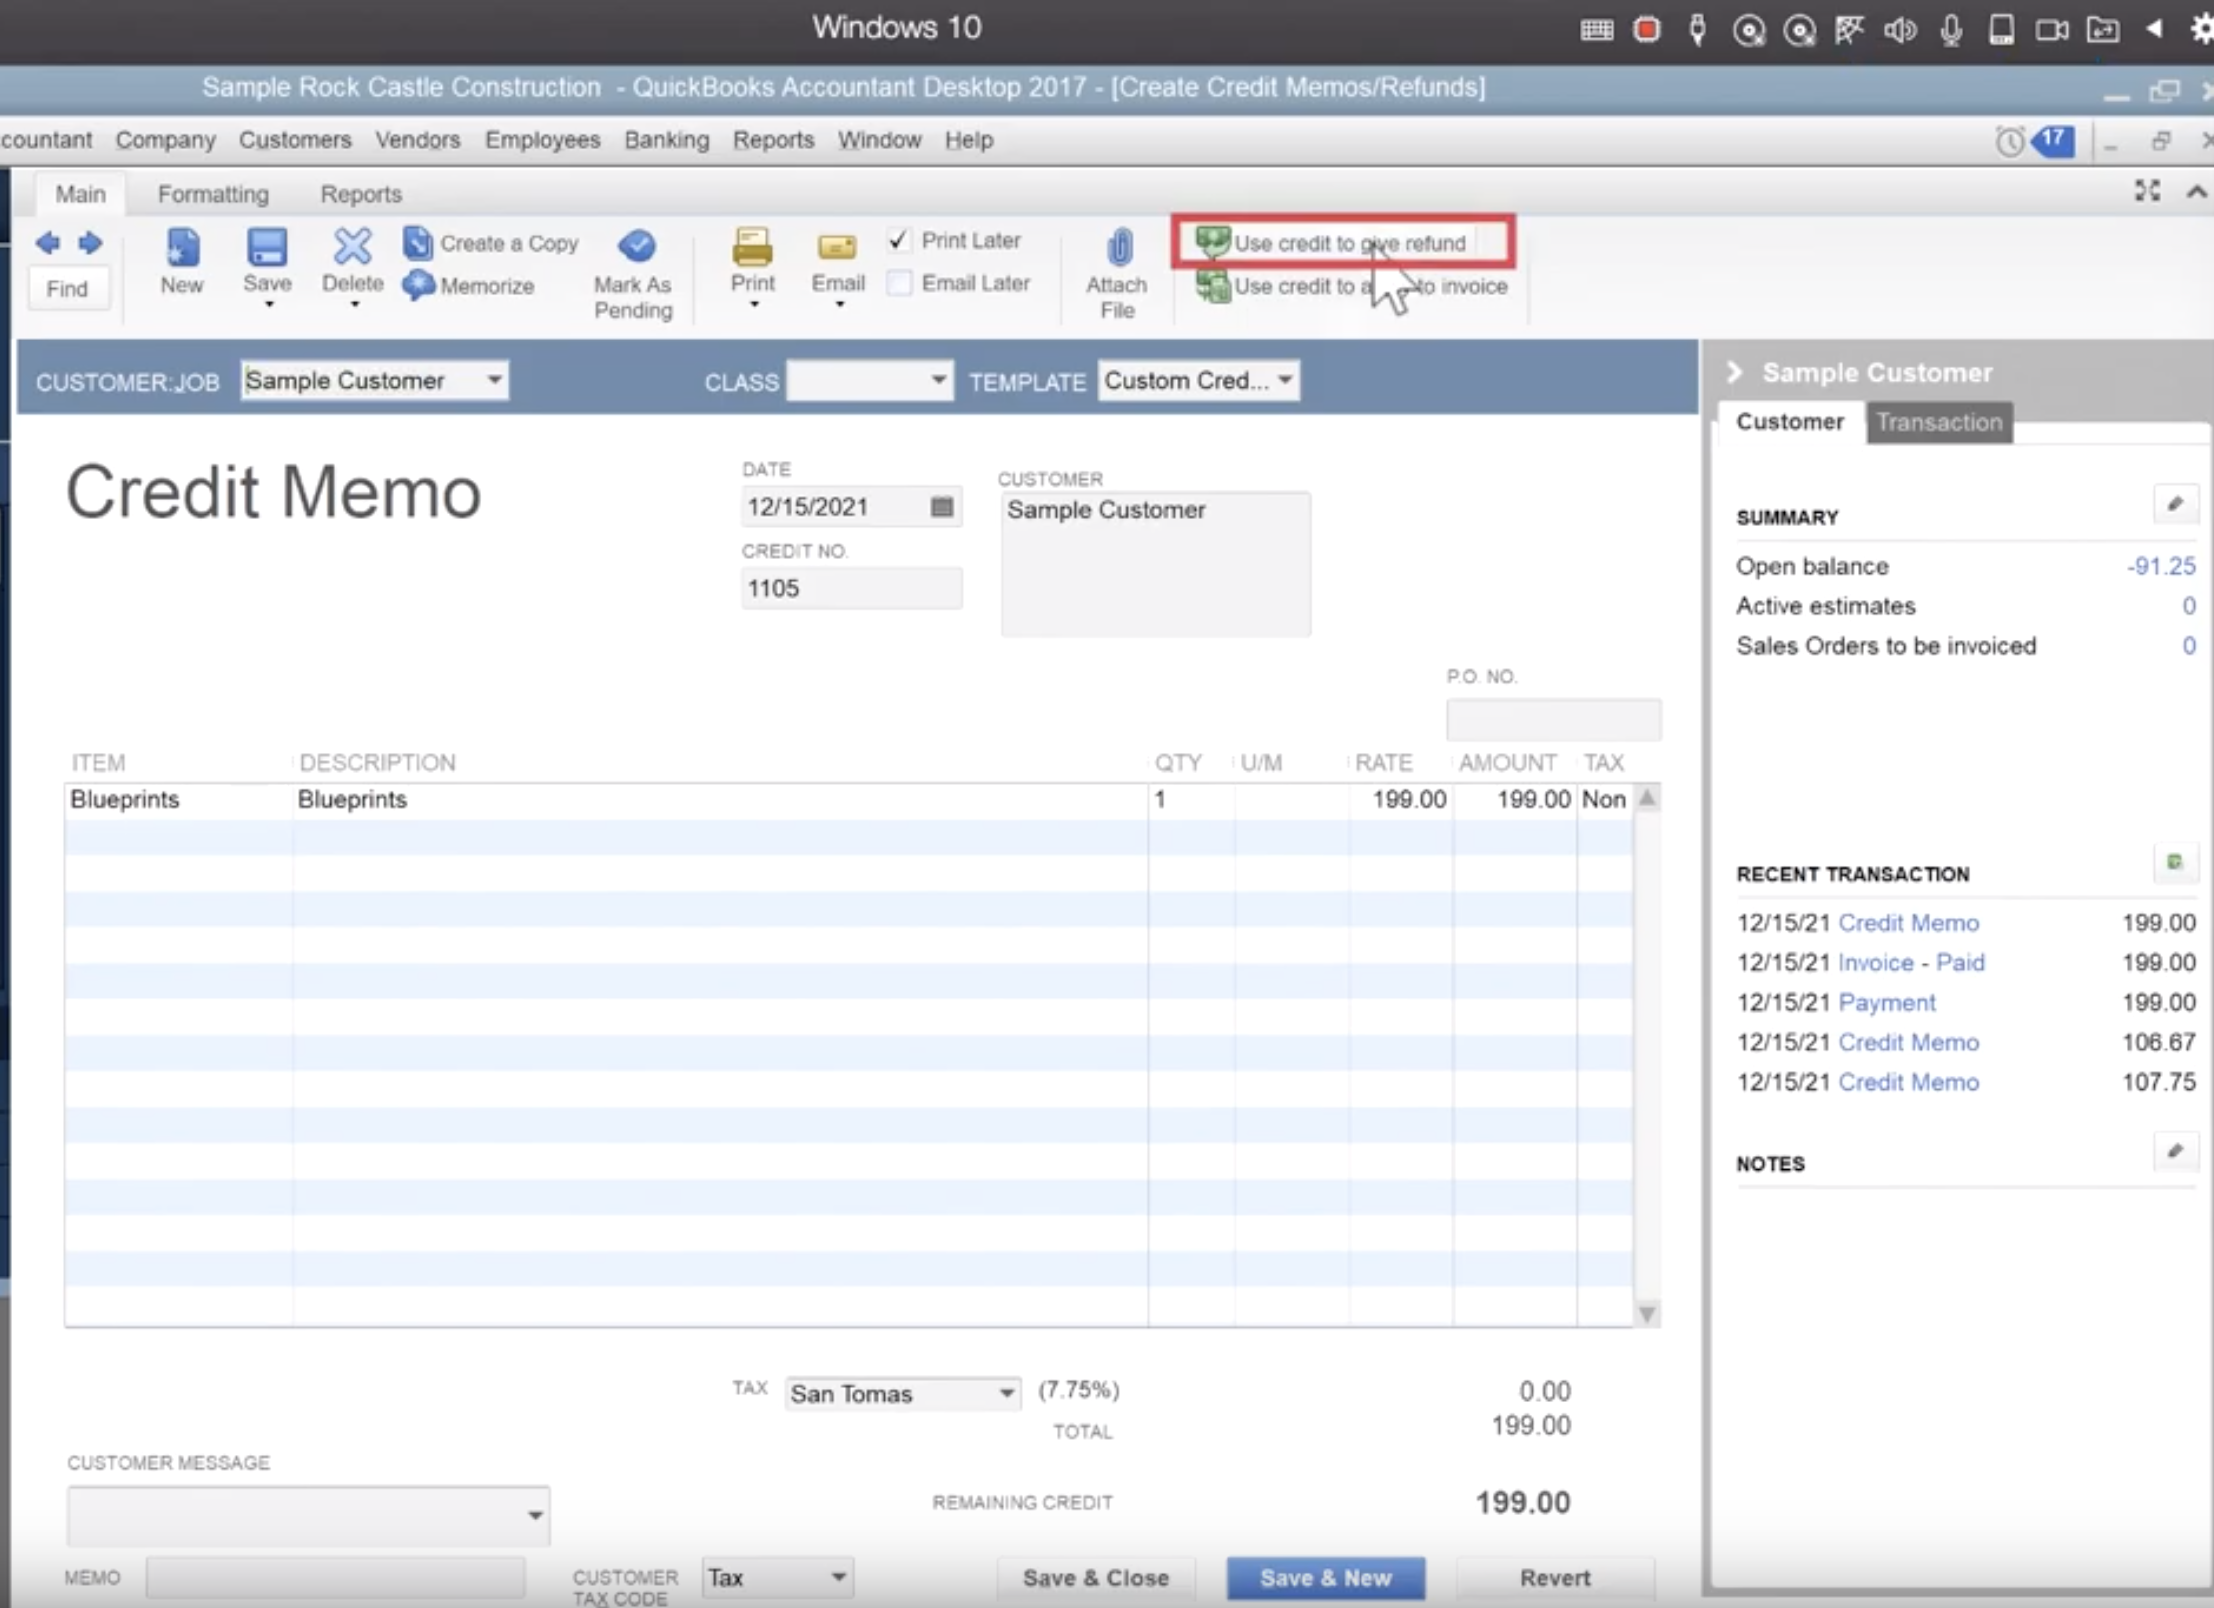
After we’ve clicked OK and logged the credit, we will be able to view the customer and their transactions. If we double click the credit memo we just created, the next screen that pops up will prompt us for instruction on how to deal with it. In the past example, we never got to this screen because we entered information about the check we just cut to them. Entering that information is what created the refund transaction in Customer Information. So now, let’s click Credit Memo and handle the refund.
Now that we’re in the credit memo, we need to click “Use Credit to Give Refund.”
The next screen will look very familiar. This was the screen where we entered the check information in the previous example.
After you enter the appropriate details, you’ll see a confirmation icon stating that the credit memo had been refunded.
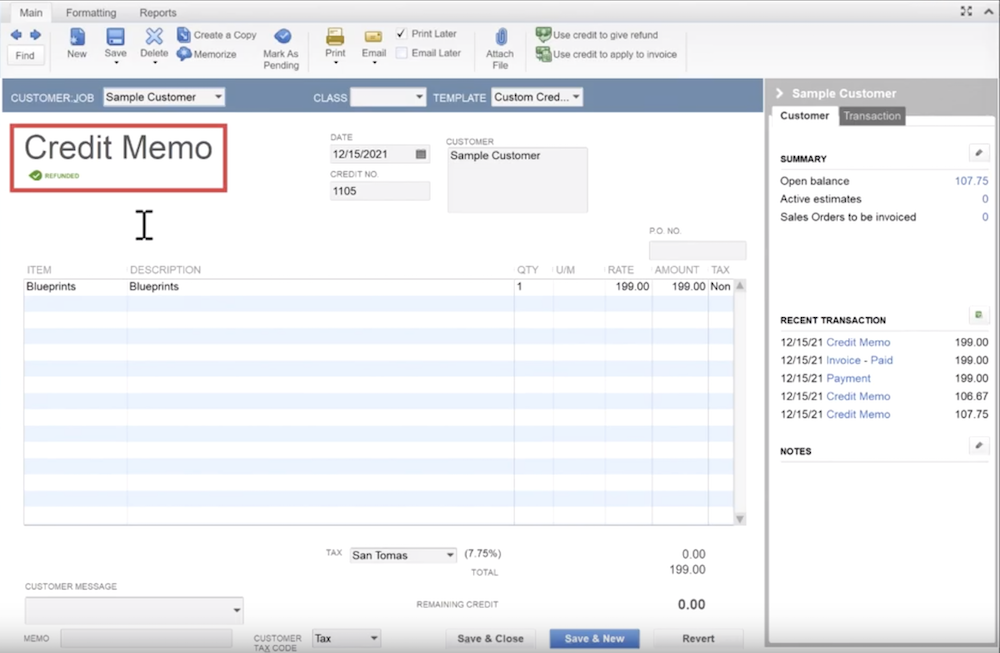
And you’re finished.
☕ If you found this helpful you can say “thanks” by buying me a coffee…
https://www.buymeacoffee.com/gentlefrog
If you would like to see a video walk-through of this tutorial, please see the video below.