Progress invoicing is a handy tool within QuickBooks that allows you to invoice clients incrementally throughout a project/job.
You’ll need to create an estimate first and have your customer accept it before you can use progress invoicing. Then you can charge either a percentage or a specific amount of the estimate in each progress invoice.
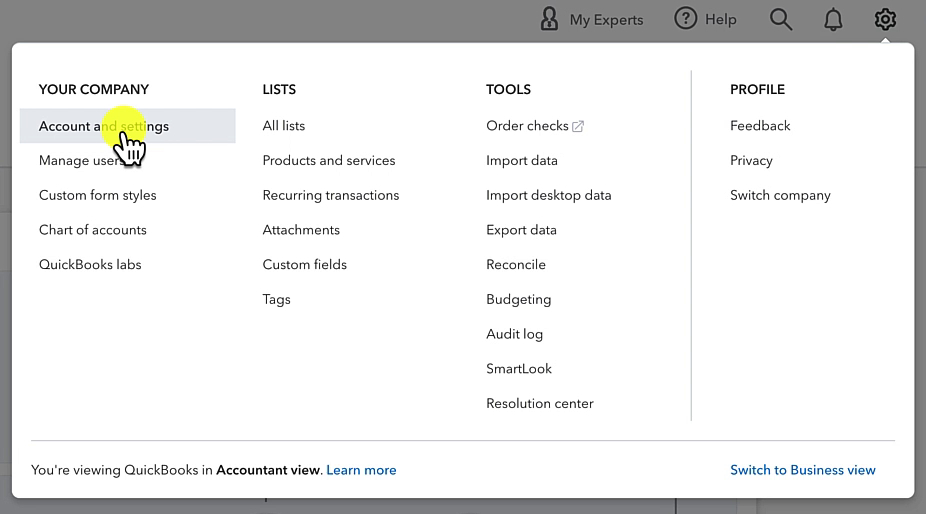
Turn On Progress Invoicing
First, you’ll need to have Progress Invoicing turned on.
Click on the gear in the upper left corner. Then click Account and settings under YOUR COMPANY.
In the left side menu click Sales. Scroll until you see Progress Invoicing.
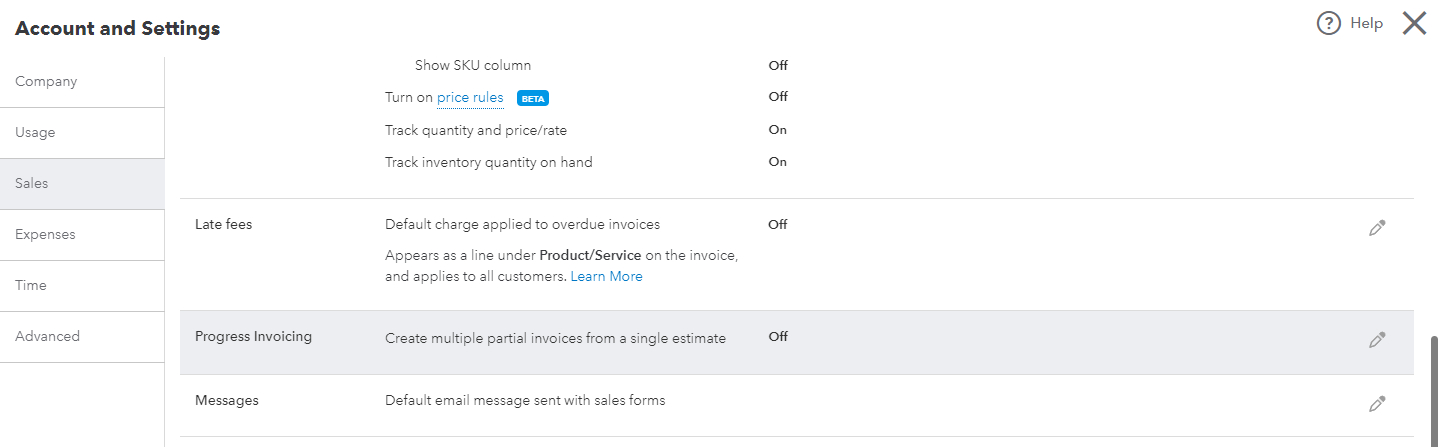
If it says “On” you’re good to go. If it says “Off” click the pencil to the right, click the toggle, and Save to turn it on.
Progress Invoicing an Estimate
Once an estimate has been accepted you can begin progress invoicing.
On the Estimate screen click the Create invoice towards the upper right.
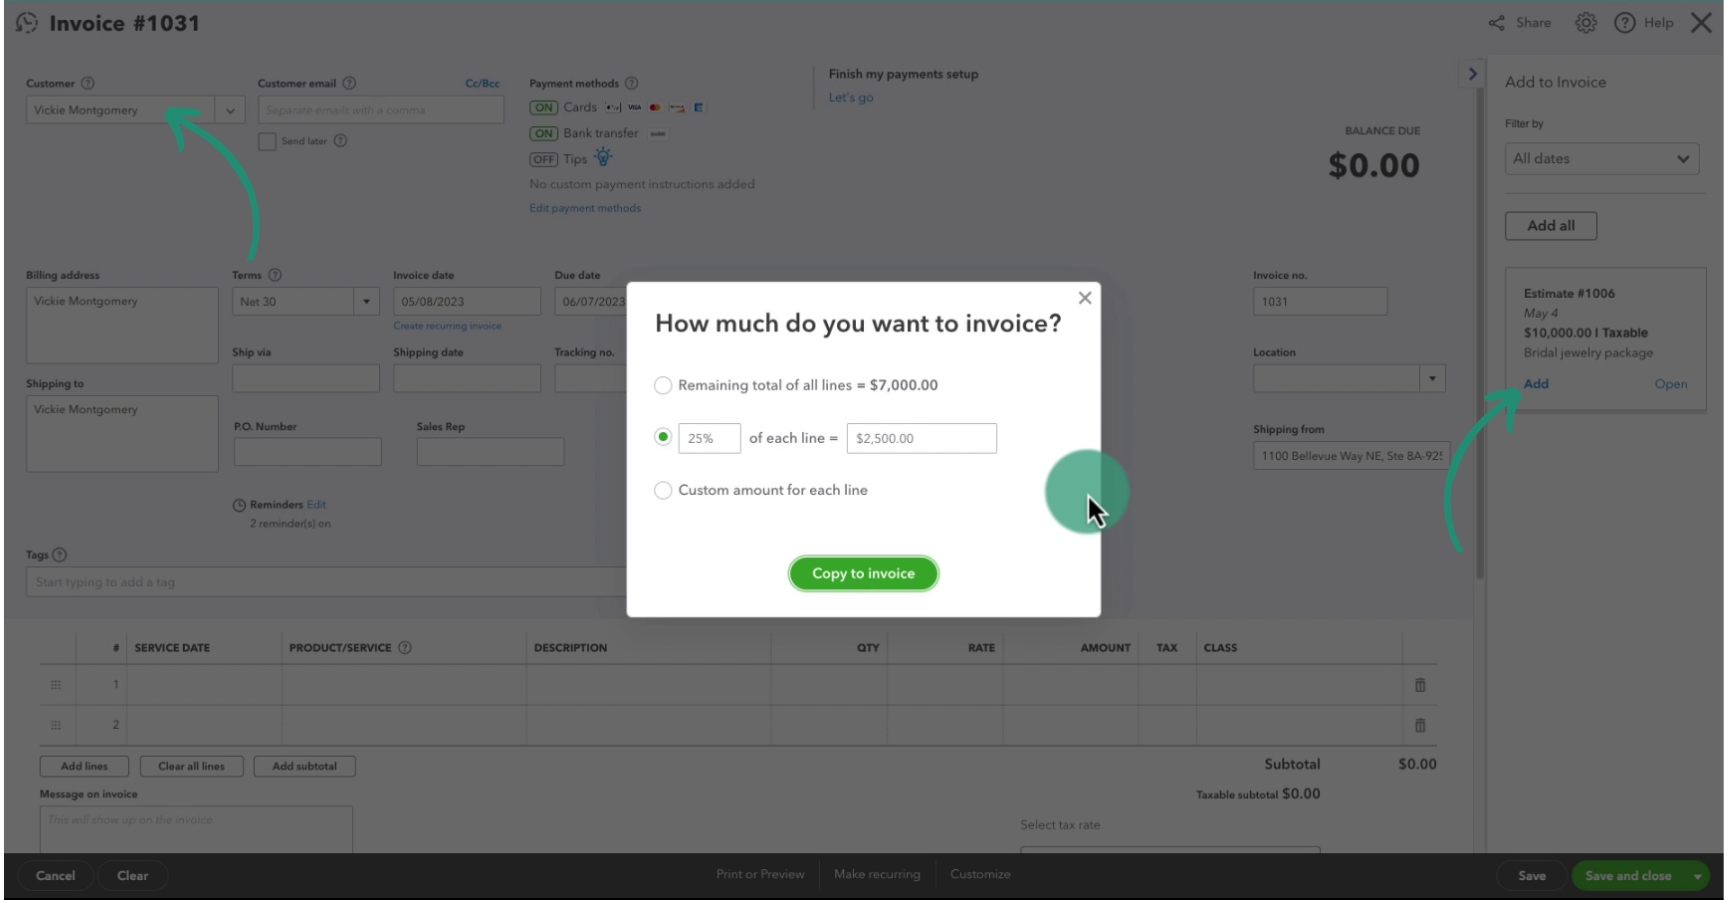
A pop-up will appear asking How much do you want to invoice? You have three options…
- Total of all estimate lines (this creates a single invoice for the whole estimate)
- % of each line
- Custom amount for each line
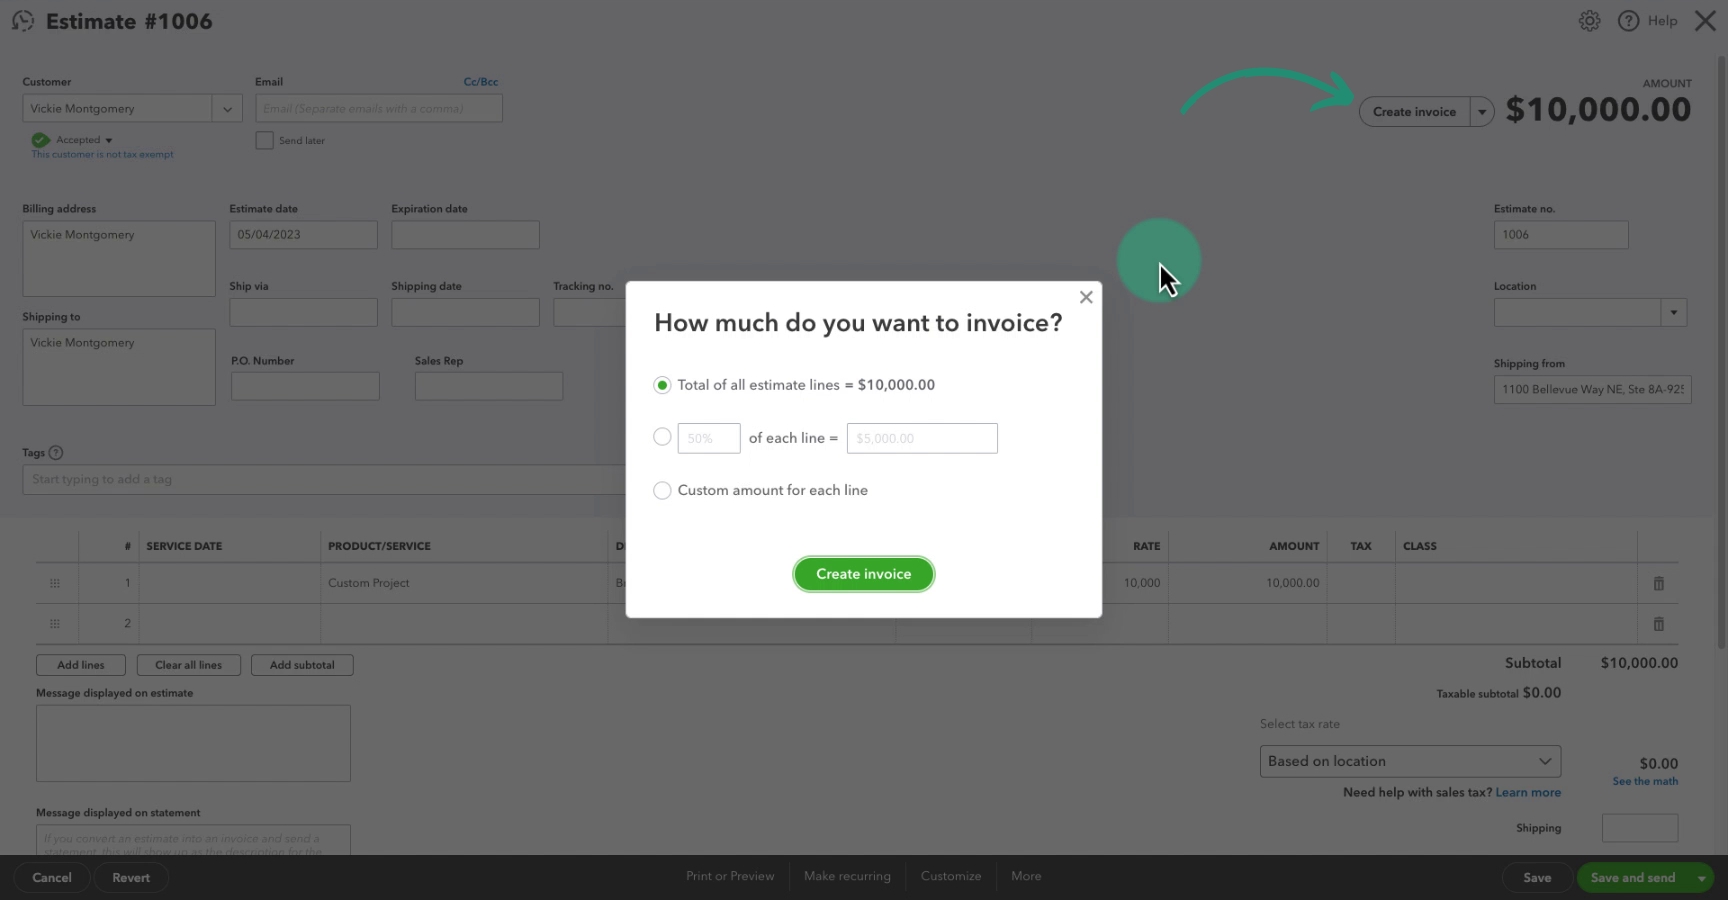
When you click Create Invoice it will take you to the Invoice screen.
Everything will be filled in with information from the estimate. Be sure to check the Invoice date as it will carry over the estimate date which could be a few weeks in the past. You don’t want to send an invoice to your customer that’s already past due!
When creating this invoice I selected to invoice 25% of each line.
Whatever you pick when creating the invoice from the estimate you can update it within the invoice.
Click the product/service line you want to change. You’ll have the option to change the percentage or even change from percent to amount and enter a specific amount.
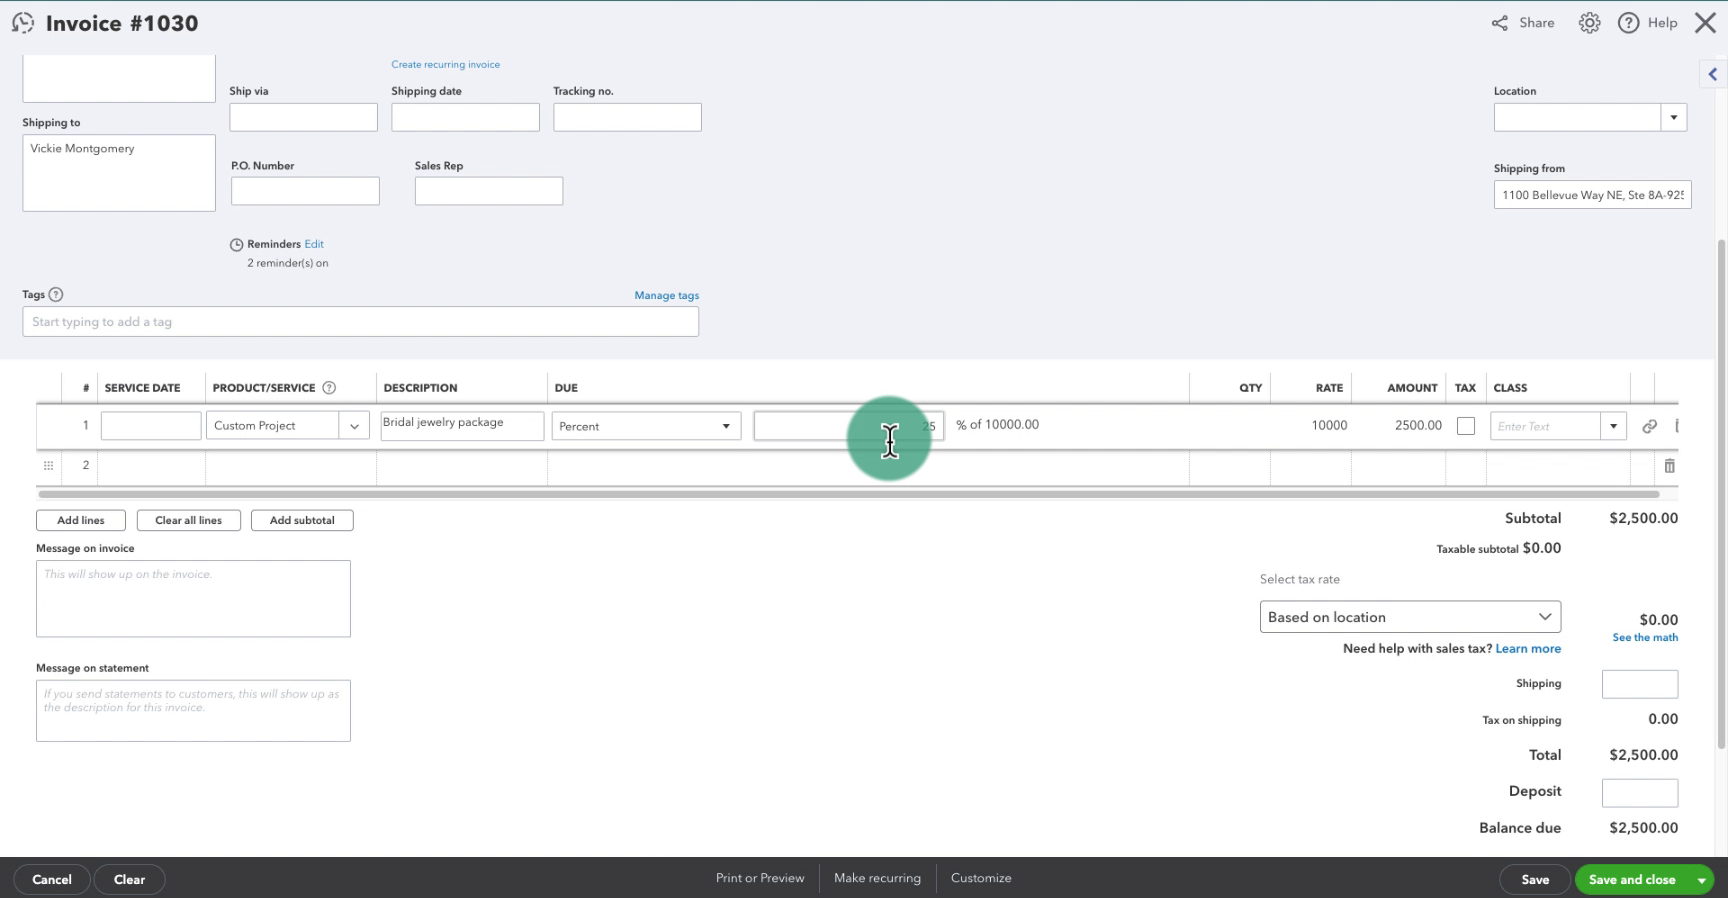
When you’re finished you would Save and close or Save and send. To save the invoice.
Create a Progress Invoice From New Invoice
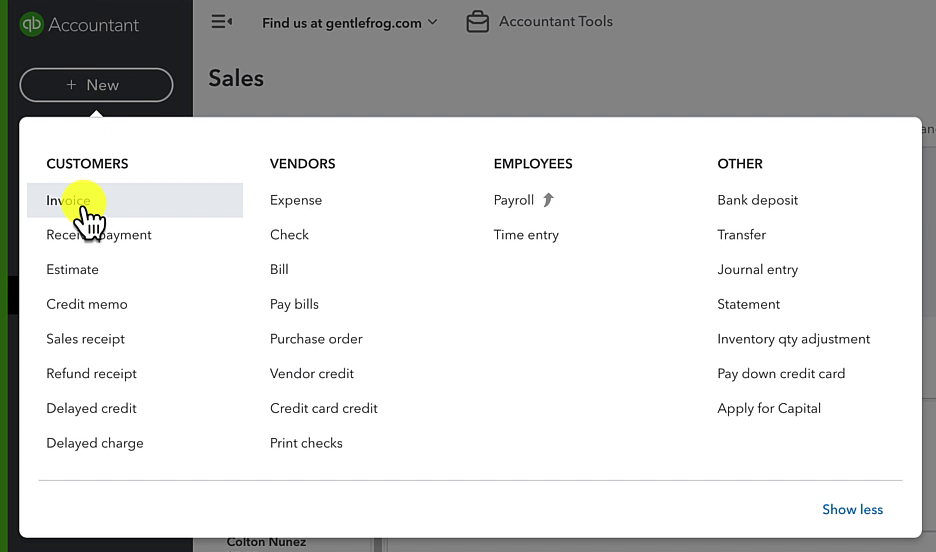
You don’t have to be within an estimate to create a progress invoice. You can click the +New button and select Invoice.
From the Invoice screen you’ll select your customer. The estimate will appear on the right side of the screen.
You can click the Add link in the Estimate square to add it to the invoice. The How much do you want to invoice pop-up will appear just like it did when creating an invoice from the estimate.
Progress Invoicing in the Customer Profile
Let’s see what this looks like in the profile of the customer you’re progress invoicing.
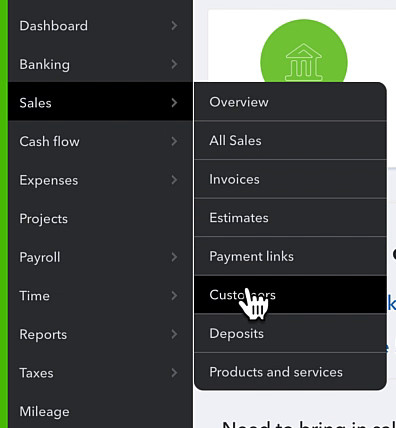
Click Sales in the left side menu then select Customers.
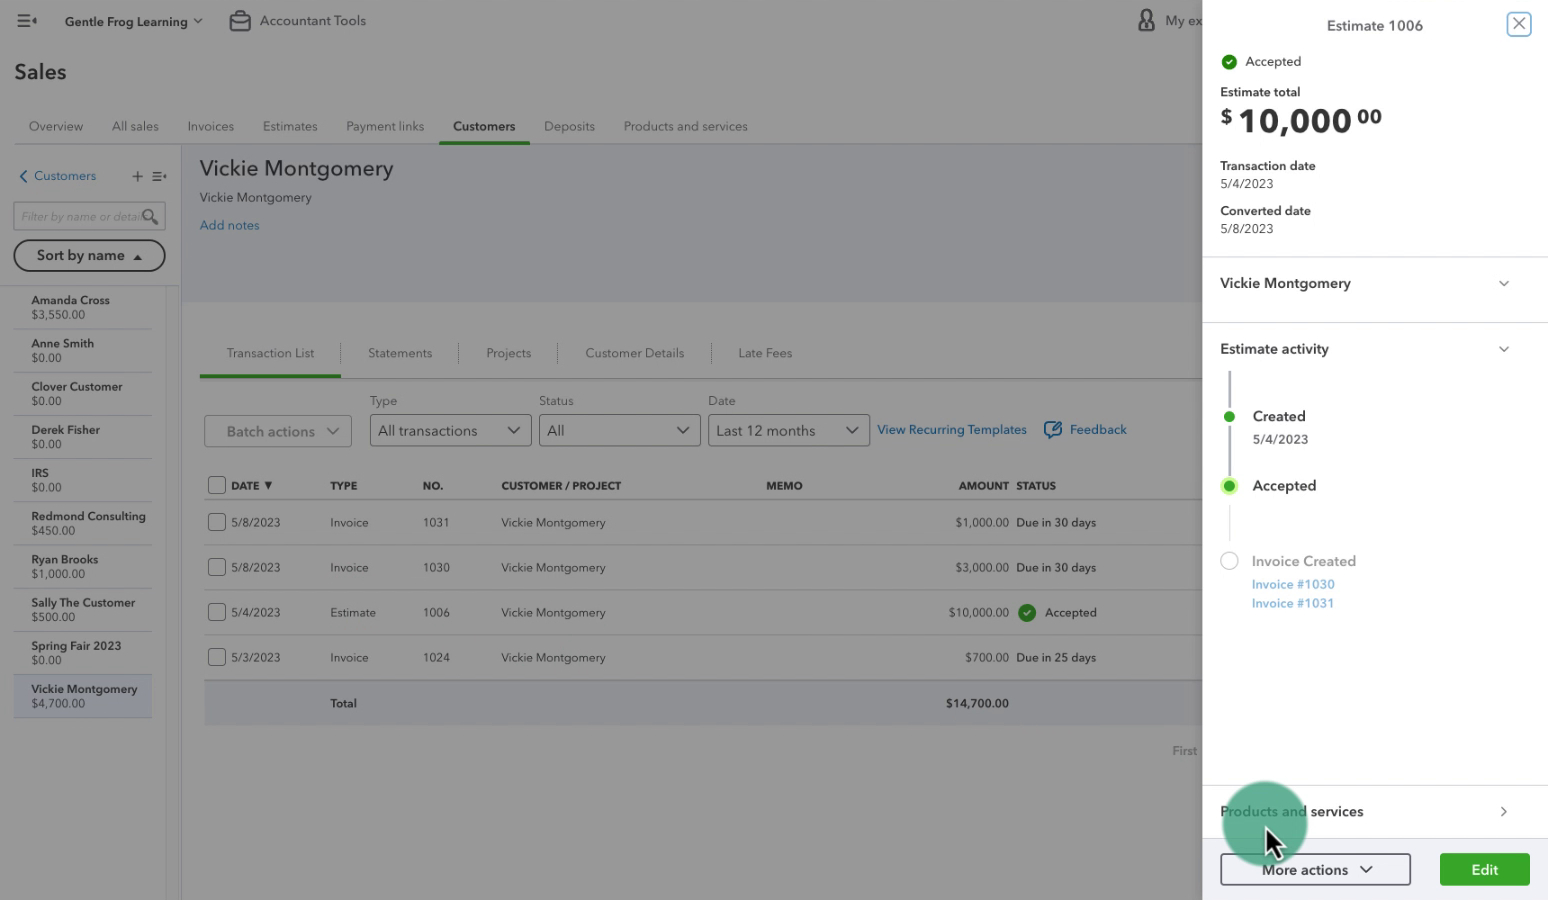
Use the search box to find your customer.
From within the customer profile you can see the Estimate with a green Accepted check mark.
If you click on the estimate it will open a box to the right that shows you when it was created, accepted and the invoices linked to it.
If you click the green Edit button it will open the estimate. From within the estimate you can see how much has been invoiced and how much remains to be invoiced. In the upper right below the amount it shows that there are linked invoices.

Progress Invoicing Report
In QuickBooks, you have one report that will show you progress invoicing. The Estimates & Progress Invoicing Summary by Customer Report.
This report shows you a list of all your estimates. You can see the status of the estimate, how much has been invoiced, the percentage invoiced and the remaining amount to receive.
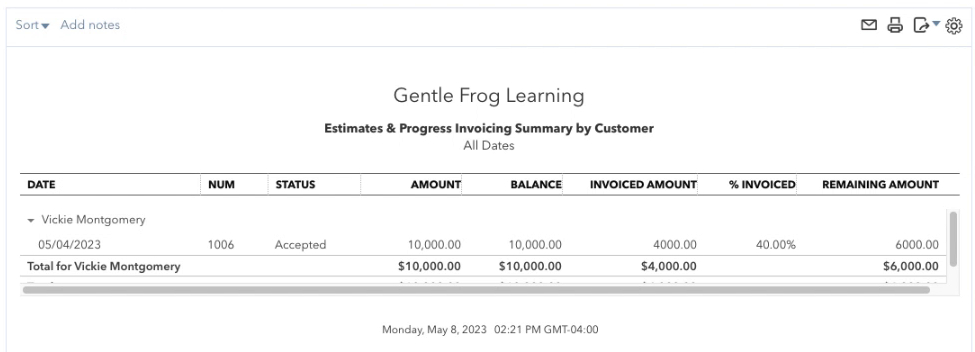
From within this report, you can click on an estimate to open it and create another progress invoice.
You now know how to create and use progress invoicing in QuickBooks Online. Scroll down if you’d like to see a video walkthrough.
☕ If you found this helpful you can say “thanks” by buying me a coffee… https://www.buymeacoffee.com/gentlefrog
If you have questions about progress invoicing in QuickBooks Online click the green button below to schedule a free consultation.