If a customer prepays for a product/service that is considered a “liability.”
A liability is “the state of being responsible for something, especially by law.”
Meaning, your customer paid you. Now it’s on you to provide the product/service they paid for.
These payments do not count as income. Instead, they go into a prepaid liability account. Once you provide the goods/services and are ready to collect funds from the customer that’s when the payment becomes income.
Here’s an overview of how to account for these prepayments in QuickBooks Desktop:
- Create a liability account.
- Map an item to that liability account.
- Use that item on invoices to record prepayments/deposits from customers.
- When you collect payment for goods/services use the item mapped to the liability account on the invoice.
For this tutorial, I’ll show you how to create a liability account and map an item to that account. I’ll also show you an example of a prepayment being collected and applied to an invoice.
I’m using QuickBooks Premier 2022. The instructions are the same for all 2022 versions of QuickBooks Desktop.
Quick Instructions:
Create a Customer Prepaid Liability Account
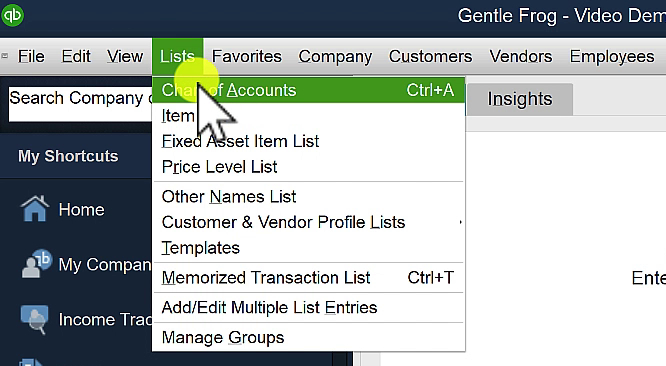
- In the top menu click Lists -> Chart of Accounts
- In the bottom menu click Account -> New
- Select Other Account Types
- In the drop-down menu select Other Current Liability
- Click Continue
- Fill in Account Name
- Fill in Description (optional)
- Click Save & Close
Map an Item to the Customer Prepaid Liability Account
- In the top menu click Lists -> Item List
- In the bottom menu click Item -> New
- In the Type drop-down select Service
- Fill in Item Name/Number
- Fill in Description (optional)
- In the Account drop-down select your new liability account
- Click OK
Request a Prepayment/Deposit
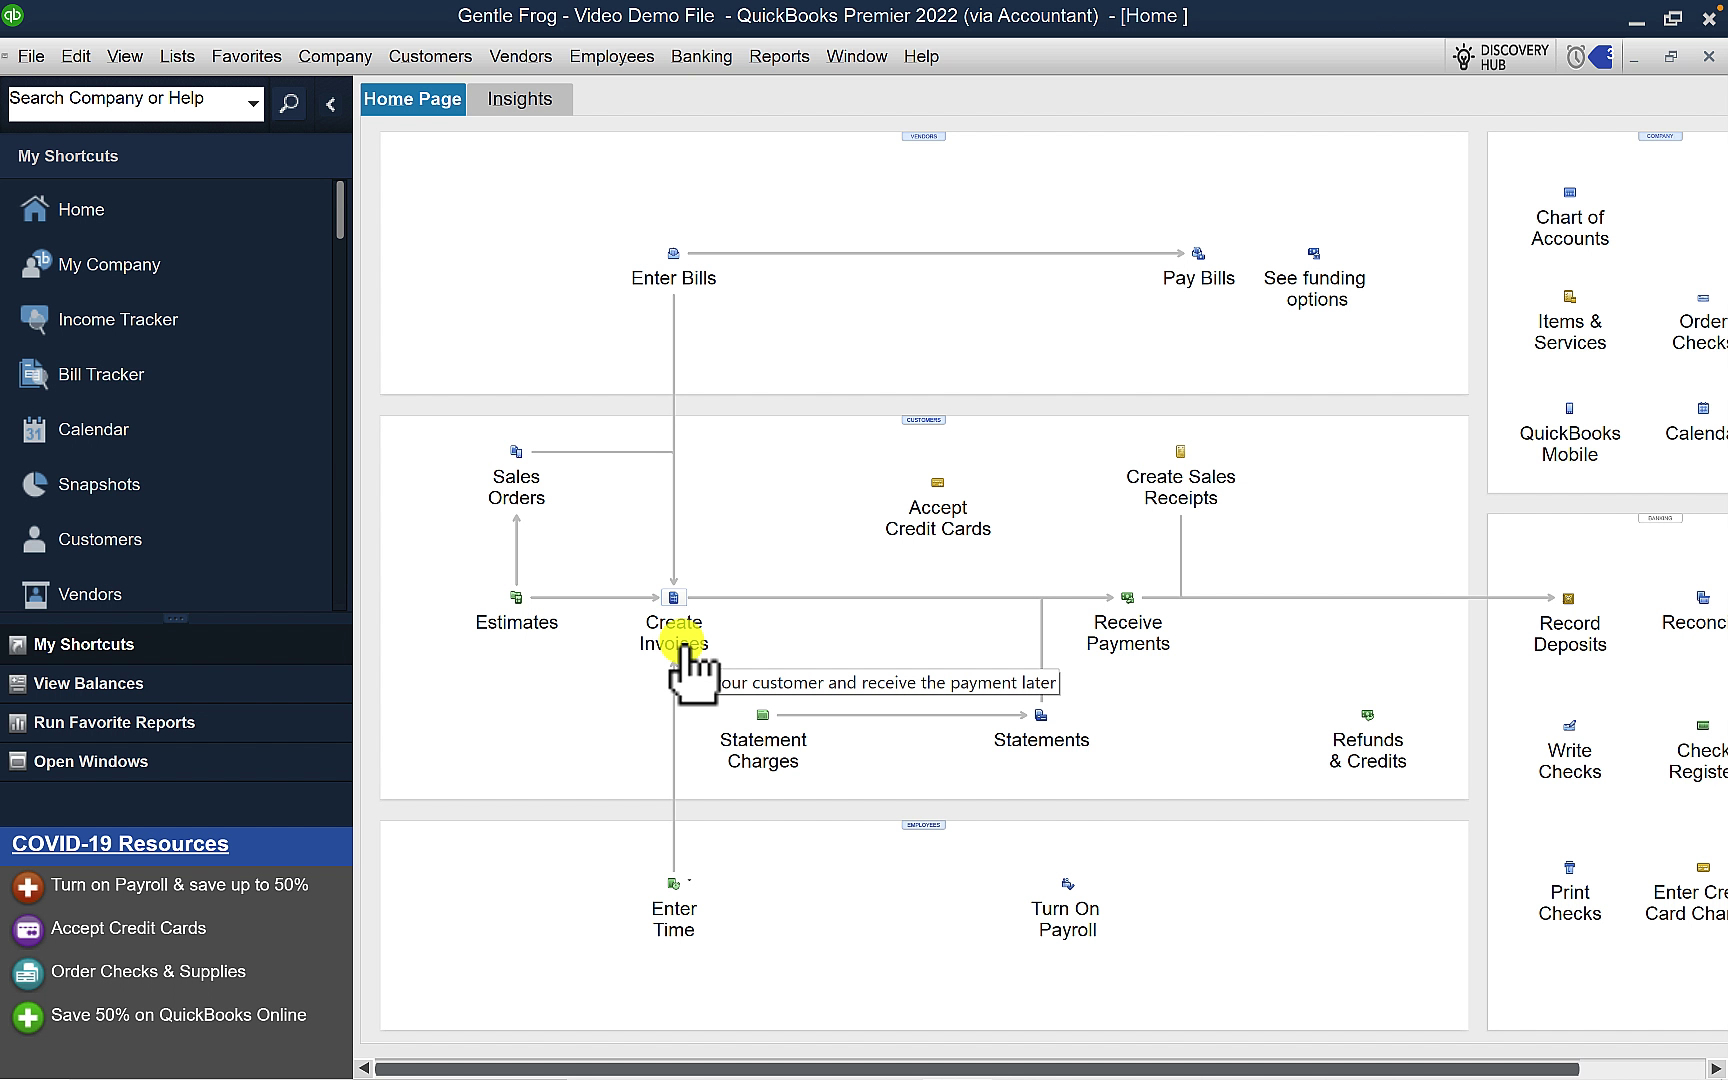
- On the Home Page click Create Invoices
- In the CUSTOMER:JOB drop-down menu select the customer/client you’re requesting the prepayment from
- Fill in the following:
- QUANTITY: 1
- ITEM: The item mapped to your customer liability account
- DESCRIPTION: The reason for collecting the deposit
- PRICE EACH: The deposit amount you’re collecting
- Click Save & Close
Receive a Prepayment/Deposit
- In the top menu click Customers-> Receive Payments
- In the RECEIVED FROM drop-down select the customer making the prepayment/deposit
- Select the invoices being paid
- Click Save & Close
Apply a Prepayment to an Invoice
- On the Home Page click Create Invoices
- In the CUSTOMER:JOB drop-down menu select the customer/client you’re invoicing
- Add the product/services you’re invoicing the customer for
- Add the item mapped to your customer liability account
- Give the item a negative dollar amount equal to the prepayment/deposit
- Click Save & Close
Keep reading for a complete walkthrough with screenshots:
Create a Customer Prepaid Liability Account
To create your Liability account click Lists in the top menu, then select Chart of Accounts.
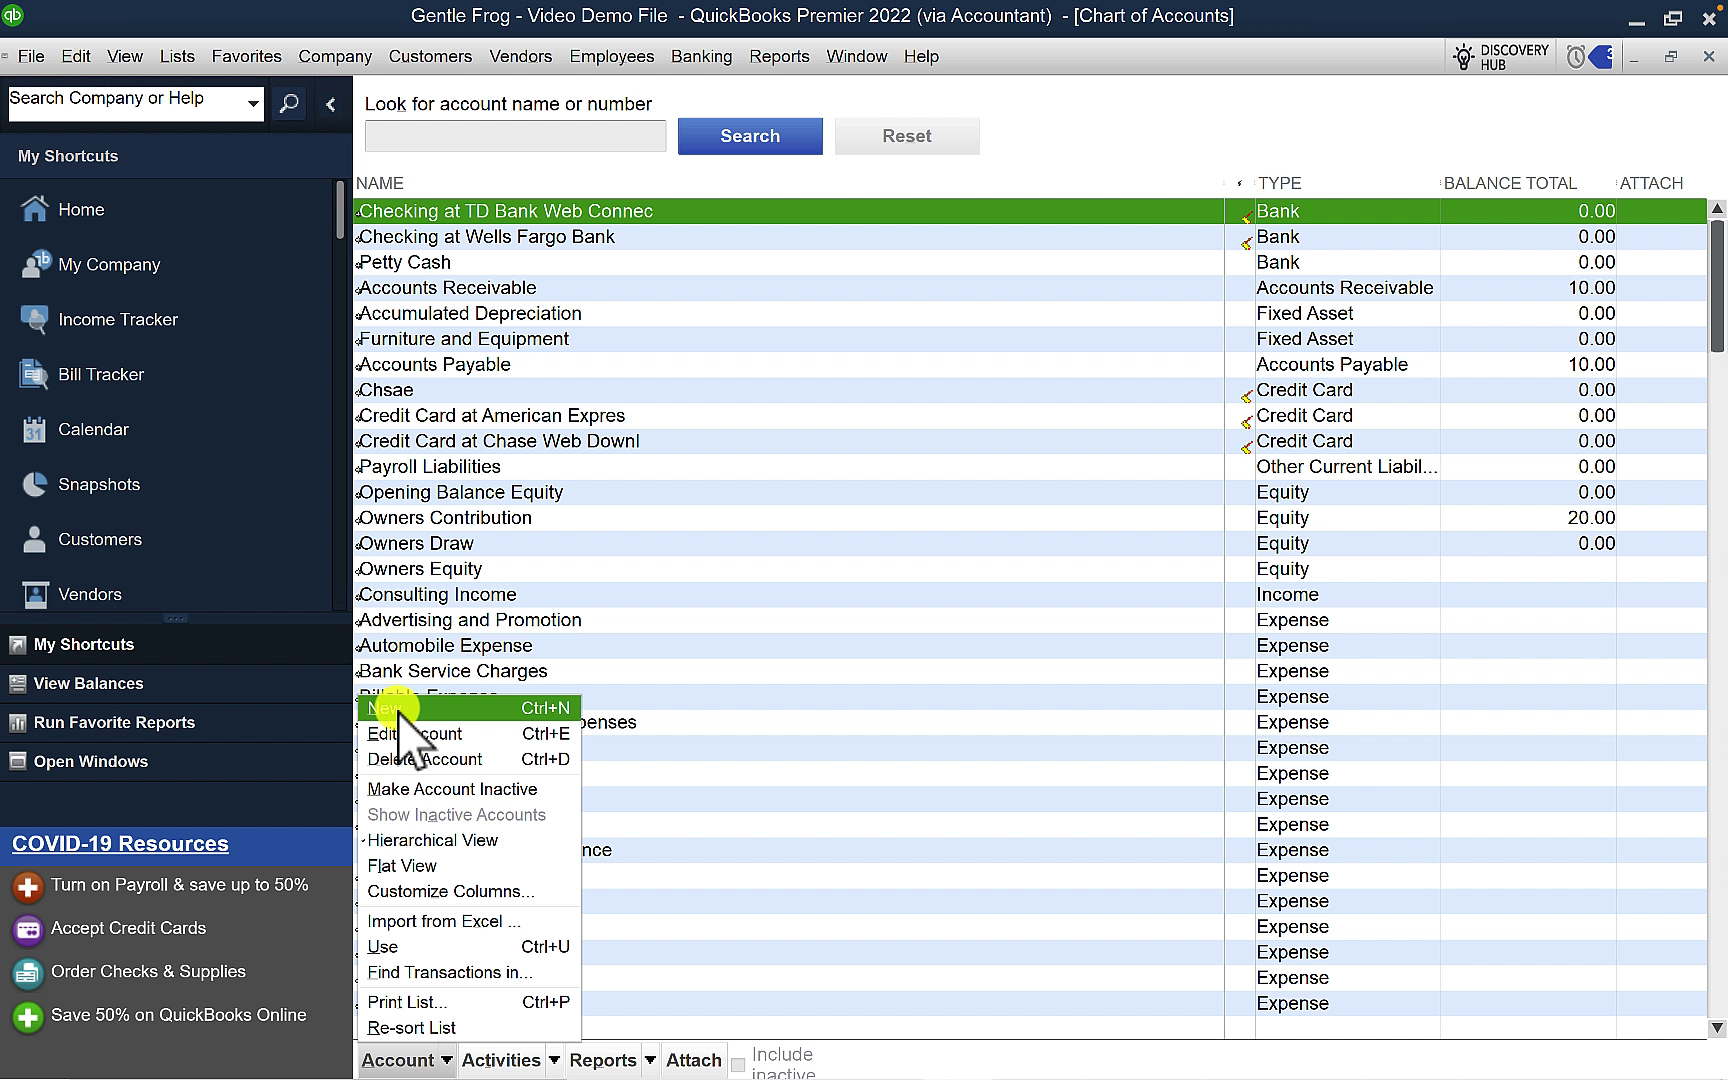
At the bottom of the Chart of Accounts click Account and select New from the menu.
Select Other Account Types and from the drop-down menu click Other Current Liability.
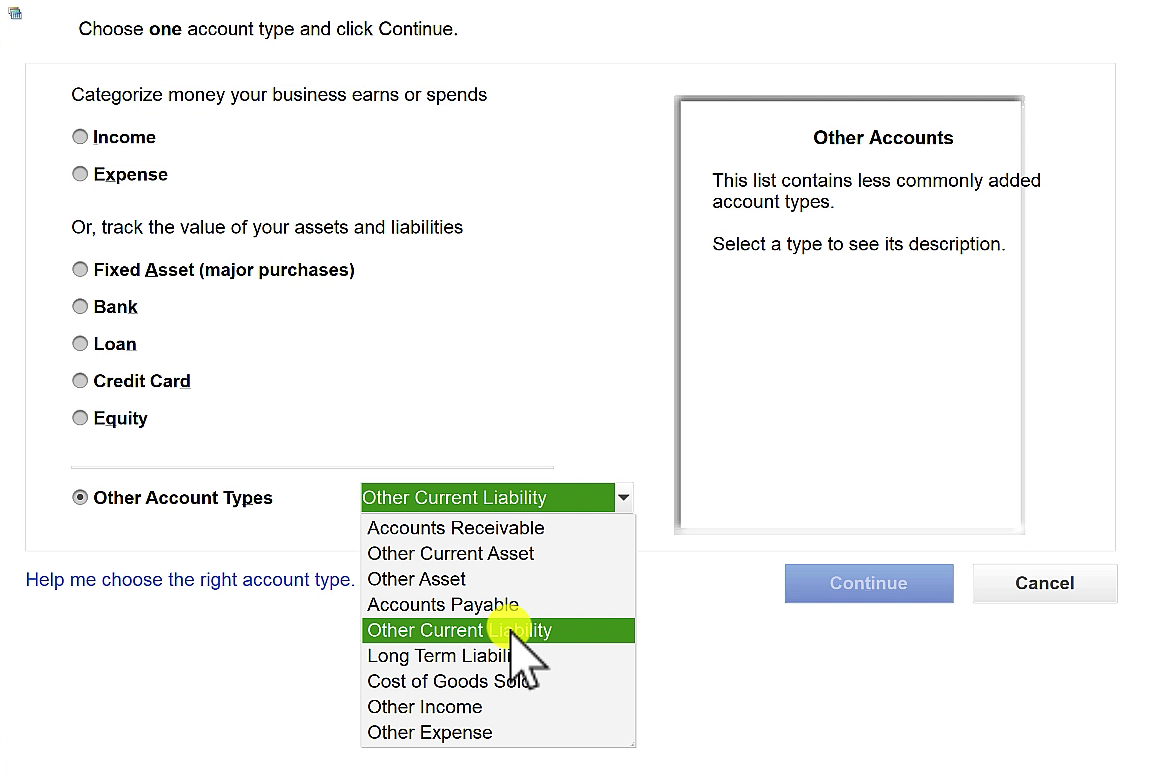
Other Current Liability accounts are for tracking money your business owes and expects to pay within one year. If you think it’ll take longer than a year select Long Term Liability. Click Continue.
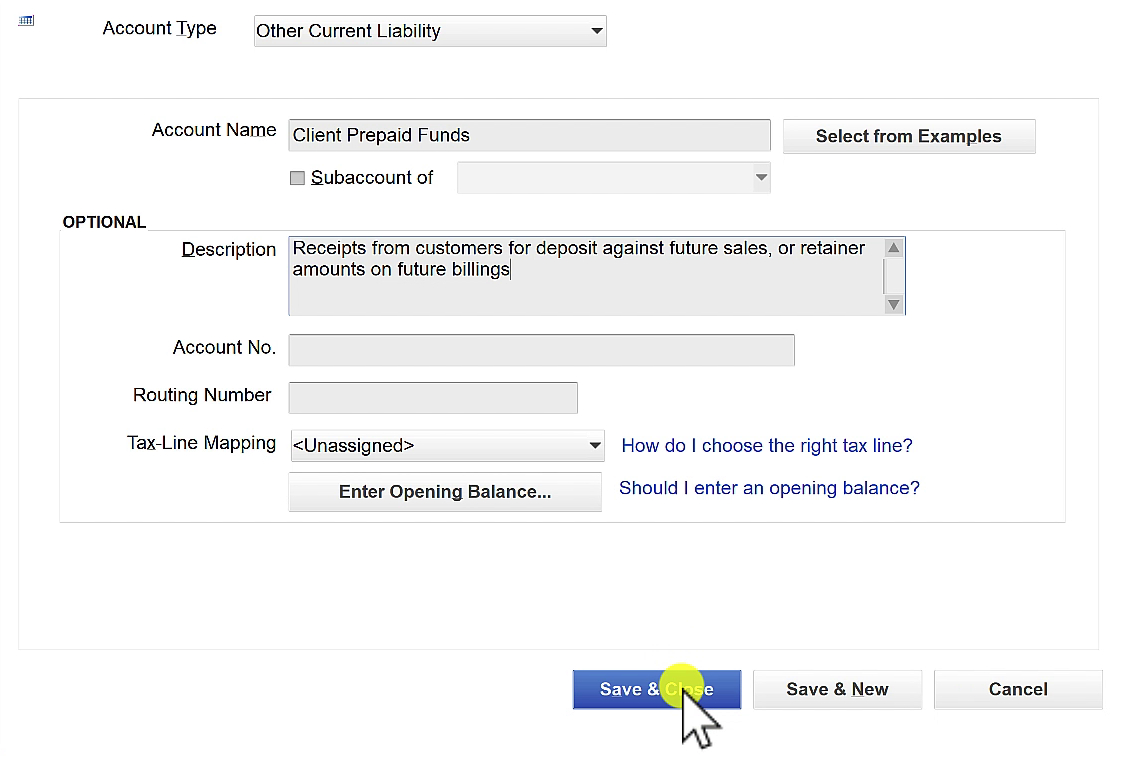
Now you’ll give your new account a name. I’m using “Client Prepaid Funds” you can use any name you’d like.
Entering a description, account number, routing number, and mapping to a tax-line are all optional.
When ready click Save & Close.
Your new account will now appear in your Chart of Accounts.
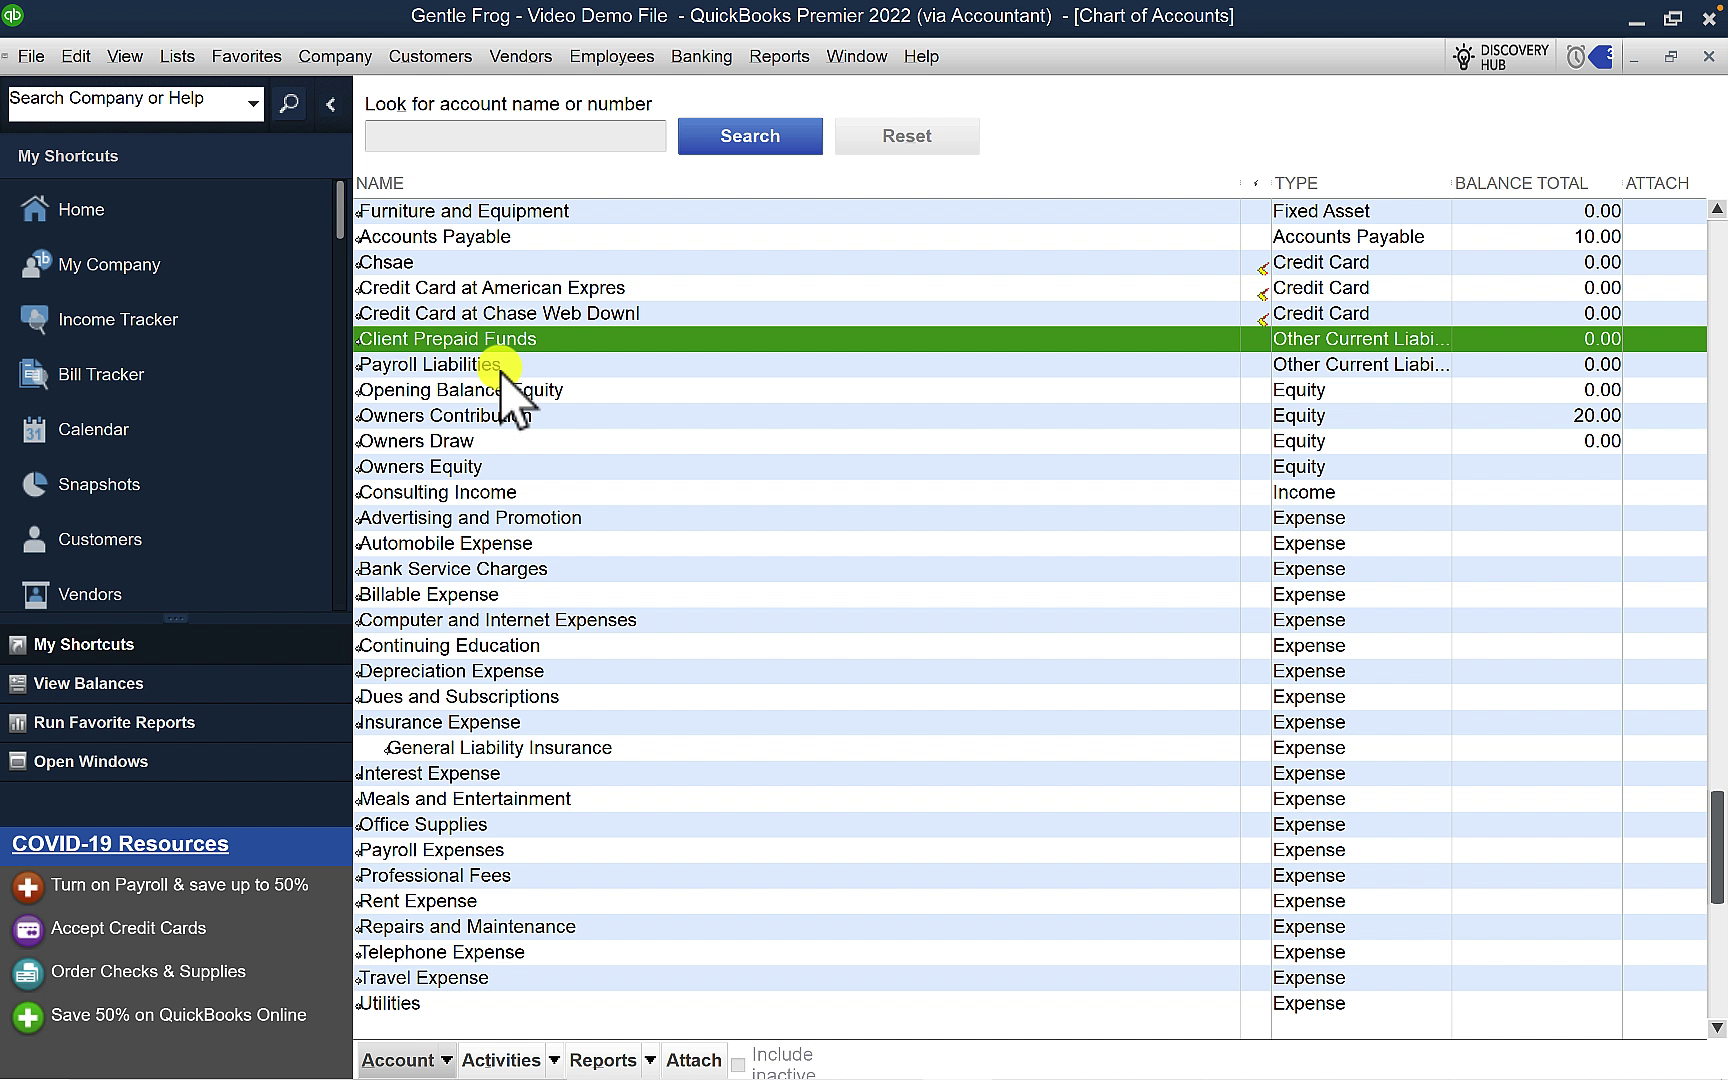
When there’s value in this account it will appear in the Balance Sheet in the Liabilities section.
Map an Item to a Customer Prepaid Liability Account
Now you’ll need to create an item to map to this account.
In the top menu click Lists -> Item List.
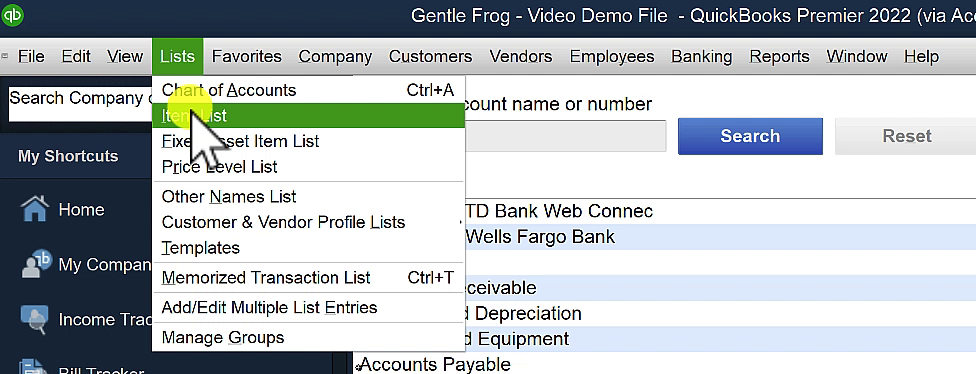
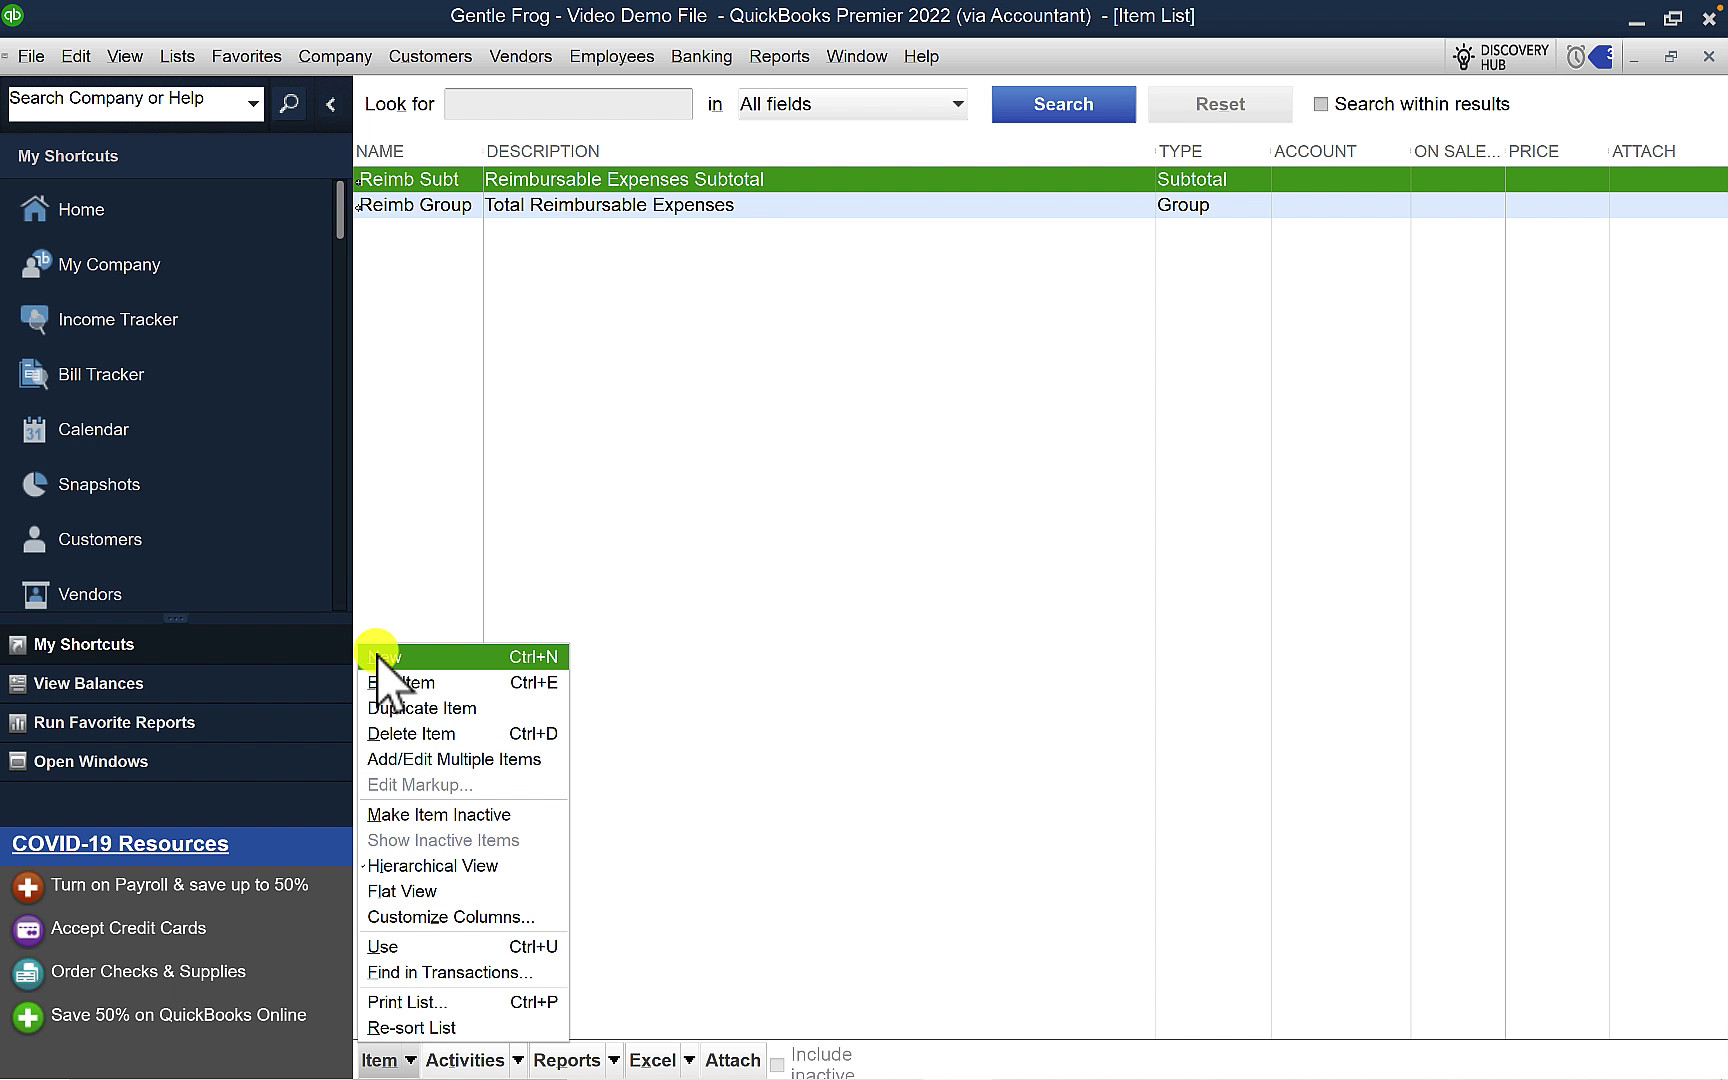
At the bottom of the screen click Item then select New from the menu.
From the Type drop-down select Service.
Item Name/Number is the name that will appear on invoices in reports. I’m calling mine “Customer Deposit.”
The Description is optional. But it’s a good idea to enter something that will remind you how you’re using this item.
There’s no Rate to enter.
For the Account, find the liability account you created earlier from the drop-down menu.
When you’re done filling out this screen click the blue OK button.
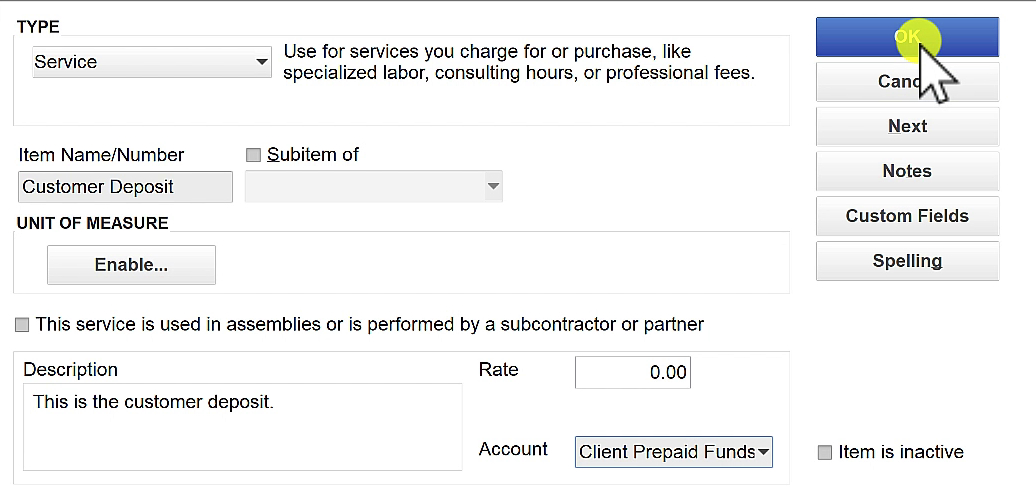
This item is now mapped to your customer prepaid liability account.
Request a Prepayment/Deposit from a Customer
Let’s imagine you have a customer you’d like to collect a prepayment from.
First, you’ll need to create an invoice. From the Home Page click Create Invoices.
Select the customer you’re requesting the prepayment from in the CUSTOMER:JOB drop-down.
- QUANTITY: 1
- ITEM: The customer deposit item you created earlier
- DESCRIPTION: The reason for collecting the deposit
- PRICE EACH: The deposit amount you’re collecting
When you’re ready click the Save & Close button at the bottom of the screen.

Receiving A Prepayment
Receiving a prepayment is the same as receiving any other type of payment.
In the top menu click Customers -> Receive Payments.
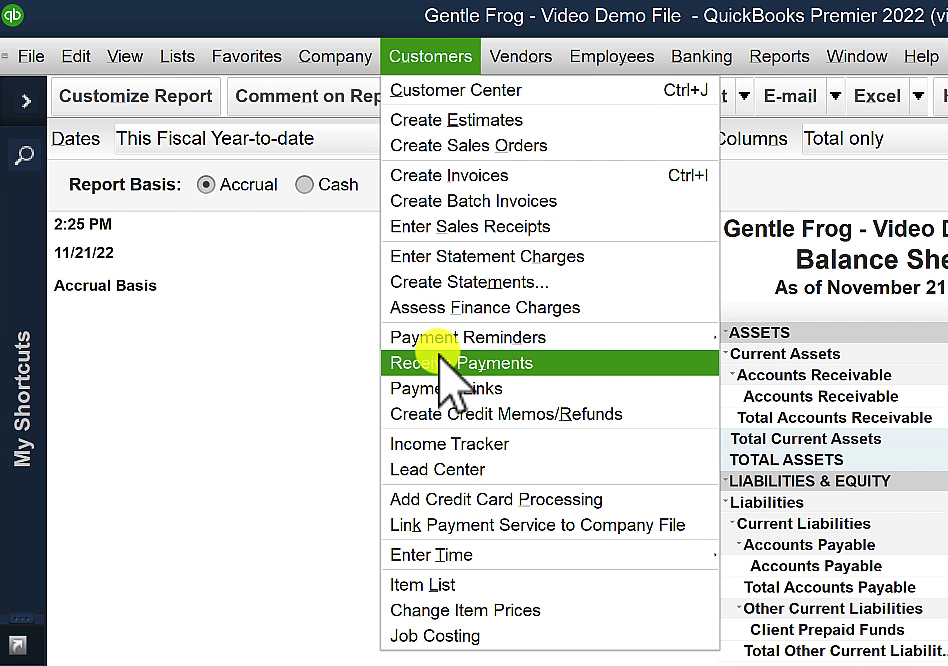
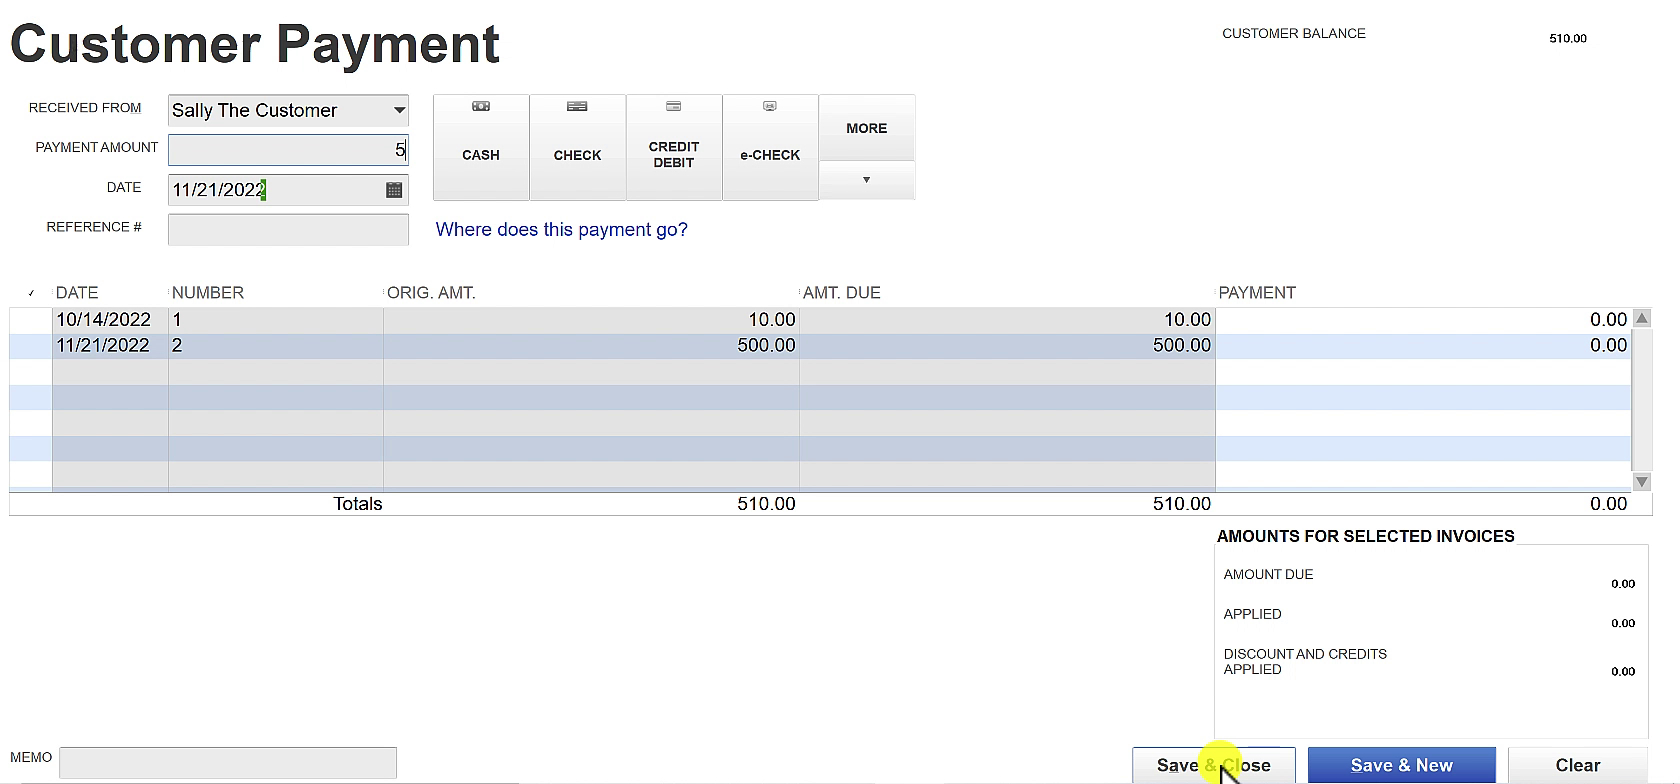
Select the customer making the prepayment in the RECEIVED FROM drop-down.
Any open invoices for that customer will appear you can select which ones they’re paying and click Save & Close.
In my example below I’m collecting a $500 prepayment and $10 for a previous invoice.
Apply a Prepayment to an Invoice
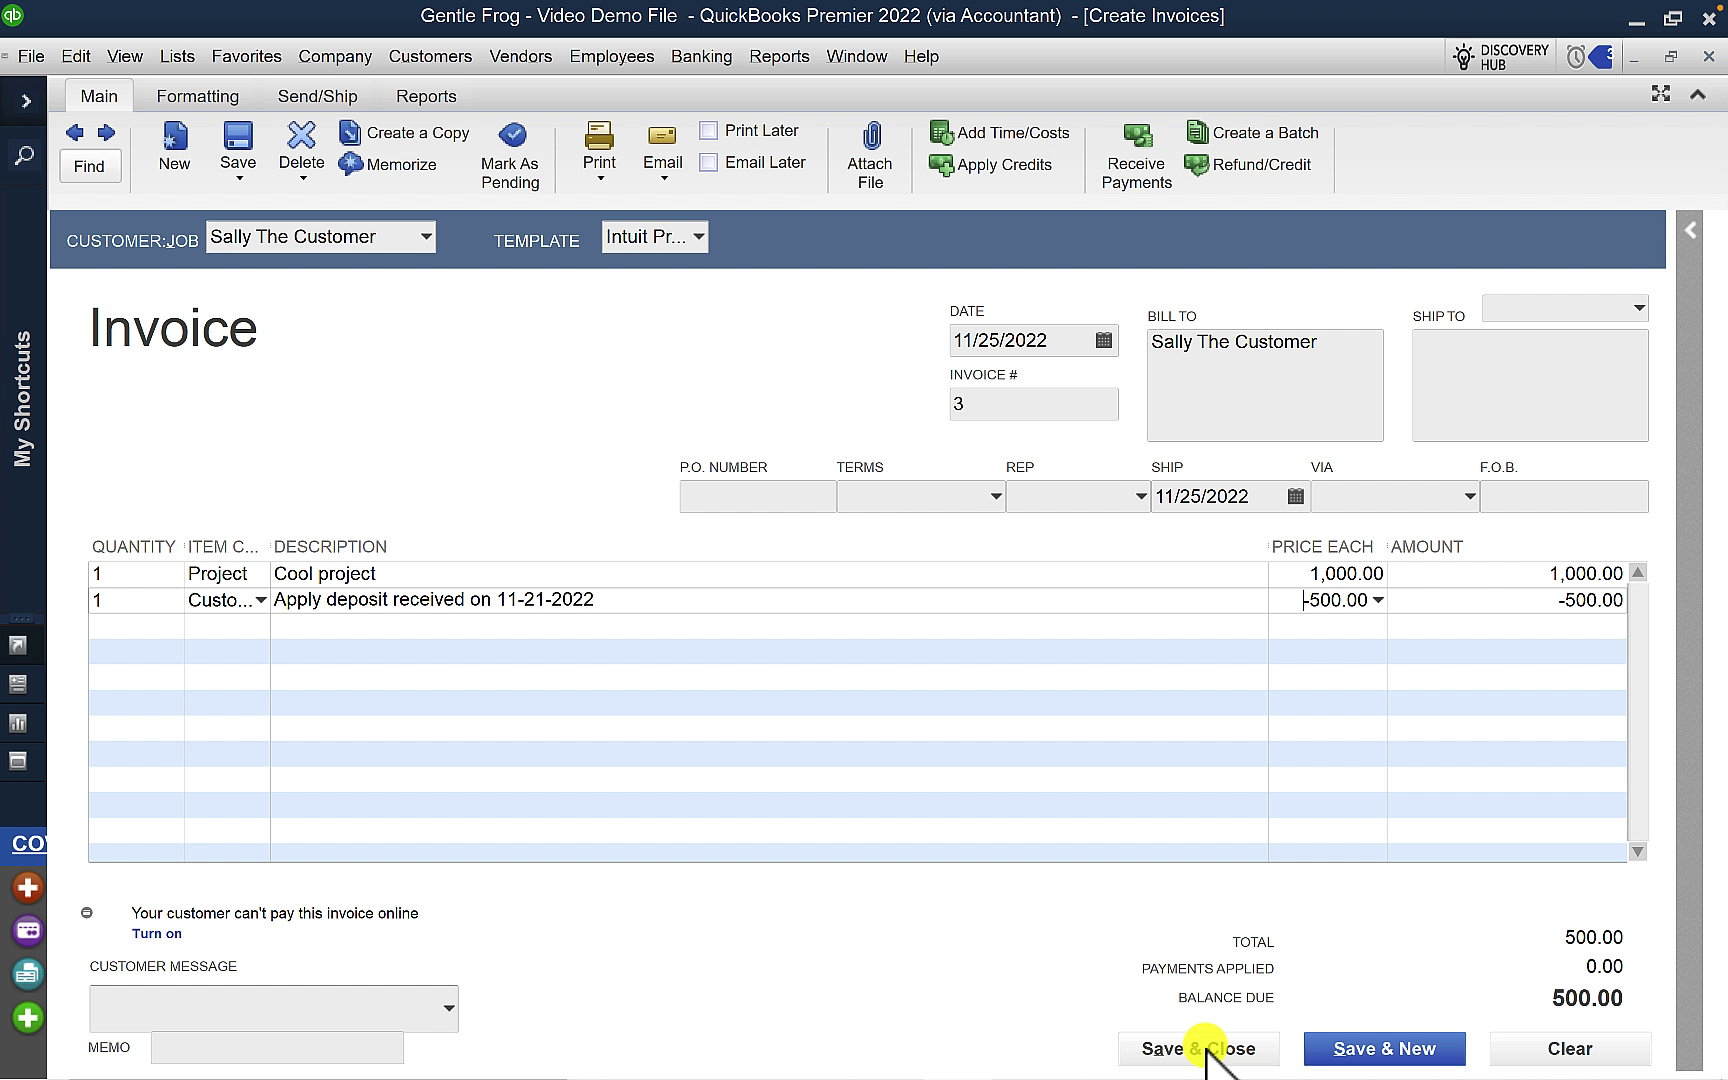
Now we’re going to pretend that some time has passed and we’re ready to apply the prepayment to an invoice for a project.
Click Create Invoices on the Home Page. Select your customer from the CUSTOMER:JOB drop-down.
In my example, the first item on the invoice is a project with a price of $1,000.
Next, I add the customer deposit by using the ITEM Customer Deposit and giving it a price of -$500 on the invoice.
This applies the $500 prepayment to the invoice leaving a balance due of $500.
When you’re ready click Save & Close.
You now know how to create a customer liability account that you can use to collect prepayments. Then apply those prepayments to invoices.
☕ If you found this helpful you can say “thanks” by buying me a coffee… https://www.buymeacoffee.com/gentlefrog
Below are videos if you prefer to watch a walkthrough.
If you have any questions about customer prepayments or liability accounts in QuickBooks Desktop click the green button below to schedule a free consultation.