One of the more common questions I get from bookkeepers and business owners is: “How do I import a bunch of transactions into QuickBooks Online?”
Whether it’s a stack of bills from vendors or a pile of business expenses paid with a company credit card.
Manually entering transactions can be frustrating, time-consuming, and prone to errors.
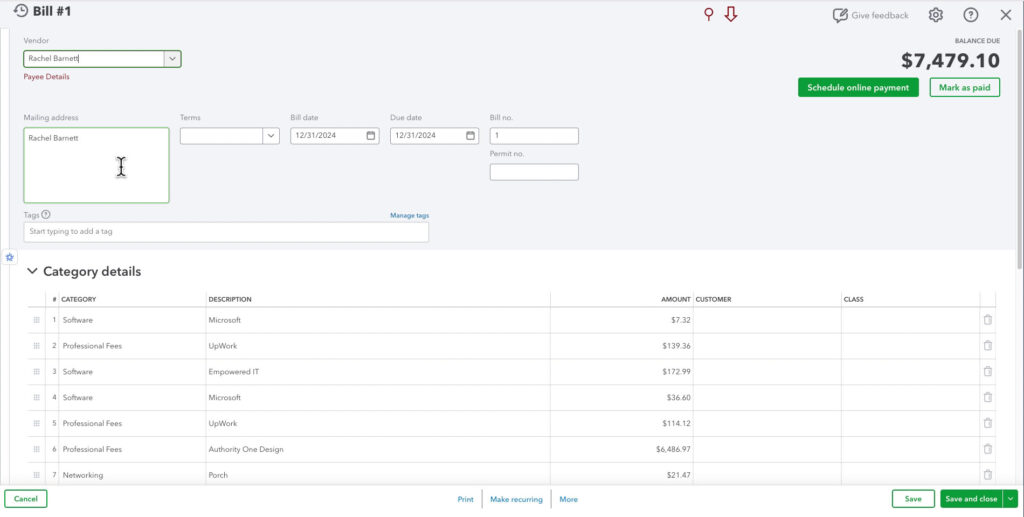
I’ve done bulk imports before, but I recently encountered a situation where I had a multi-line expense report that needed to be imported into my QuickBooks Online account as a bill.
Instead of manually entering every line, I used SaasAnt, a powerful import tool that makes uploading transactions fast and easy.
Since so many people ask me about how to import data into QuickBooks Online, I decided to document the process. Now, I’m sharing those steps with you in this guide.
Why Use SaasAnt to Import Data into QuickBooks Online?
If you’ve ever spent hours manually entering expenses, bills, customers, or any data into QuickBooks Online, you know how tedious it can be.
SaasAnt eliminates that frustration by allowing you to use a CSV or Excel file to bulk import:
- Bills
- Bill payments
- Expenses
- Deposits
- Checks
- Credit memos
- Accounts
- Customers
- Vendors
- Journal Entries
- Items
- Purchase Orders
- Sales Receipts
- Transfers
- …And more!
I’ve personally found SaasAnt to be incredibly useful because it:
- Saves hours of manual data entry.
- Ensures data accuracy by mapping fields before import.
- Supports multi-line transactions.
- Allows you to preview data before importing, preventing errors.
Whether you need to import a handful of expenses or thousands of transactions, SaasAnt can handle it seamlessly.
Connecting SaasAnt to QuickBooks Online
Before importing, you need to connect SaasAnt to your QuickBooks Online account. Here’s how:
- Log into QuickBooks Online.
- Click on Apps → Find apps in the left-hand menu.

- Search for “SaasAnt,” click the Bulk Import Excel option (with the tr icon).
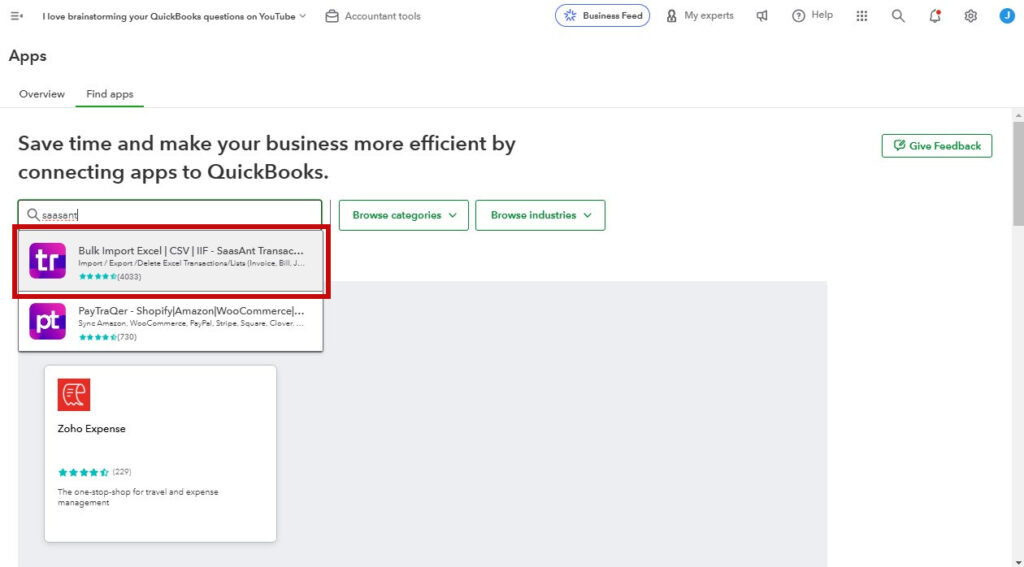
- Click Get the App now button and follow the setup instructions to connect.
Why This Matters: Once connected, SaasAnt allows you to import transactions directly into QuickBooks Online, eliminating the need for manual entry.
Preparing Your Data for Import
Once SaasAnt is connected, the next step is correctly formatting your data.
The first mistake many people make when importing data into QuickBooks Online is not formatting their Excel files properly. If your file isn’t set up correctly, QuickBooks won’t recognize the data, and your import may fail.
Luckily, SaasAnt has an easy-to-use Excel template that ensures your data is correctly formatted for easy importing.
How to Download the SaasAnt Import Template:
- Open SaasAnt from QuickBooks Online.
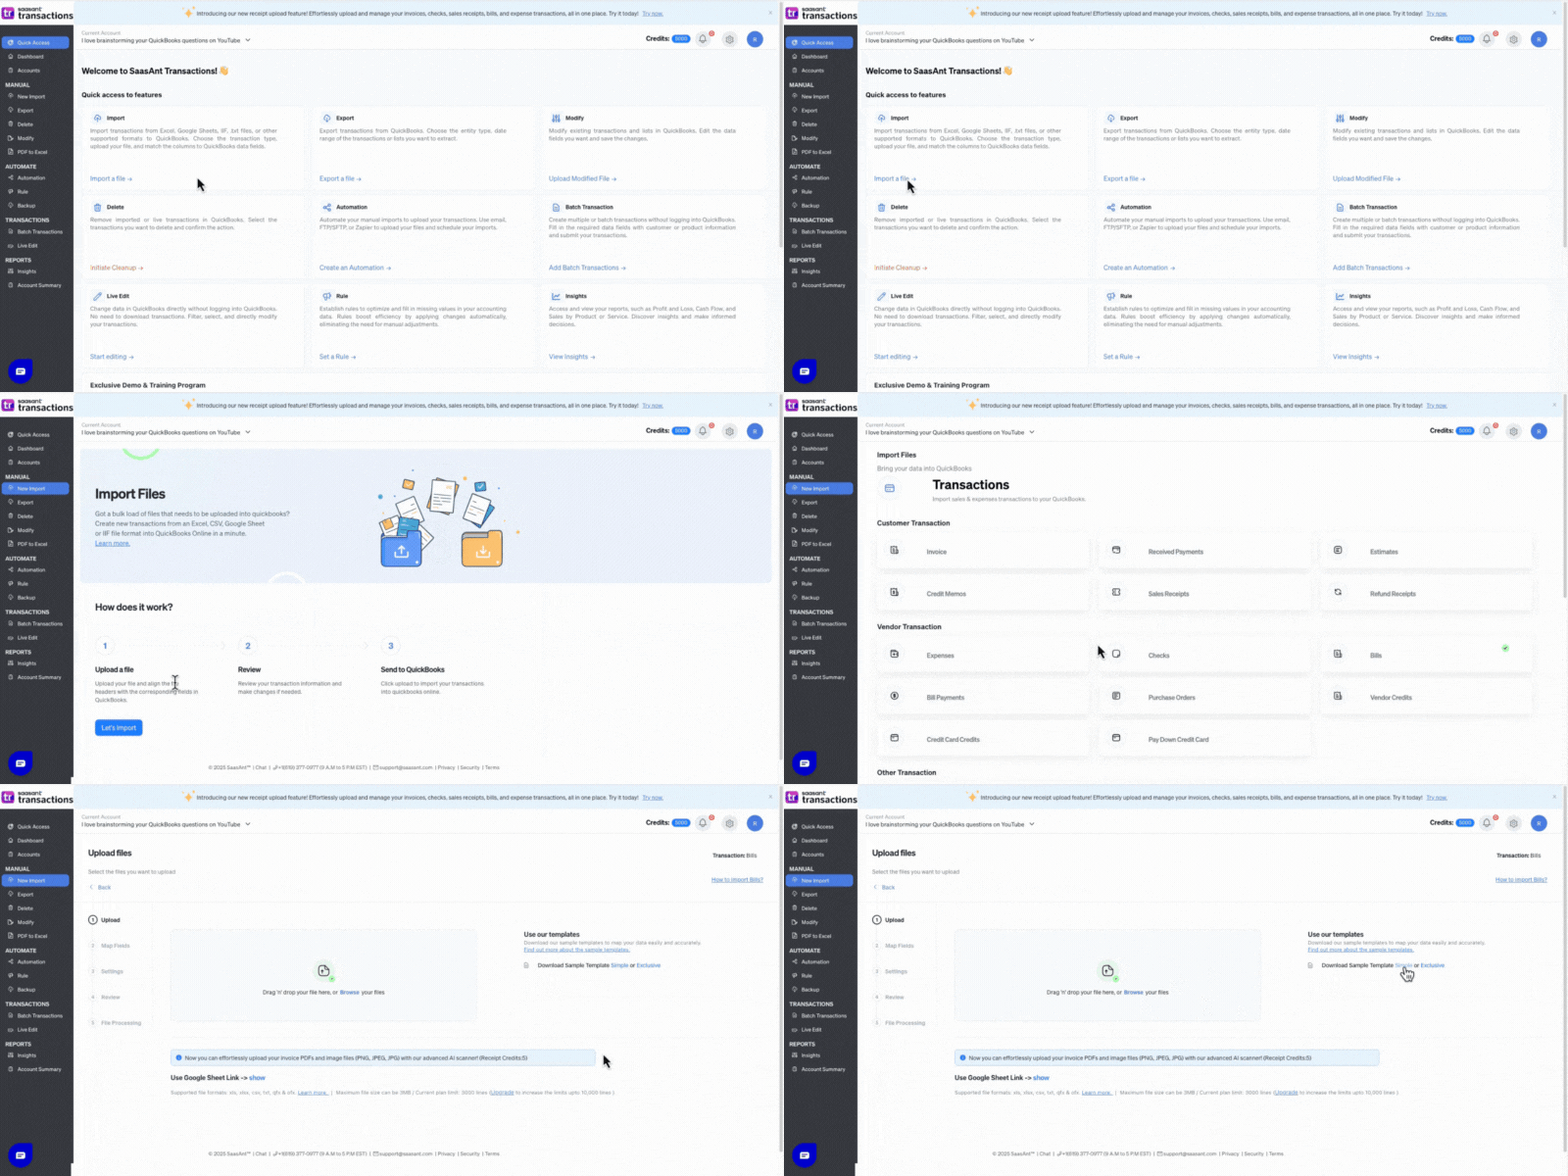
- Click Import a file → Let’s Import.
- Select any transaction type.
- Click Simple to the right of “Download Sample Template.”
When you open the template across the bottom, you’ll see multiple tabs/sheets.
Each sheet is named for the thing it’s a template for. The screenshot below shows the Bills sheet. You can see the tabs for Bill Payments, Expenses, Checks, etc.
Importing a Chart of Accounts into QuickBooks Online
While adding my expense information to the template file, I realized I needed to add new expense accounts to my Chart of Accounts before importing my expense.
Fortunately, SaasAnt allows you to import accounts directly into the QuickBooks Online Chart of Accounts.
How to Import a Chart of Accounts:
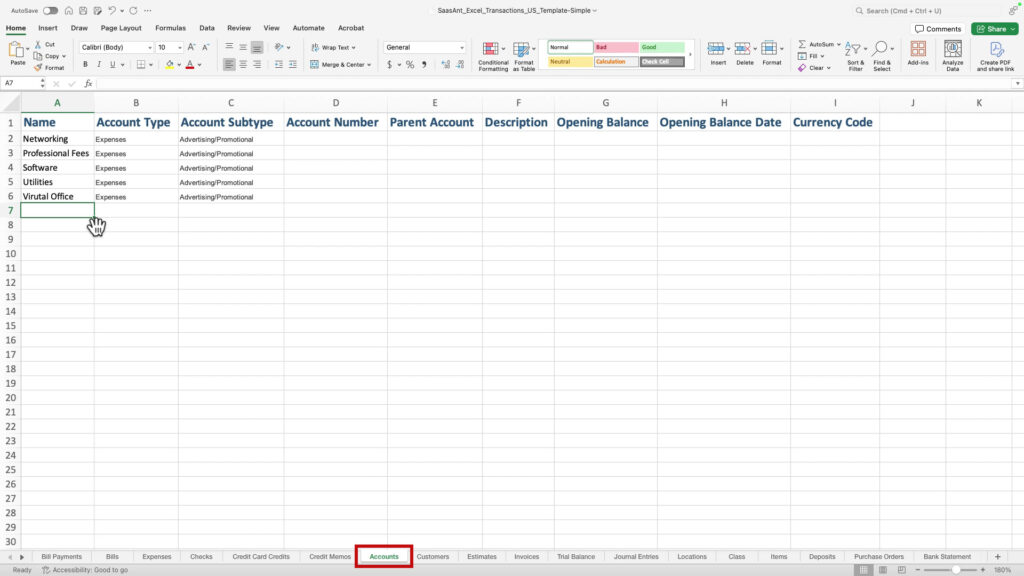
- Open the SaasAnt Template and click the Accounts tab.
- Name, Account Type, and Account Subtype are required.

- Save the template file with your new information.
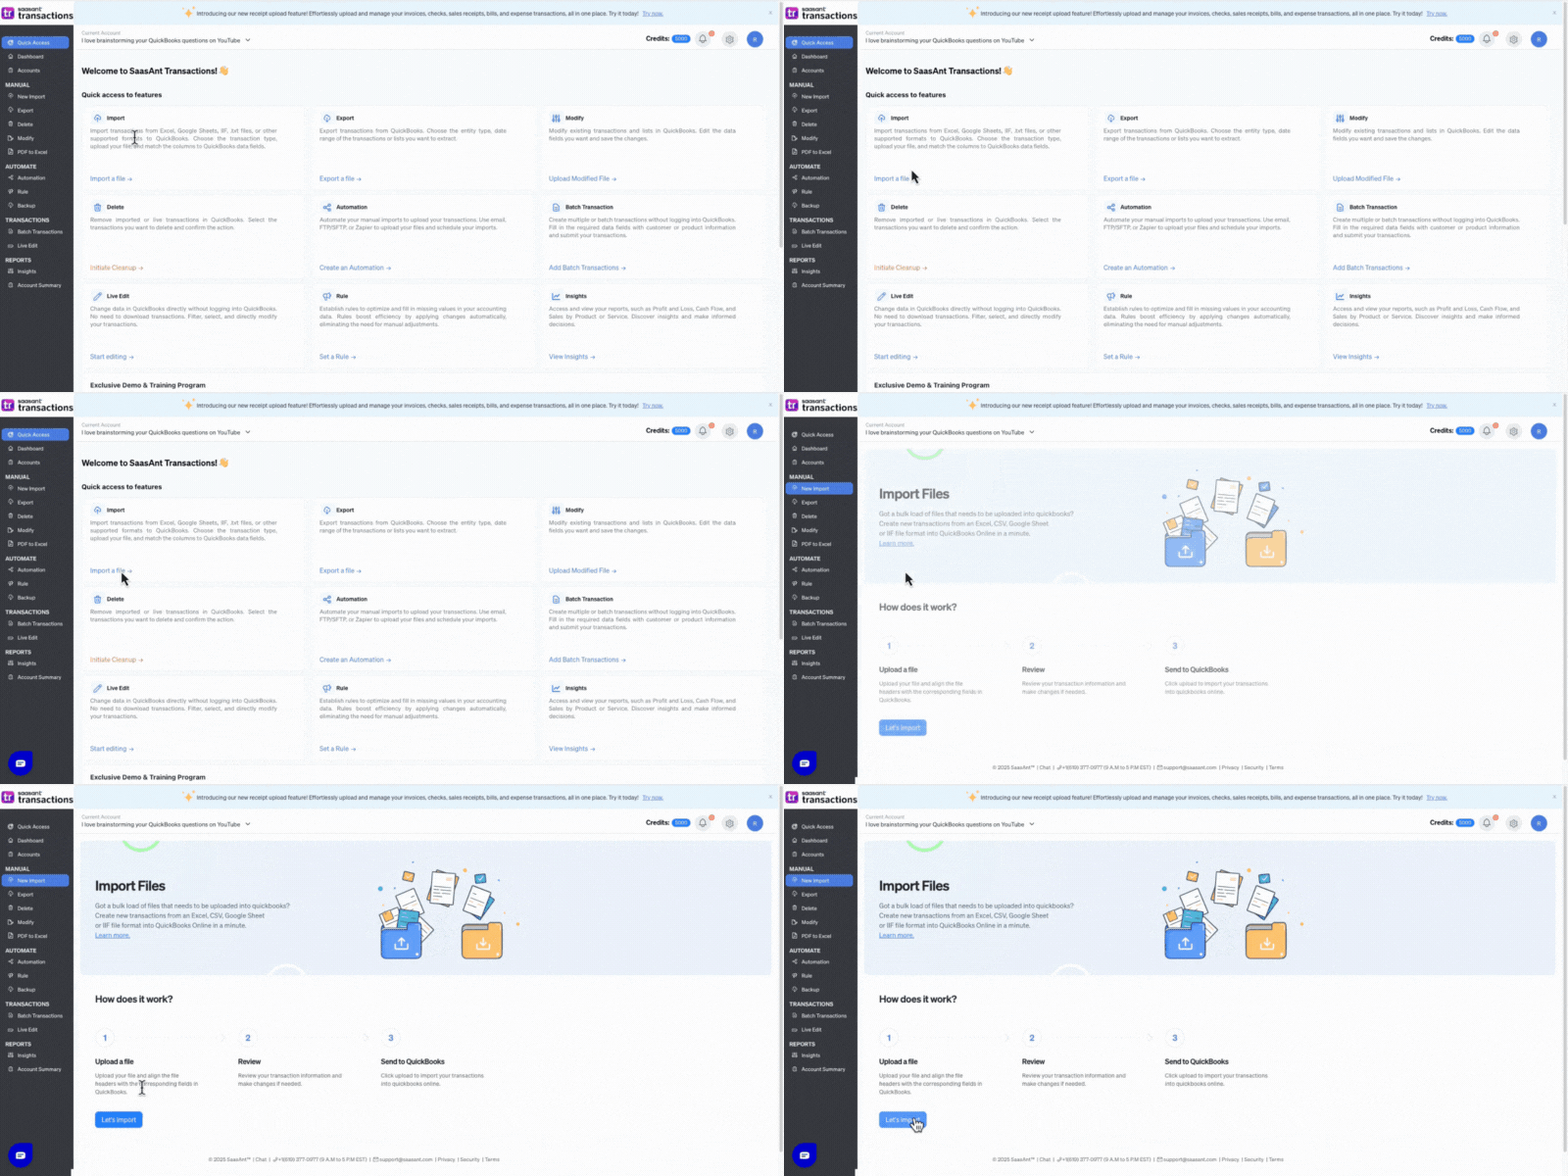
- Open SaasAnt, click Import a file.
- Click Let’s Import.

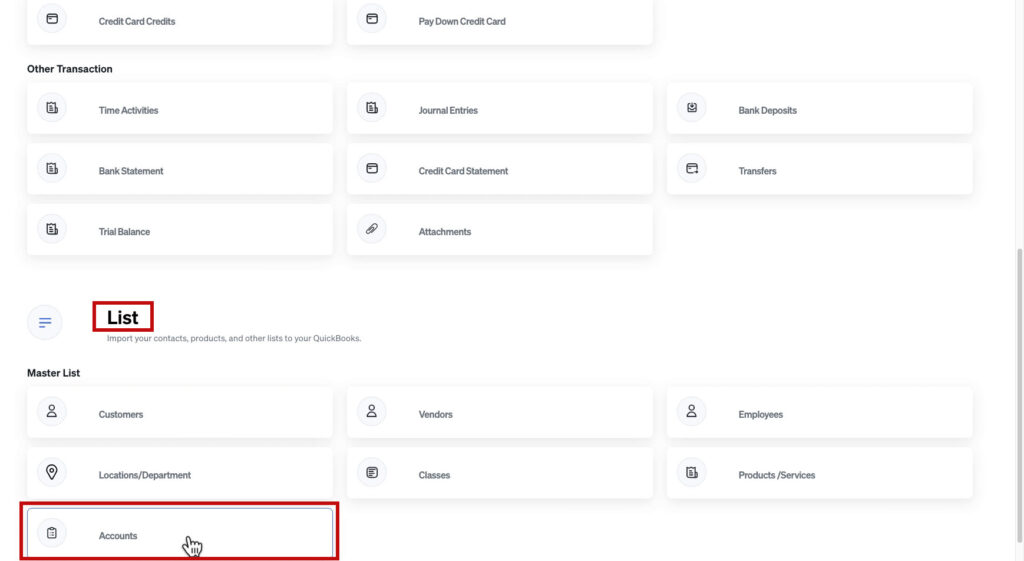
- Scroll down to the List section and click Accounts.

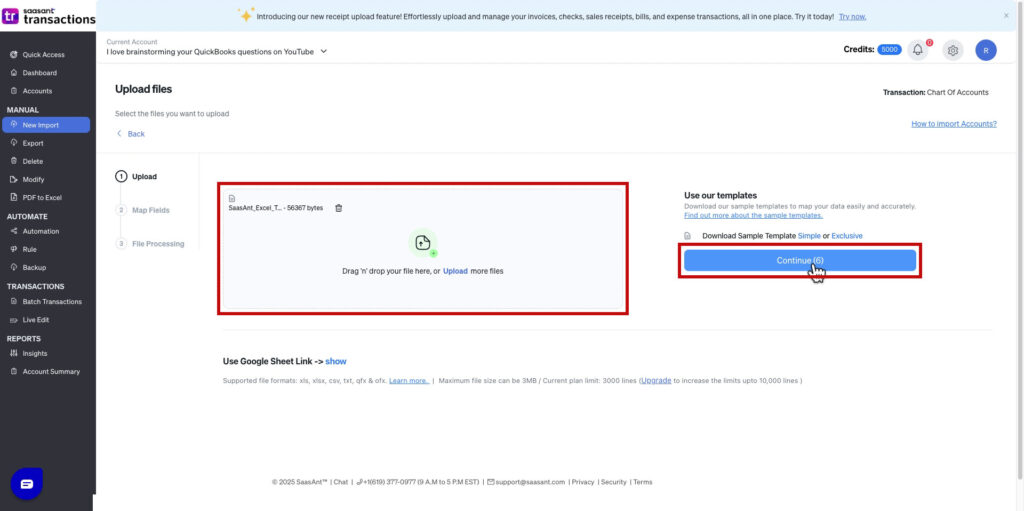
- Drag and drop your file onto the upload box.
- Click Continue.

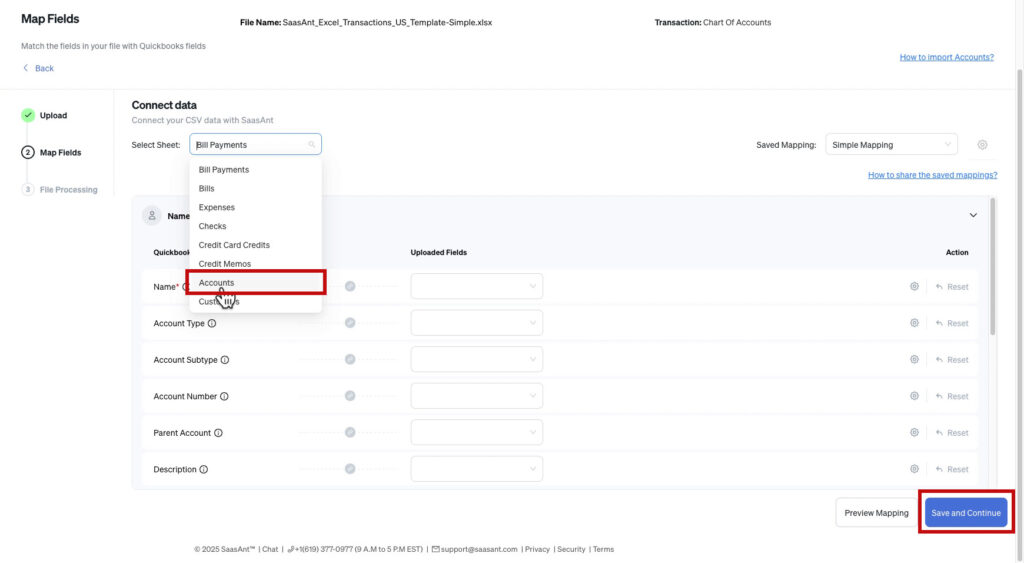
- Click Start Creating Mapping.
- In the Select Sheet drop-down select Accounts.
- Click Save and Continue.

- Because you used the template you shouldn’t need to review, but you can. When ready click Upload.
- Double-check your Chart of accounts in QuickBooks to make sure everything is imported.
Importing Bills into QuickBooks Online Using SaasAnt
After importing new accounts, I formatted my expense report to match the SaasAnt Bill template and imported it into QuickBooks.
Here, you can see the expense report on the right and the SaasAnt template on the left:
I want these expenses in one bill so they all have the same Bill No.
How to Import Bills into QuickBooks Online:
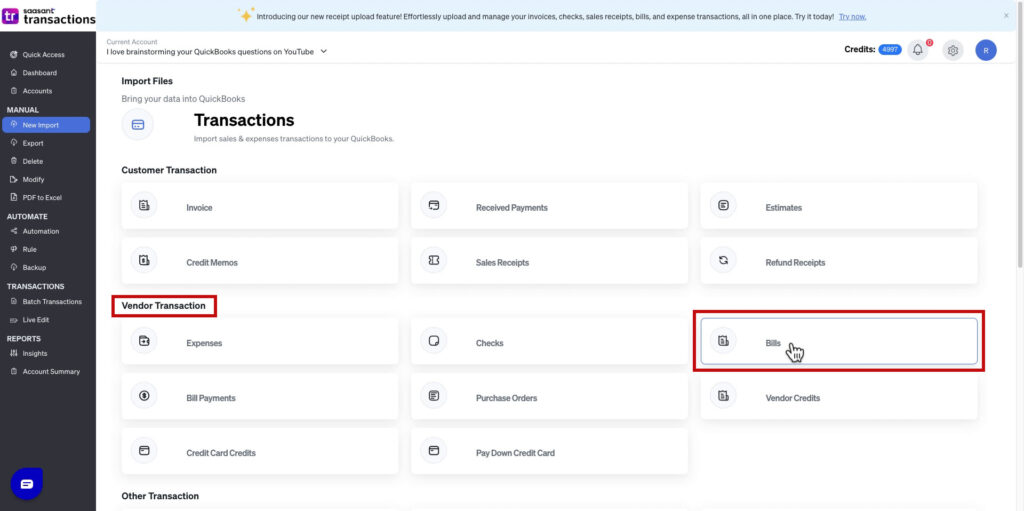
- Open SaasAnt, click Import a file.
- Click Let’s Import button.
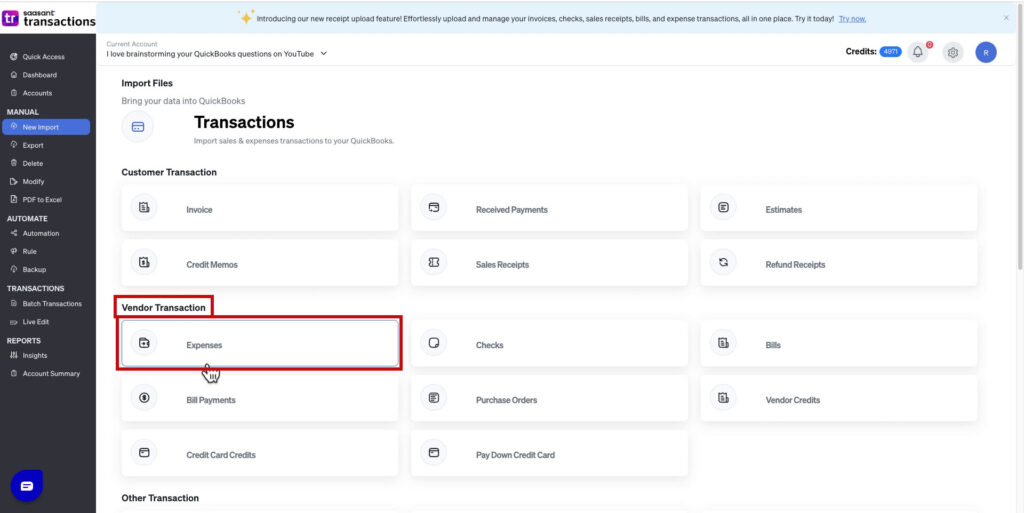
- Find Bills in the Vendor Transaction section.

- Upload your SaasAnt template file containing your bill data and click Continue.
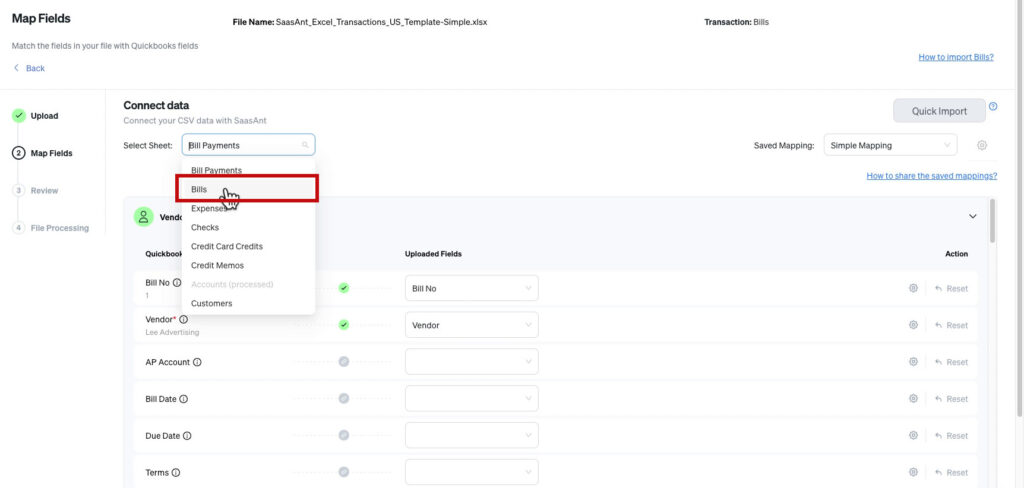
- Select Bills from the Select Sheet drop-down menu.

- Click Review to review all fields match correctly.
- Click Upload to import the bills.
- Double-check in QuickBooks that everything imported correctly.
Importing A Multi-Line Expense into QuickBooks Online
Want to import a multi-line expense instead of a bill?
No problem. It’s basically the same, but instead of using the Bills sheet in the SaasAnt template, you use the Expenses sheet.
Here’s a screenshot of the expense report I used to make my bill but with the Expense sheet filled out: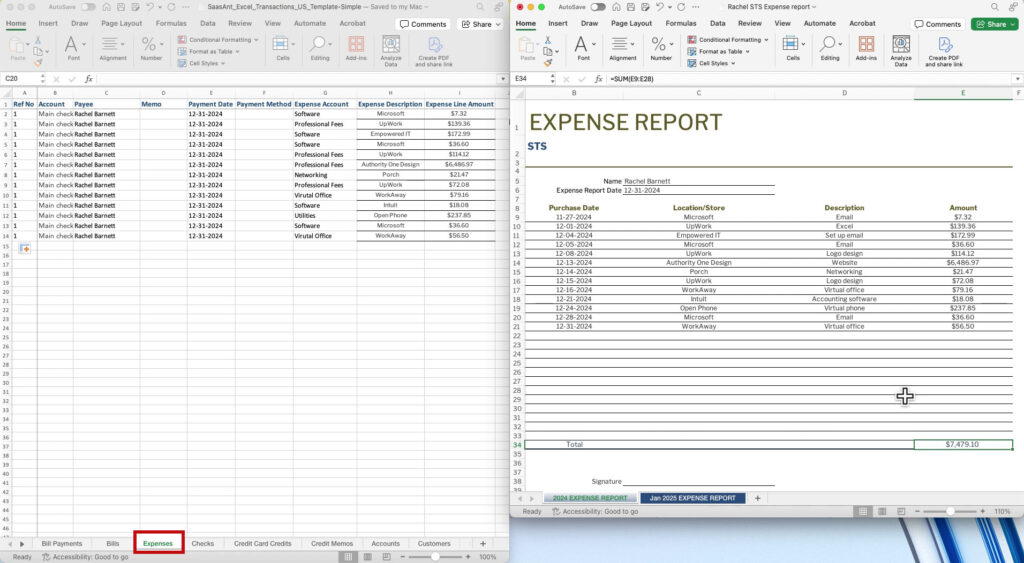
NOTE: The reference numbers must match when importing transactions with more than one line.
How to Import Multi-Line Expenses in QuickBooks Online:
- Open SaasAnt, click Import a file.
- Click Let’s Import button.
- Find Expenses in the Vendor Transaction section.

- Upload your SaasAnt template file with your expense details and click Continue.
- Select Expenses from the Select Sheet drop-down, click Review.

- Review the data and click Upload.
- Double-check in QuickBooks that everything imported correctly.
What I Learned from My Own QuickBooks Import
Going through this process firsthand made me appreciate how powerful SaasAnt is.
Importing data into QuickBooks Online became a smooth, efficient process—far better than entering everything manually.
Key Takeaways:
- Use SaasAnt to import bulk transactions instead of manual entry.
- Use the SaasAnt Template Excel file to help prevent errors.
- Import your Chart of Accounts first if you need to add new accounts to QuickBooks.
- For multi-line expenses, ensure each transaction has the same reference number.
SaasAnt is one of the best tools for importing data into QuickBooks Online if you’re dealing with hundreds or thousands of transactions.
If you’re tired of manually entering transactions, give SaasAnt a try!
📌 Need help setting up SaasAnt? Book a one-on-one training session and I’ll help walk you through it: https://gentlefrog.com/meeting


