Have you ever faced a mess of misclassified expenses? You probably wondered how you’ll ever get through it.
In this blog post I’ll show you how to do it whether you’re an Accountant user or a regular user.
Quick Instructions:
Accountant User
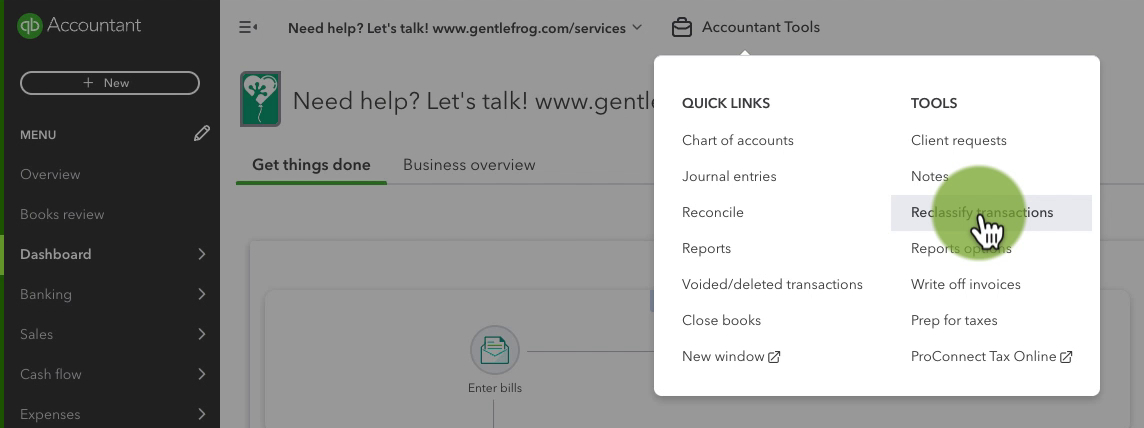
- Click Accountant Tools
- Under TOOLS select Reclassify transactions
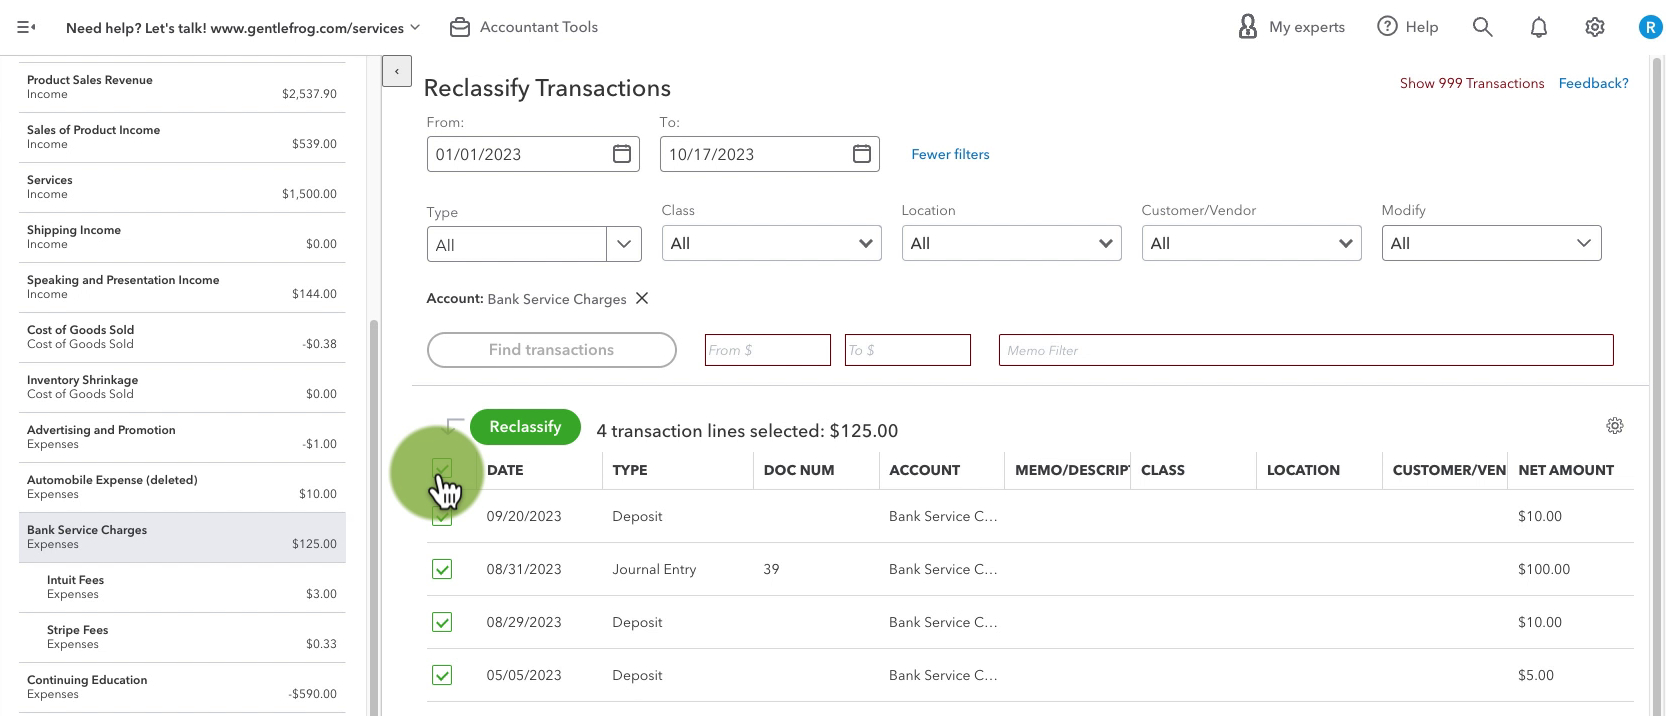
- Click the account for the expenses you need to reclassify
- Check off the transactions you need to reclassify
- Click the Reclassify button
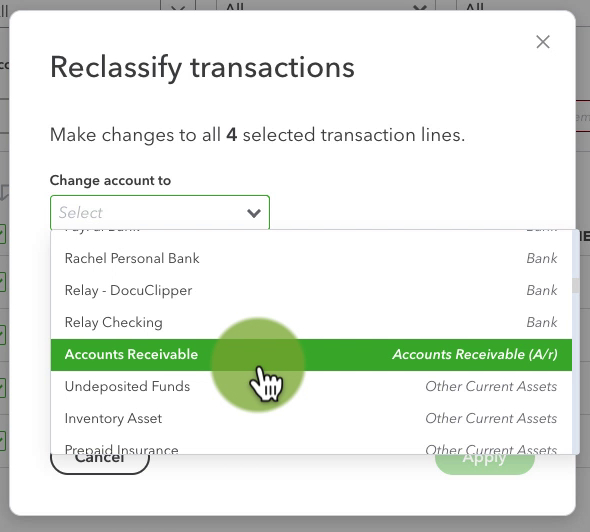
- Select the account you’d like to reclassify to from the Change account to drop-down
- Click the Apply button
Regular User
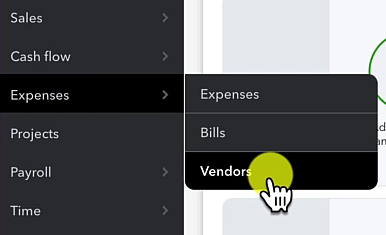
- Click Expenses in the left side menu
- Select Vendors
- Click on the vendor for the expenses that you need to reclassify
- Check off the transactions you need to reclassify
- Click the Batch action button
- Select Categorize selected
- Pick a new category from the drop-down
- Click the Apply button
Keep reading for a complete walkthrough with screenshots:
Reclassify Expenses as an Account User
This is the method to use if you’re an Accountant User.
Click on Accountant Tools at the top of the screen. Under TOOLS select Reclassify transactions.
On the left, you’ll see a list of the accounts from the Chart of Accounts. Click on the account for the expenses/income that you want to reclassify.
A list of all the transactions in that account will appear on the right. You can select them individually or click the box at the top to select them all.
Click the green Reclassify button.
In the pop-up select the account you’d like to reclassify to from the Change account to drop-down menu. Then click Apply.
Reclassify Expenses as a Regular User
If you don’t have QBO Accountant, don’t worry, you can still reclassify your transactions. Here is how to reclassify expenses.
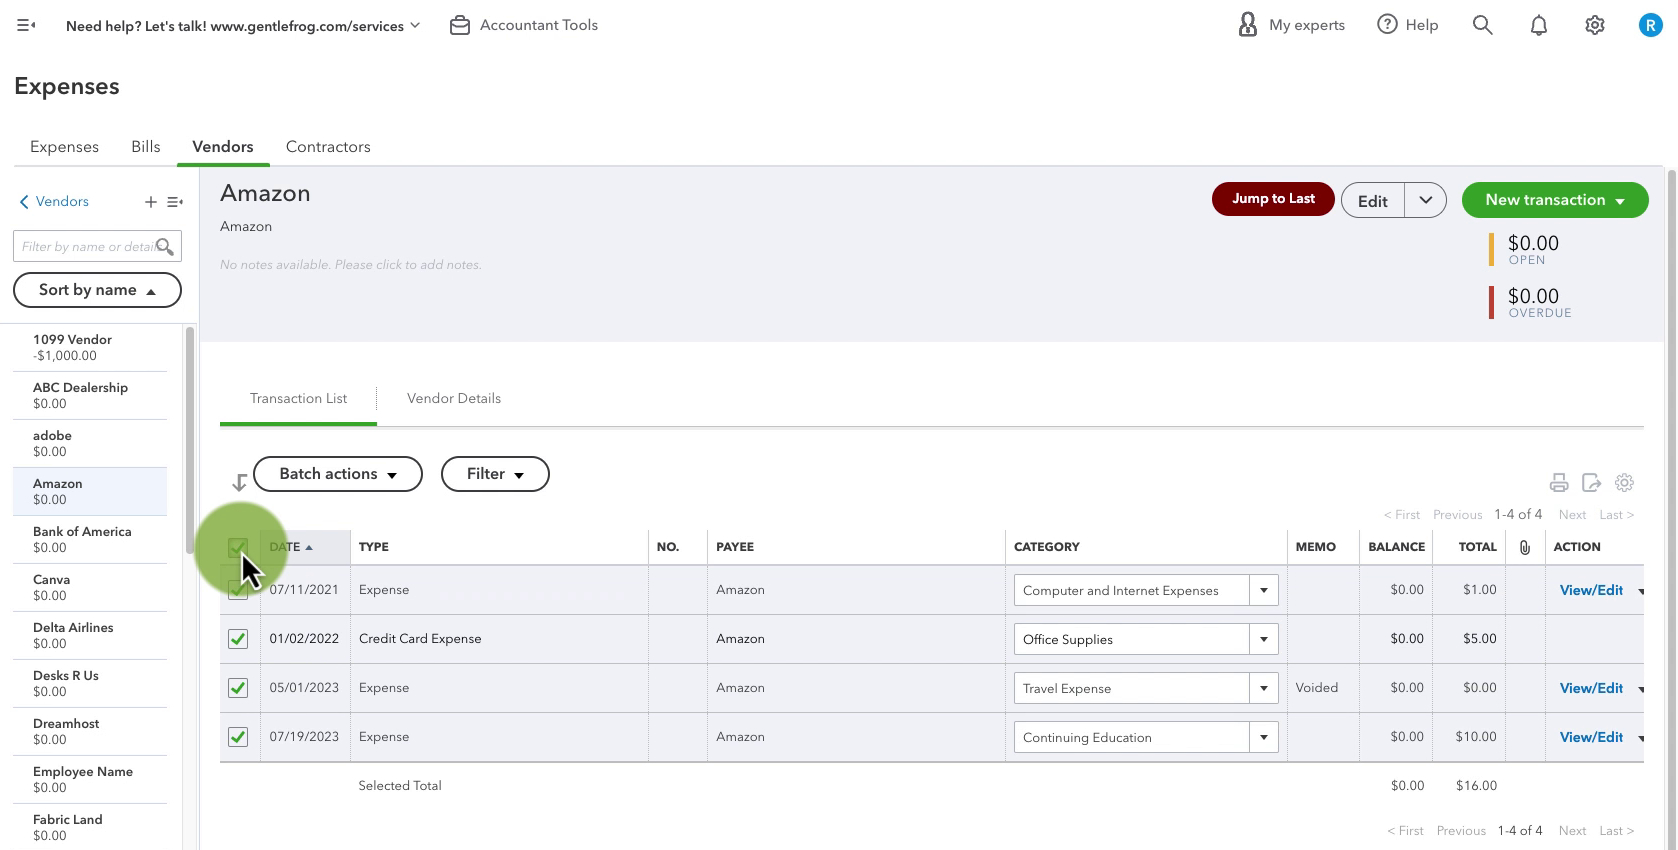
Click Expenses in the left side menu and select Vendors.
On the left, you’ll see a list of all your vendors. Click on the vendor for the expenses that you want to reclassify.
A list of all the transactions associated with that vendor will appear on the right. You can select them individually or click the box at the top to select them all.
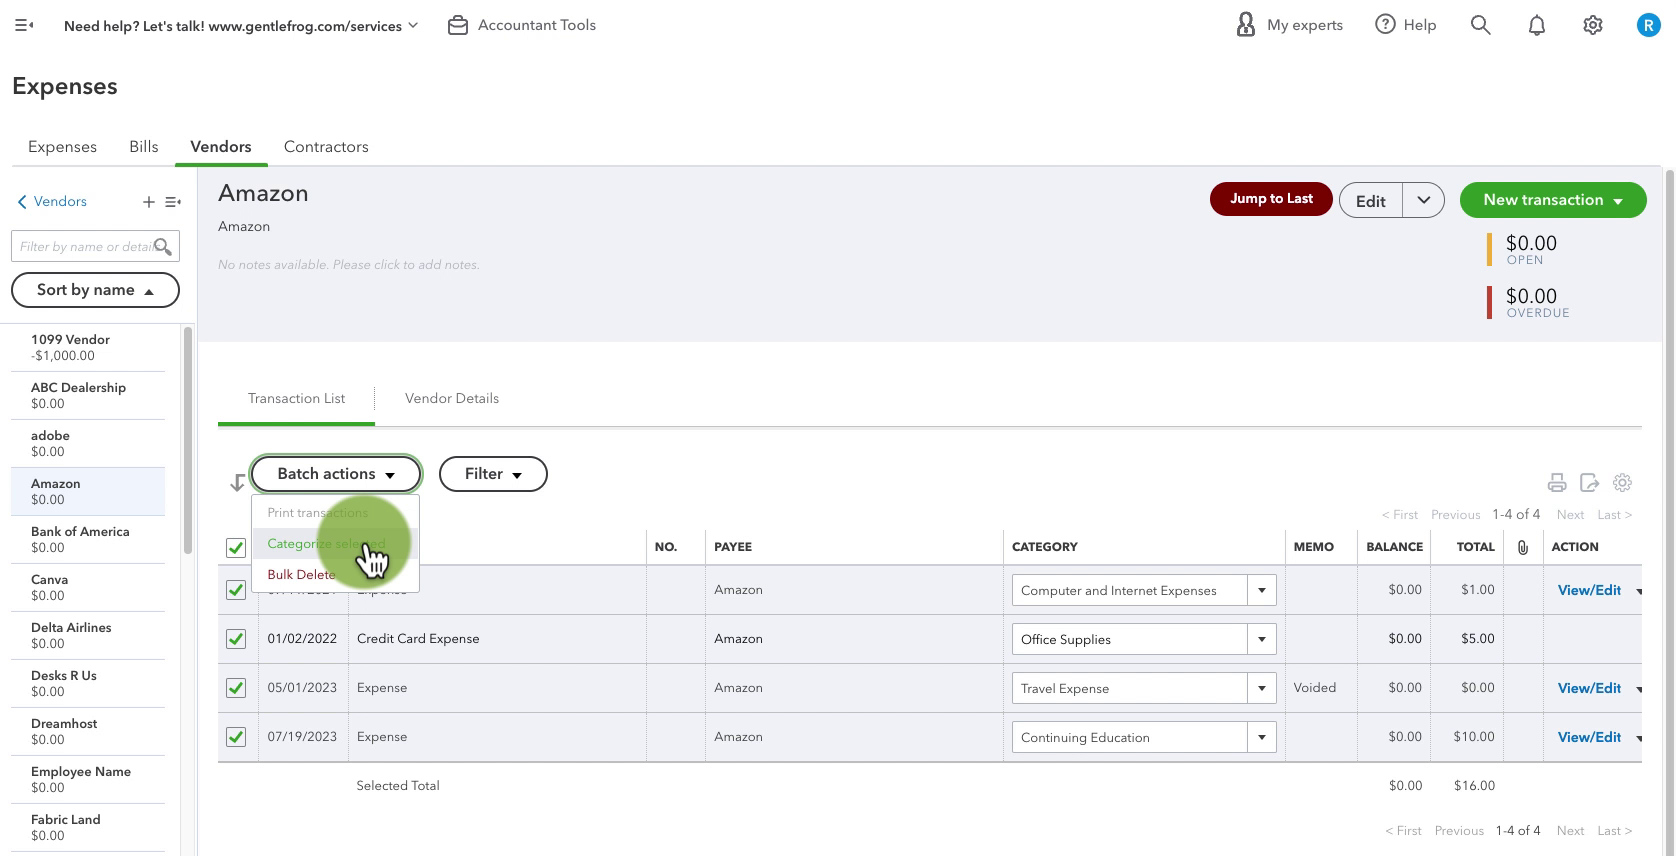
Click the Batch actions button. Select Categorize selected from the drop-down menu.
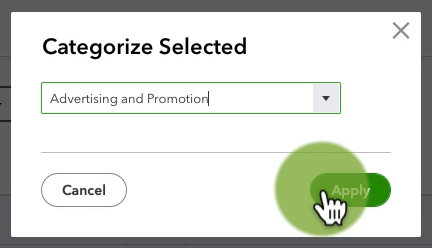
In the Categorize Selected pop-up pick a new category from the drop-down menu. Then click the Apply button.
You now know how to reclassify your expenses in QuickBooks Online. Scroll down if you’d like to watch the video version.
☕ If you found this helpful you can say “thanks” by buying me a coffee… https://www.buymeacoffee.com/gentlefrog
If you have questions about reclassifying expenses QuickBooks Online click the green button below to schedule a free consultation.

