
In this blog post, you’ll learn how to create and customize invoices using the latest interface in QuickBooks Online.
The New Invoice Screen
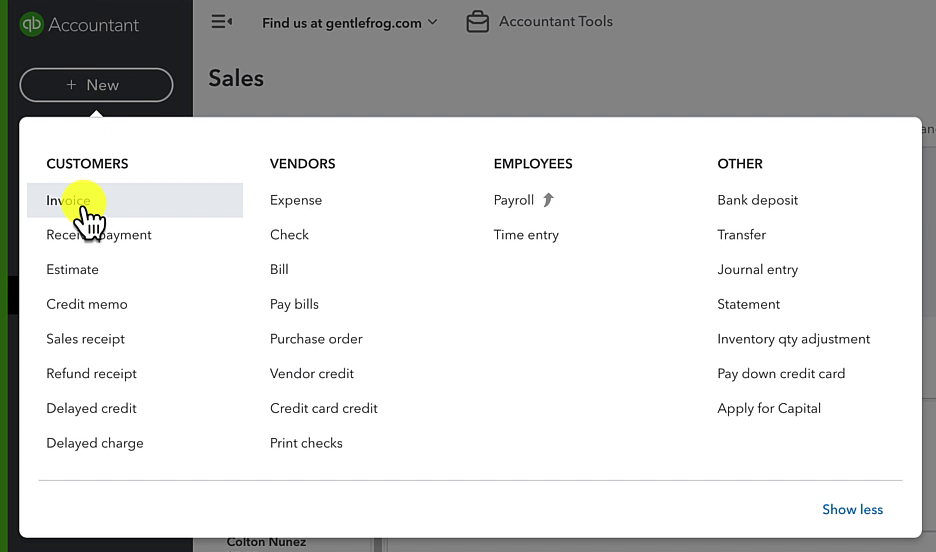
To get to the invoice screen click the +New button in the upper left corner. Then click Invoice in the CUSTOMERS column.
Across the top of the screen, you have 4 tabs.
- Edit
- Email view
- PDF view
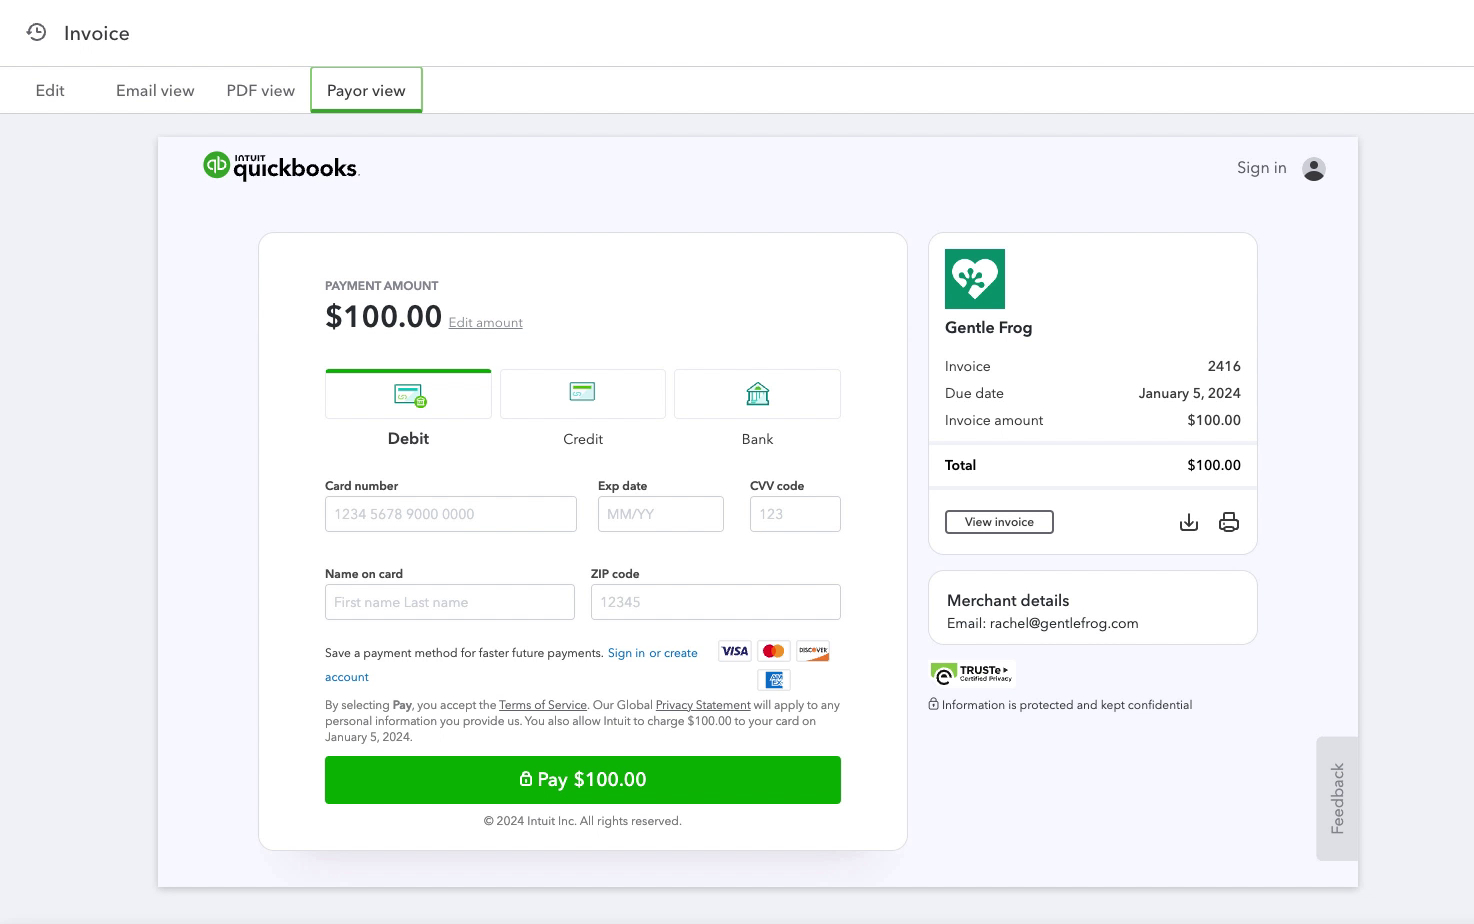
- Payor view
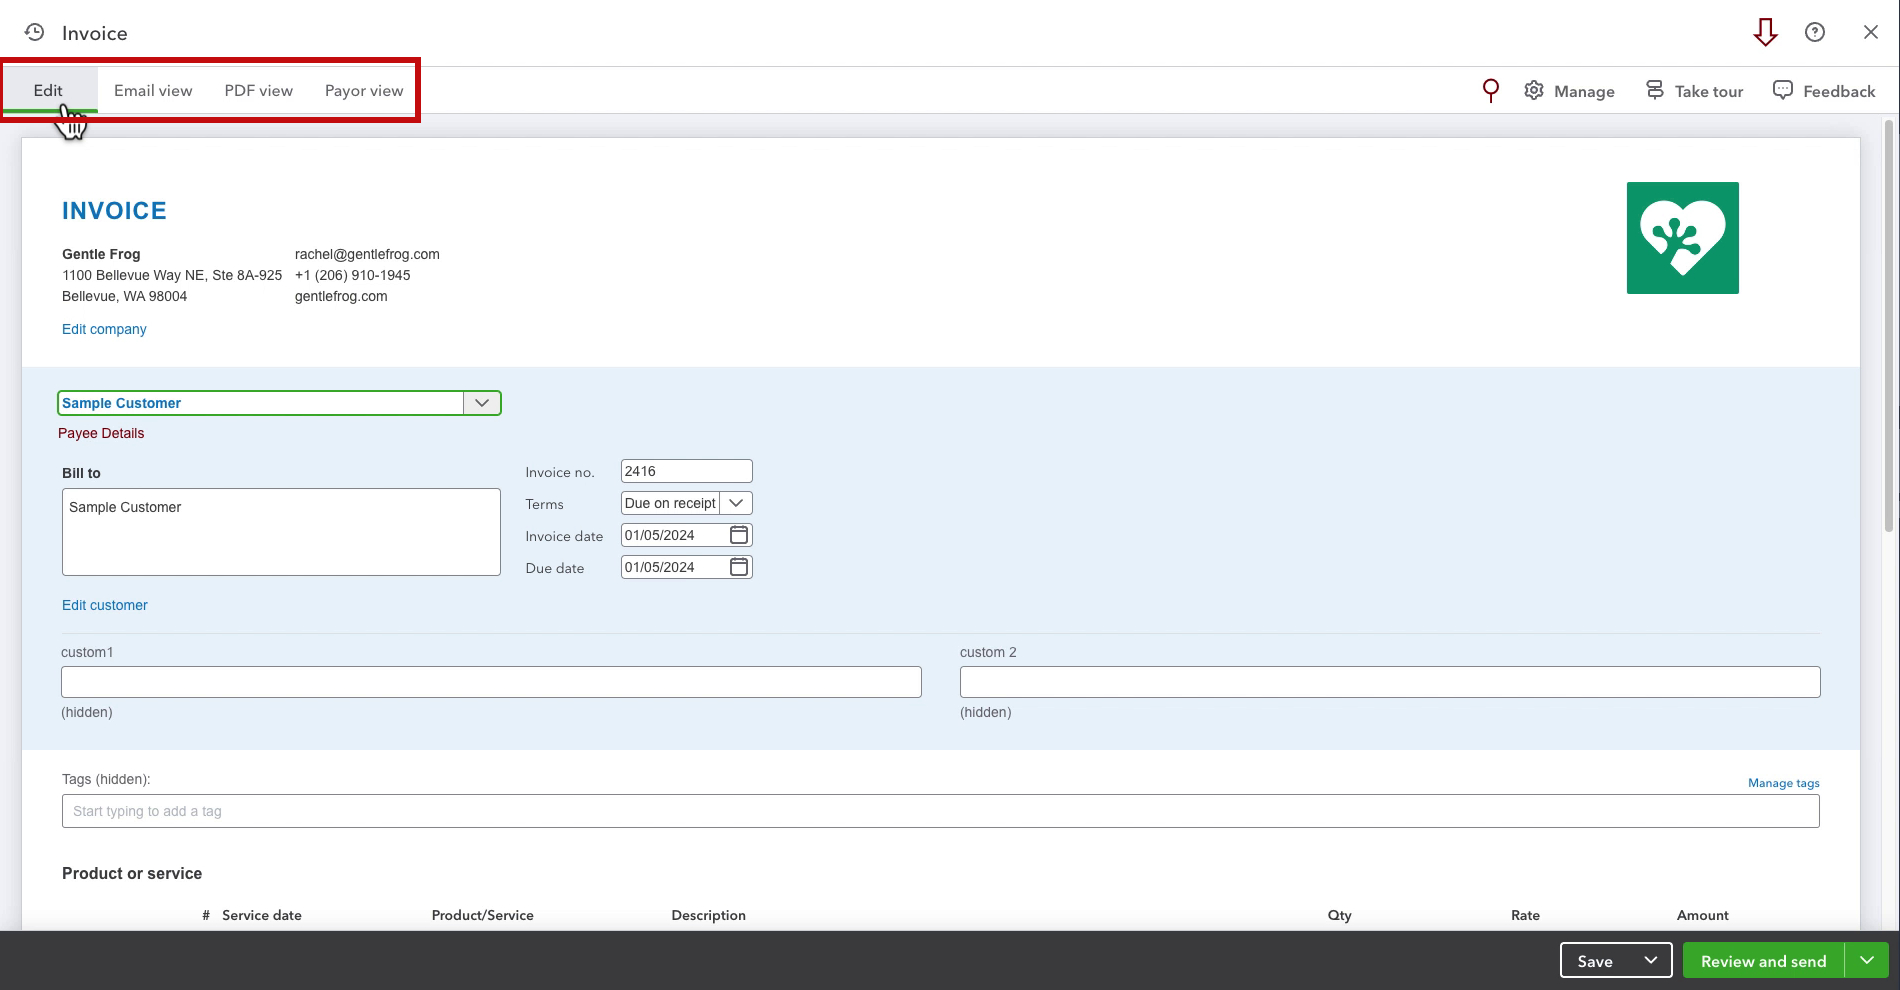
These give you a quick way to see different views of the invoice.
Edit Tab
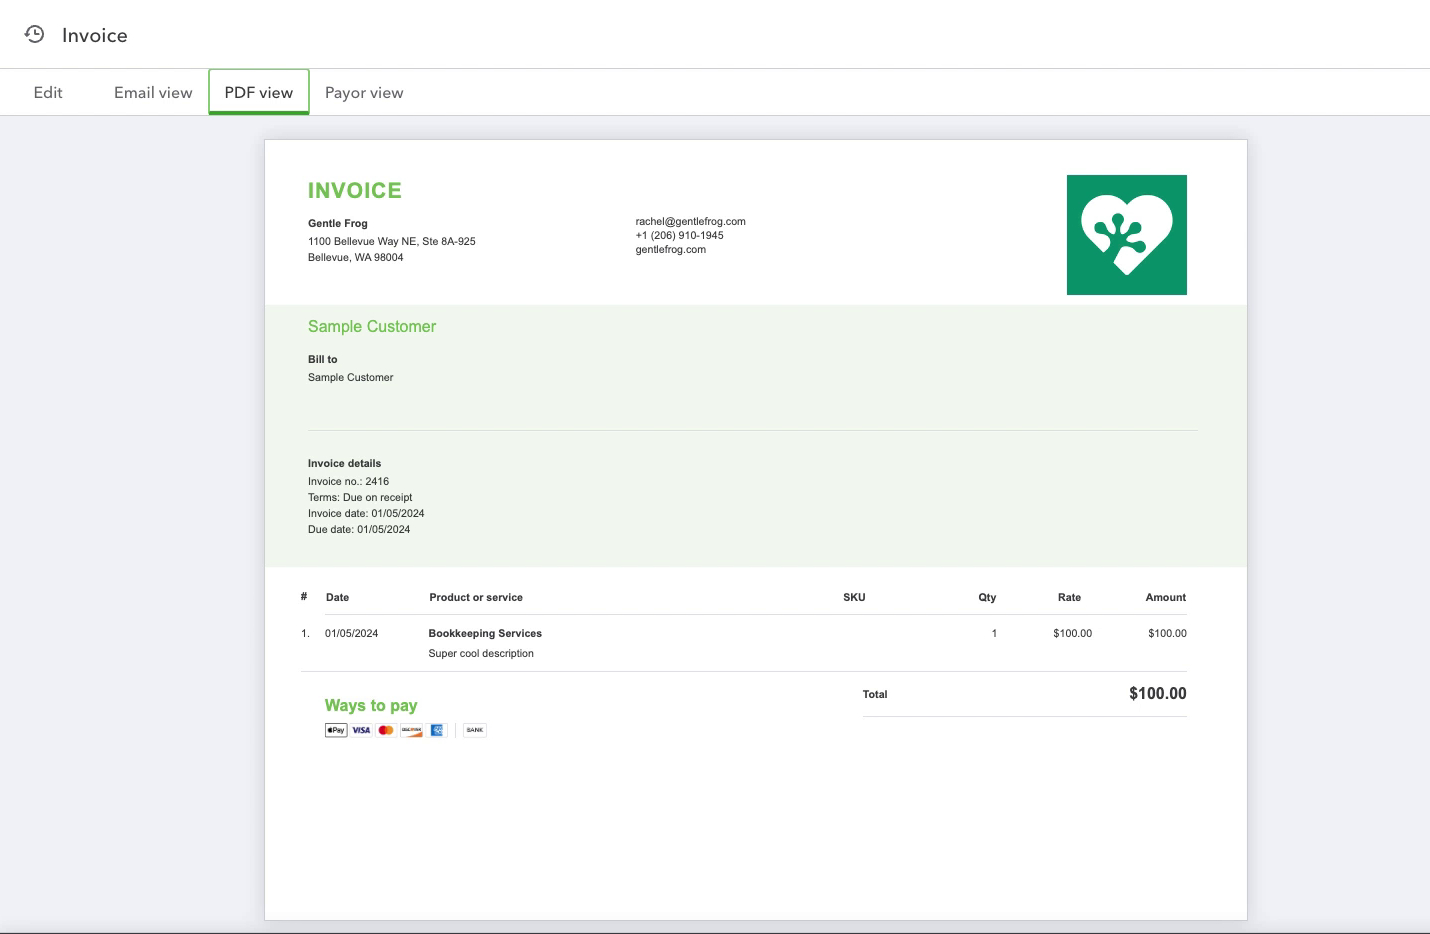
The Edit tab is where you’ll do most of the work. It’s laid out the way it will look in the PDF view.
At the top, you’ll find your company information on the left and your logo on the right. Both of these can be edited.
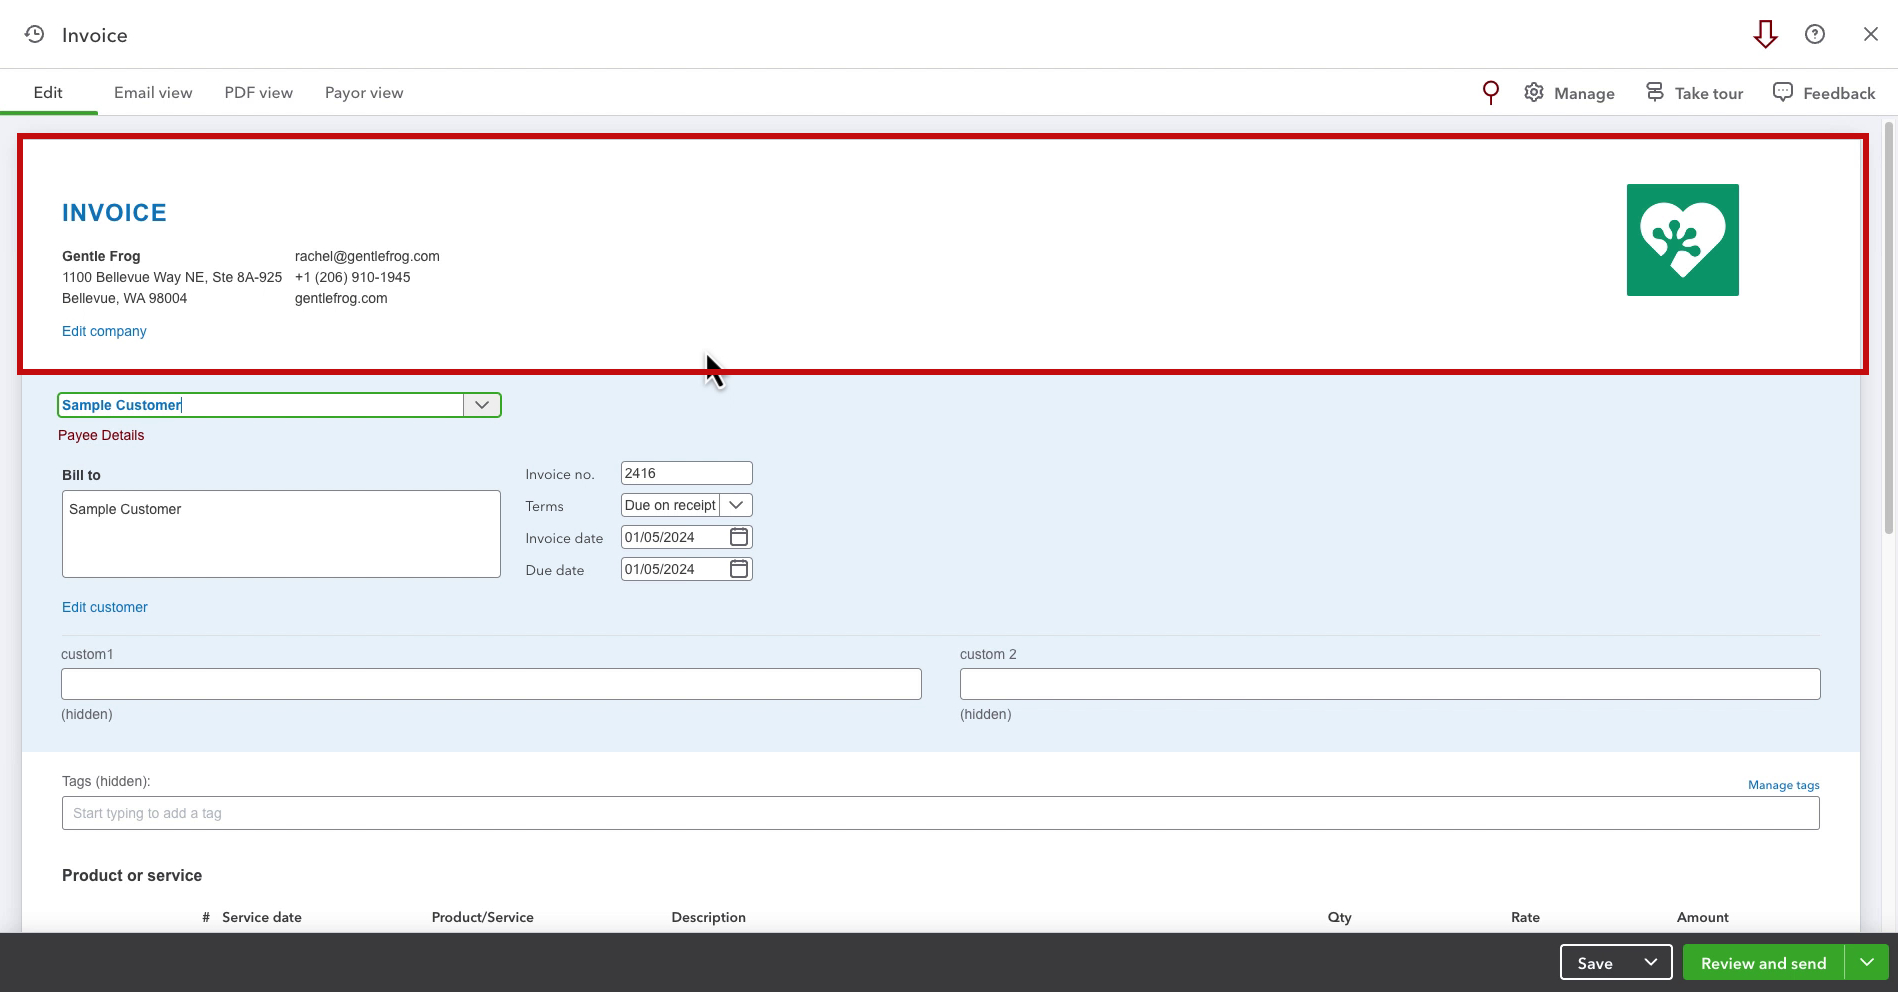
Next is a blue section. This includes everything that was at the top of the old layout. Customer selection, Bill to address, Invoice no. and date, Terms, due date, and custom fields (if you use them).
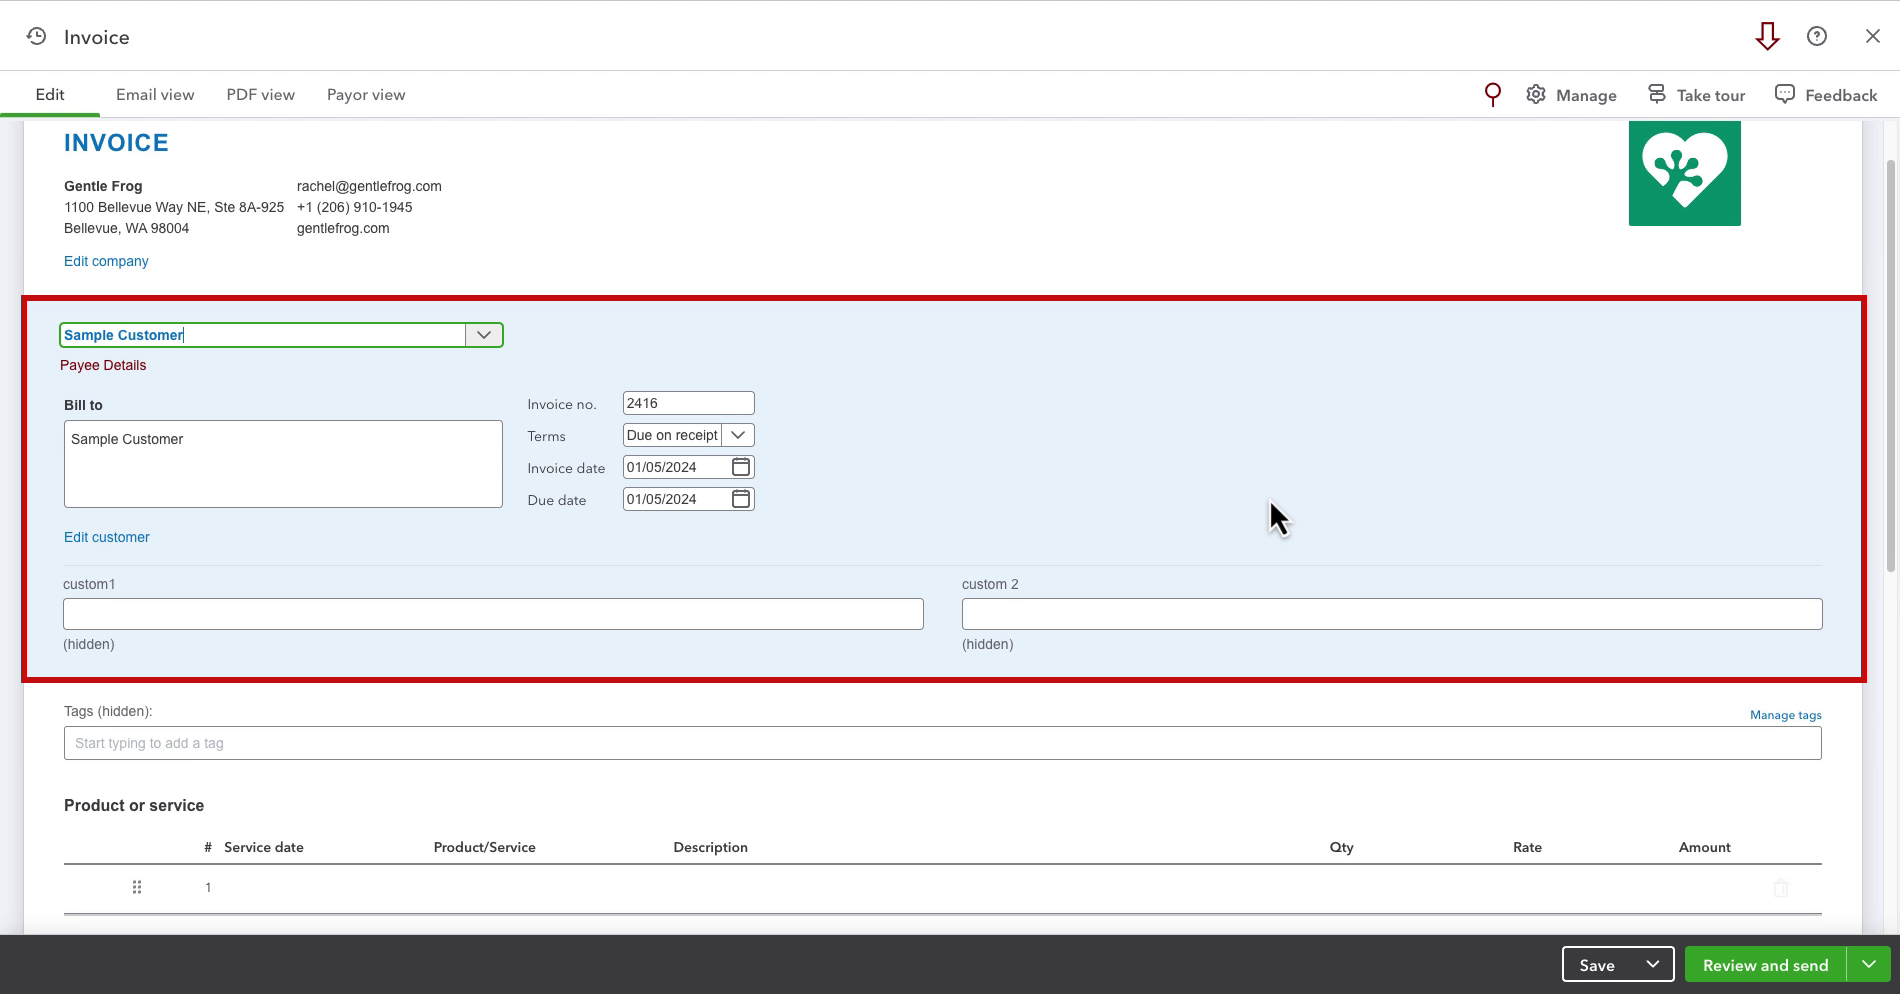
Next, you have Tags, and below that the Product or service section.
In the Product or service section, you now have the option to add a Service date to each line. You then have the same options as before. Product/Service, Description, Qty, Rate, and Amount.

Customer payment options, which used to be at the top of the invoice screen, are next.
If you click the Edit link it opens the Manage invoice pop-out on the right. Here you can toggle on/off the different payment options, and Tips.
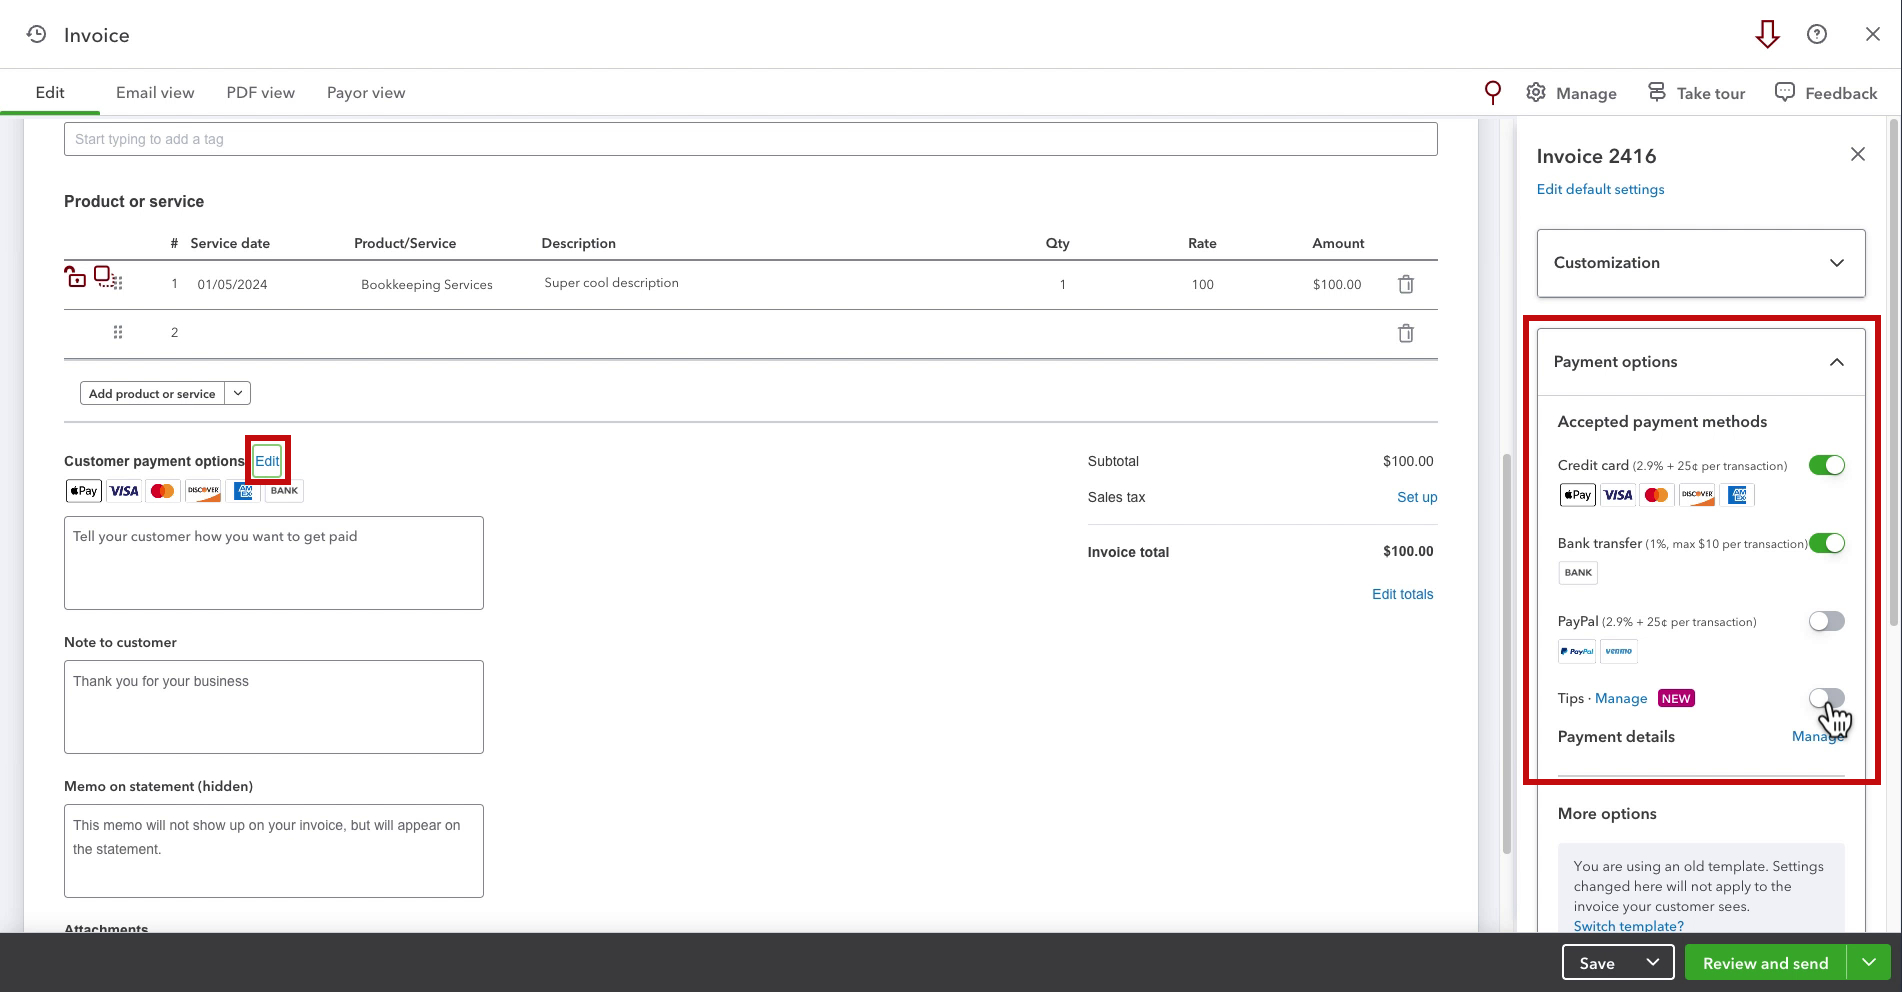
You can open or close the Manage invoice pop-out by clicking the Manage button to the right of the tabs at the top of the screen.

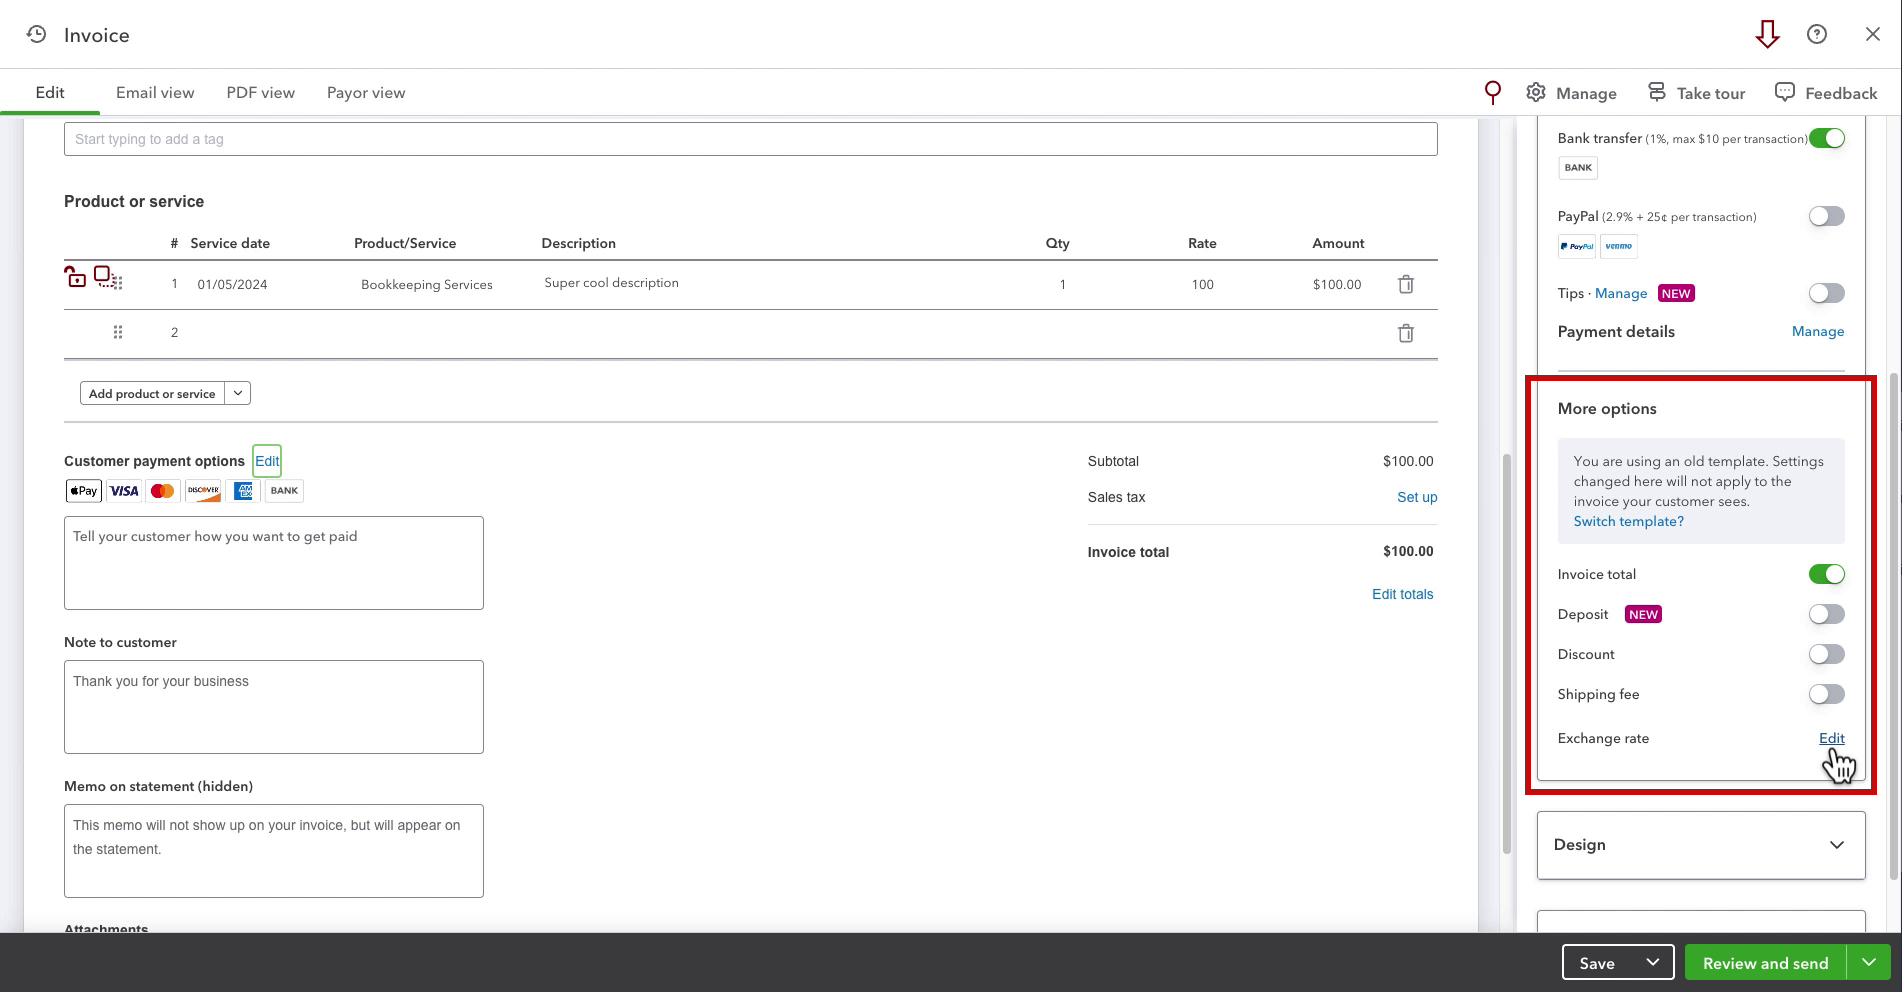
Scrolling down in the pop-out is a More options section. Here you can toggle on/off the Invoice total, Deposit, Discount, and Shipping fee. I have a link to edit Exchange rate. You may see different things here depending on your QBO version/setup.
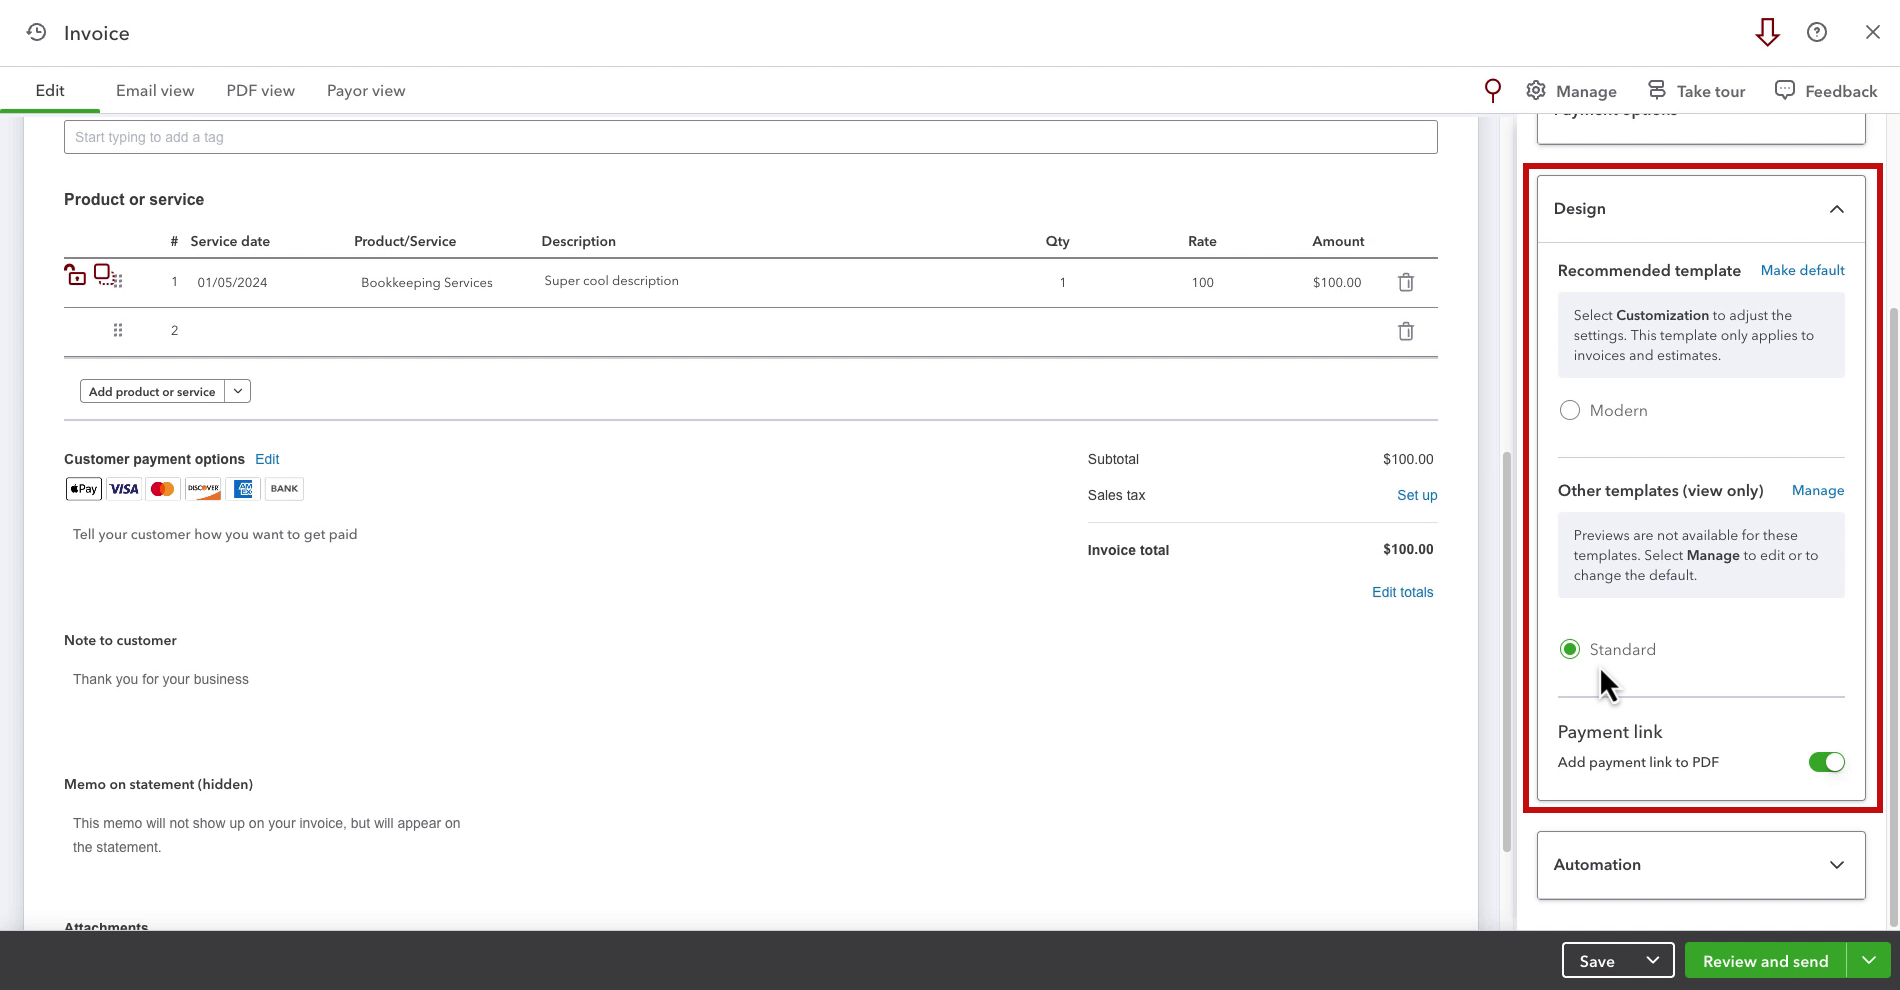
The next section in the Manage invoice pop-out is Design. This is where you change the template and toggle on/off the payment link in the PDF version.
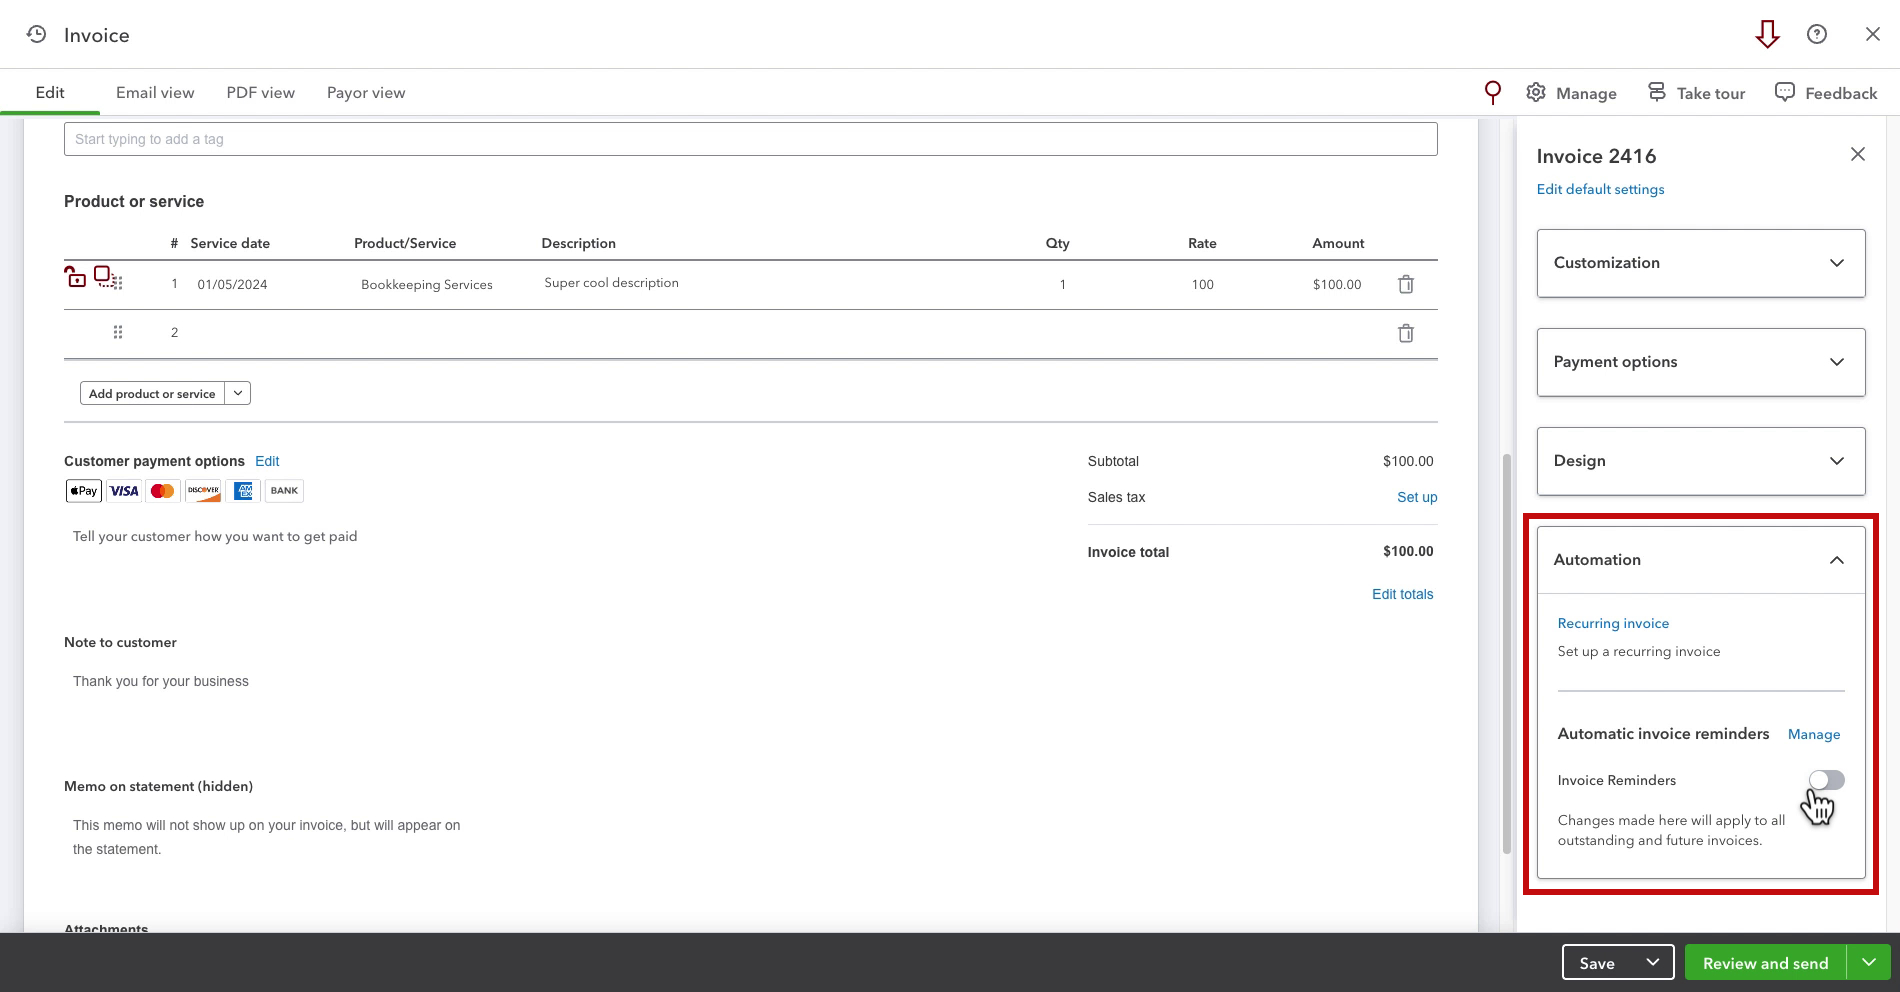
The next section in the Manage invoice pop-out is Automation. Here you can setup a recurring invoice and automatic invoice reminders.
PDF View
The Standard template cannot be viewed in PDF view. You will see the following screen, click Print and download to view it.
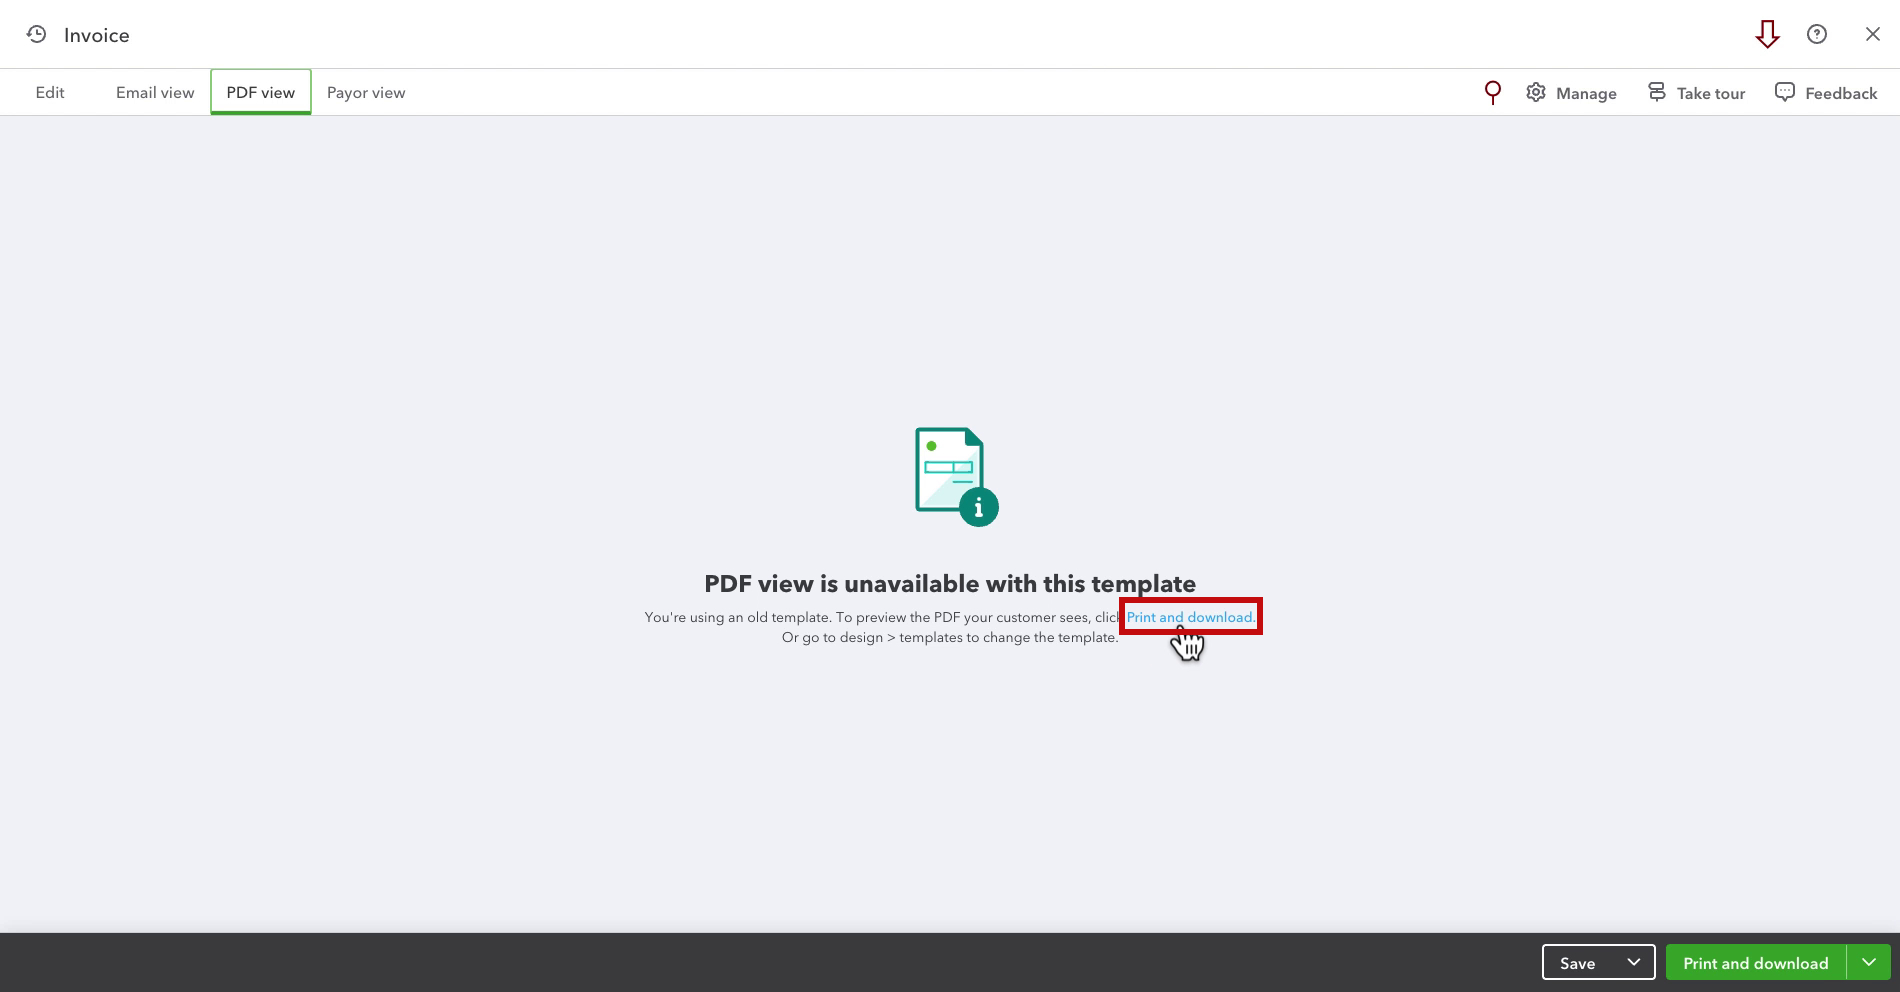
If you use the Modern template you can use the PDF view tab to view the invoice.
Save / Print / Download
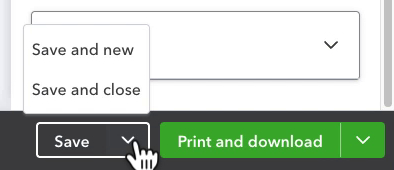
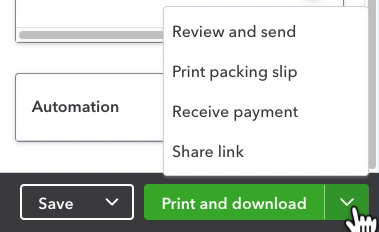
In the lower right corner you have different options than in the previous invoice layout.
On the left, you have a Save button. You can click this at any time to save your progress. Clicking the drop-down arrow gives you the option to Save and new or Save and close.
On the right, you have a Print and download button. Clicking the drop-down arrow gives you the option to Review and send, Print packing slip, Receive payment, or Share link.
Review and send
If you select Review and send you get a screen where you can view and edit the email that gets sent to your customer.
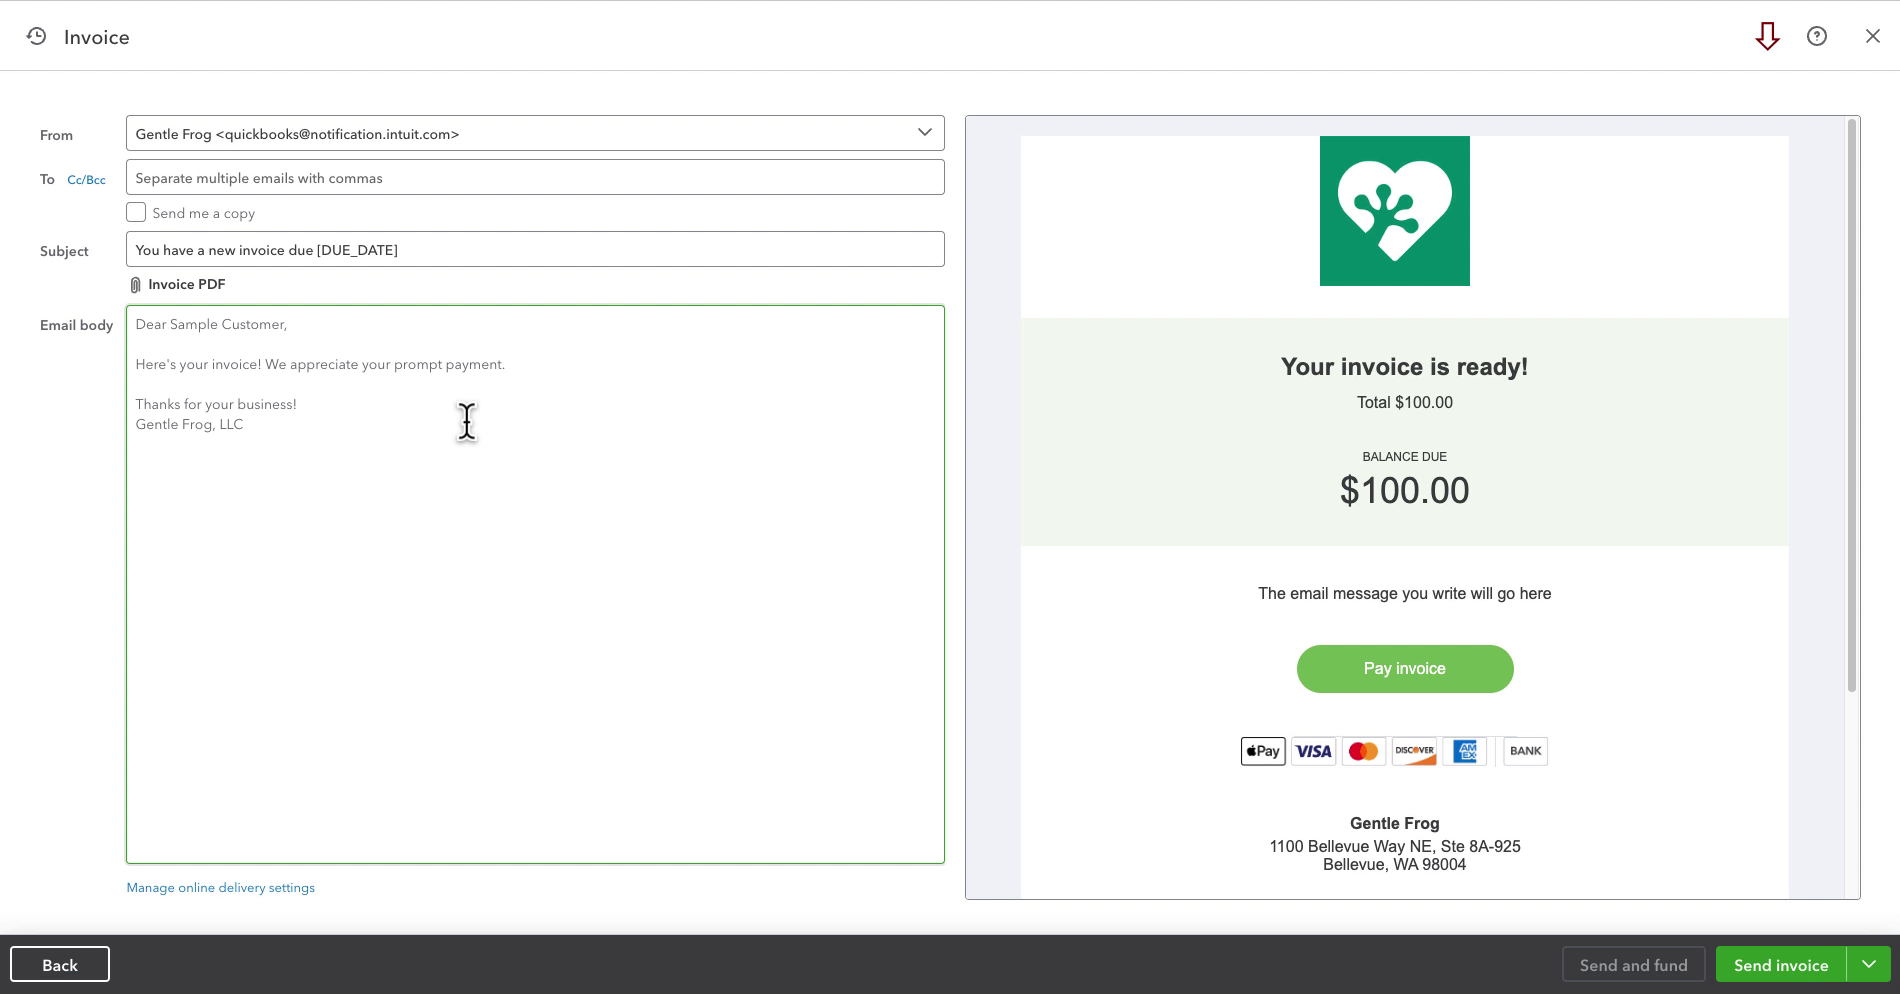
The preview on the right is the same as what you’ll see in the Email view tab.
Payor view
This is what the customer sees when they click the Pay invoice button on their invoice.
That’s the new QuickBooks Online invoice layout. It looks a little different than the old layout. You have to click the Manage button in the upper right corner to edit things. But otherwise it should feel pretty familiar.
☕ If you found this helpful you can say “thanks” by buying me a coffee… https://www.buymeacoffee.com/gentlefrog
Below is a video if you prefer to watch a walkthrough.
If you have questions about the new invoice layout in QuickBooks Online click the green button below to schedule a free consultation.


2 Responses
Every time I open an invoice Intuit gives me the pop-out. Yes, the Manage button makes it go away but the next time I open an invoice it appears again. Is there a way to turn it off?
Which pop-up are you referring to?