In part one of this series I showed you what bank rules are and the basics of using them. In part two I’ll show you how you can use bank rules to help you get through the 101 things on your to do list.
Creating a Bank Rule to Organize Transactions by Payee
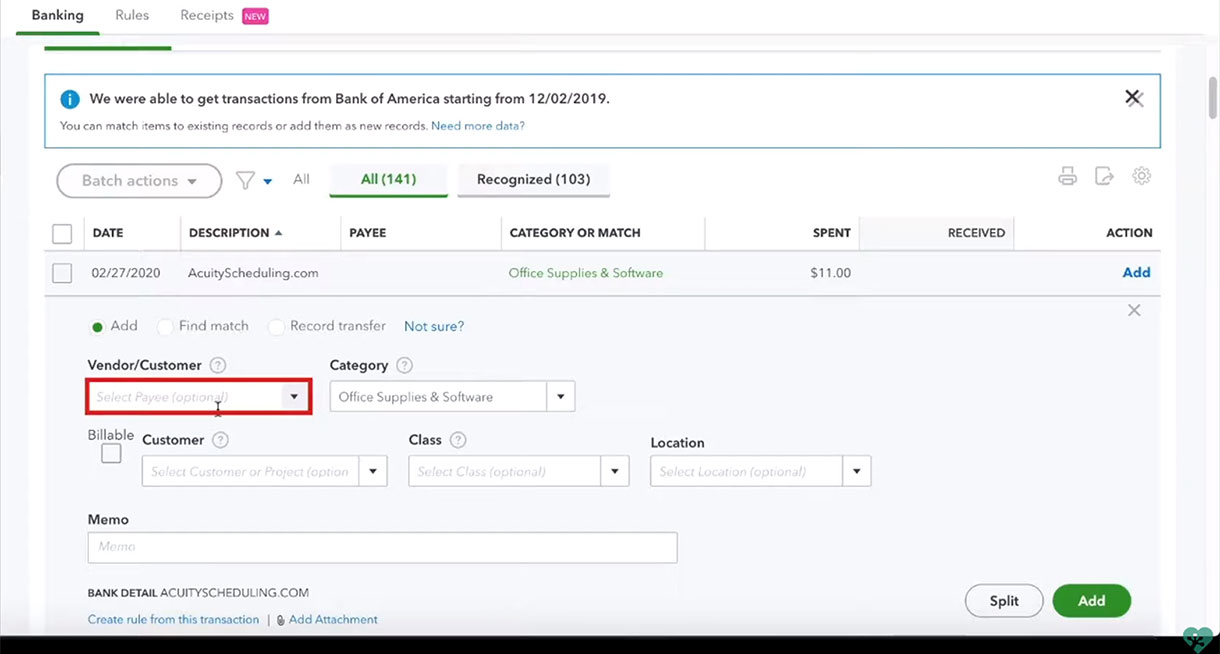
We’ll start by organizing transactions by the Payee. In my example the Payee field is blank.
![]()
I never like to leave Payee blank so I’m going to create a rule to fill that in. To do so I click anywhere on the transaction, that isn’t “Add” in the Action field, that will open the transaction.
You’ll notice in the Vendor/Customer box it says “Select Payee (optional)” you’ll click there to enter a Payee.
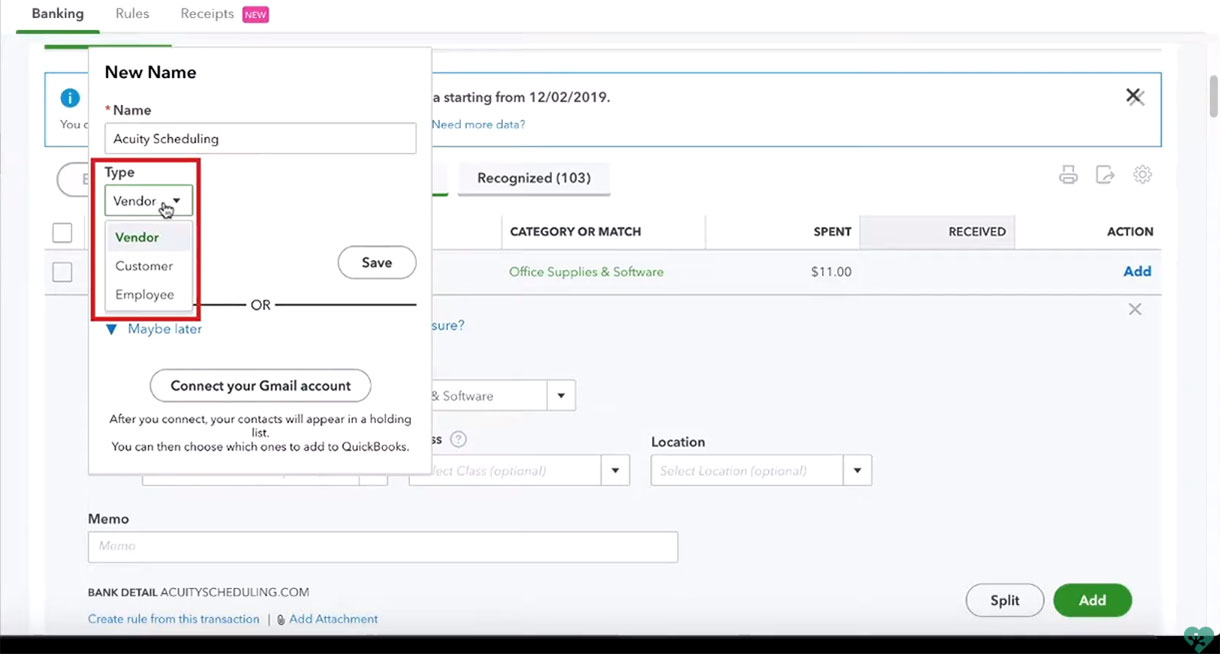
I enter the name of a new Payee and get a pop-up where I can pick what Type of Payee they are:
- Vendor – someone you give money
- Customer – someone who gives you money
- Employee – a member of your team
I’ll select Vendor as this is someone I’m giving money, and click Save.
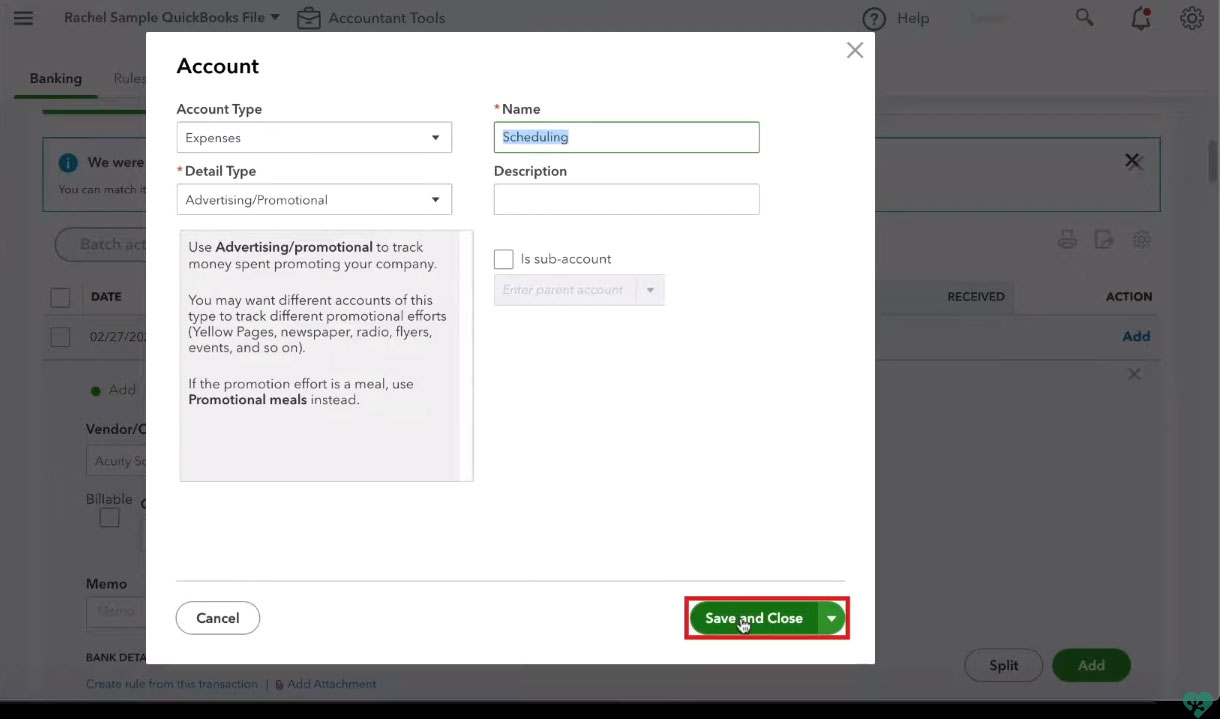
Now I’ll select the Category (why I give this vendor money). Quickbooks will make a suggestion but you can click the box and change it to whatever you prefer.
Once again I’m going to type in something new and I get an Account pop-up where I can select the Account Type and give this new account a name. I select Expense, name it and click Save and Close.
At the bottom of the transaction, you’ll see a link “Create rule from this transaction.”

I click that link and can now create a new rule for that transaction.
For descriptions of the fields on this screen see Using Bank Rules in QOB – Part 1.
For this example I give the rule a name, leave the For field as “Money Out,” and select “All bank accounts” under In.
Under the conditions section I’ll change the Description to “Bank text” and delete the dollar amount line.
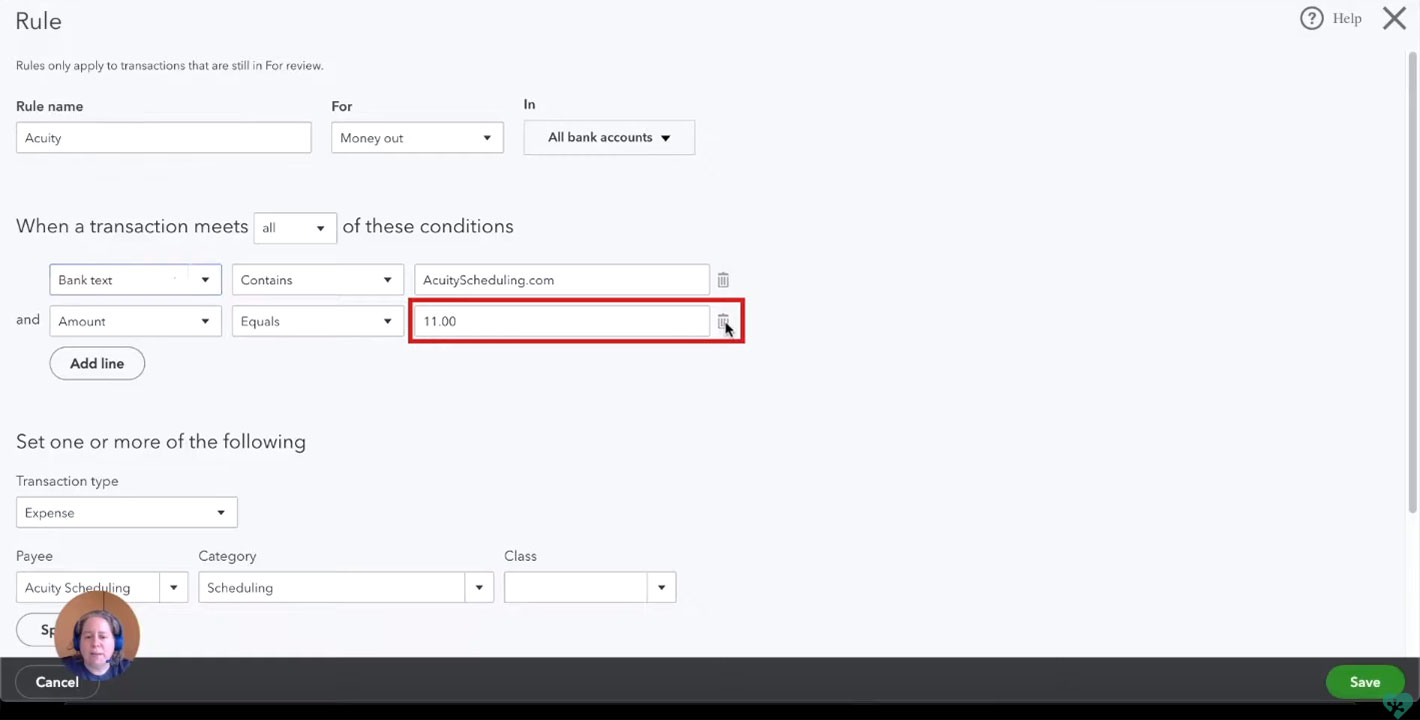
Under “Set one more of the following” I can select what I want Quickbooks to do when these conditions are met.
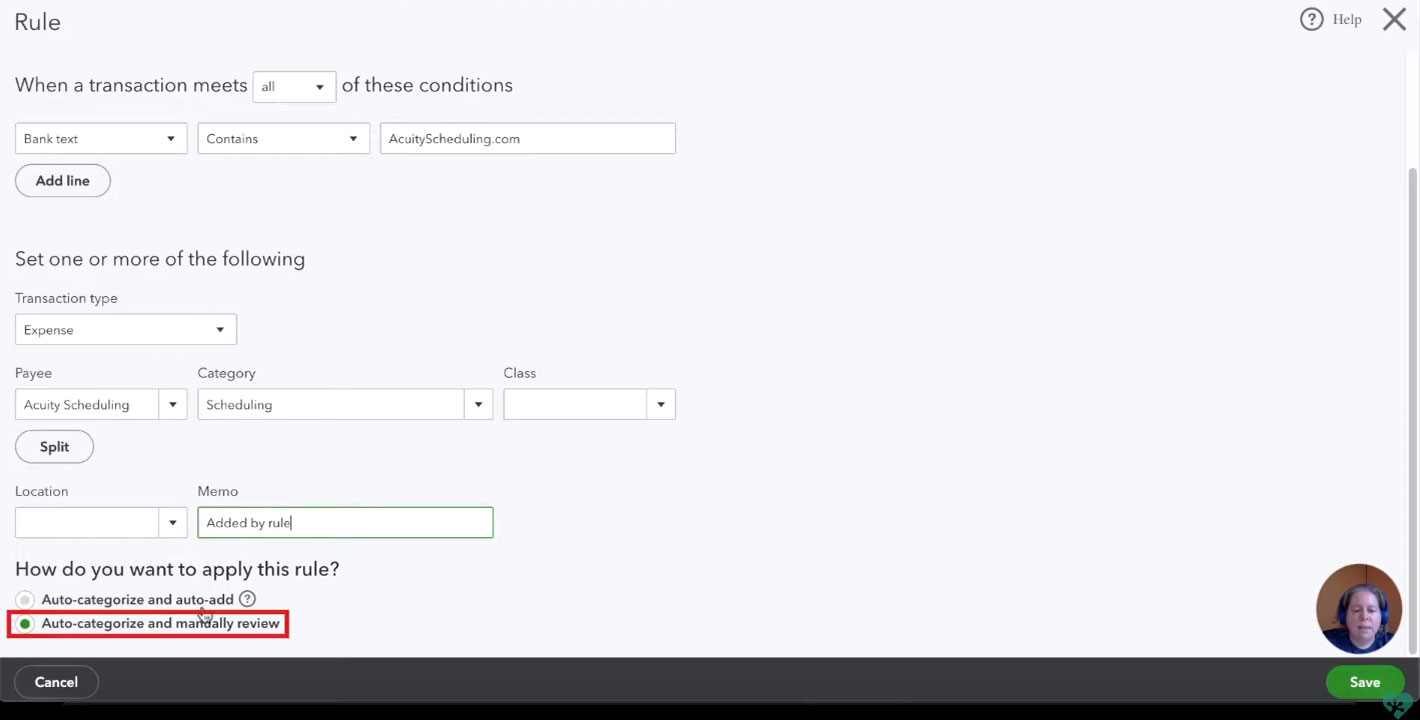
I want Quickbooks to automatically make the Transaction type an Expense. I select the Payee and Category, enter a memo, make sure “Auto-categorize and manually review” is selected and click Save.
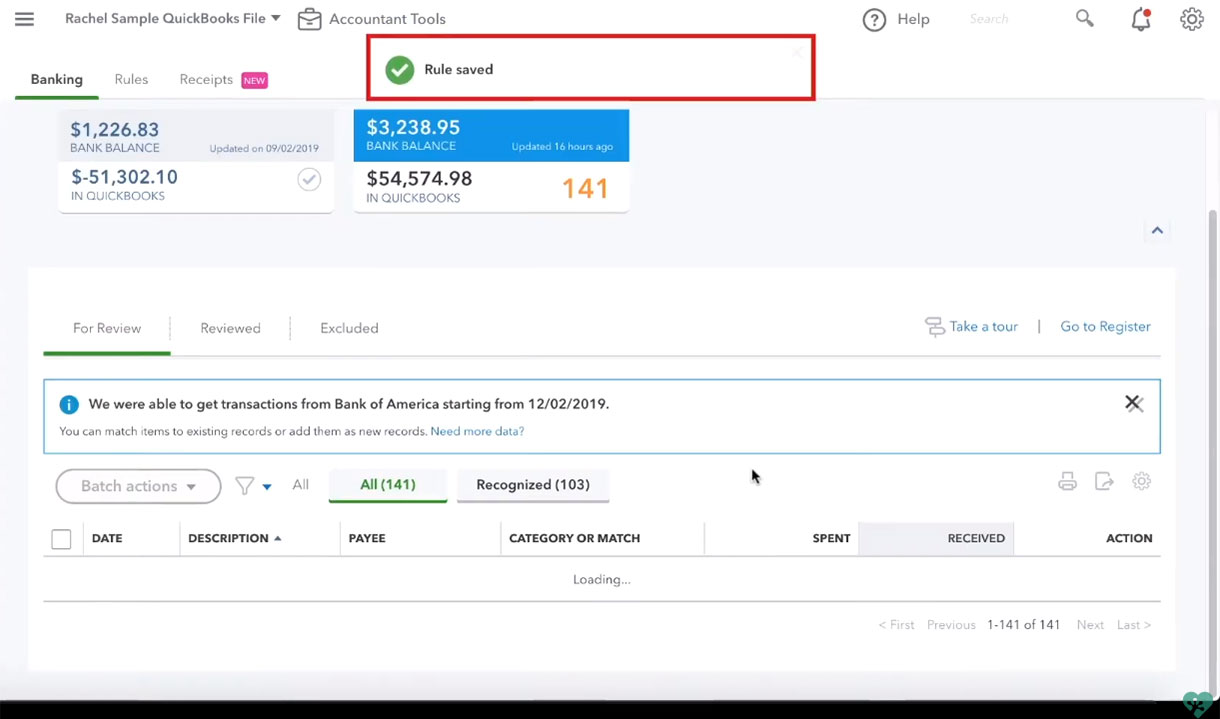
You’ll see a message across the top of your transactions letting you know your rule was saved.
I can now see that four transactions automatically got this new rule by the green “RULE” in the Category field.
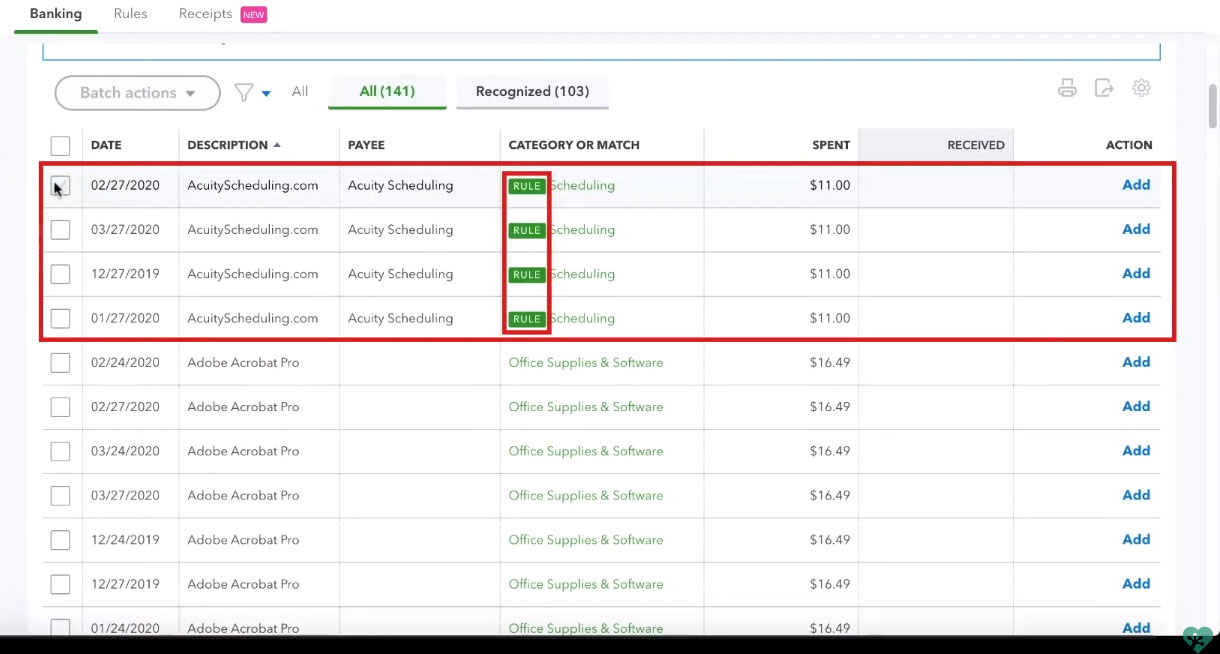
I’m going to select all four of these transactions, click “Batch actions” and select “accept selected.”
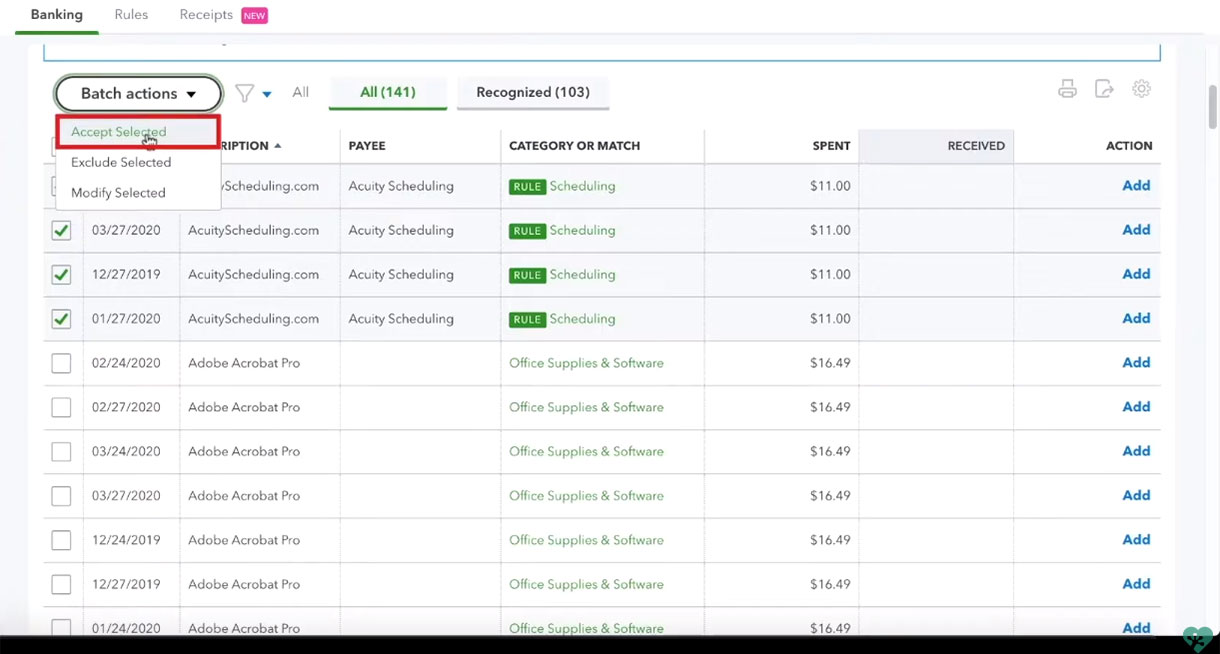
Those transactions will now be moved to Reviewed.
Turning on Auto-Accept
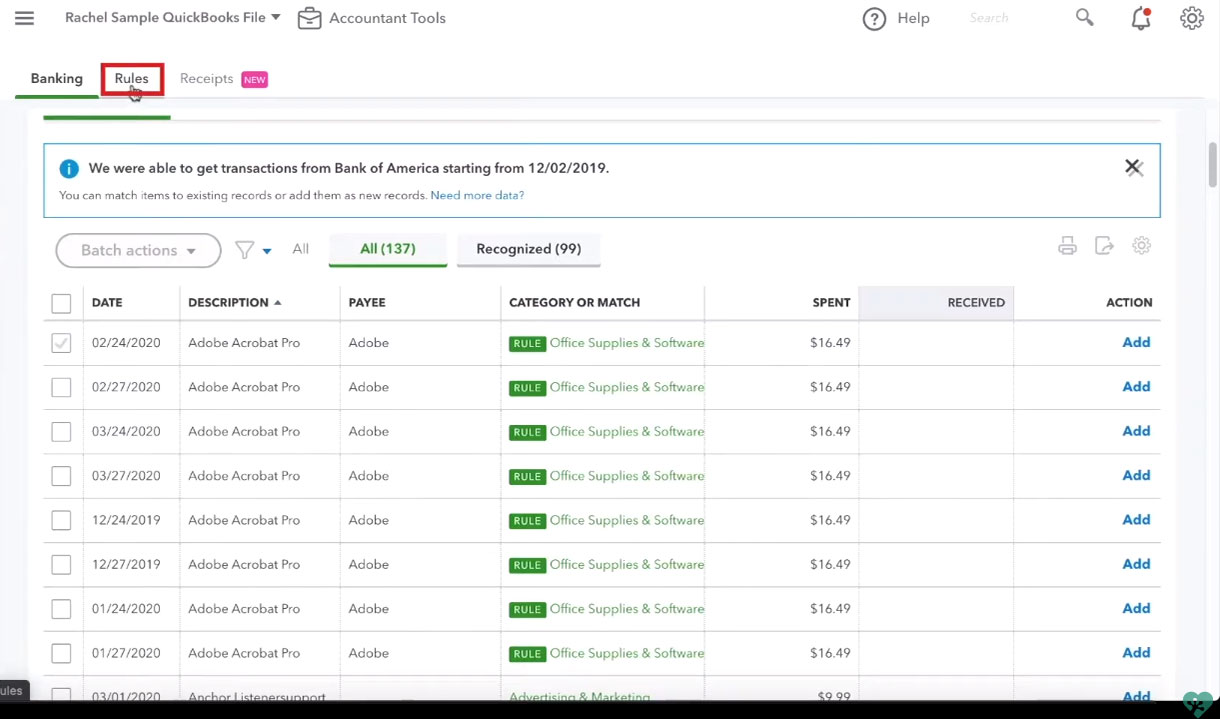
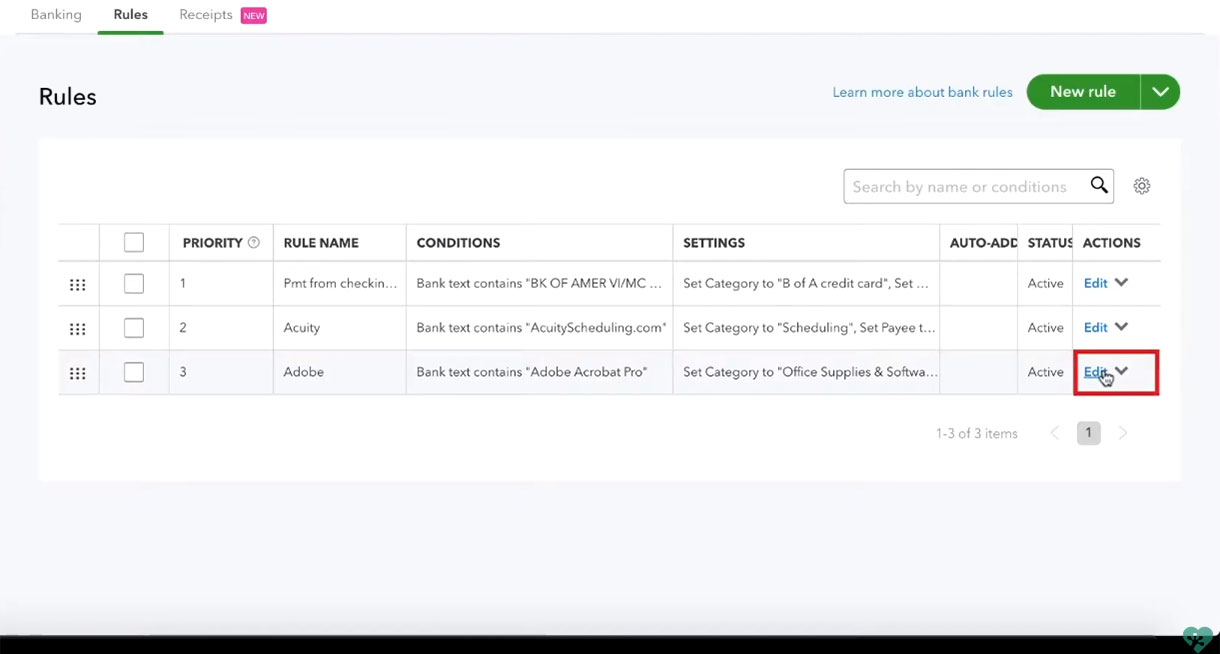
To change an existing rule from manual review to auto-accept click on Rules at the top of the screen.
Click “Edit” under Actions for the rule you’d like to update.
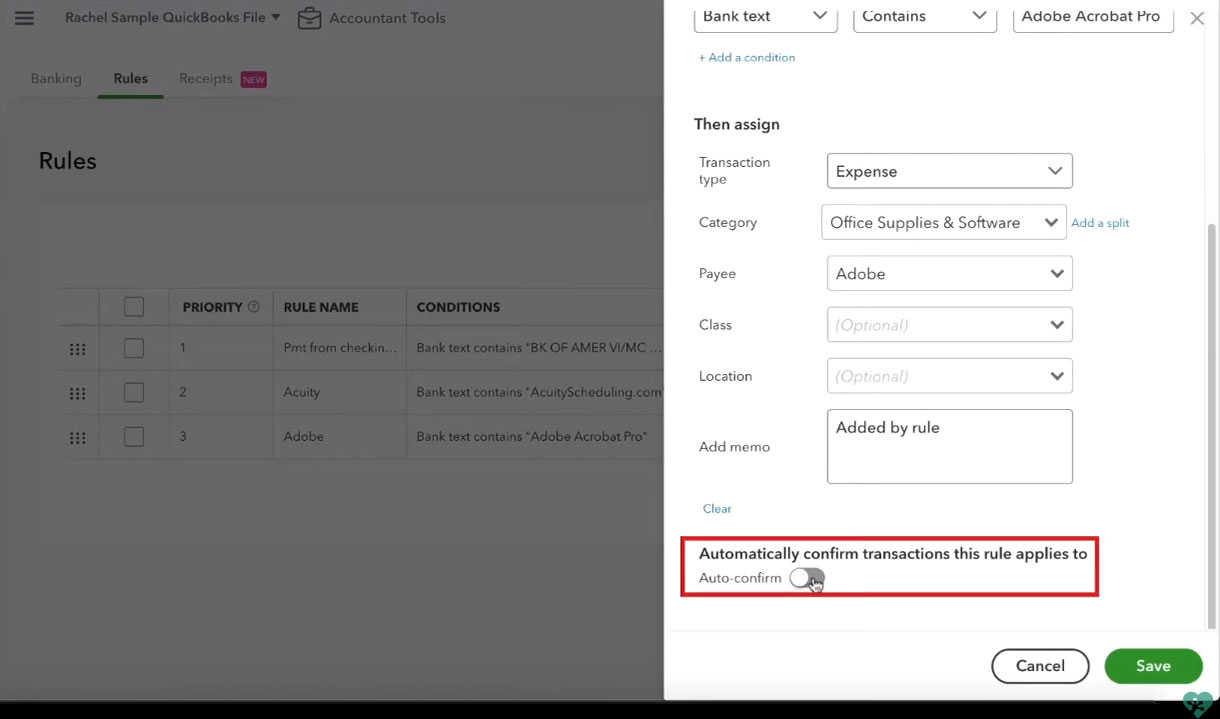
Scroll to the bottom of the edit screen and you’ll find the Auto-confirm slider bar. Click the slide bar to on auto-confirming and then click the green save button.
Splitting a Transaction
Now I’ll show you how you can use a bank rule to automatically split a transaction.
In this example, I’m going to pretend that I have transactions that are partially “Advertising & Marketing” and partially a “Gift” for a vendor called Anchor.
I’ll find an Anchor transaction and click the “Create rule from this transaction” link.
![]()
I name my rule “Anchor” set the conditions and in the “Set one or more of the following” section I click Split.
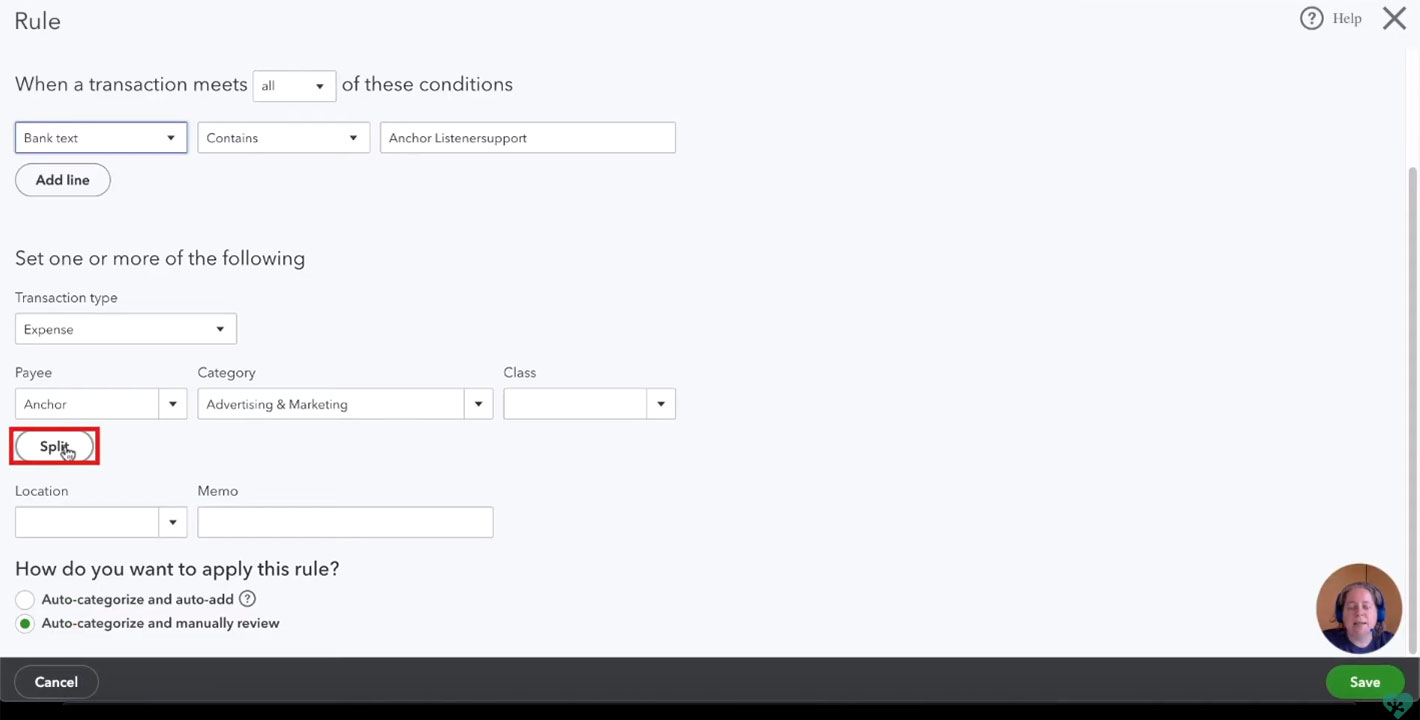
I can now create a rule that will automatically split transactions for Anchor where money comes out of my bank account between two categories.
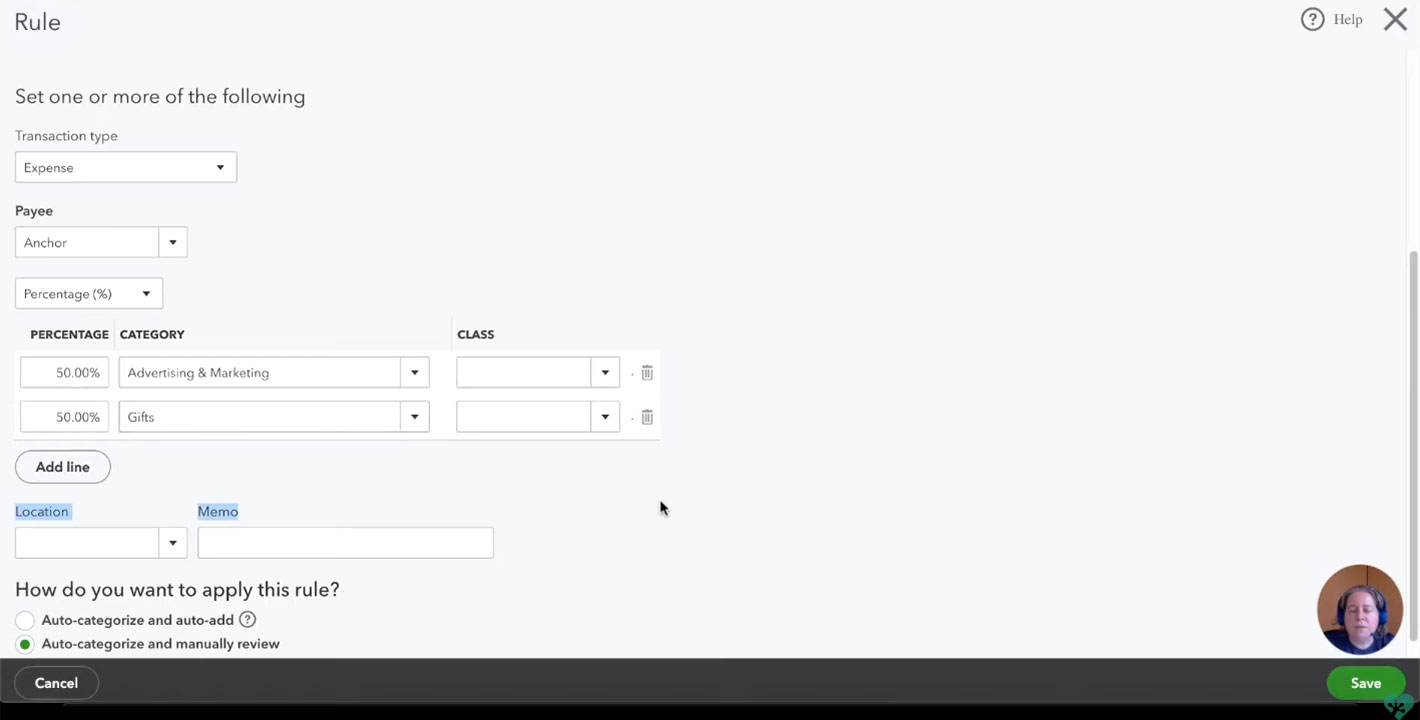
In the example I’ll split it 50/50 between Advertising & Marketing and Gifts and click Save.
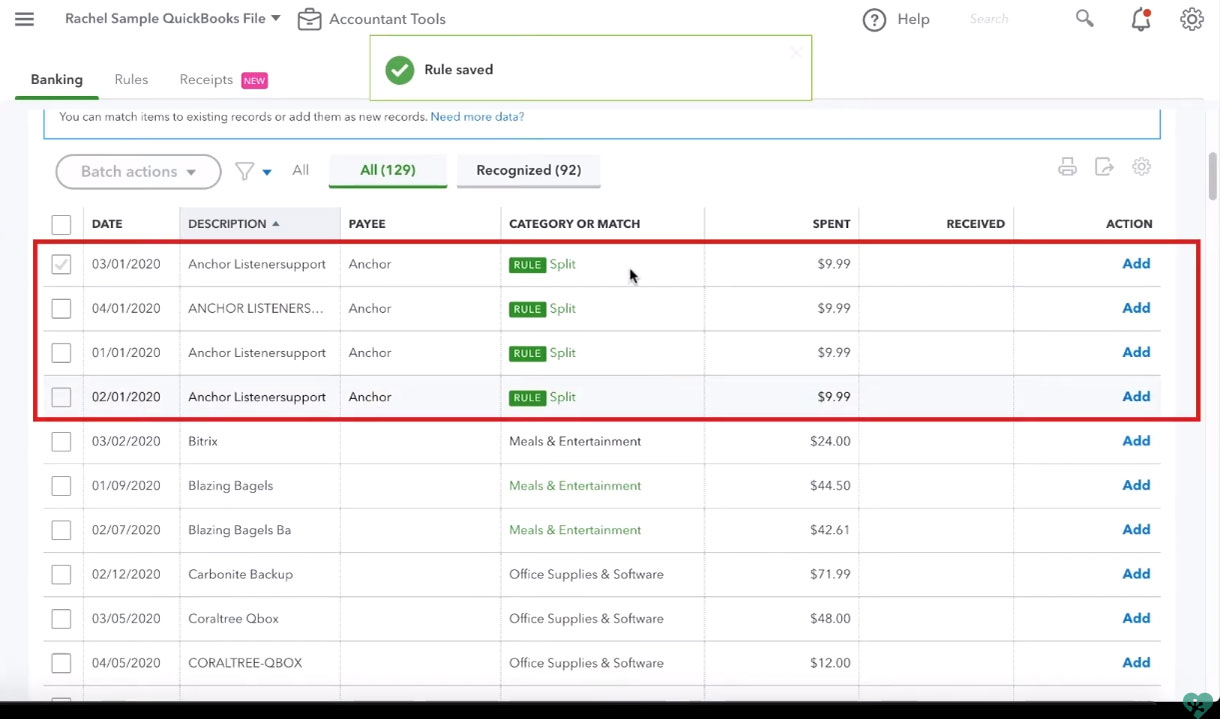
In my list of transactions I can now see the green RULE for all Anchor transactions and the Category has been updated to Split.
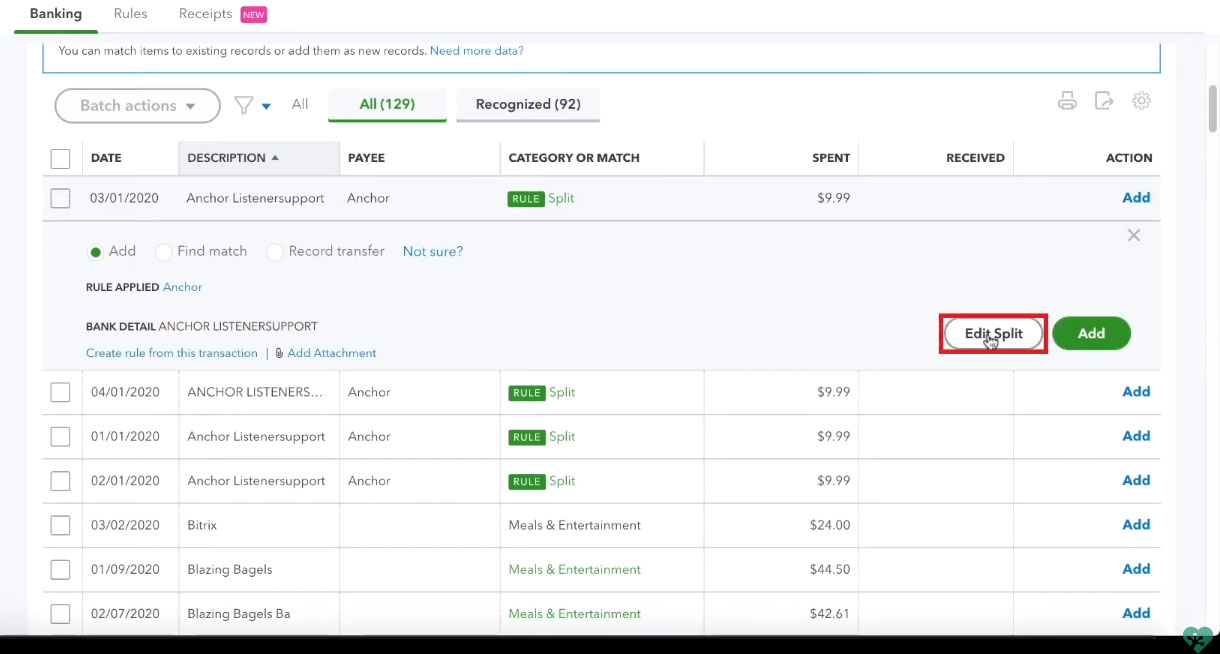
If I select a transaction and click Edit Split I can see that the transaction has been split into two categories.
![]()
Reviewing Recognized Transactions
Once you have a lot of rules setup the list of transactions For Review can become quite long. It can become difficult to find your rules that need reviewing.
Instead of viewing all the transactions that are For Review click on Recognized.
![]()
You’ll now see the transactions that Quickbooks knows (or thinks it knows) what to do with. This includes all the transactions with rules.
You can now review all these transactions and if you’re happy with them click the checkbox next to Date to select them all. Click Batch actions and Accept Selected to move them all to Reviewed.
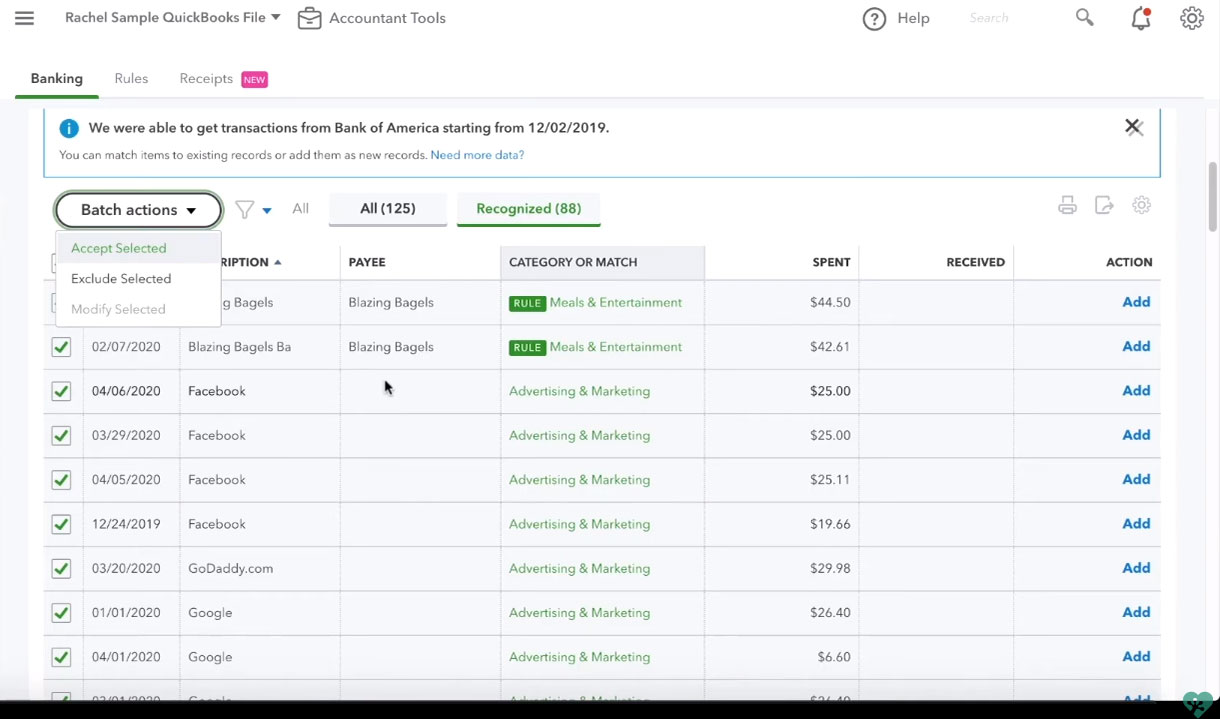
For myself, I wouldn’t do this as I like to add Payees for all my transactions.
So there you go, if you add a rule or two each time you process your Quickbooks you’ll find yourself spending less time reviewing so you can spend more time on the rest of your business.
☕ If you found this helpful you can say “thanks” by buying me a coffee…
https://www.buymeacoffee.com/gentlefrog
You can watch me walk through setting up these rules in the video below: