How to Enter Bills and Mark Them Paid in QuickBooks Online

Written By

In this tutorial, you’ll learn how to enter a bill into QuickBooks Online and mark it as paid.

Quick Instructions:

Enter a bill:

  1. Click + New in the upper left corner
  2. Under Vendors click Bill
  3. Fill in the following:
    1. Vendor
    2. Bill date
    3. Due date, if applicable
    4. Category
    5. Description, optional
    6. Amount
  4. Attach a copy of the receipt, optional
  5. Click Save and Close

Mark Bill as Paid:

  1. Click + New in the upper left corner
  2. Under Vendors click Pay bills
  3. Fill in the following:
    1. Payment account
    2. Payment date
  4. Check off all bills paid with this payment
  5. Adjust Payment amounts if needed
  6. Click Save and Close

Keep reading for a complete walkthrough with screenshots:

Enter a Bill Into QuickBooks Online

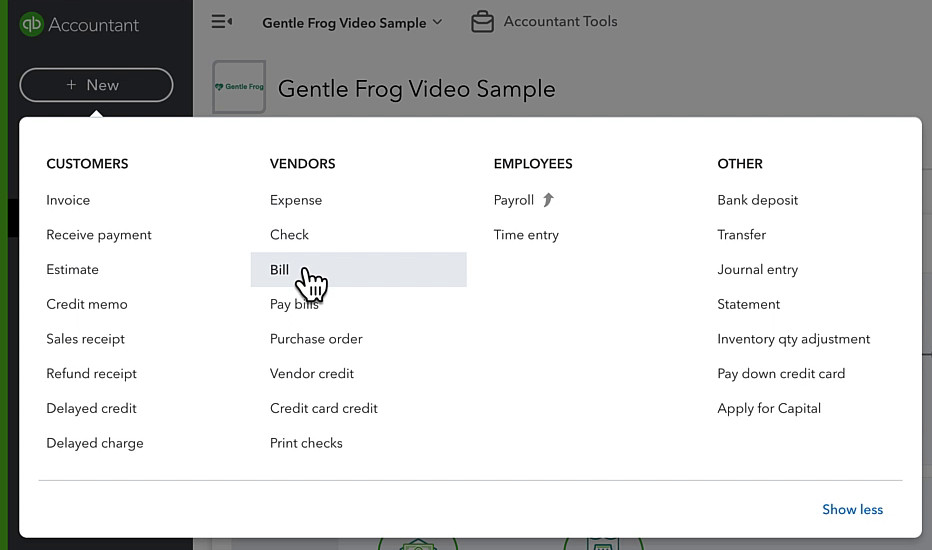
To enter a bill into QBO you can start by clicking the + New button in the upper left corner.

Under Vendors select Bill.

Creating a new using the + New button in QuickBooks Online

For this example, I’m going to enter a bill for Hubdoc. Here’s what it looks like:

Hubdoc receipt for entering a bill in QuickBooks Online

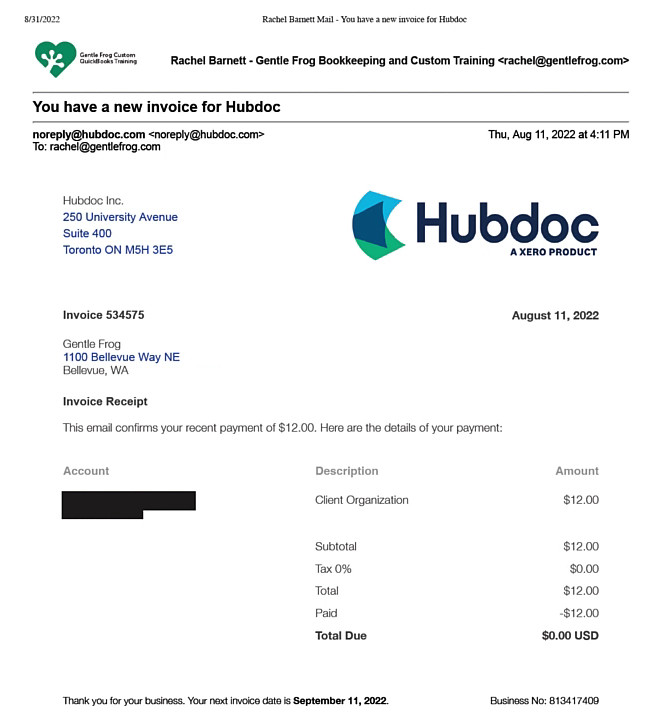
To enter this into QuickBooks I select Hubdoc from the Vendor drop-down. 

The Bill date is 8/11/22 and I’ll enter that as the Due date as well.

If you don’t want to enter a due date you can select “Due on receipt” from the Terms drop-down.

I’ve previously entered Hubdoc bills. So QuickBooks pre-fills in the information from the last one I entered. It fills in Category  as “Office expenses” and the Amount as “12.00”

If this was the first Hubdoc bill I was entering I’d have to fill those in myself.

I’m going to click Attachments and attach a copy of my email receipt to this bill. This is optional but it’s a good idea to have that paper trail if needed.

Here’s what the Bill screen looks like filled out:

Entering a bill into QuickBooks Online

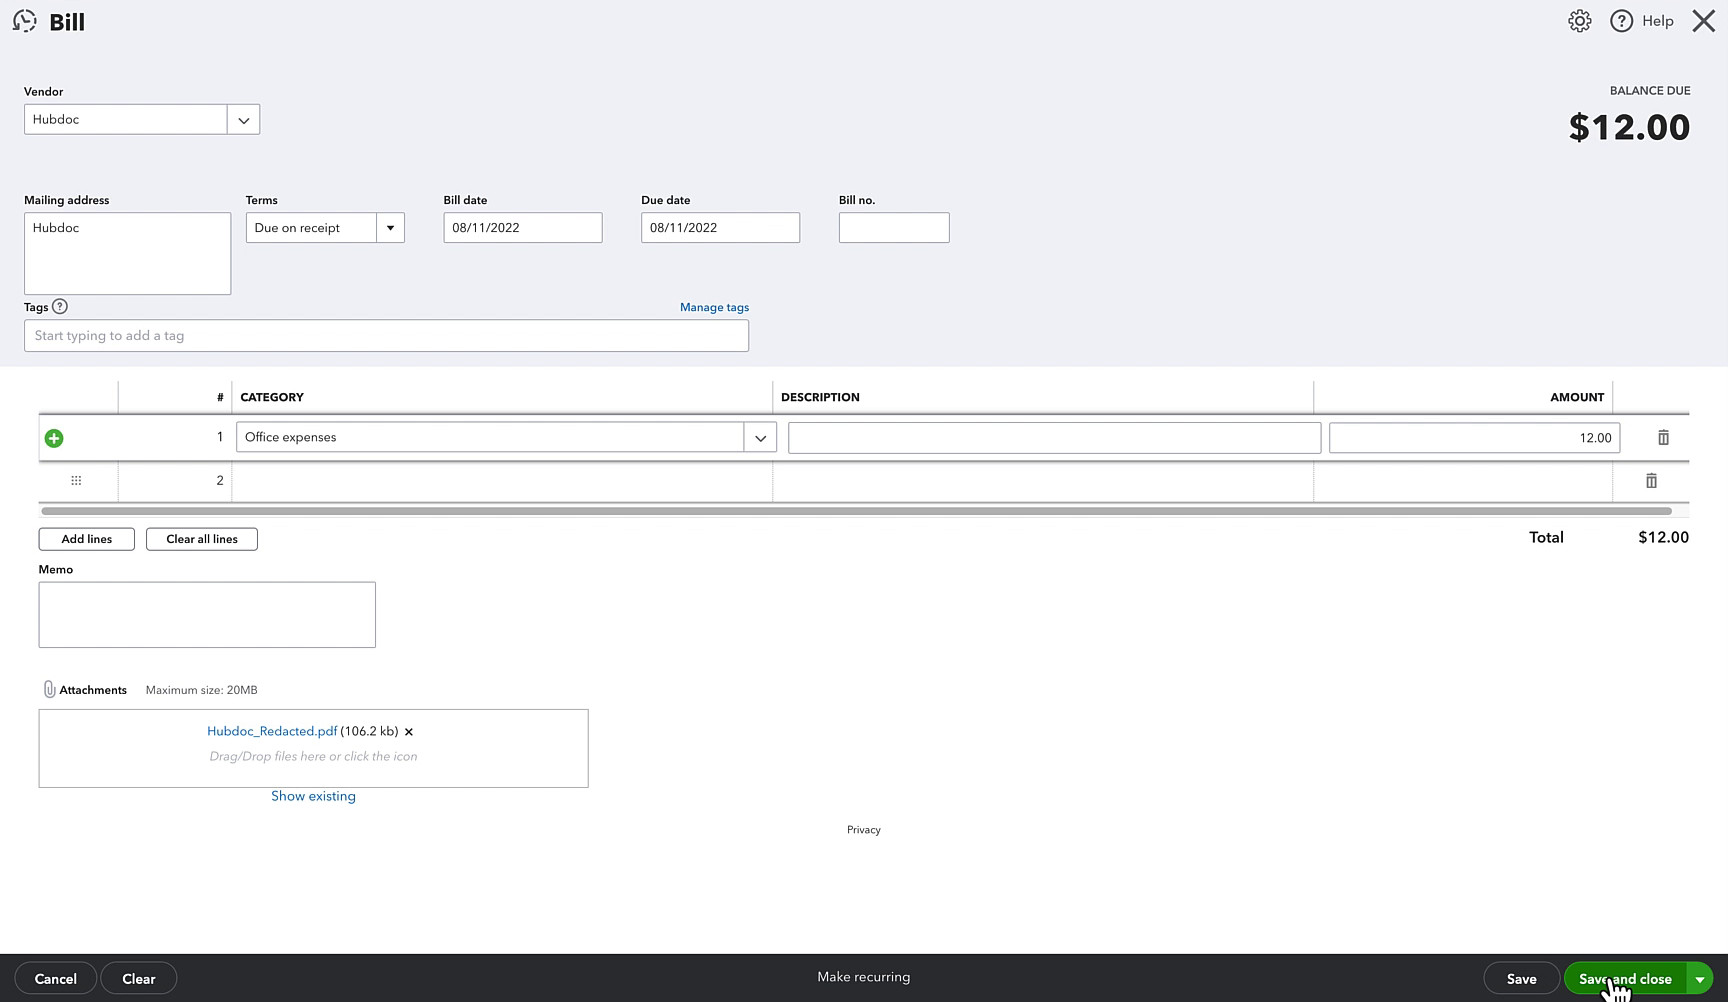
I’ve finished entering the bill and will click the Save and Close button in the lower right corner.

Finding Your Unpaid Bills

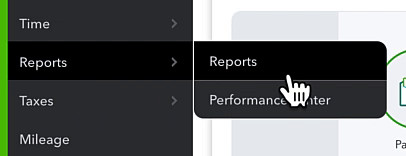
To find your unpaid bills in Quickbooks Online click Reports, then Reports.

Navigating to Reports in QBO.

I like to use the “Accounts payable aging summary” report.

Here you can see my report includes the Hubdoc bill I entered:

Finding unpaid bills in QBO using the Accounts payable aging summary report.

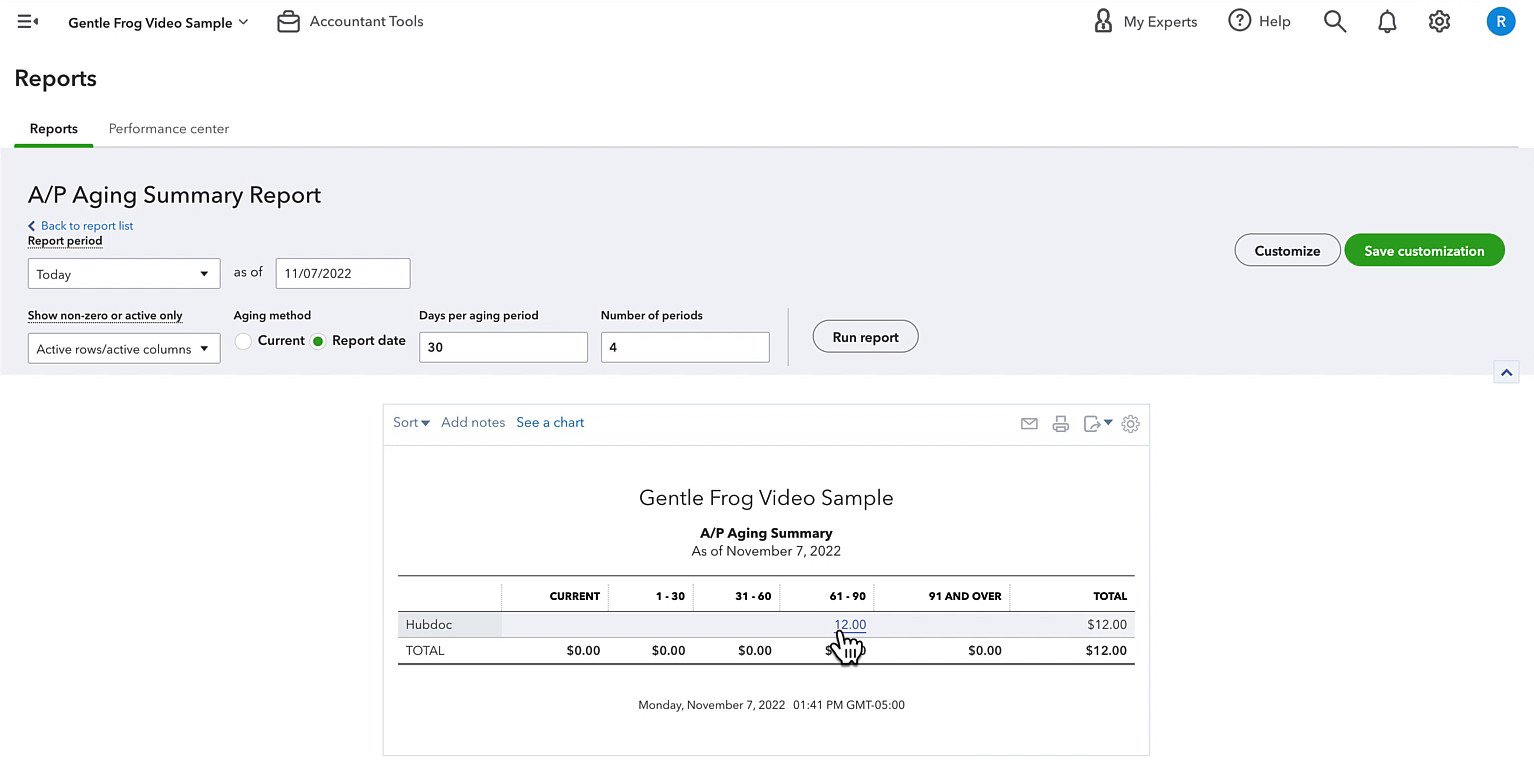
You can also use the “Unpaid bills” or “Accounts payable aging detail” reports.

Mark a bill Paid

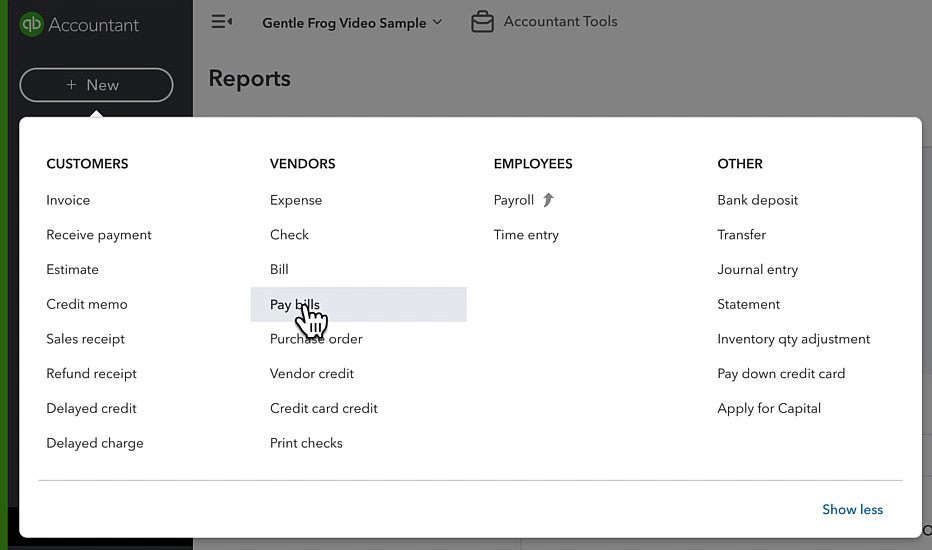
To mark a bill as paid in QuickBooks Online click the + New button in the upper left corner.

Under Vendors select Pay bills.

Using the + New button to get to the Pay Bills screen in QuickBooks Online.

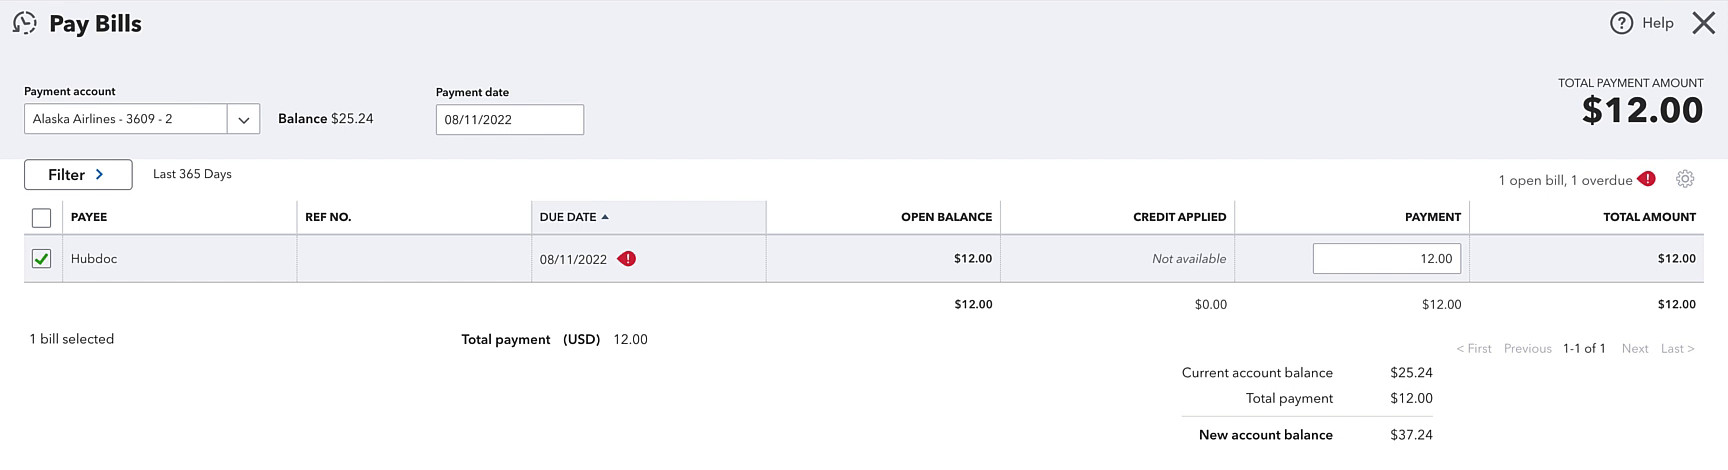
In the Payment account drop-down select the bank account used to pay the bill. 

Payment date is the day the bill was paid.

Check off the bill(s) you’re paying. In my example, I only have one bill. But you may have a single payment, like a credit card payment, that covers several bills. Check off all bills that the payment applies to.

Under Payment it will autofill the full amount of the bill, you can adjust this if needed.

Here’s what this looks like for my Hubdoc bill paid using my Alaska Airlines credit card on 8/11/22:

Paying bills in QuickBooks Online

When finished click the Save and Close button.

This records that the bill was paid. It does NOT initiate any form of payment. 

You now know how to enter a bill into QuickBooks Online and mark it as paid.

☕ If you found this helpful you can say “thanks” by buying me a coffee… https://www.buymeacoffee.com/gentlefrog

Below are videos if you prefer to watch a walkthrough.

If you have any questions about entering or paying bills in QuickBooks Online click the green button below to schedule a free consultation.

Need some one-on-one QuickBooks assistance?
Share Now

This content is for information purposes only and should not be considered legal, accounting, or tax advice, or a substitute for obtaining such advice specific to your business. Additional information and exceptions may apply. Applicable laws may vary by state or locality. No assurance is given that the information is comprehensive in its coverage or that it is suitable in dealing with a customer’s particular situation. Gentle Frog, LLC does not have any responsibility for updating or revising any information presented herein. Accordingly, the information provided should not be relied upon as a substitute for independent research. Gentle Frog, LLC does not warrant that the material contained herein will continue to be accurate, nor that it is completely free of errors when published. Readers and viewers should verify statements before relying on them.

Leave a Reply

Your email address will not be published. Required fields are marked *

Read similar articles

How to Add a Team Member to Your QBOA Account

Learn how to add a team member to QuickBooks Online Accountant account.

Have a QuickBooks / Bookkeeping Question?

Let me know what you’d like to see in future videos, blog posts, and courses.

Review Your QuickBooks

Are you a small business owner struggling to make sense of your QuickBooks data?

  • Discover how to spot costly mistakes in your bookkeeping and fix them quickly and easily.

  • Save time and money by streamlining your bookkeeping process and reducing errors.

  • Learn how to identify trends in your financial data so you can make smarter business decisions.

  • Get organized and stay on top of your finances by tracking expenses, managing receipts, and closing your books effectively.

Sign up now for this free mini-course and start mastering the essential bookkeeping skills that every small business owner needs to succeed!

FREE Mini Course

Sign up now and enjoy the peace of mind that comes with knowing your bookkeeping is accurate, up-to-date, and free from costly errors.

We won’t send spam. Unsubscribe at any time.