How to Edit an Invoice Template in QuickBooks
Have you ever had a generic Invoice Template that needed customization? In this blog post, I’m going to show you how to customize an invoice template in QuickBooks.
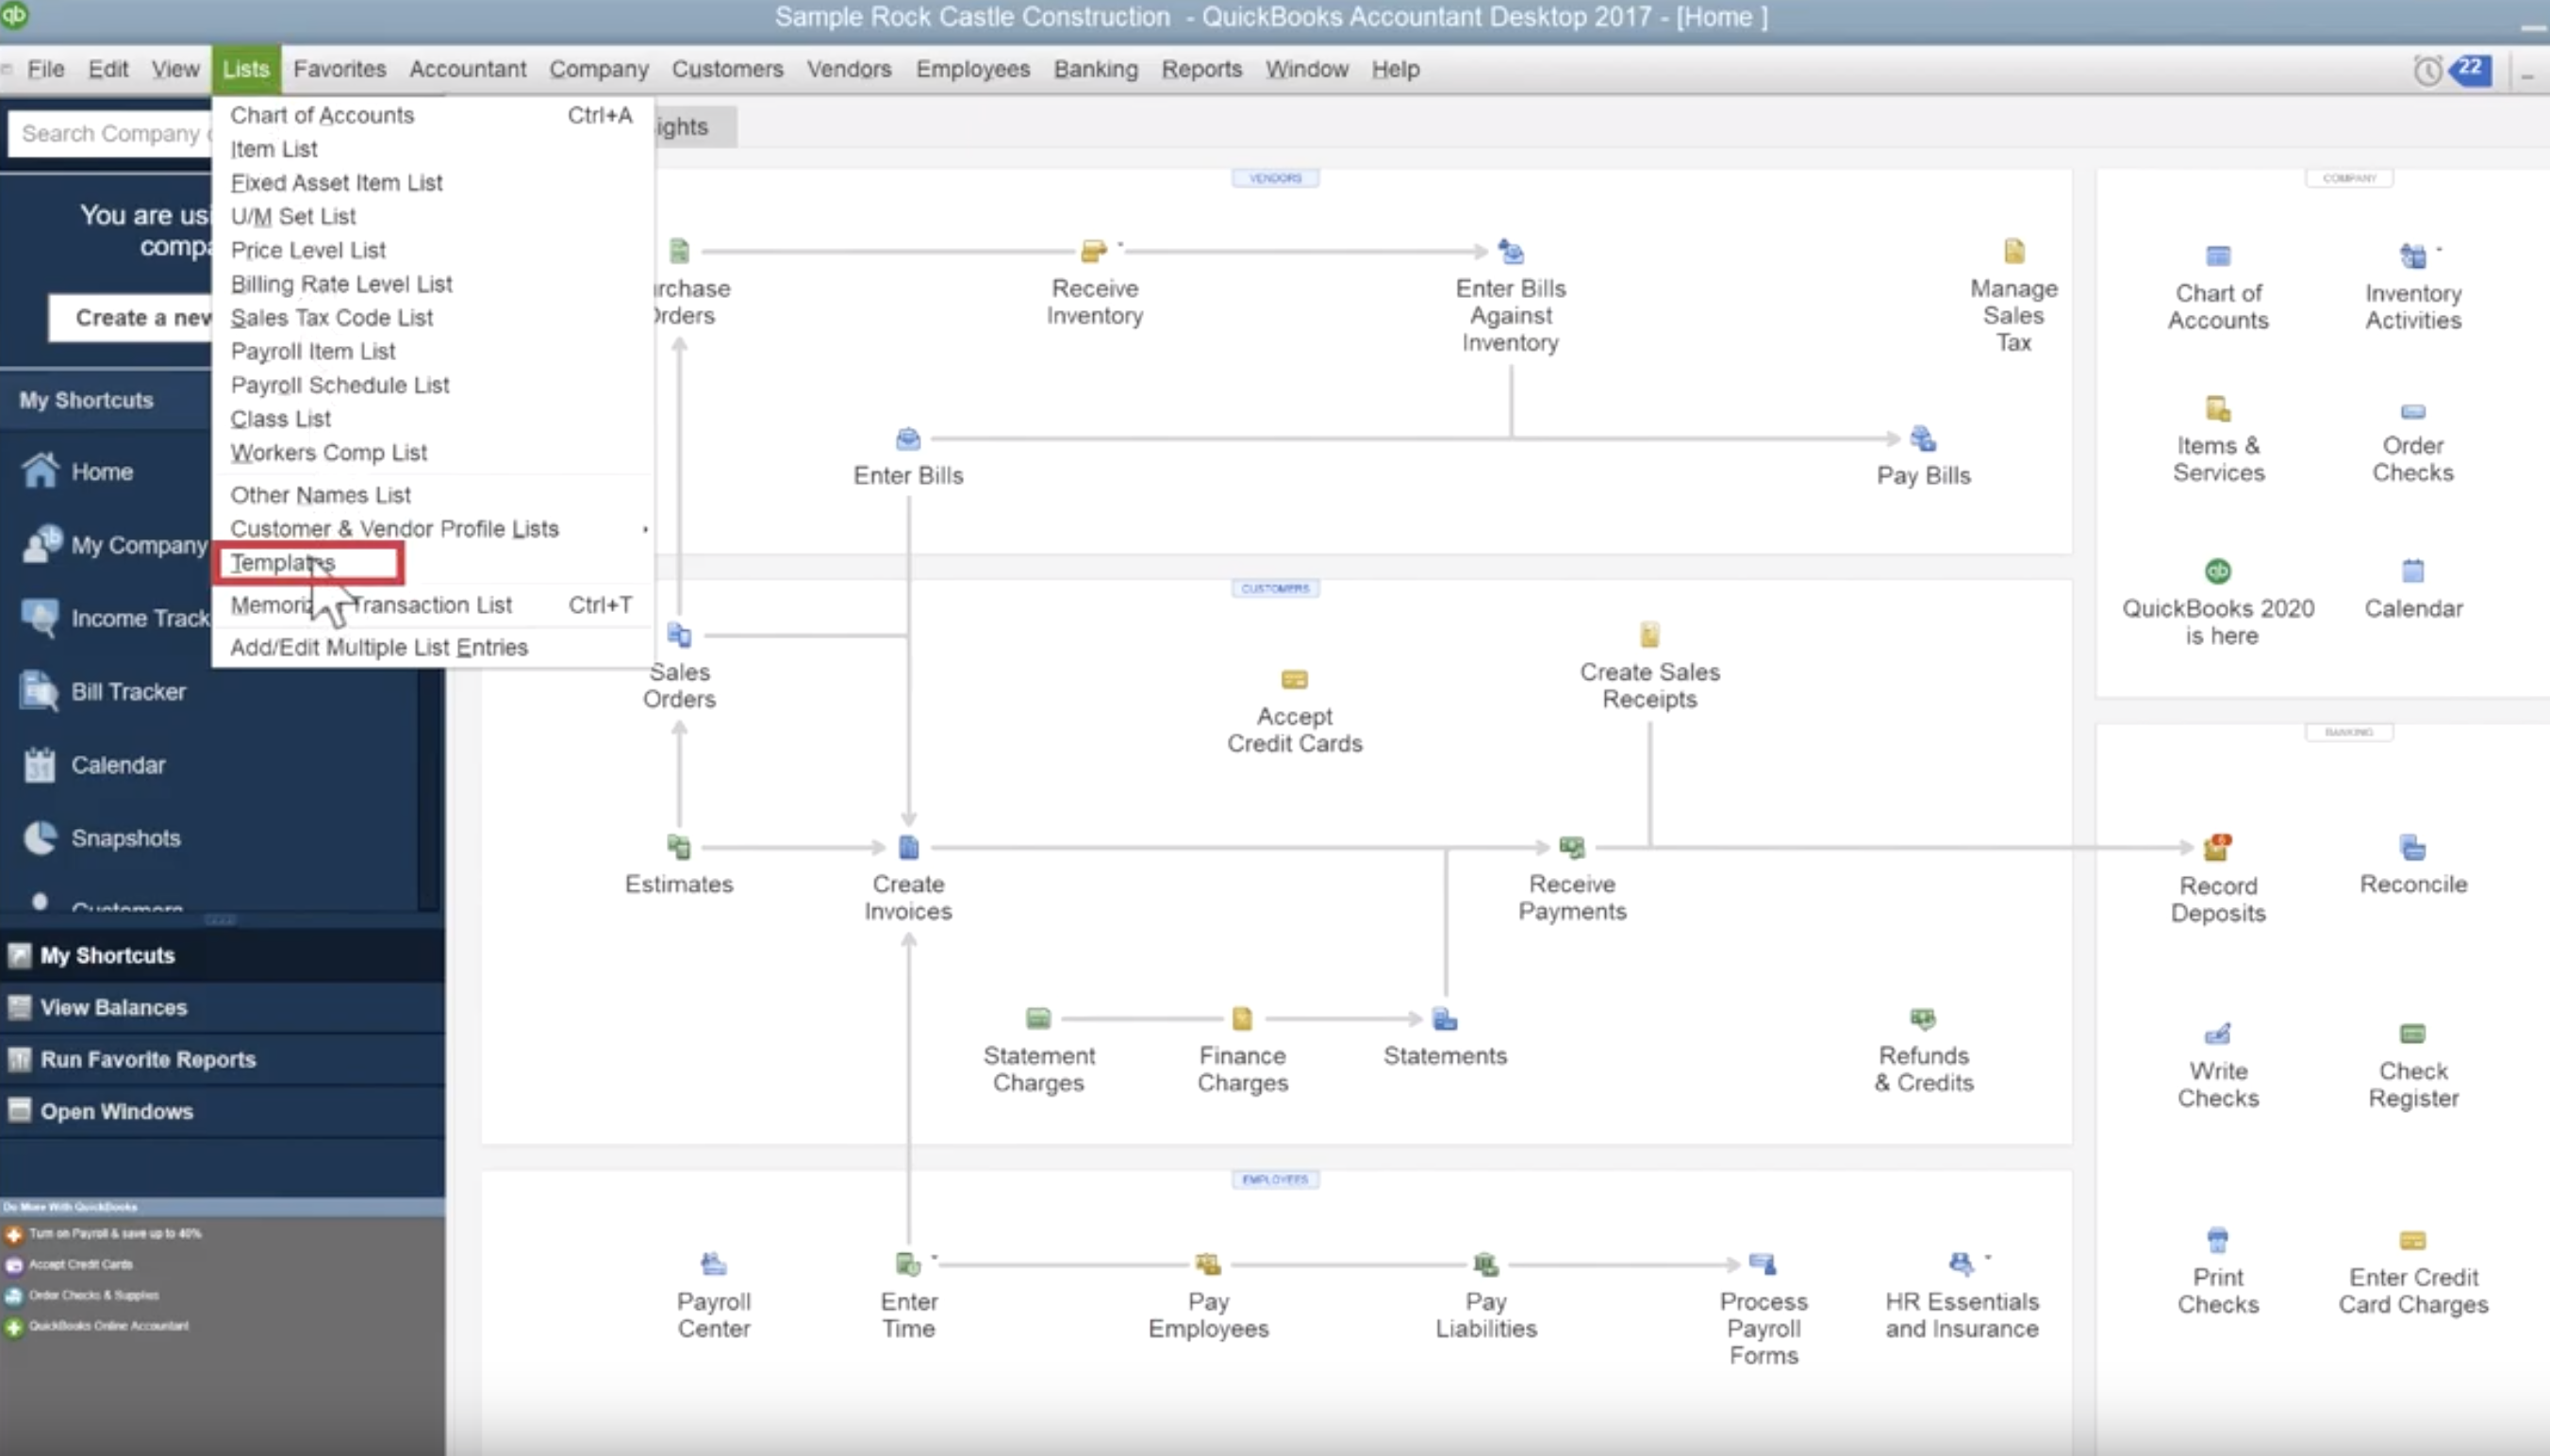
I want first to show you how the invoice looks before customization. We will start by opening QuickBooks and clicking the “Lists” menu heading and then the “Templates” item.
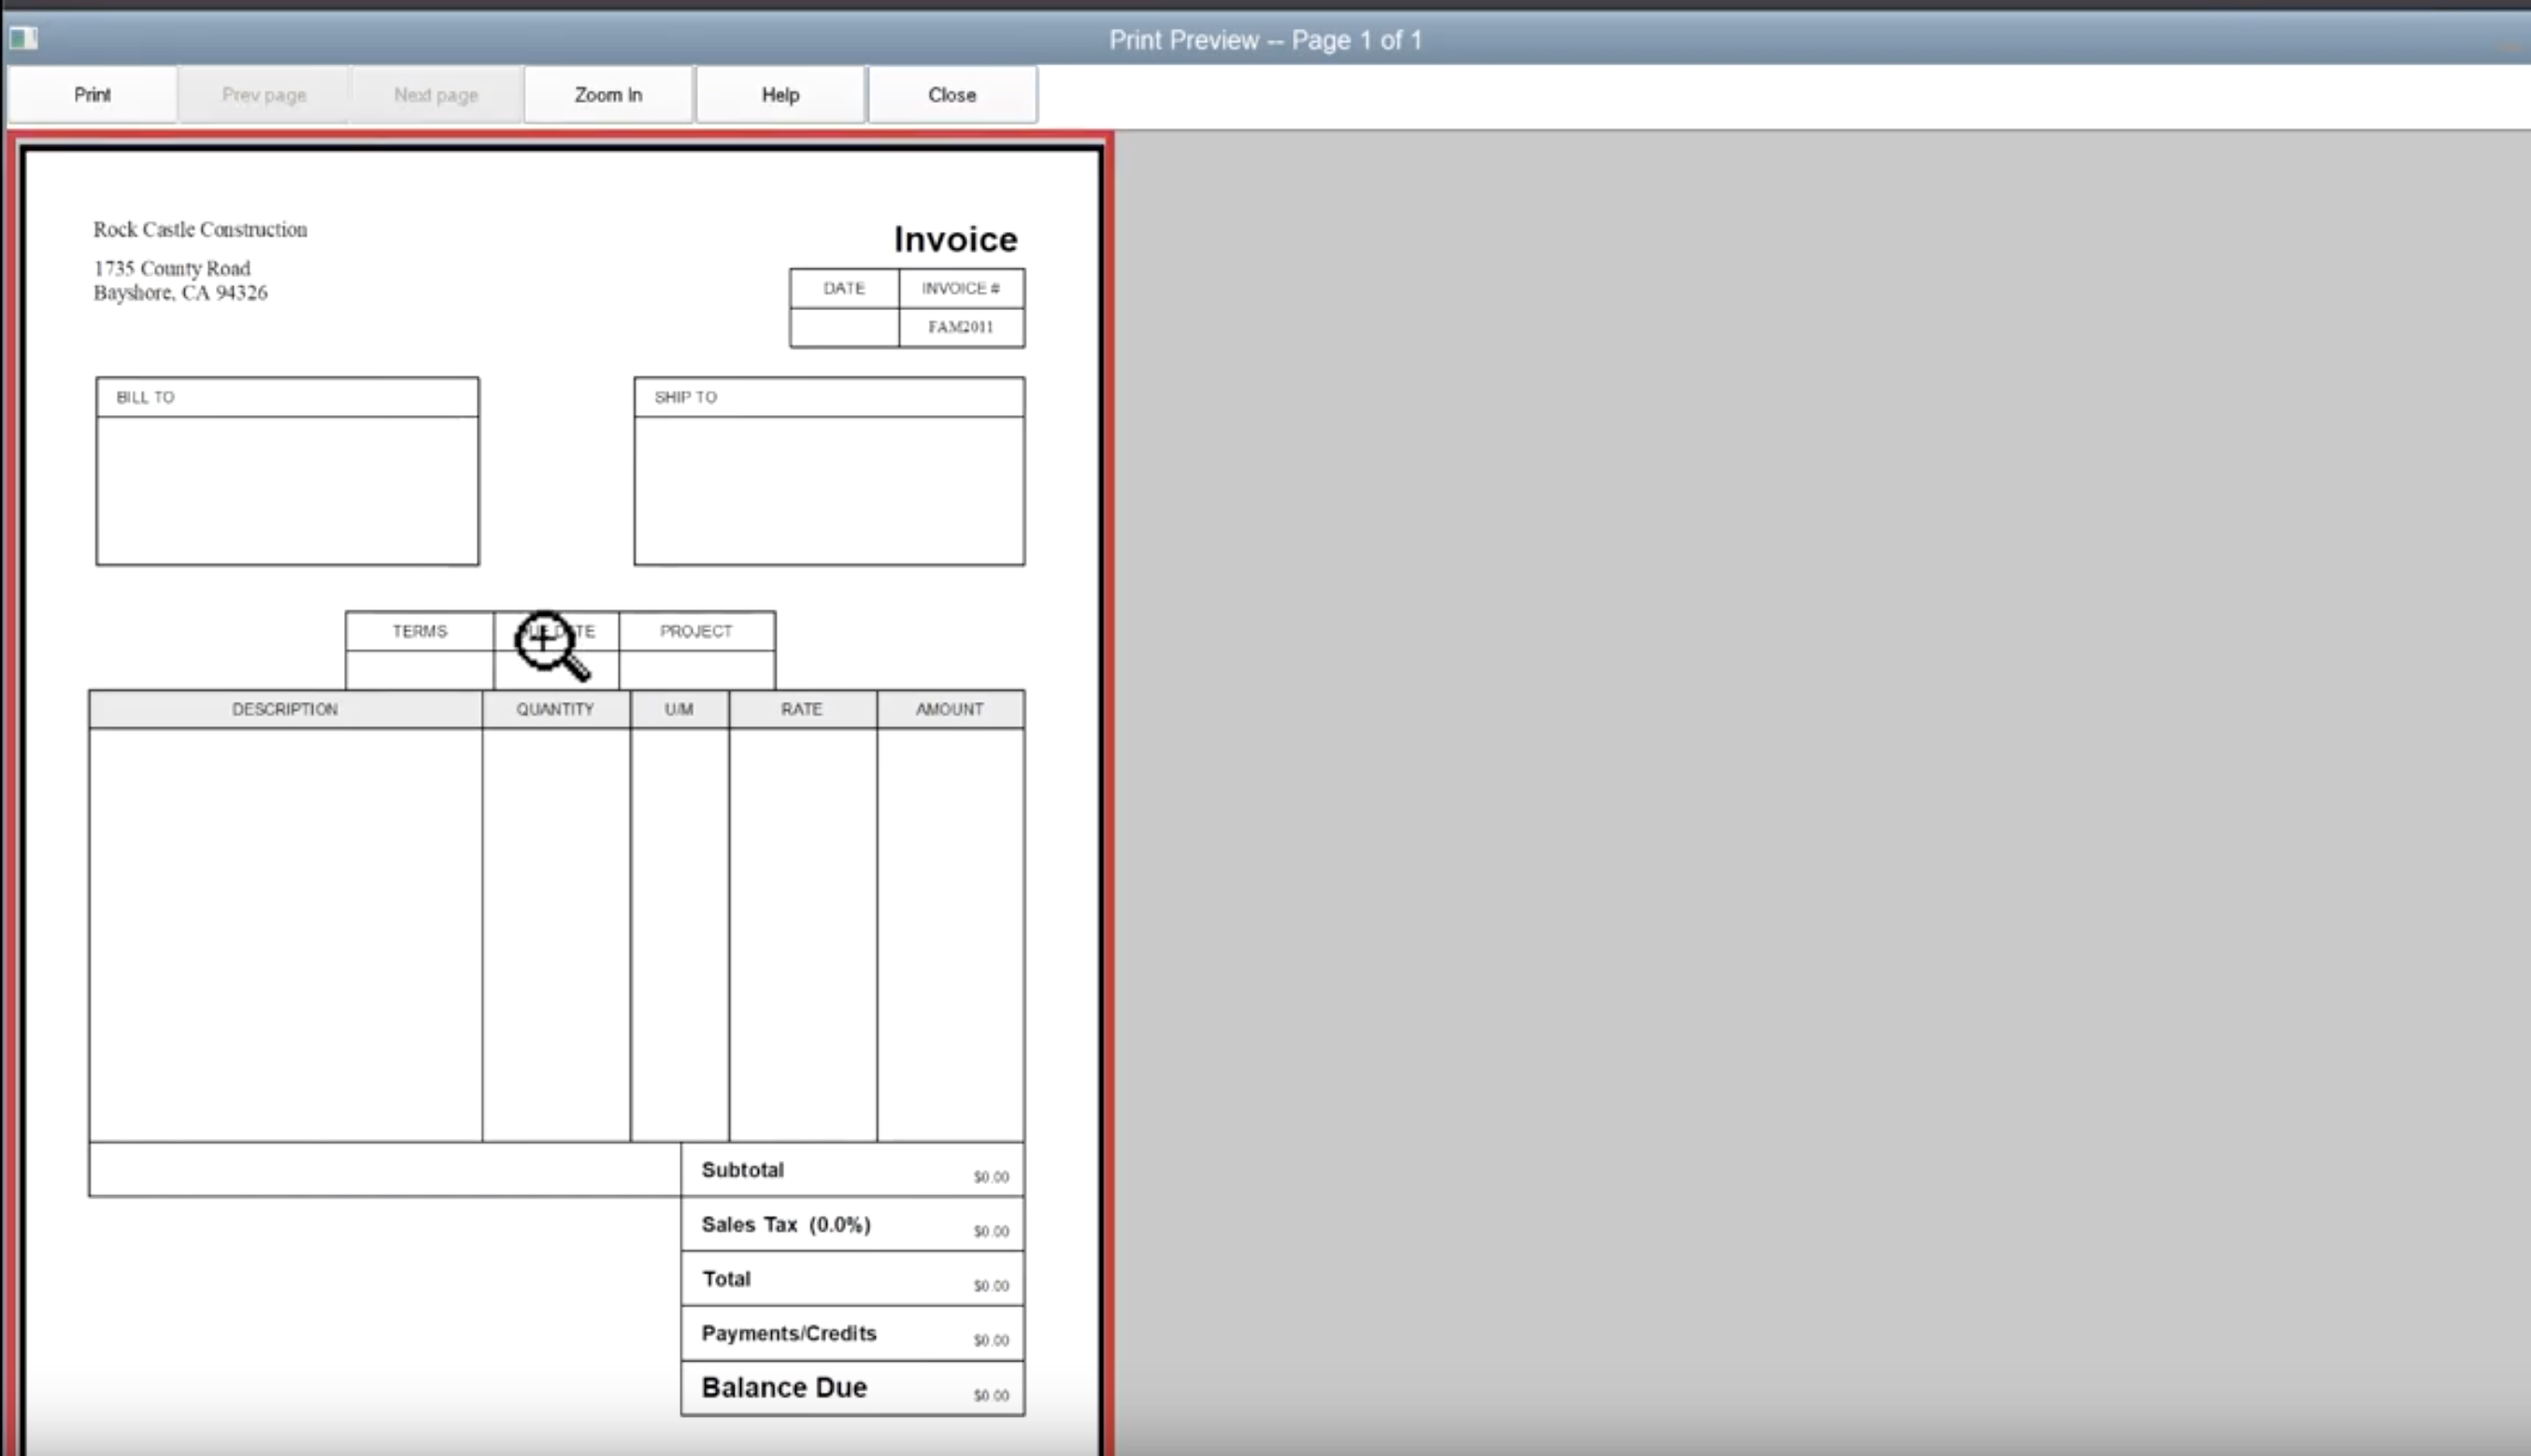
From there, we will open up the Rock Castle Invoice and then click “Print Preview.” We are only opening this print preview so that I can better illustrate how generic the default invoice template is. This is the base from which we will begin customizing.

Next, we will close the Print Preview. Closing this screen will bring us back to the page we can use to customize the Invoice Template.

Adding a custom logo
The first part of customization that we will do to our invoice template is to customize the logo. To do this, we follow a few simple steps.
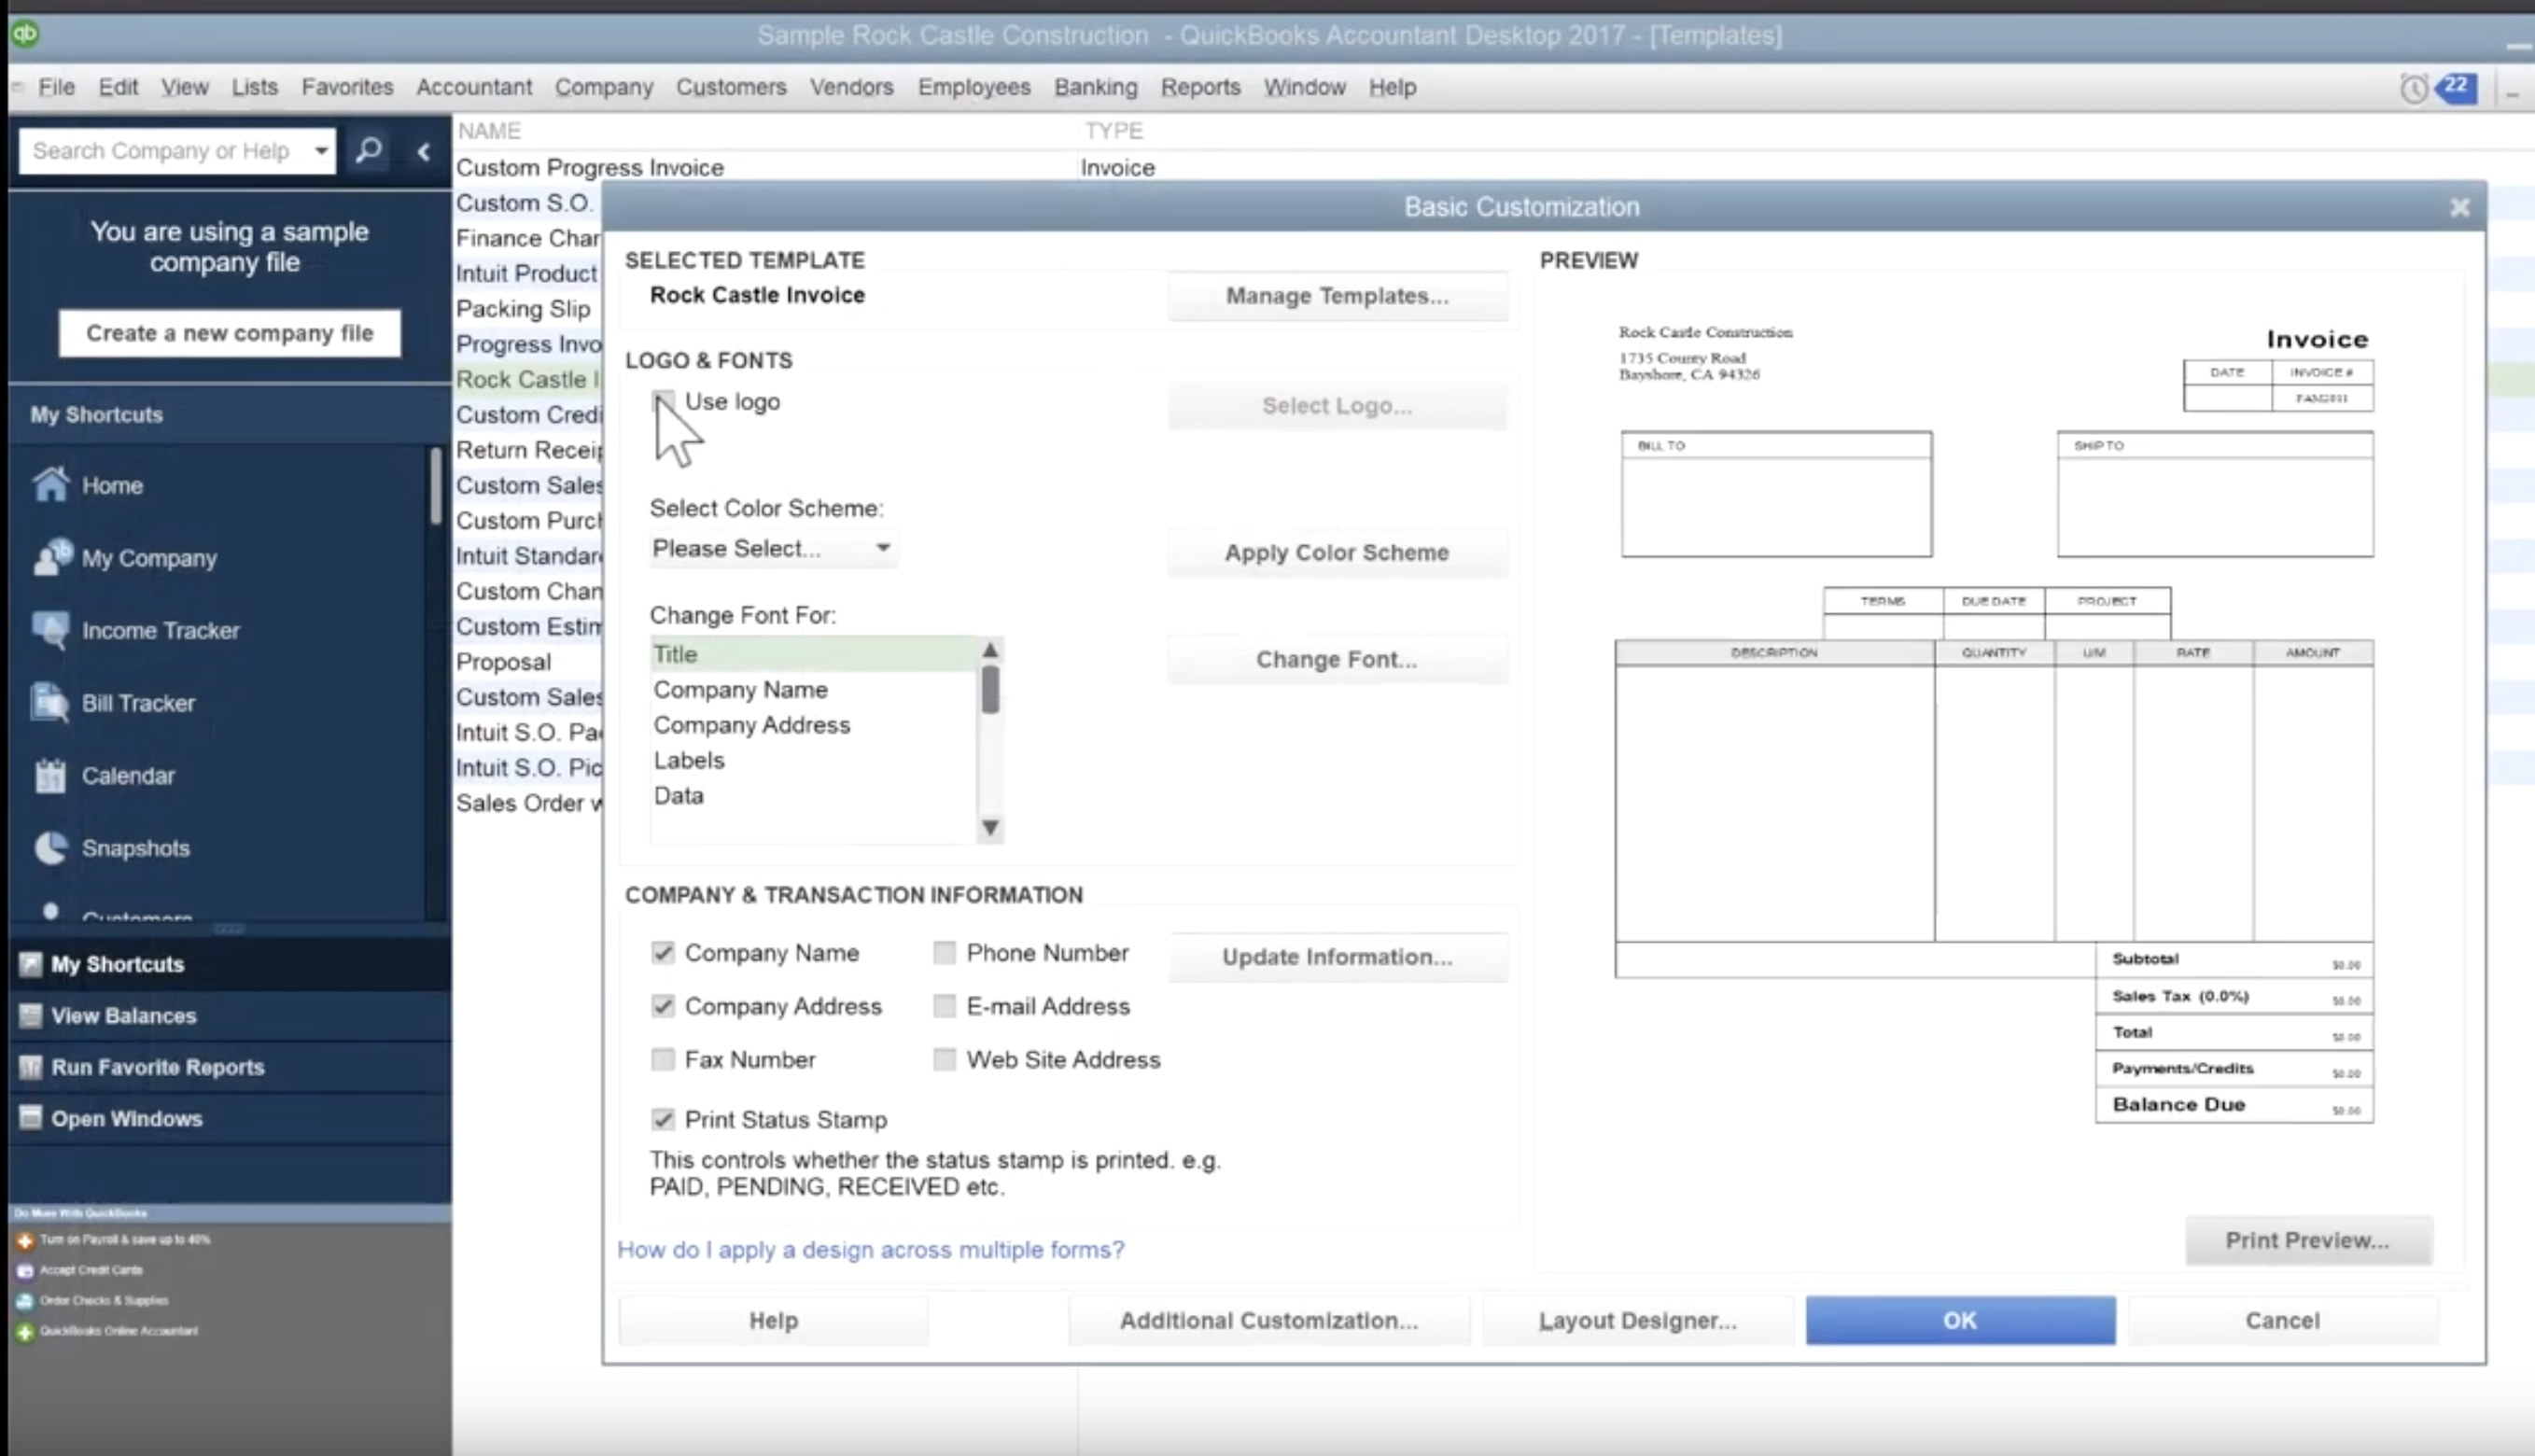
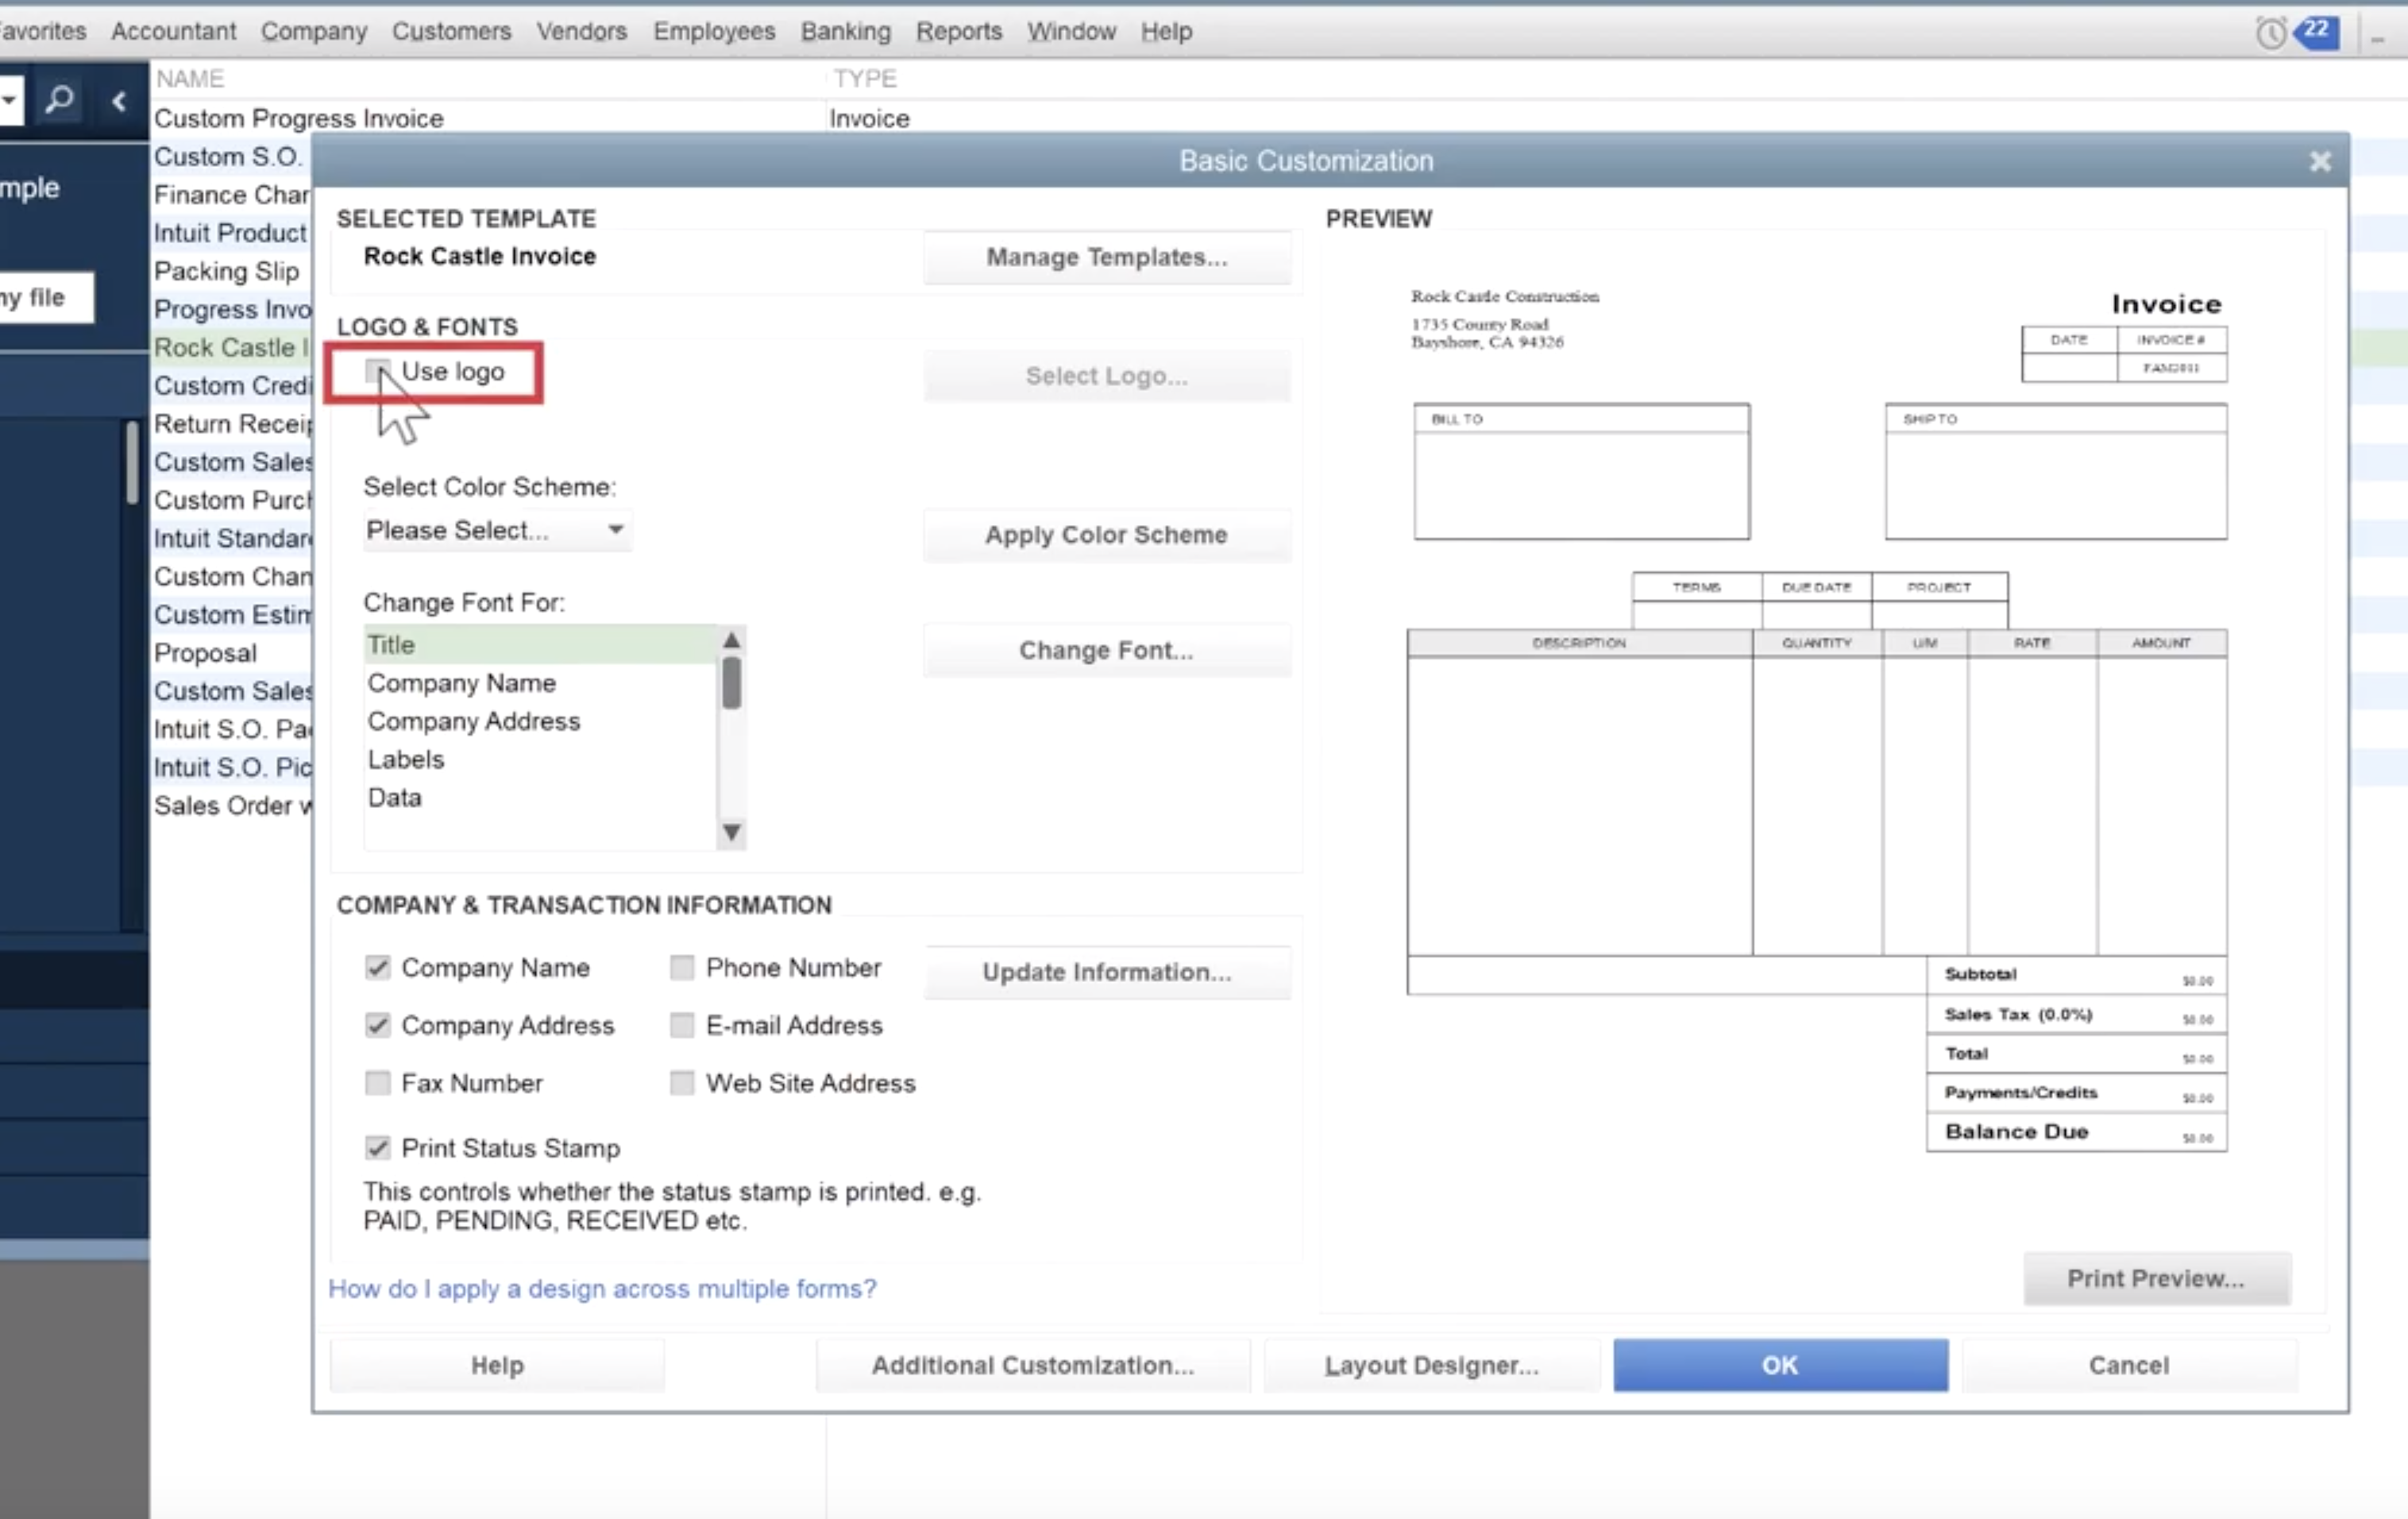
Navigate to the Basic Customization page
This page should have popped up once you backed out of the Print Preview. It is the first step of customization in this process.
Upload your Logo
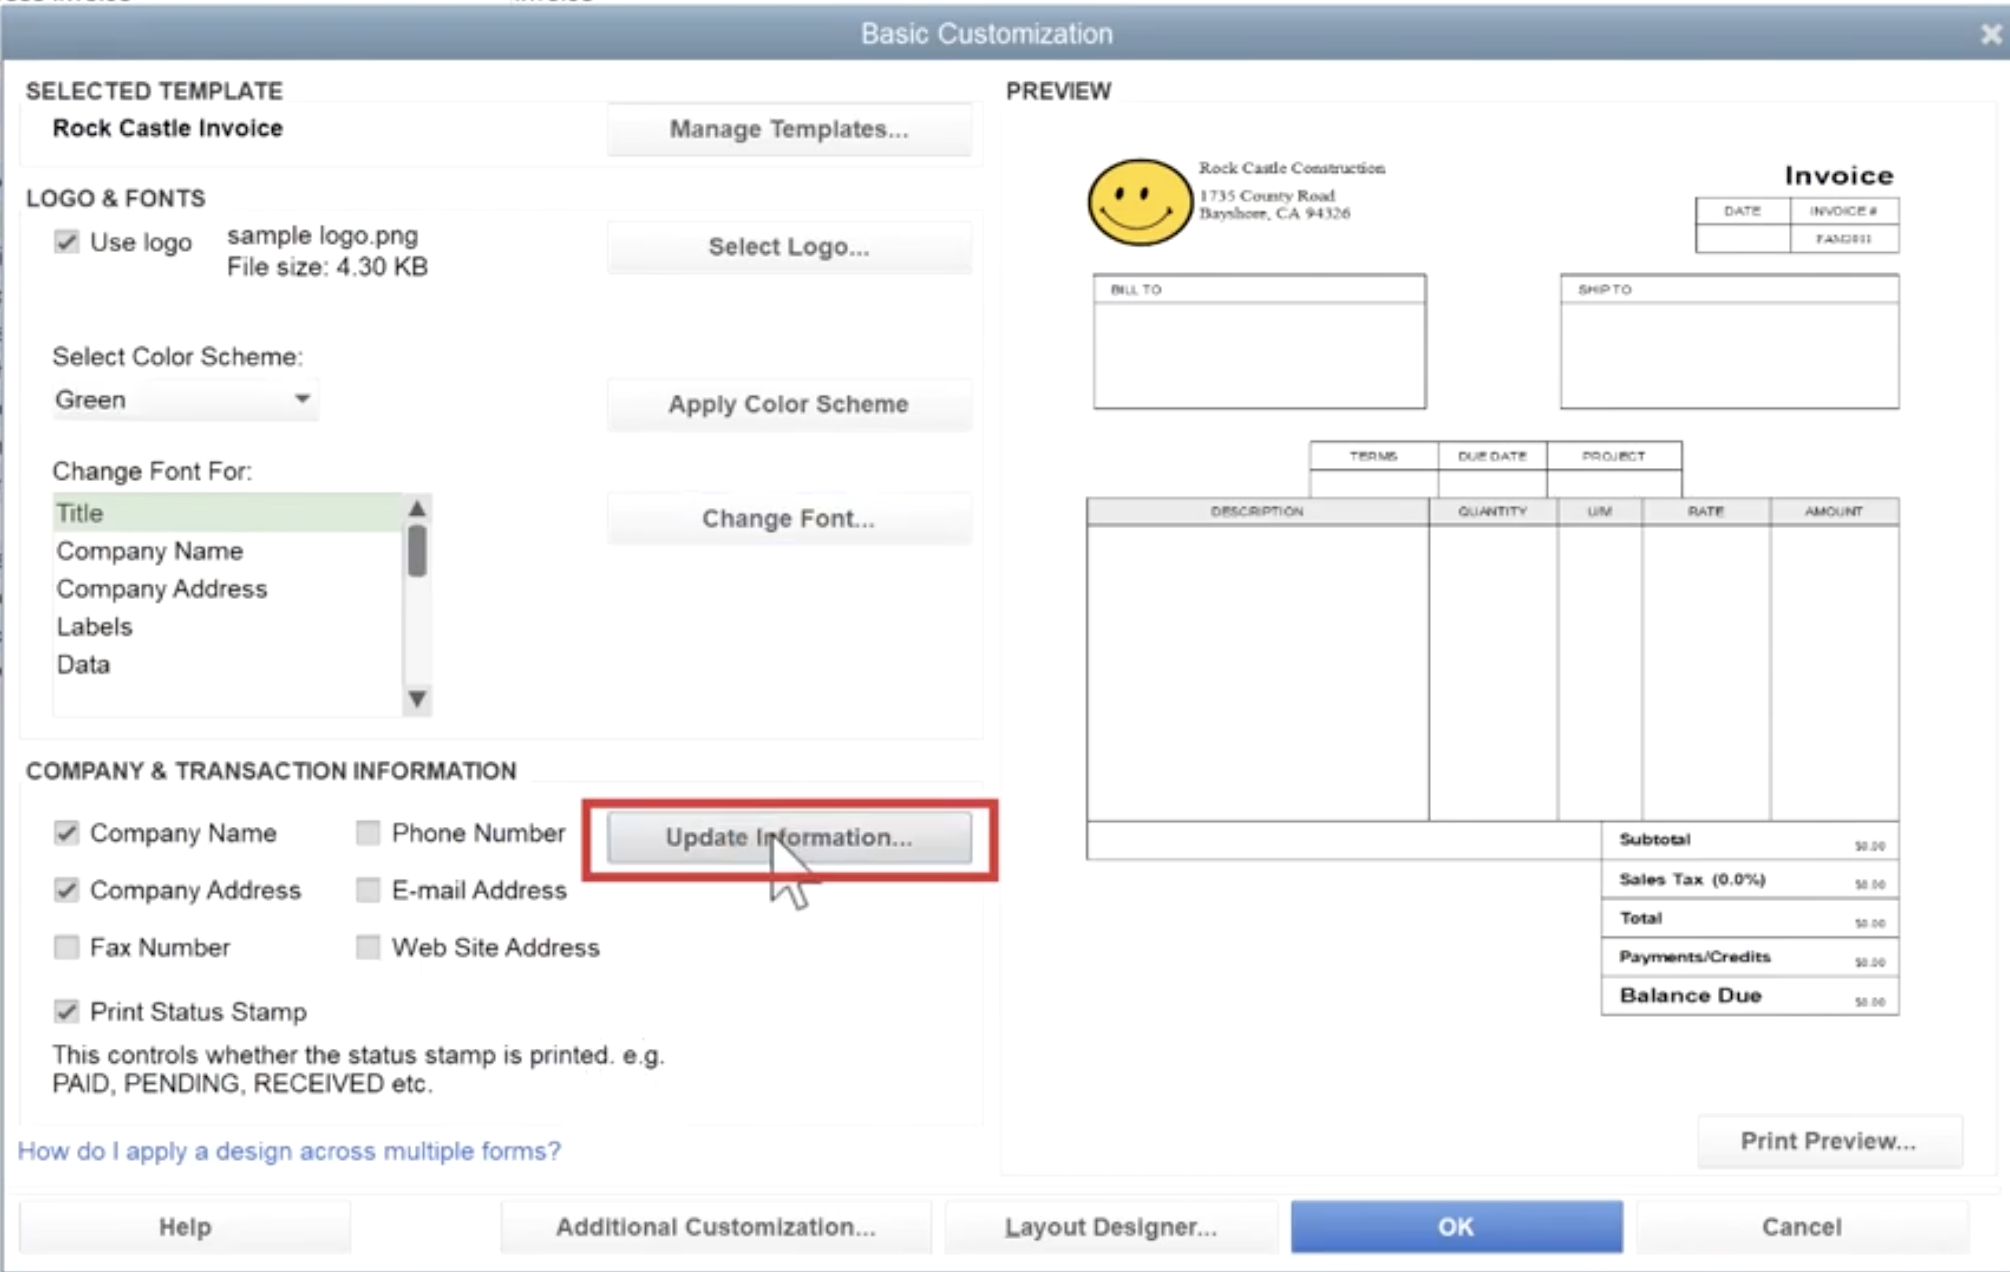
This step has two parts. You first need to click on the “Use Logo” button on the Basic Customization page. Once you click that, a box will pop up that allows you to select the logo for your custom invoice template.
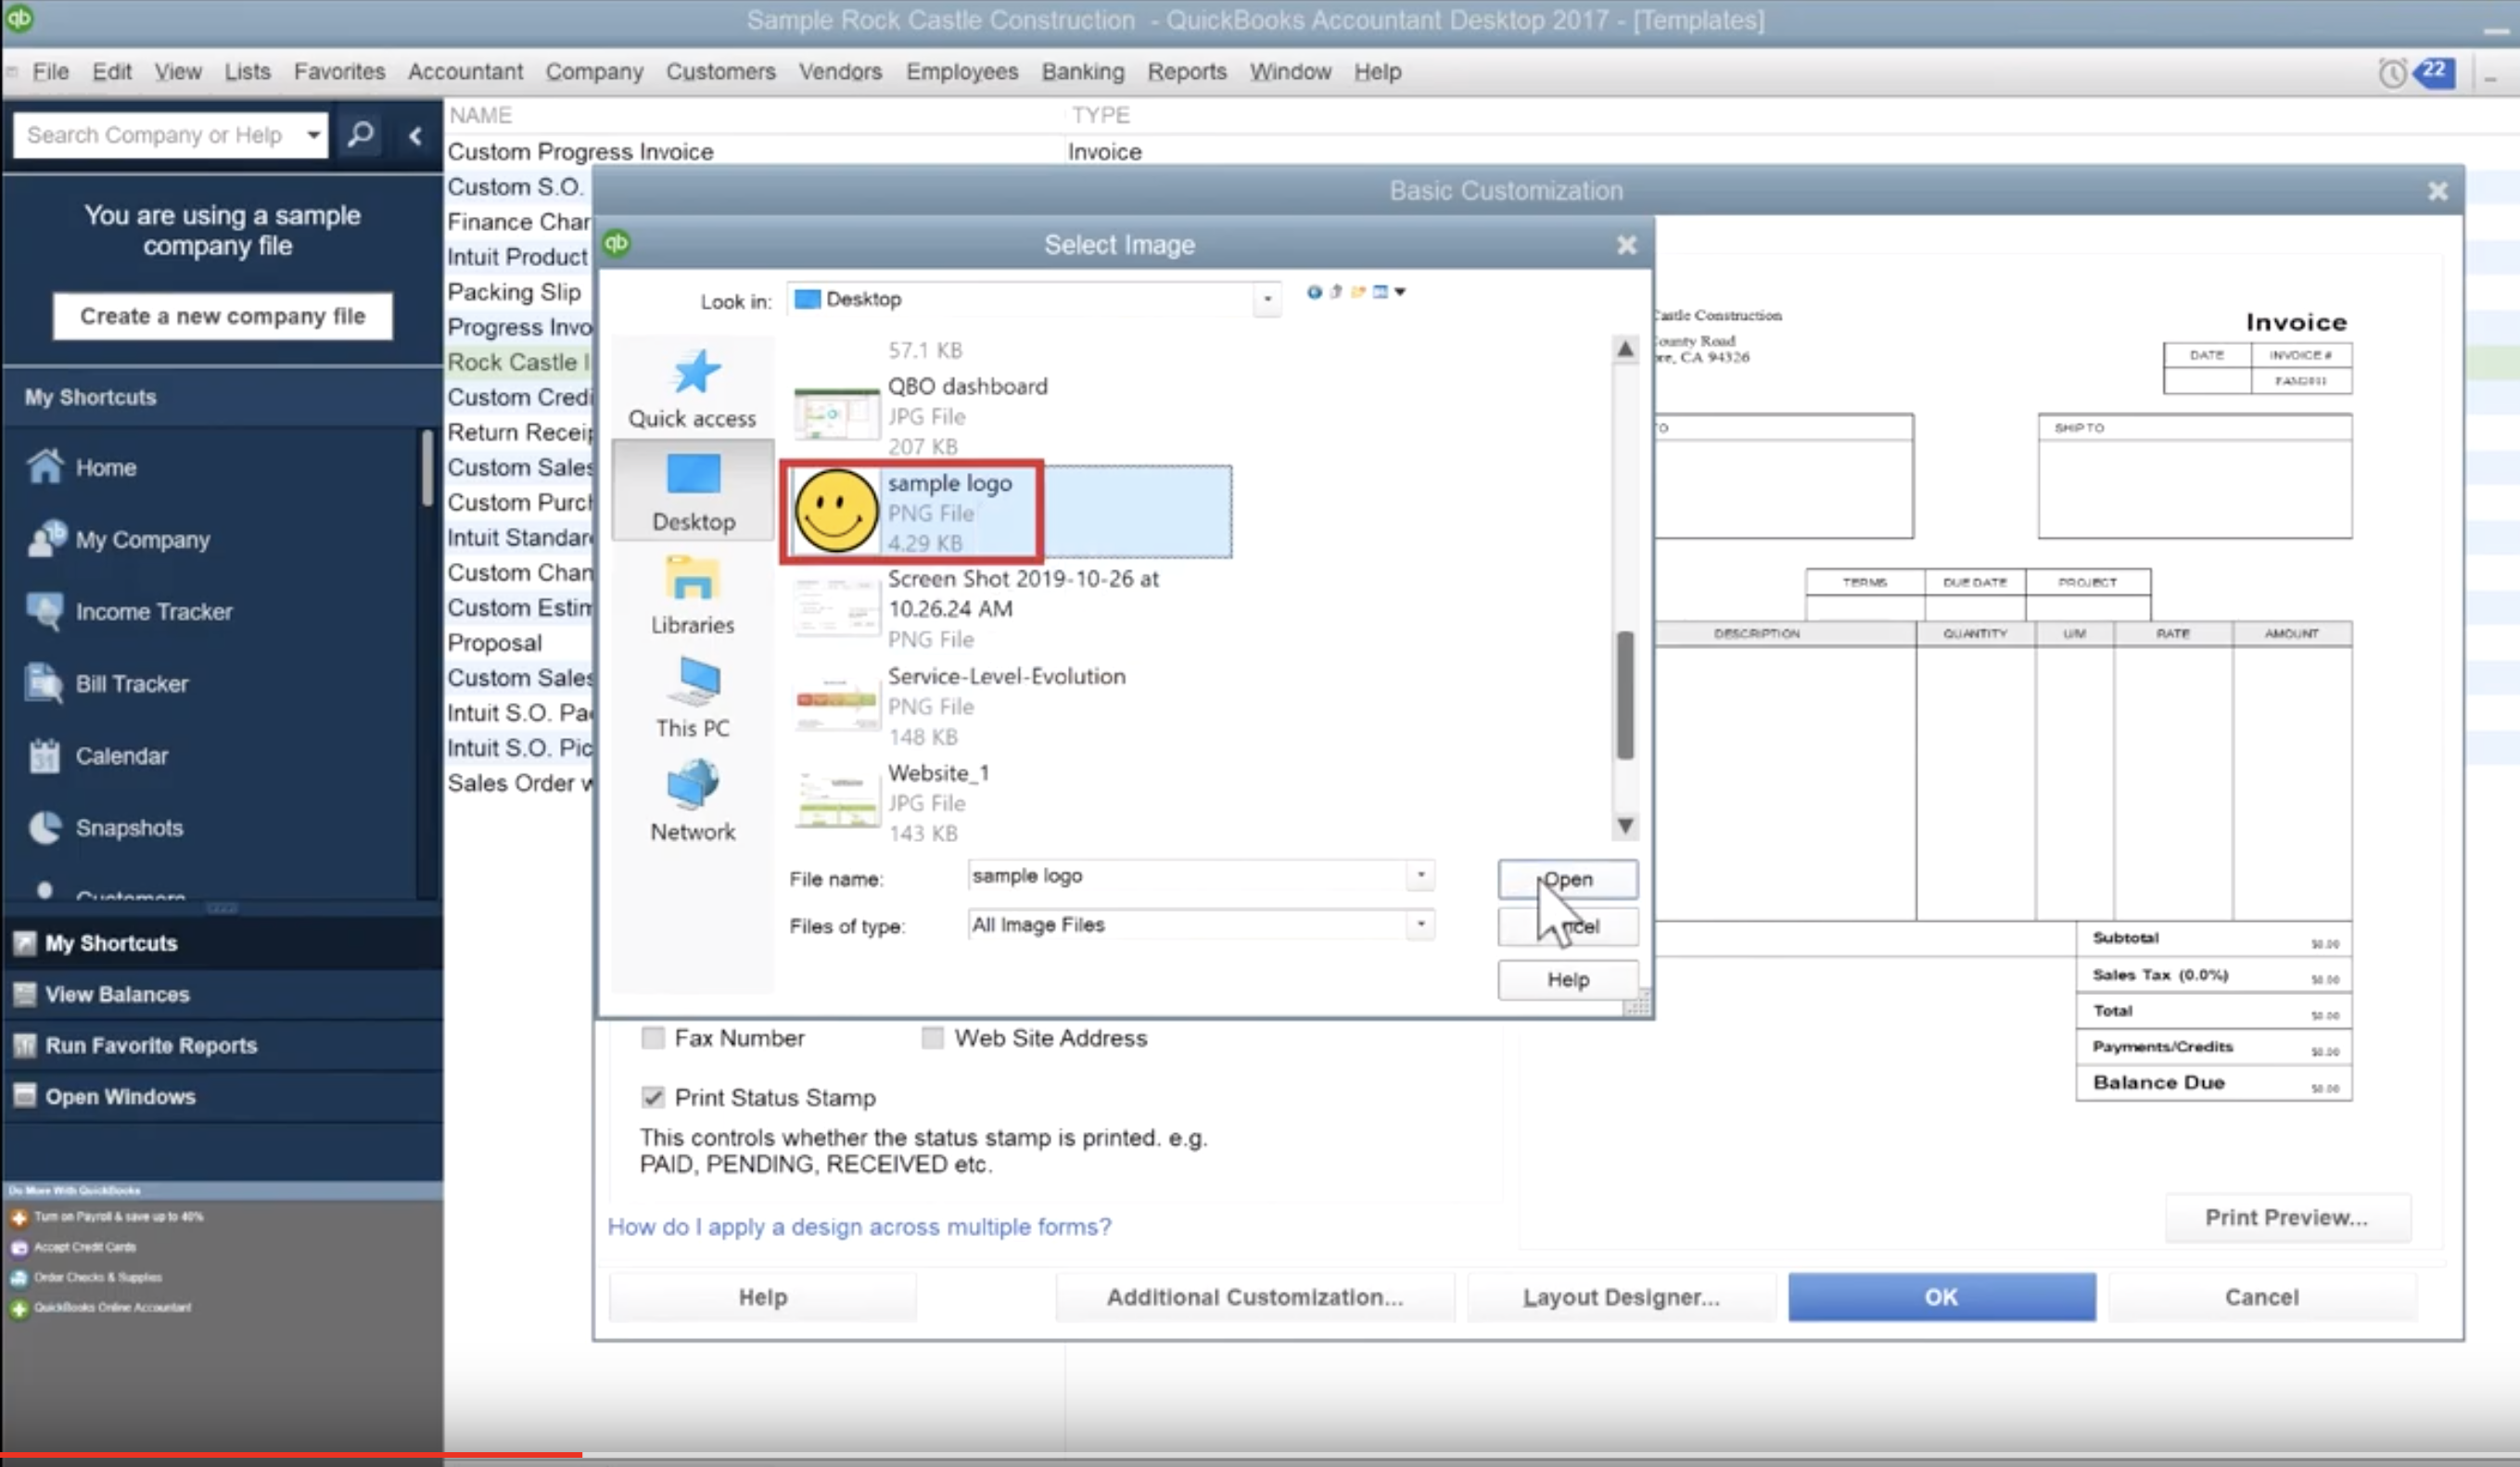
And once it’s uploaded, you will see your logo in the invoice preview on the basic customization page.

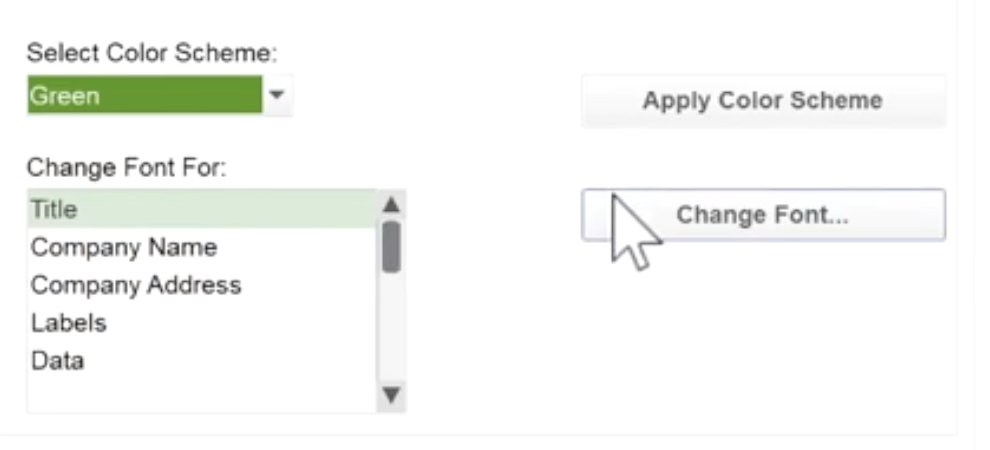
Changing Font and Color Scheme
On that same basic configuration page, you can update your Color Scheme from default and select a font of your choice.
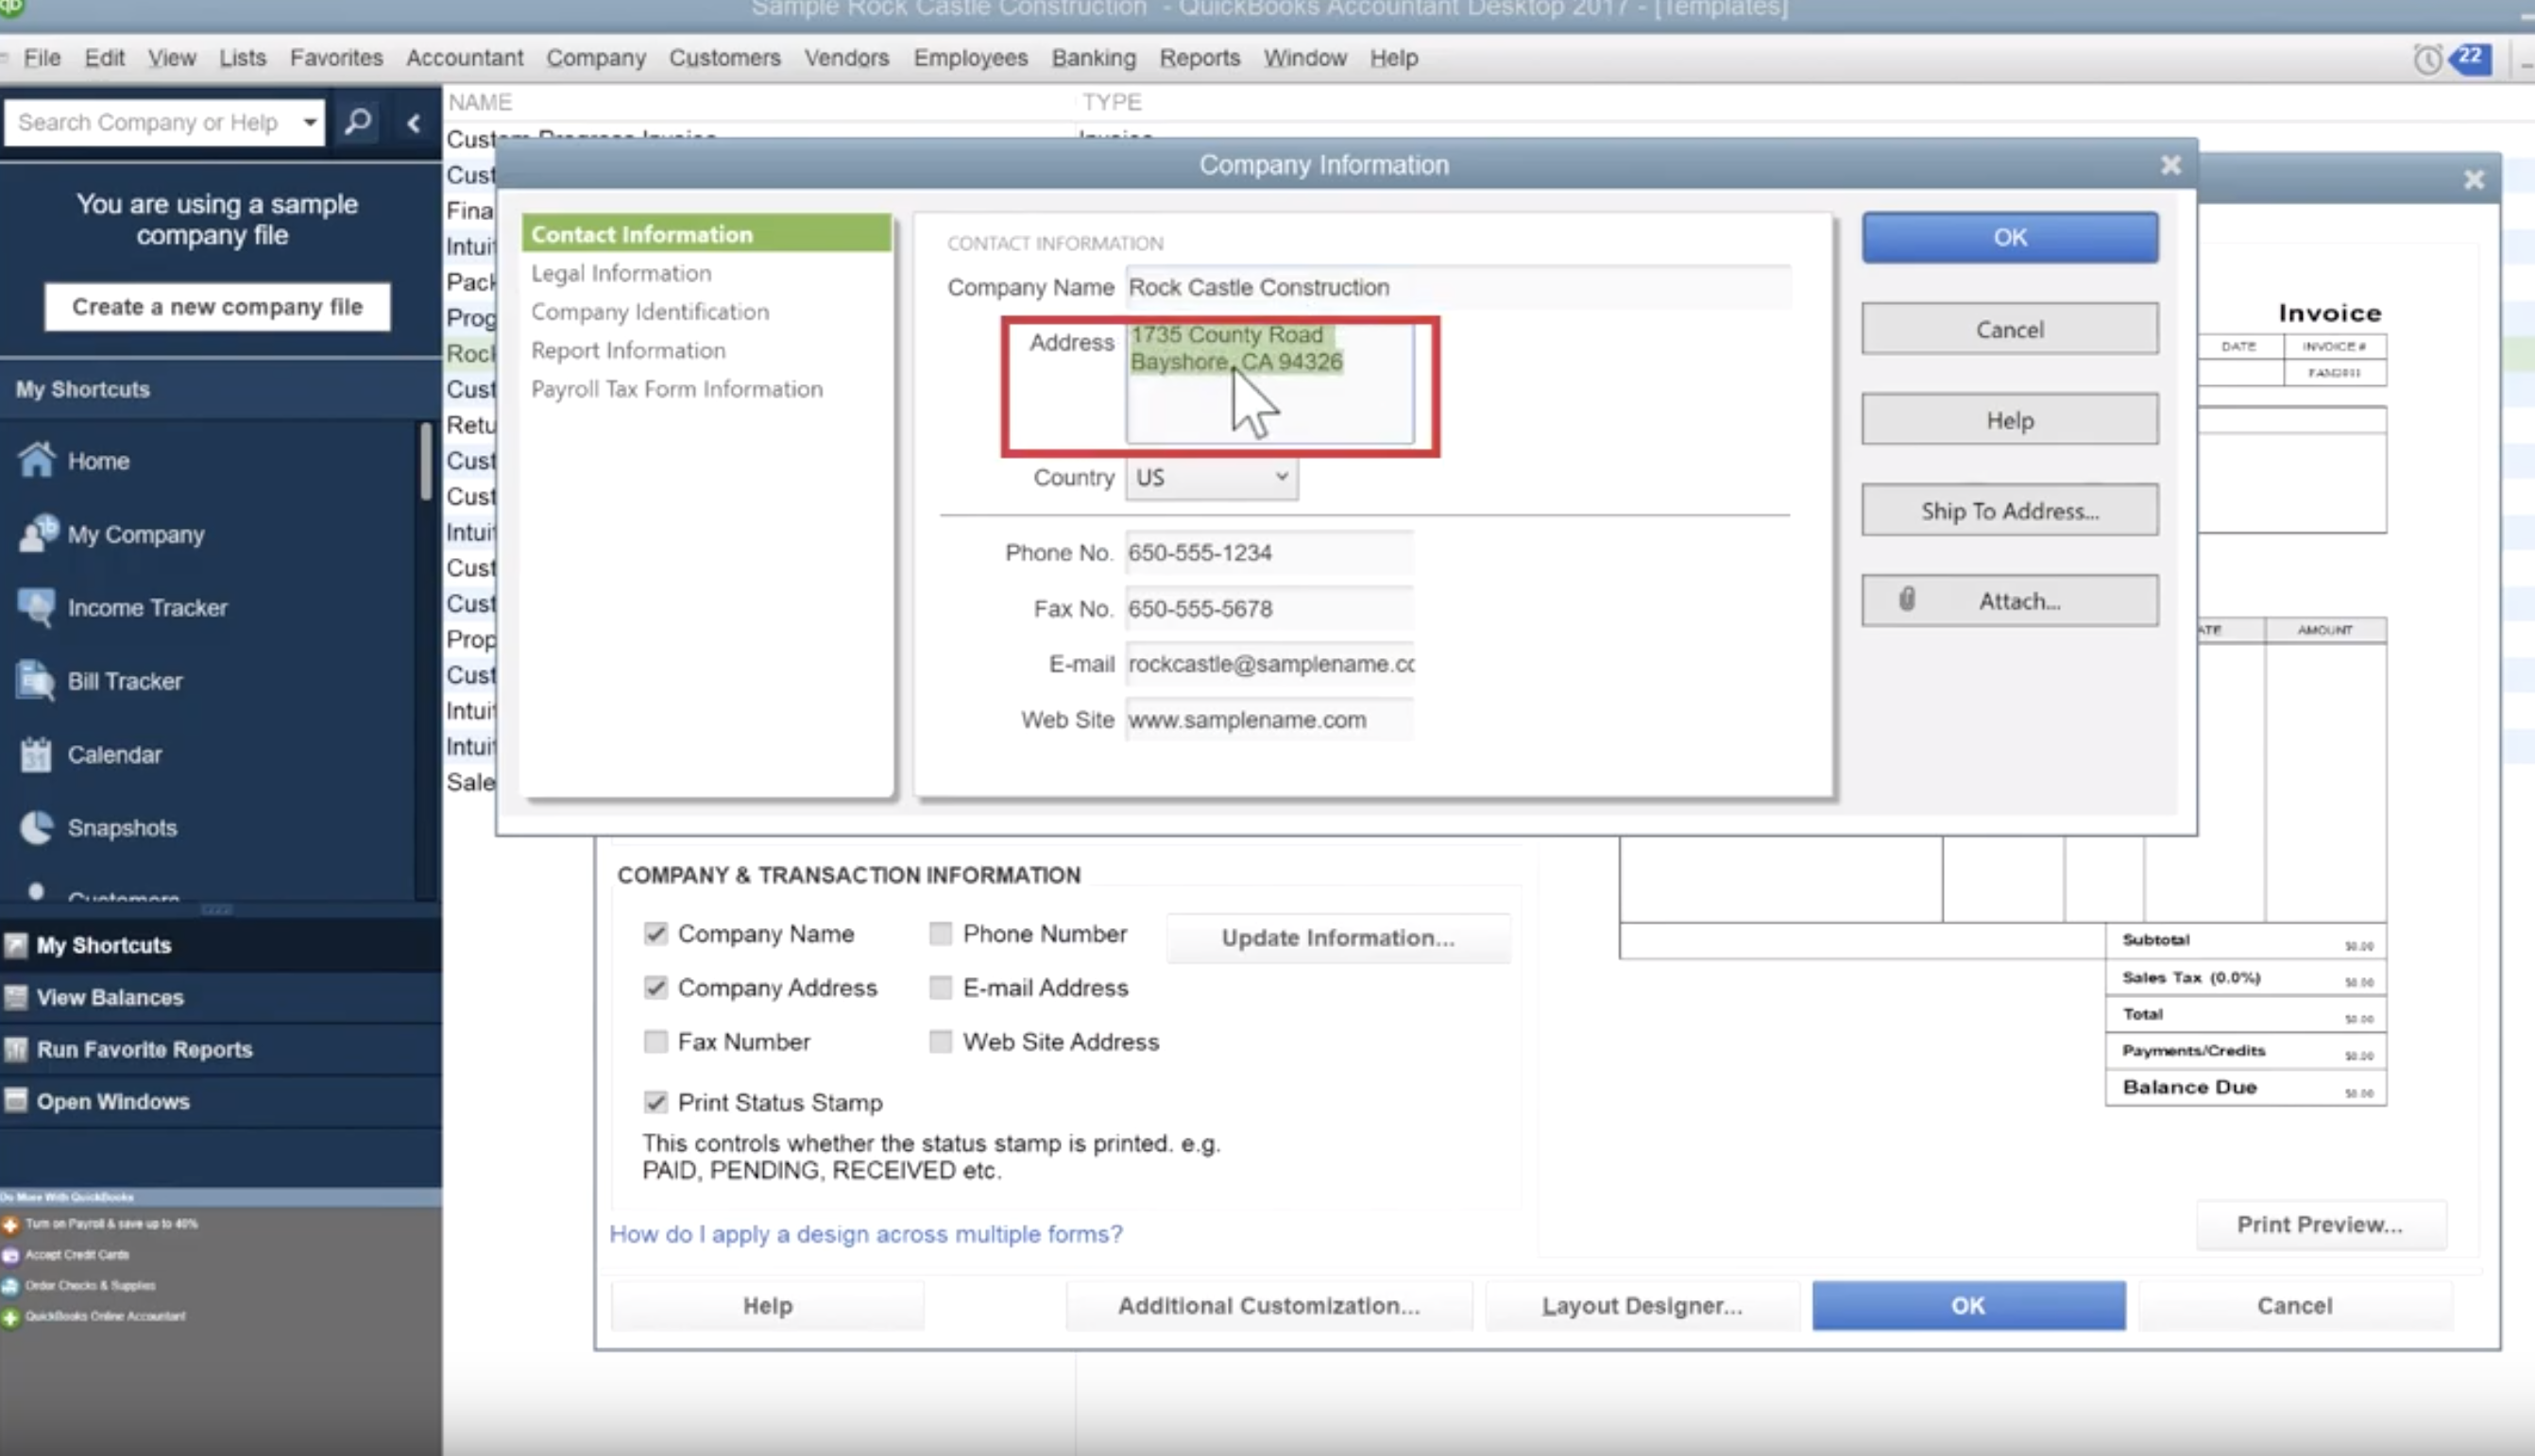
Update Company Information
Next, we’ll customize our Invoice Template by updating our Company Information. To do this, click the button labeled “Company Information.” That will open up a dialog box containing the following tabs:
- Contact information
- Legal Information
- Company Identification
- Report Information
- Payroll Tax Form Information
You can customize the information in each tab to your preference or need.
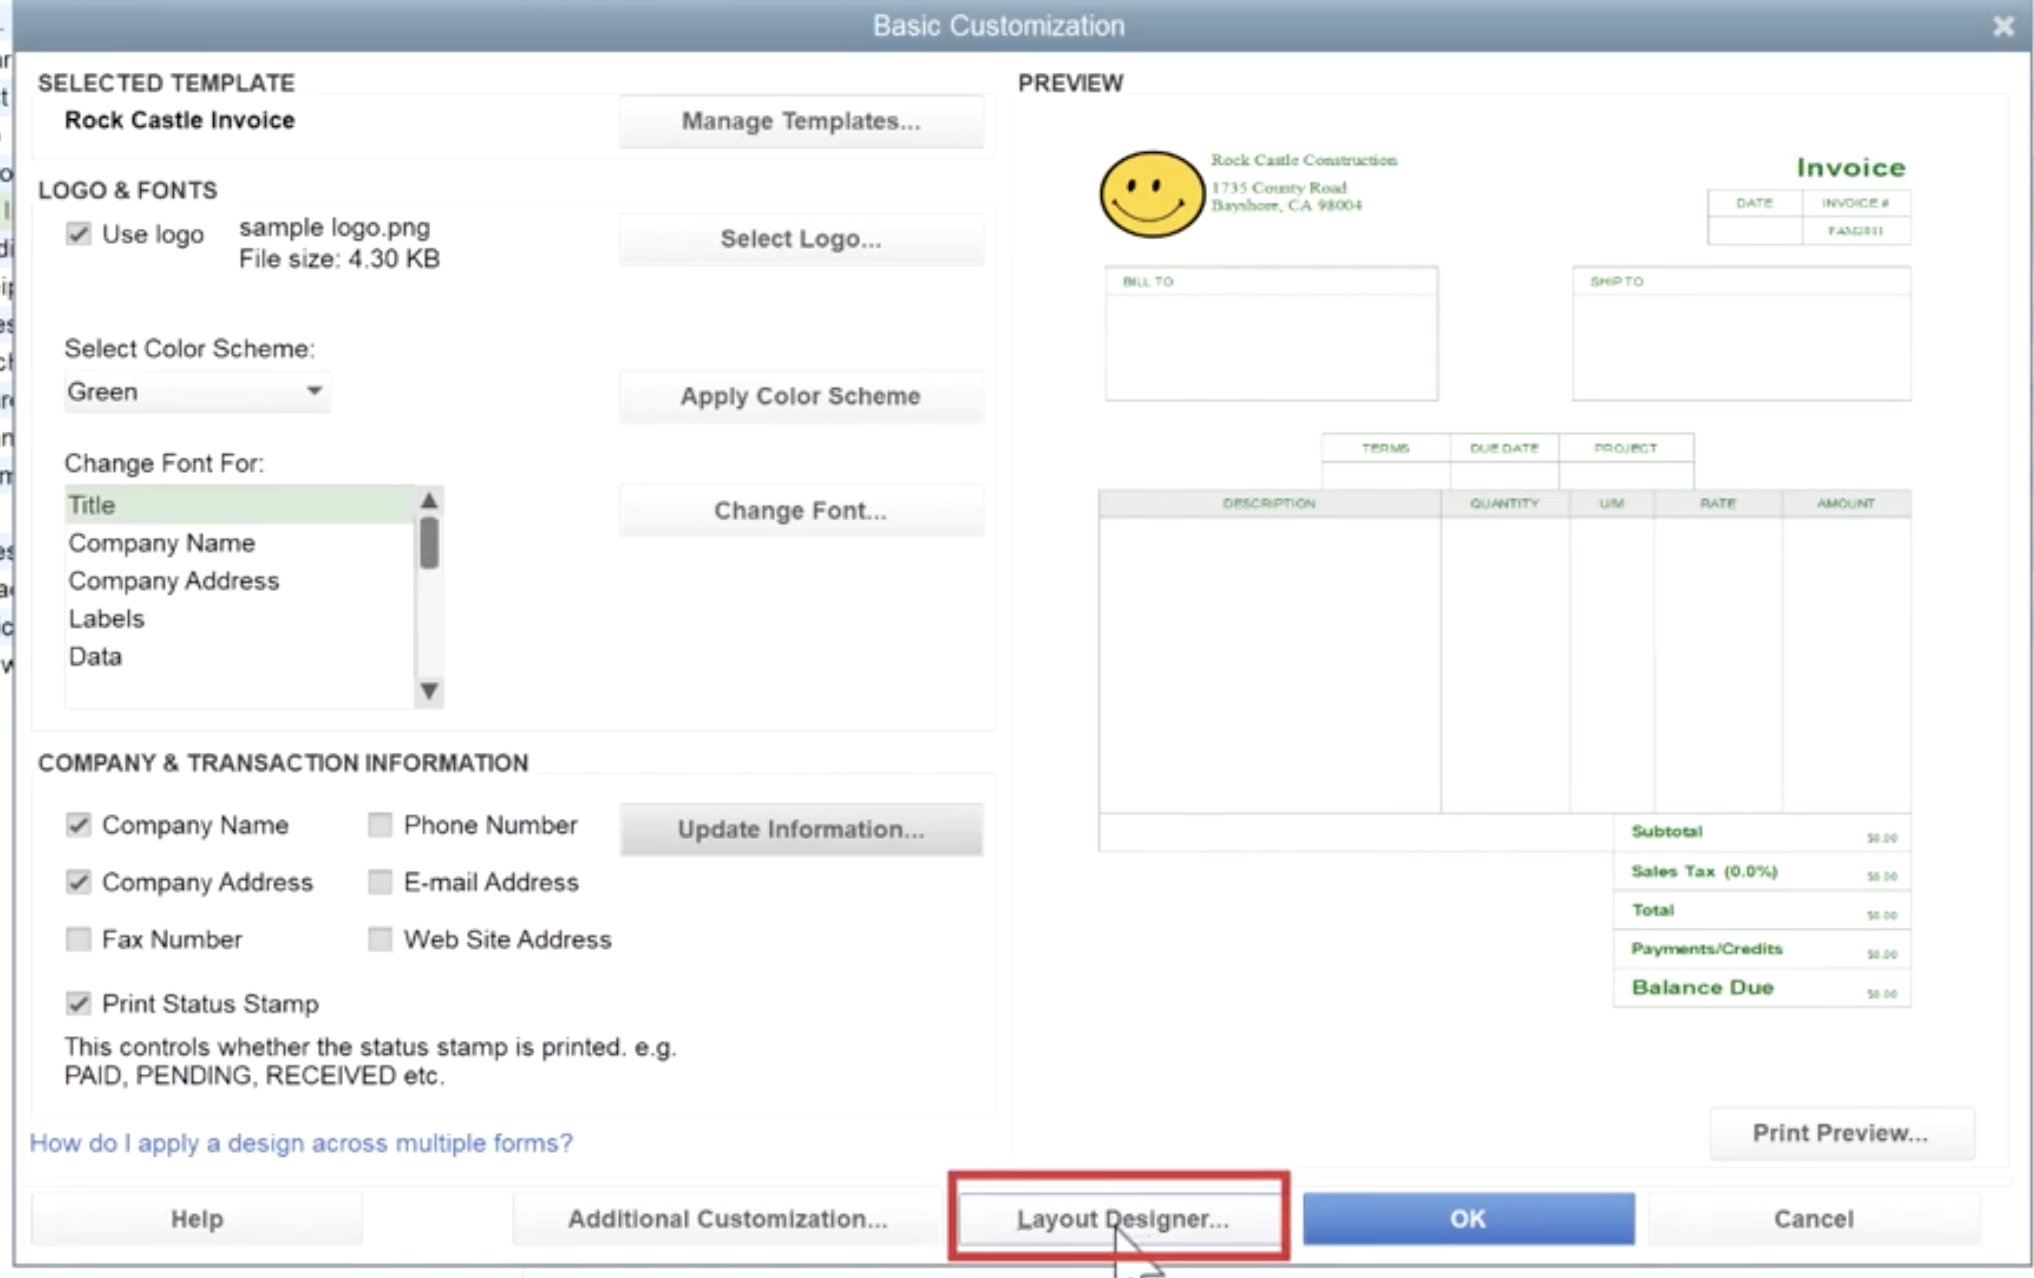
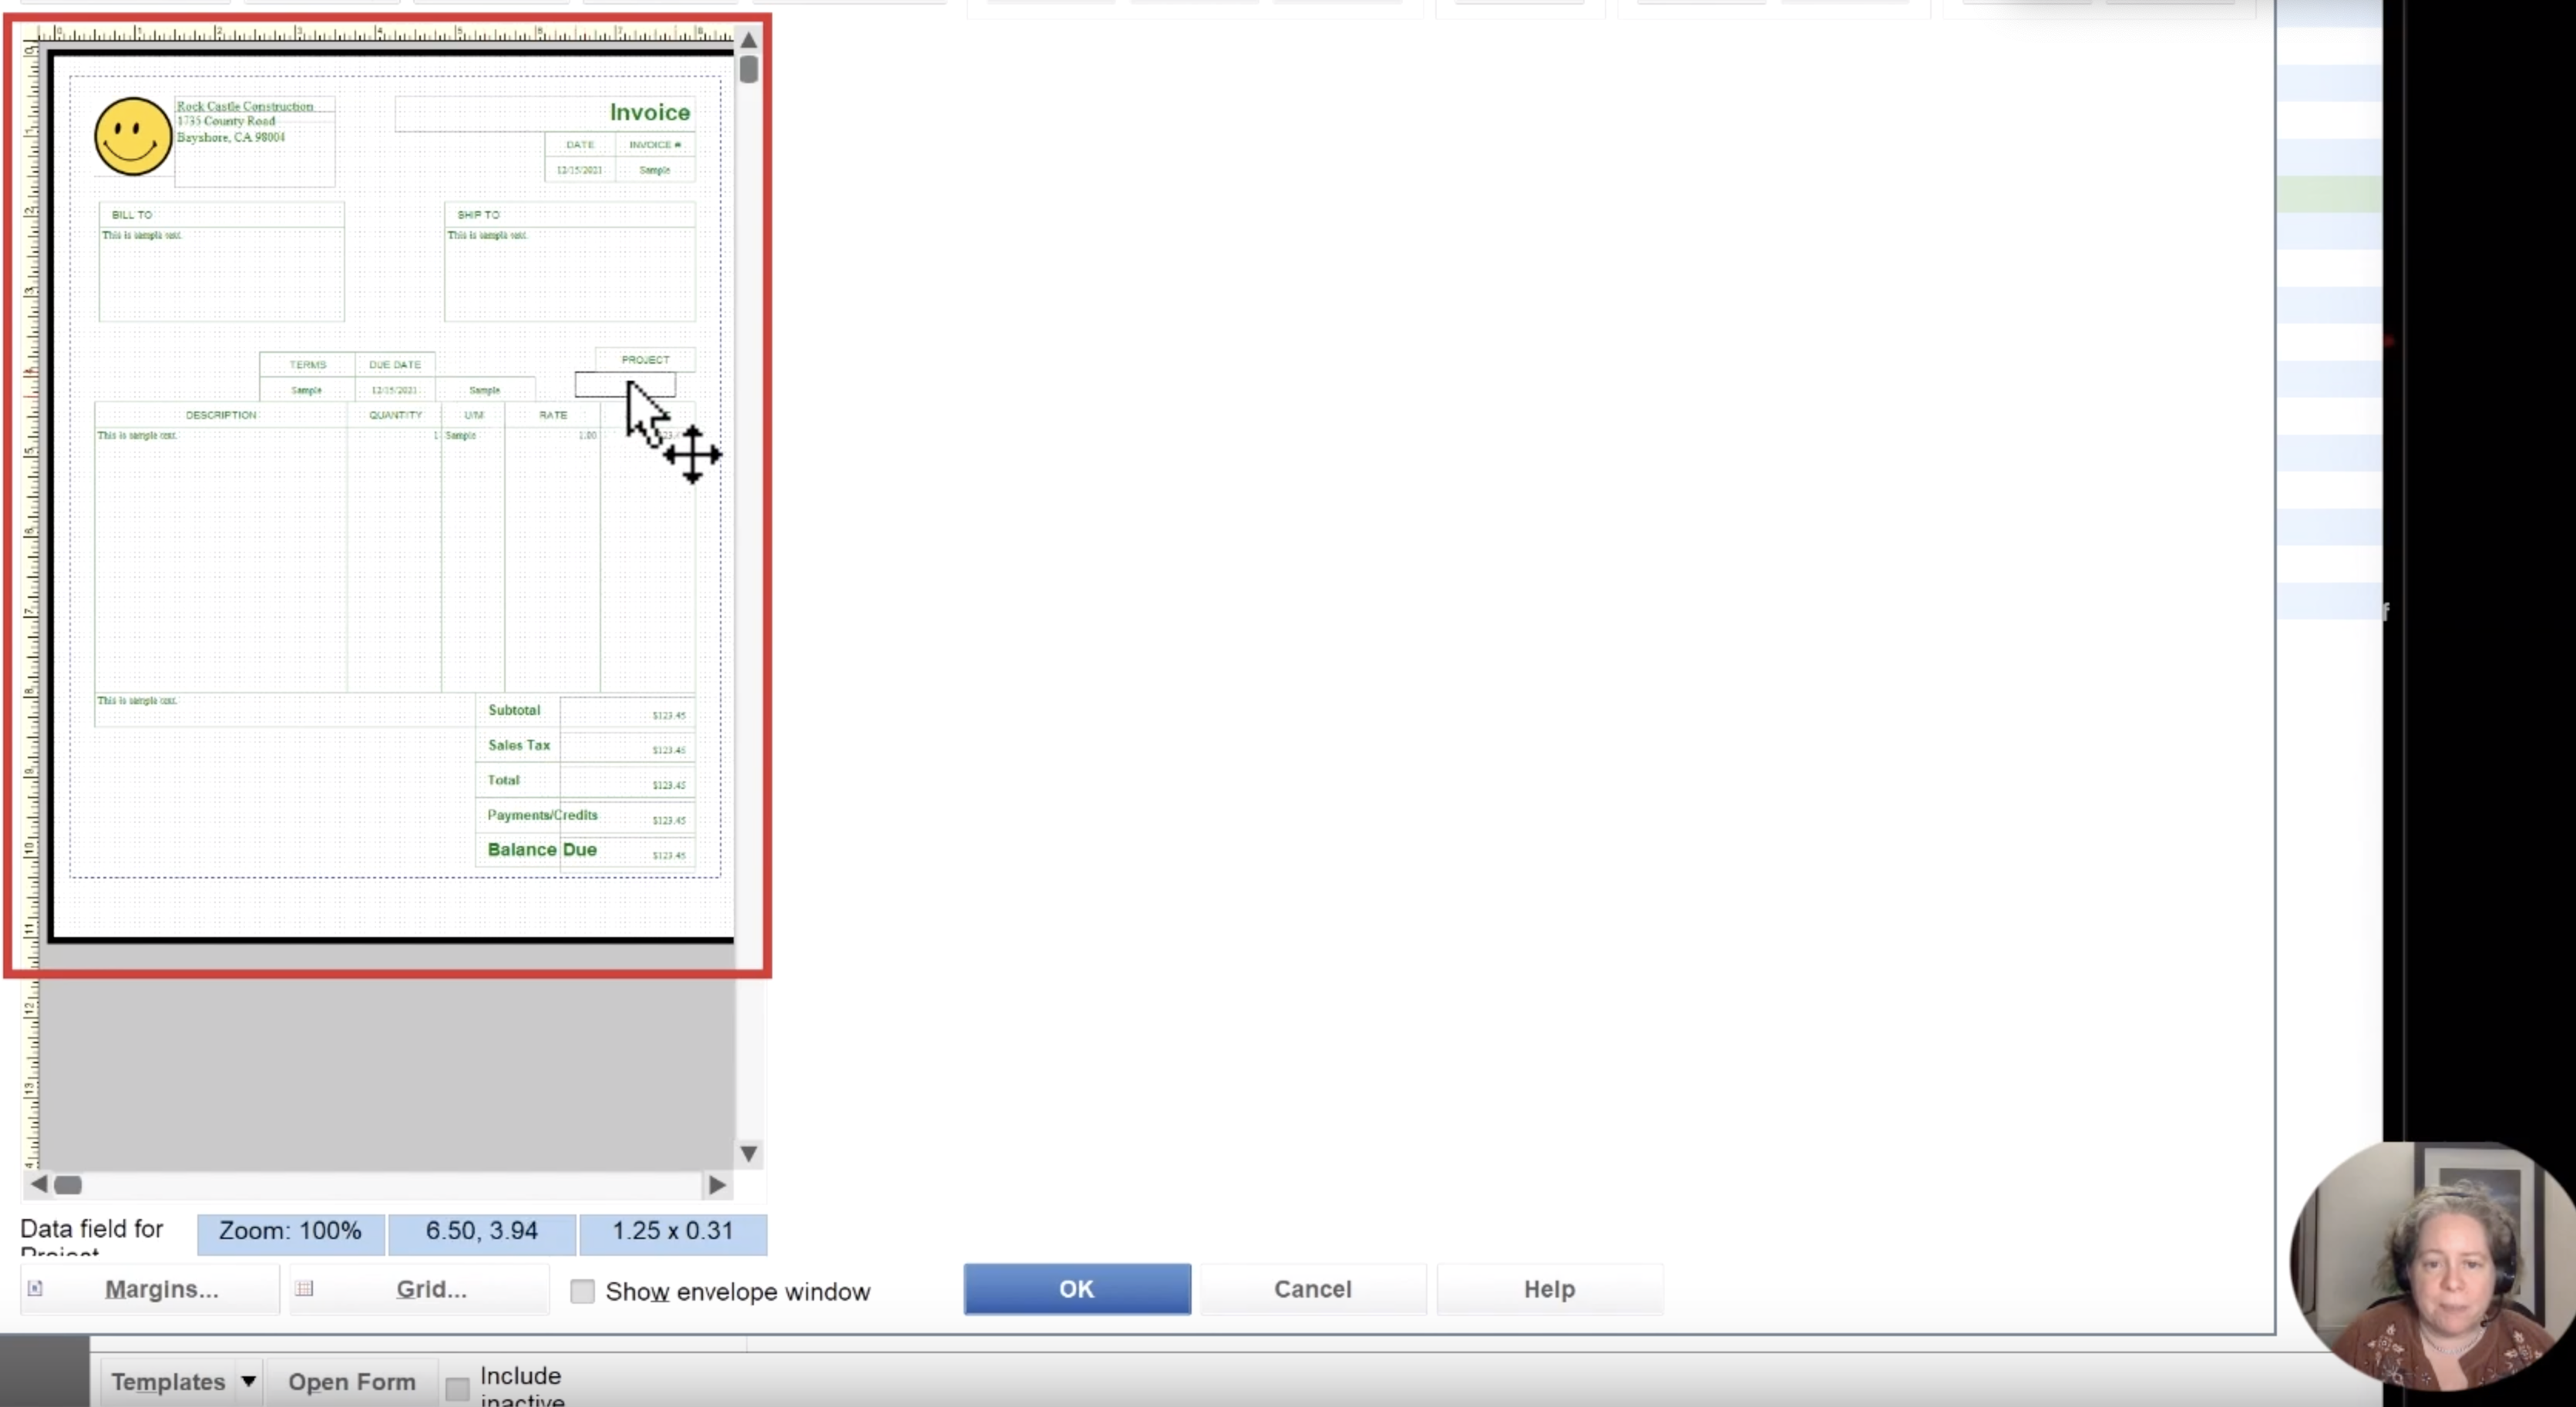
Changing the Invoice Template Layout
To begin with, customizing how your template is laid out, click on the “Layout Designer” button. This button will unsurprisingly bring you to the page descriptively labeled “Layout Designer.”
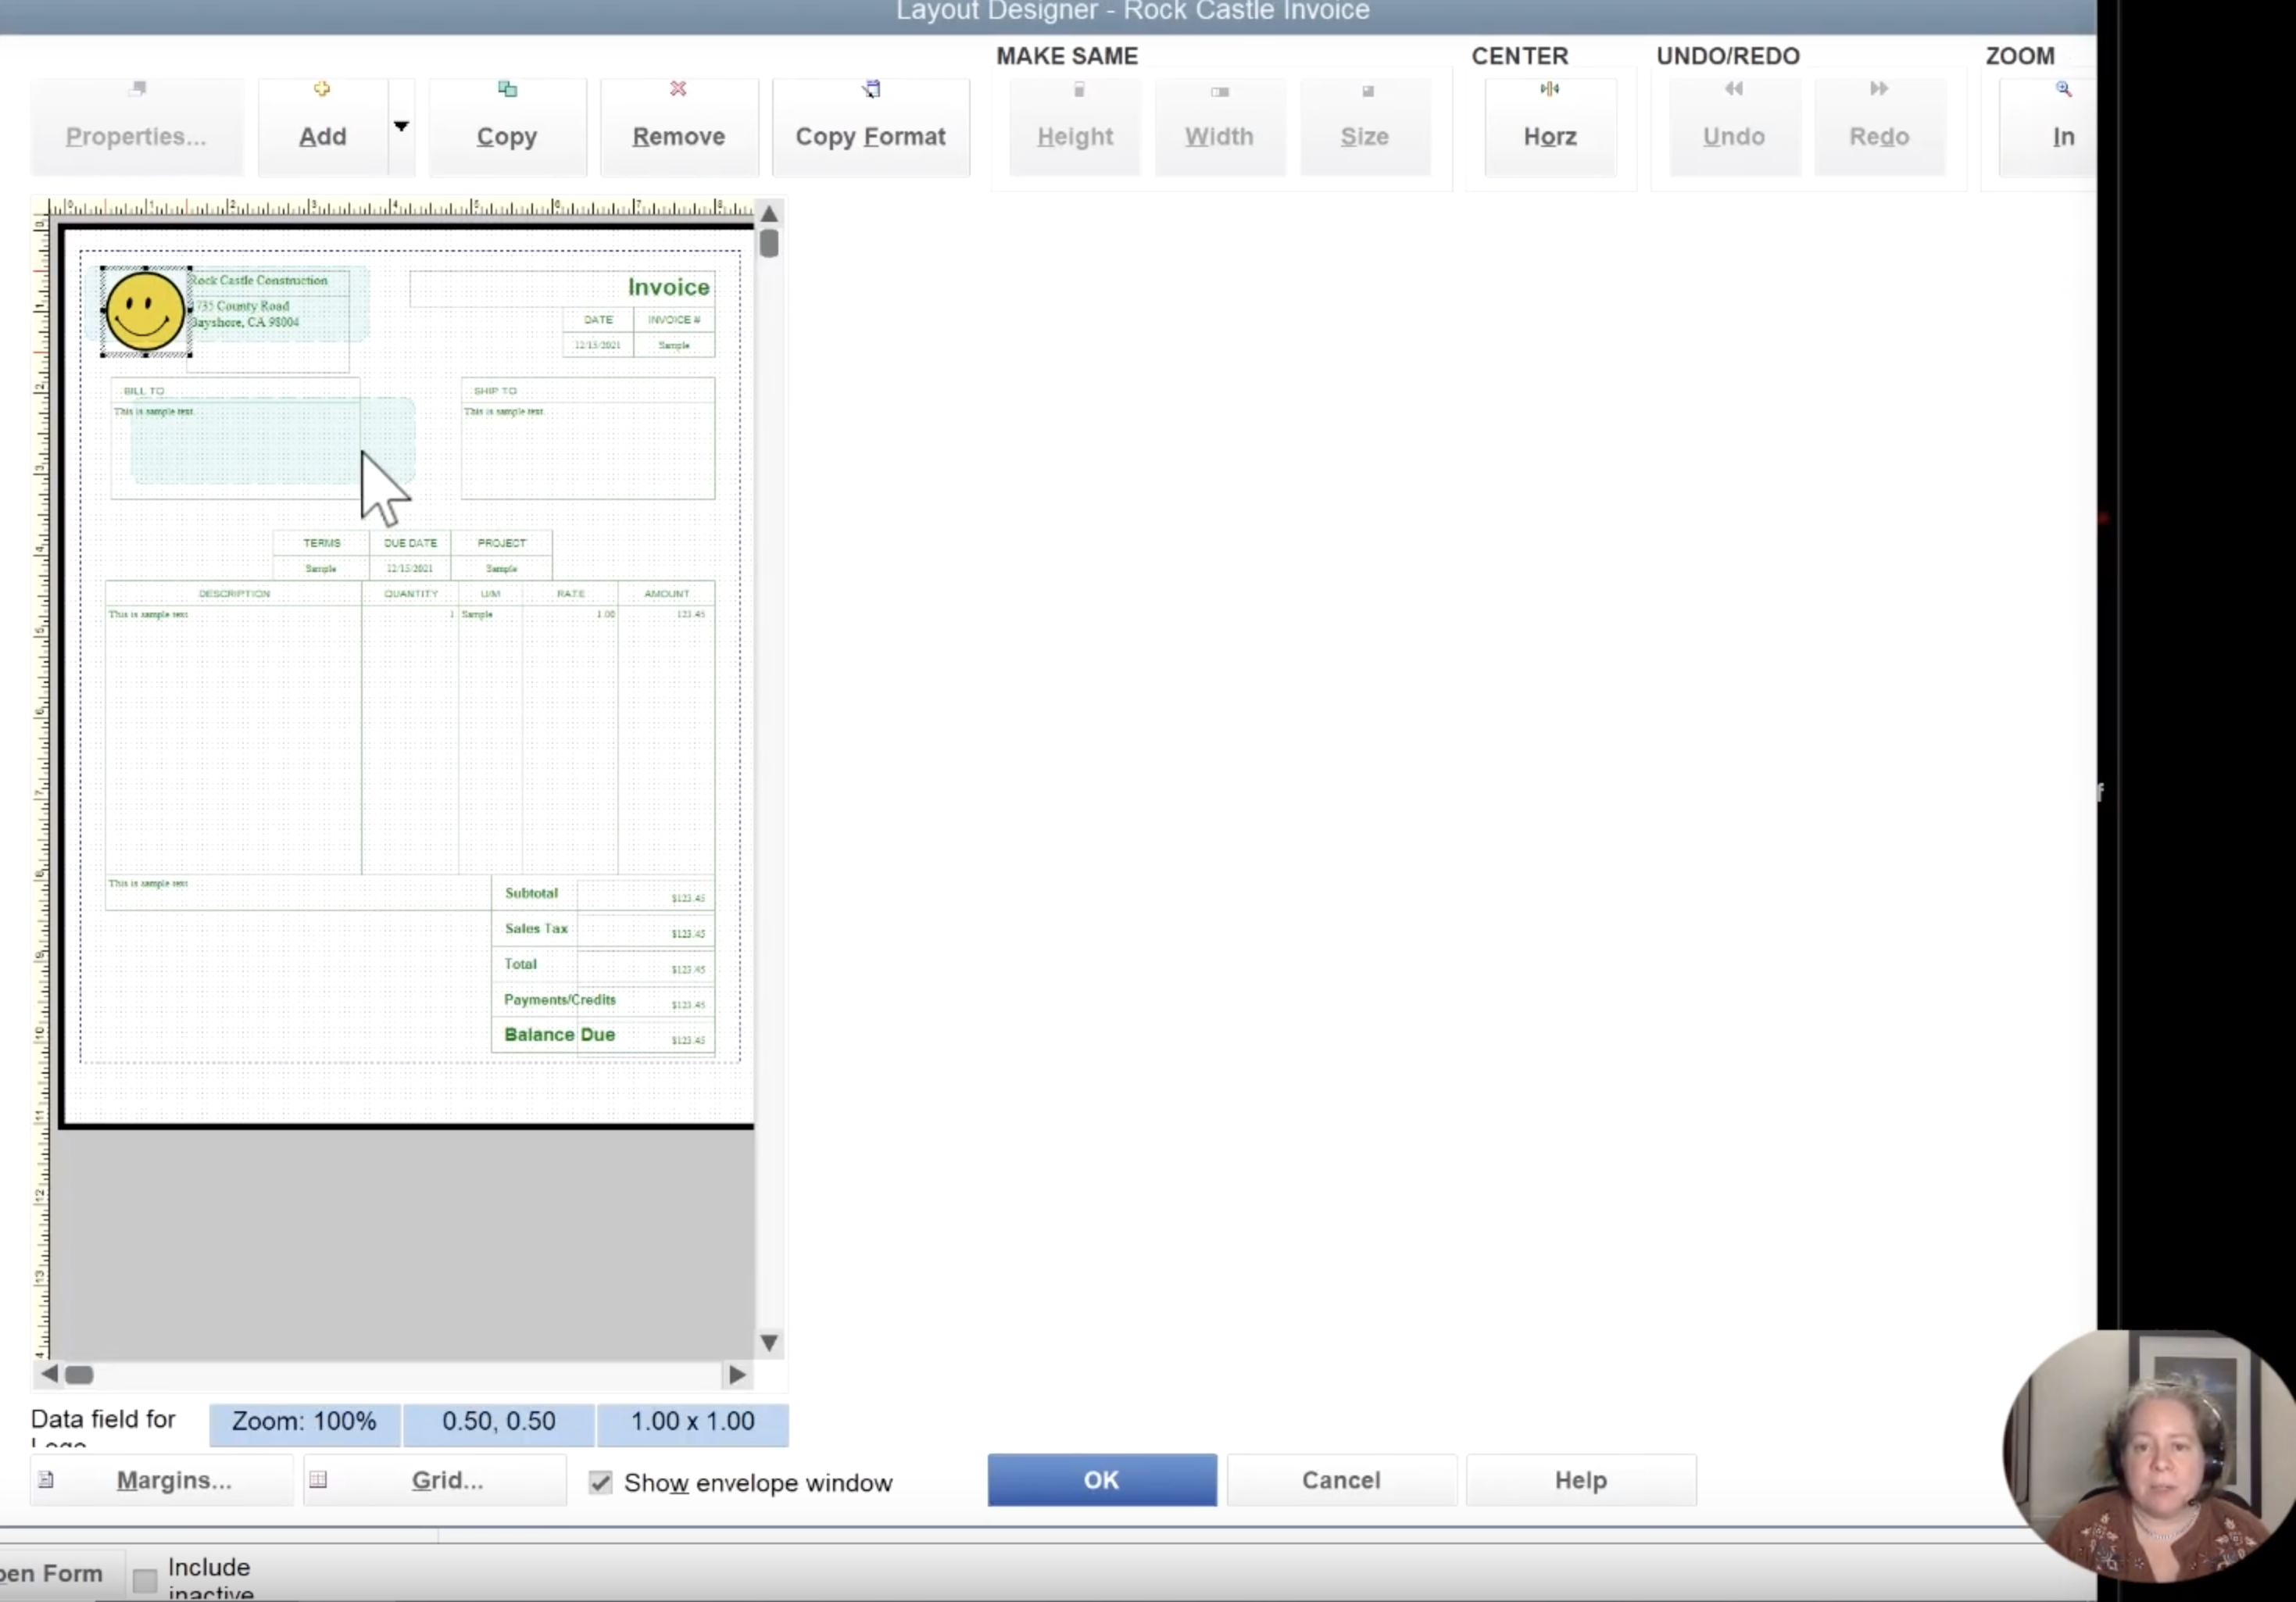
The first thing you might notice is the soft green boxes. These boxes represent where the printed paper would line up to if mailing in a windowed envelope. If you plan on printing and mailing these envelopes, you want to make sure you pay attention to what is displayed in these soft green boxes.
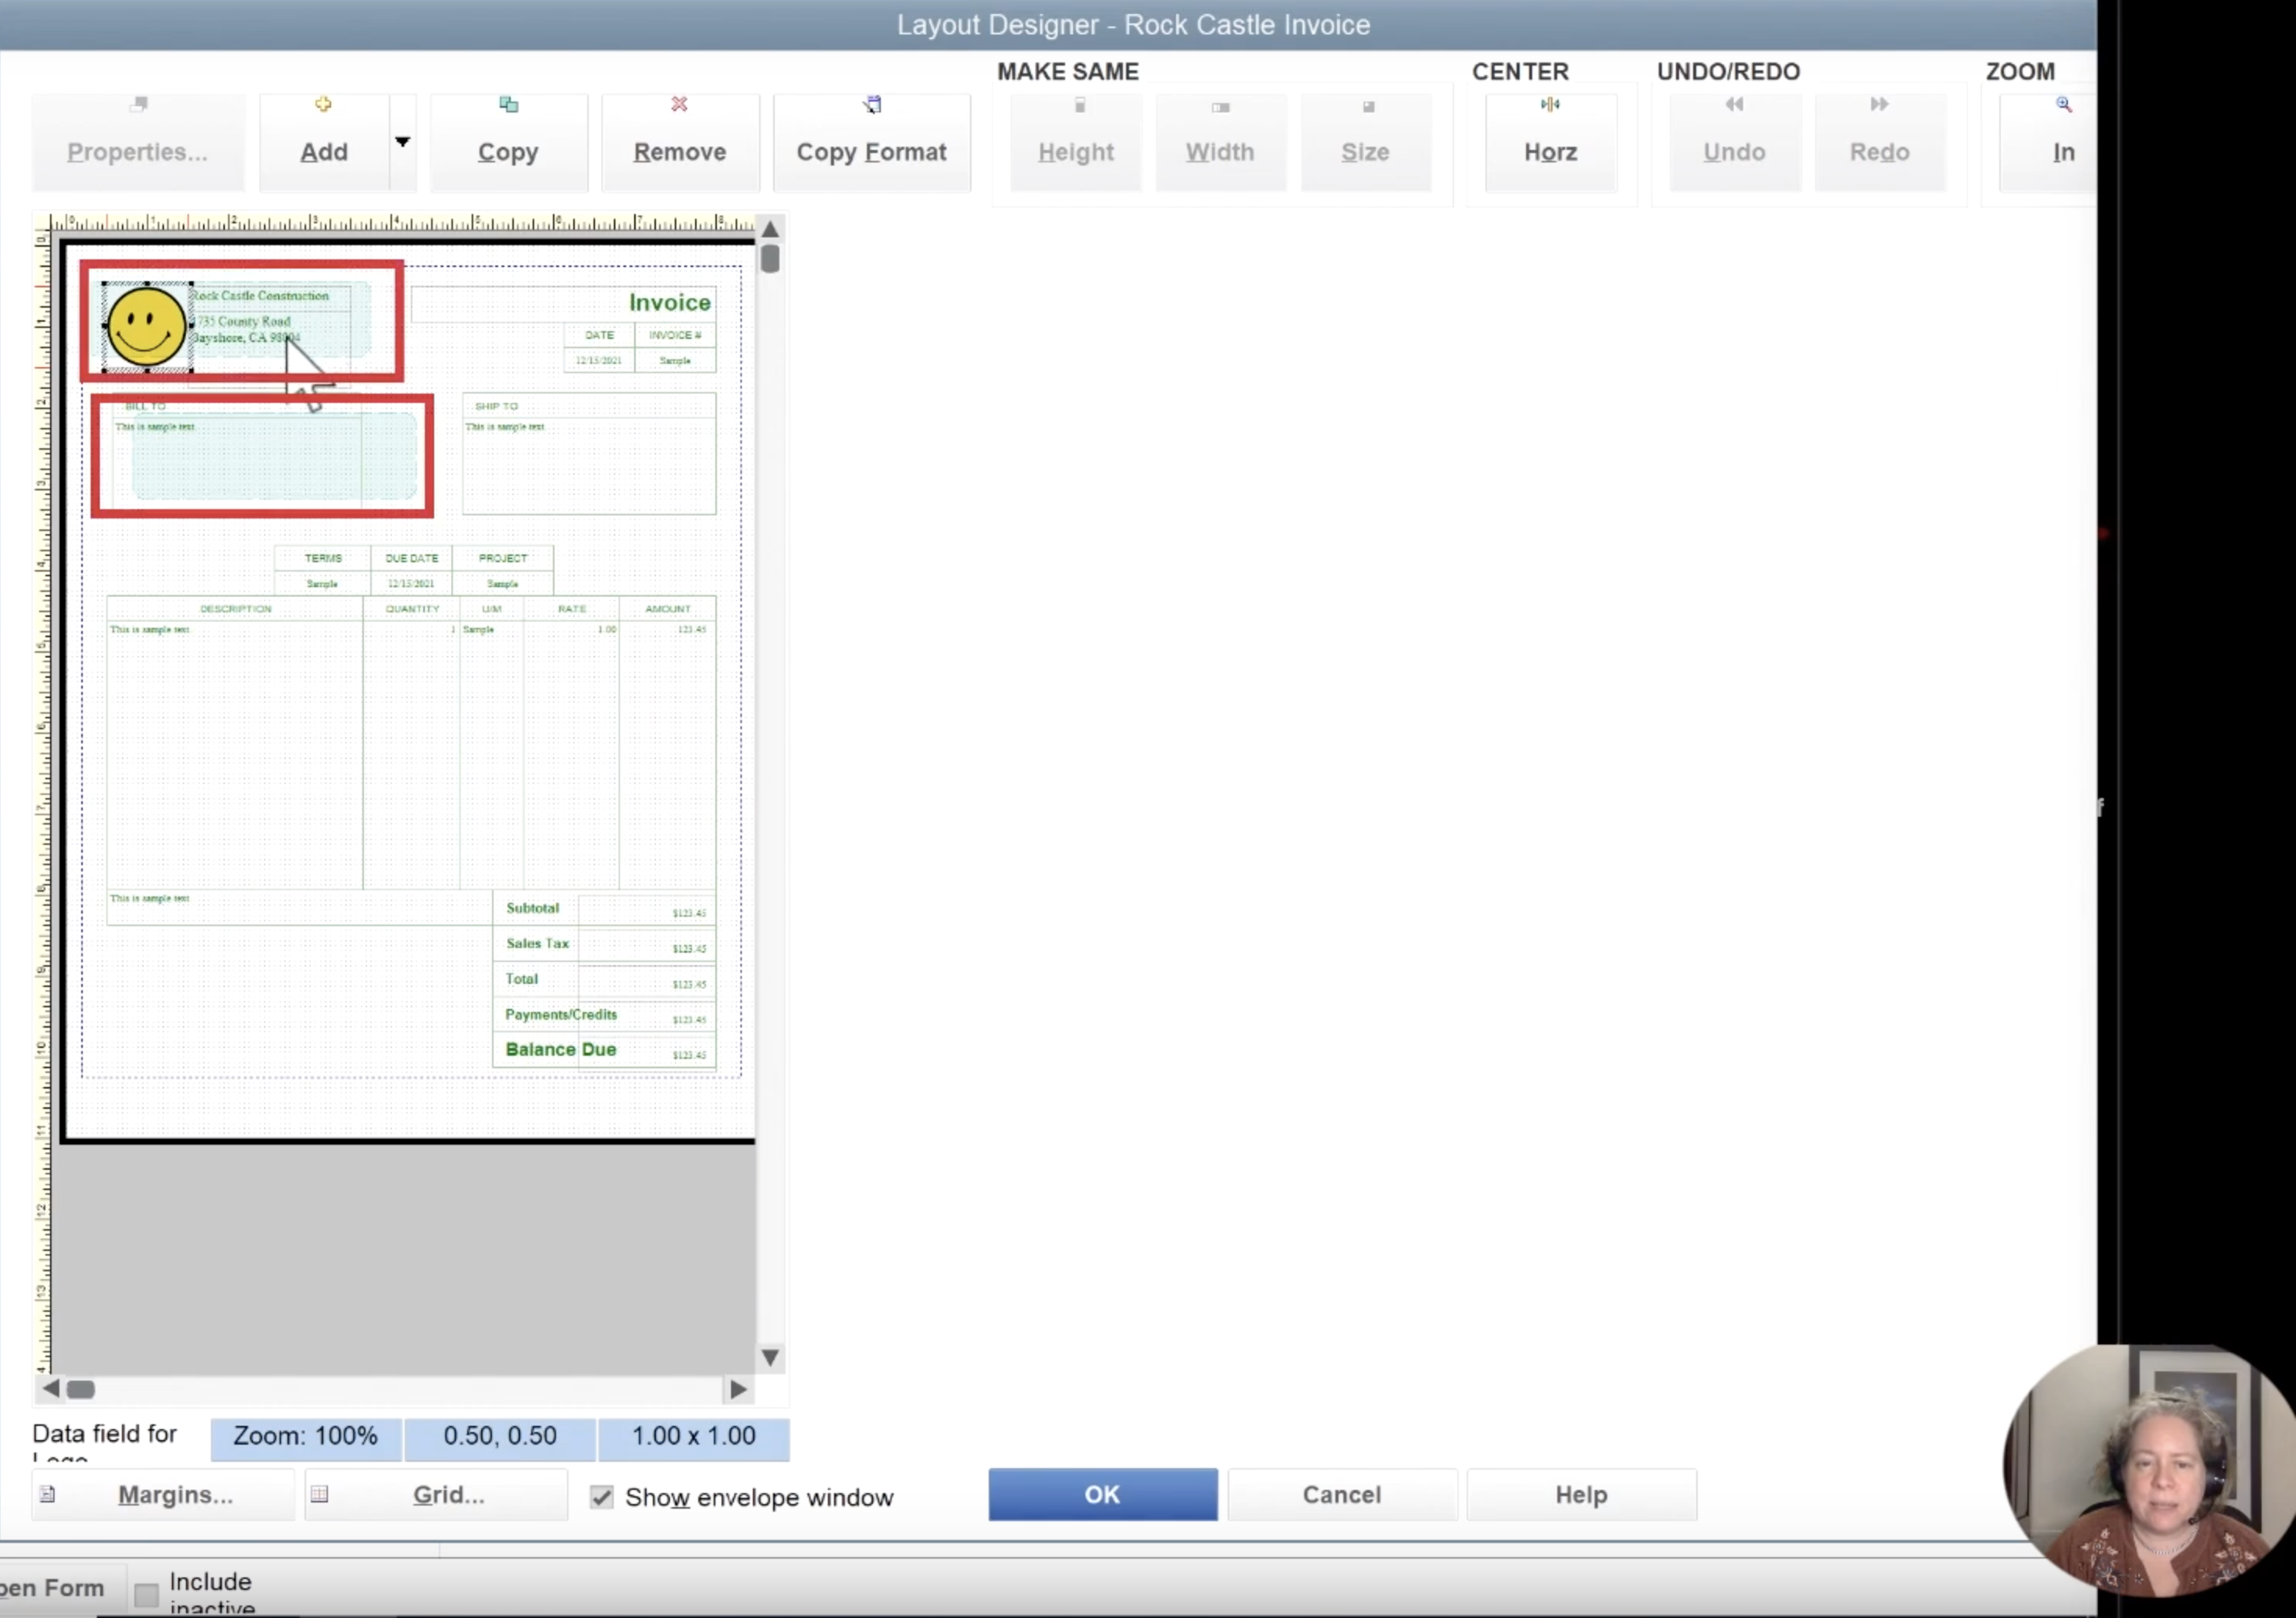
Now let’s say we wanted to rearrange some of the components of this invoice. Pieces that have a box around it, like “Due Date,” “Terms,” etc., can all be dragged and dropped to the location you choose.
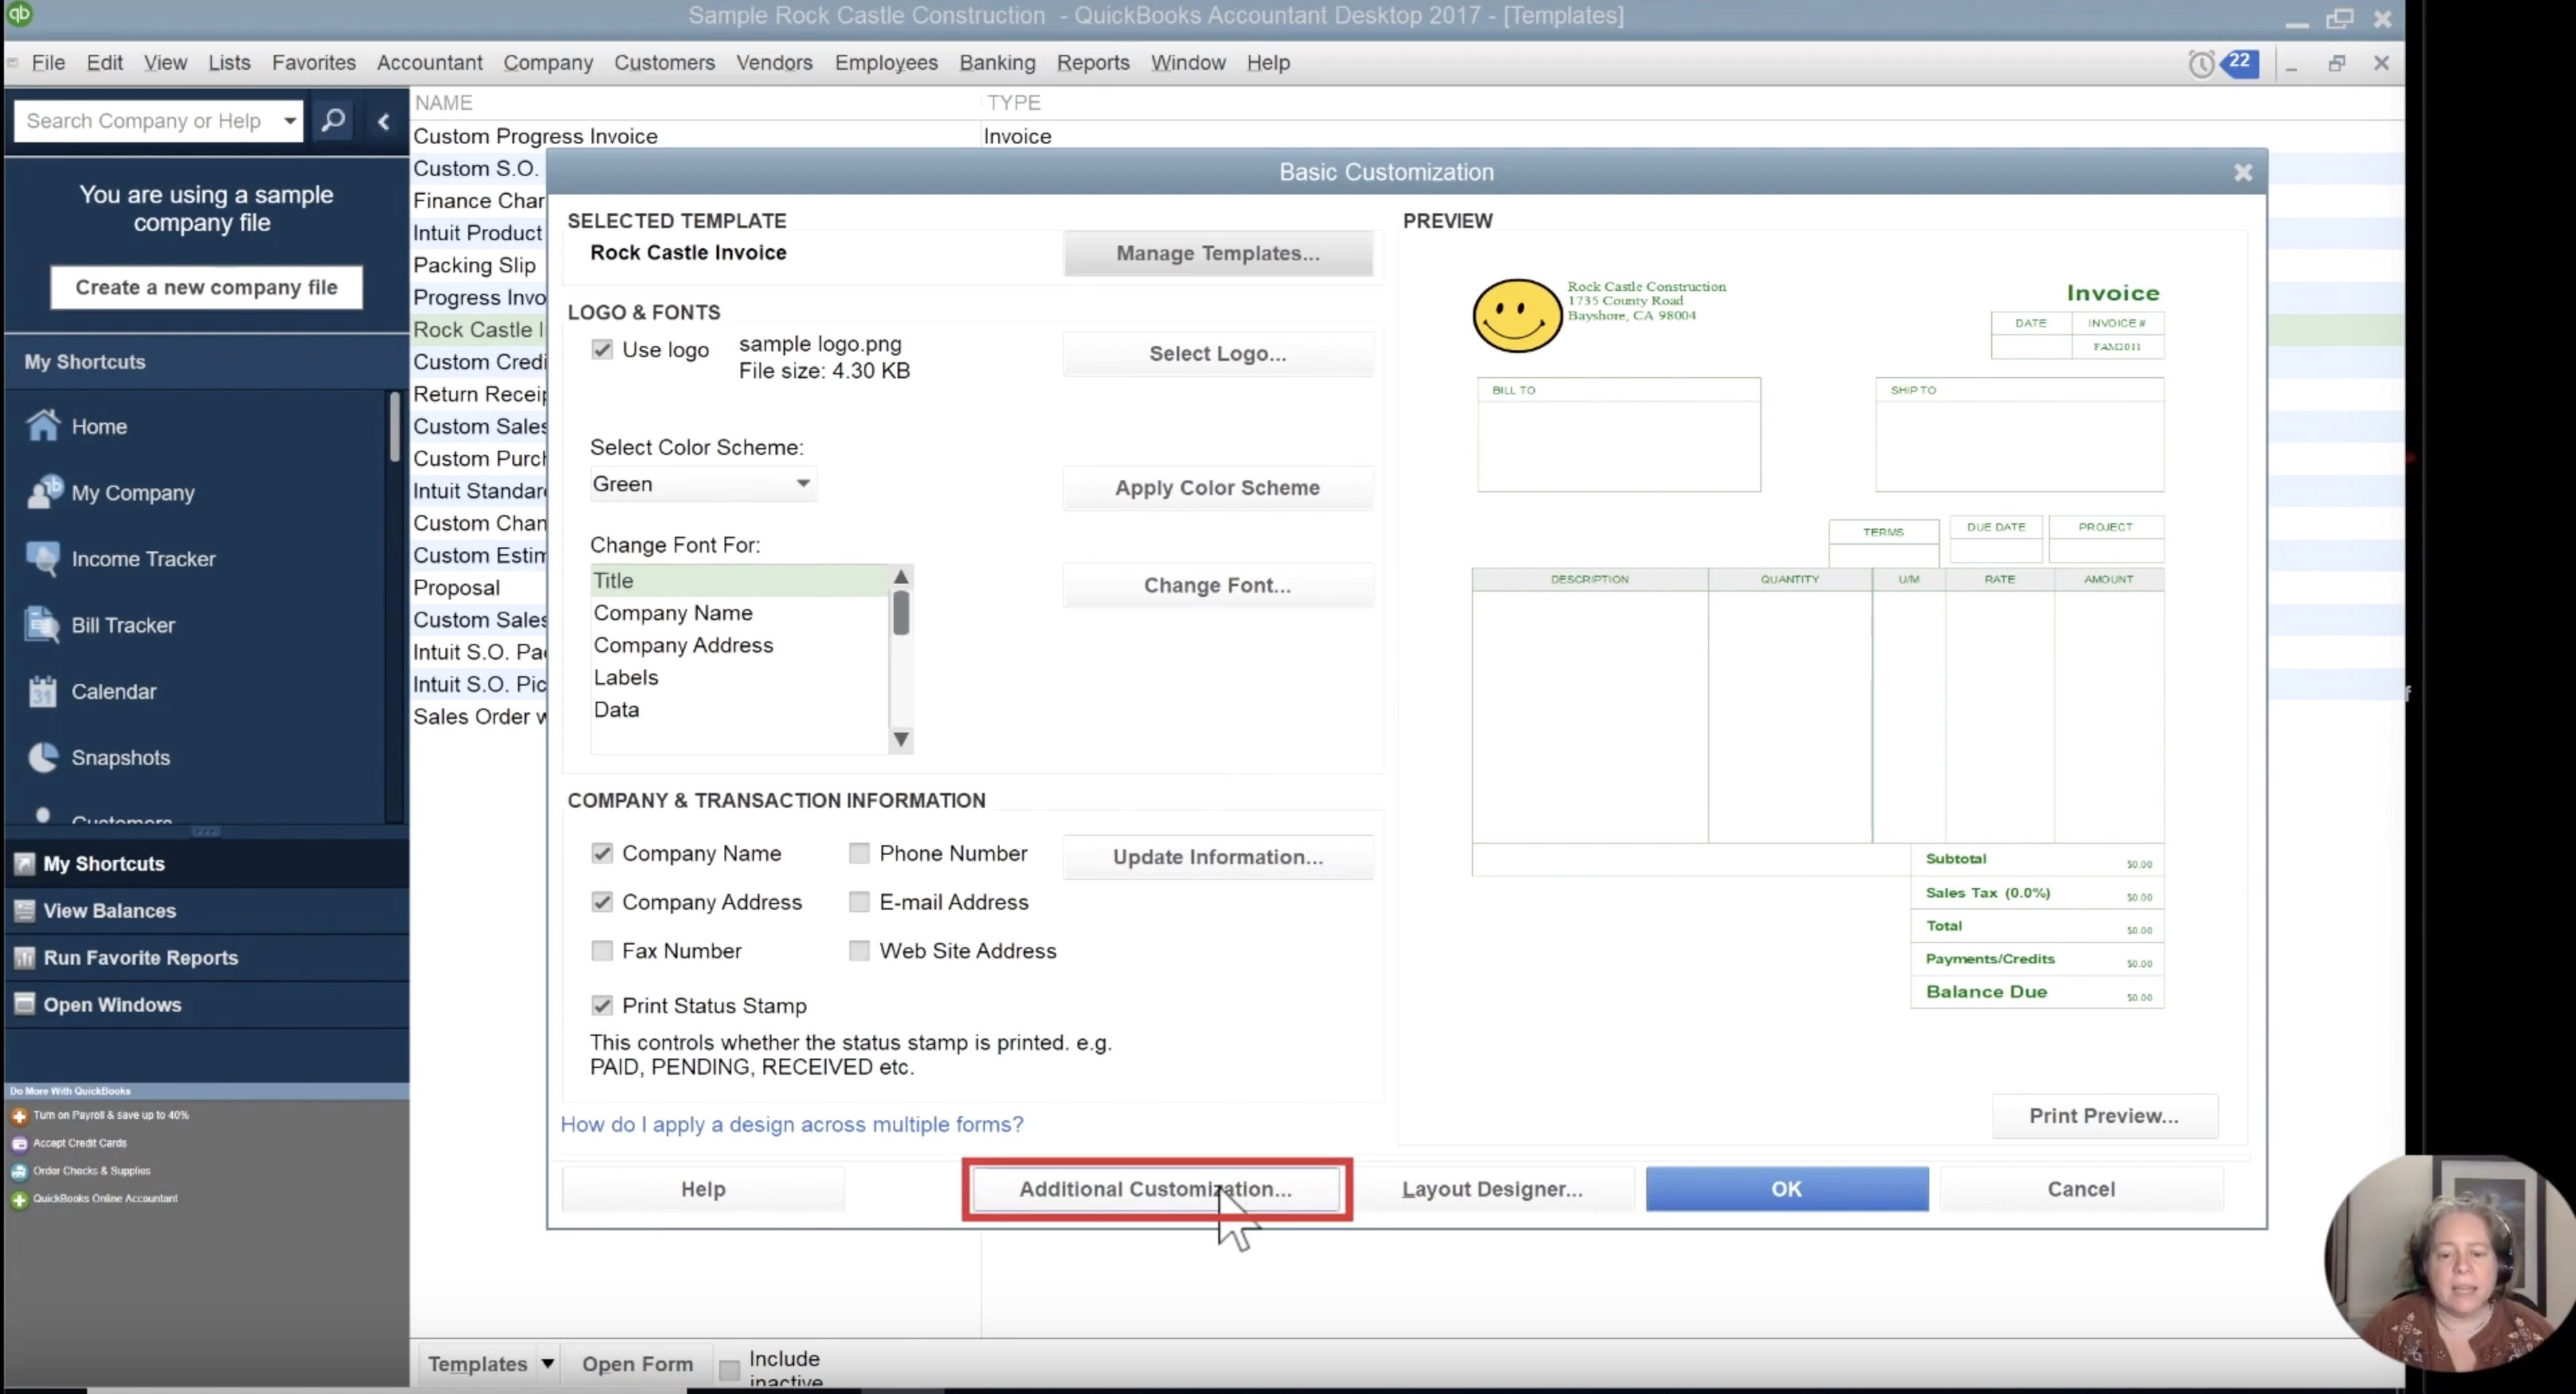
The next step in customizing the layout is to go back to your Basic Customization Screen by clicking “Okay” or “Cancel” on the Layout Designer. Once you’re at the next screen, click the button just adjacent to the Layout Designer. That button is labeled “Additional Customization.”
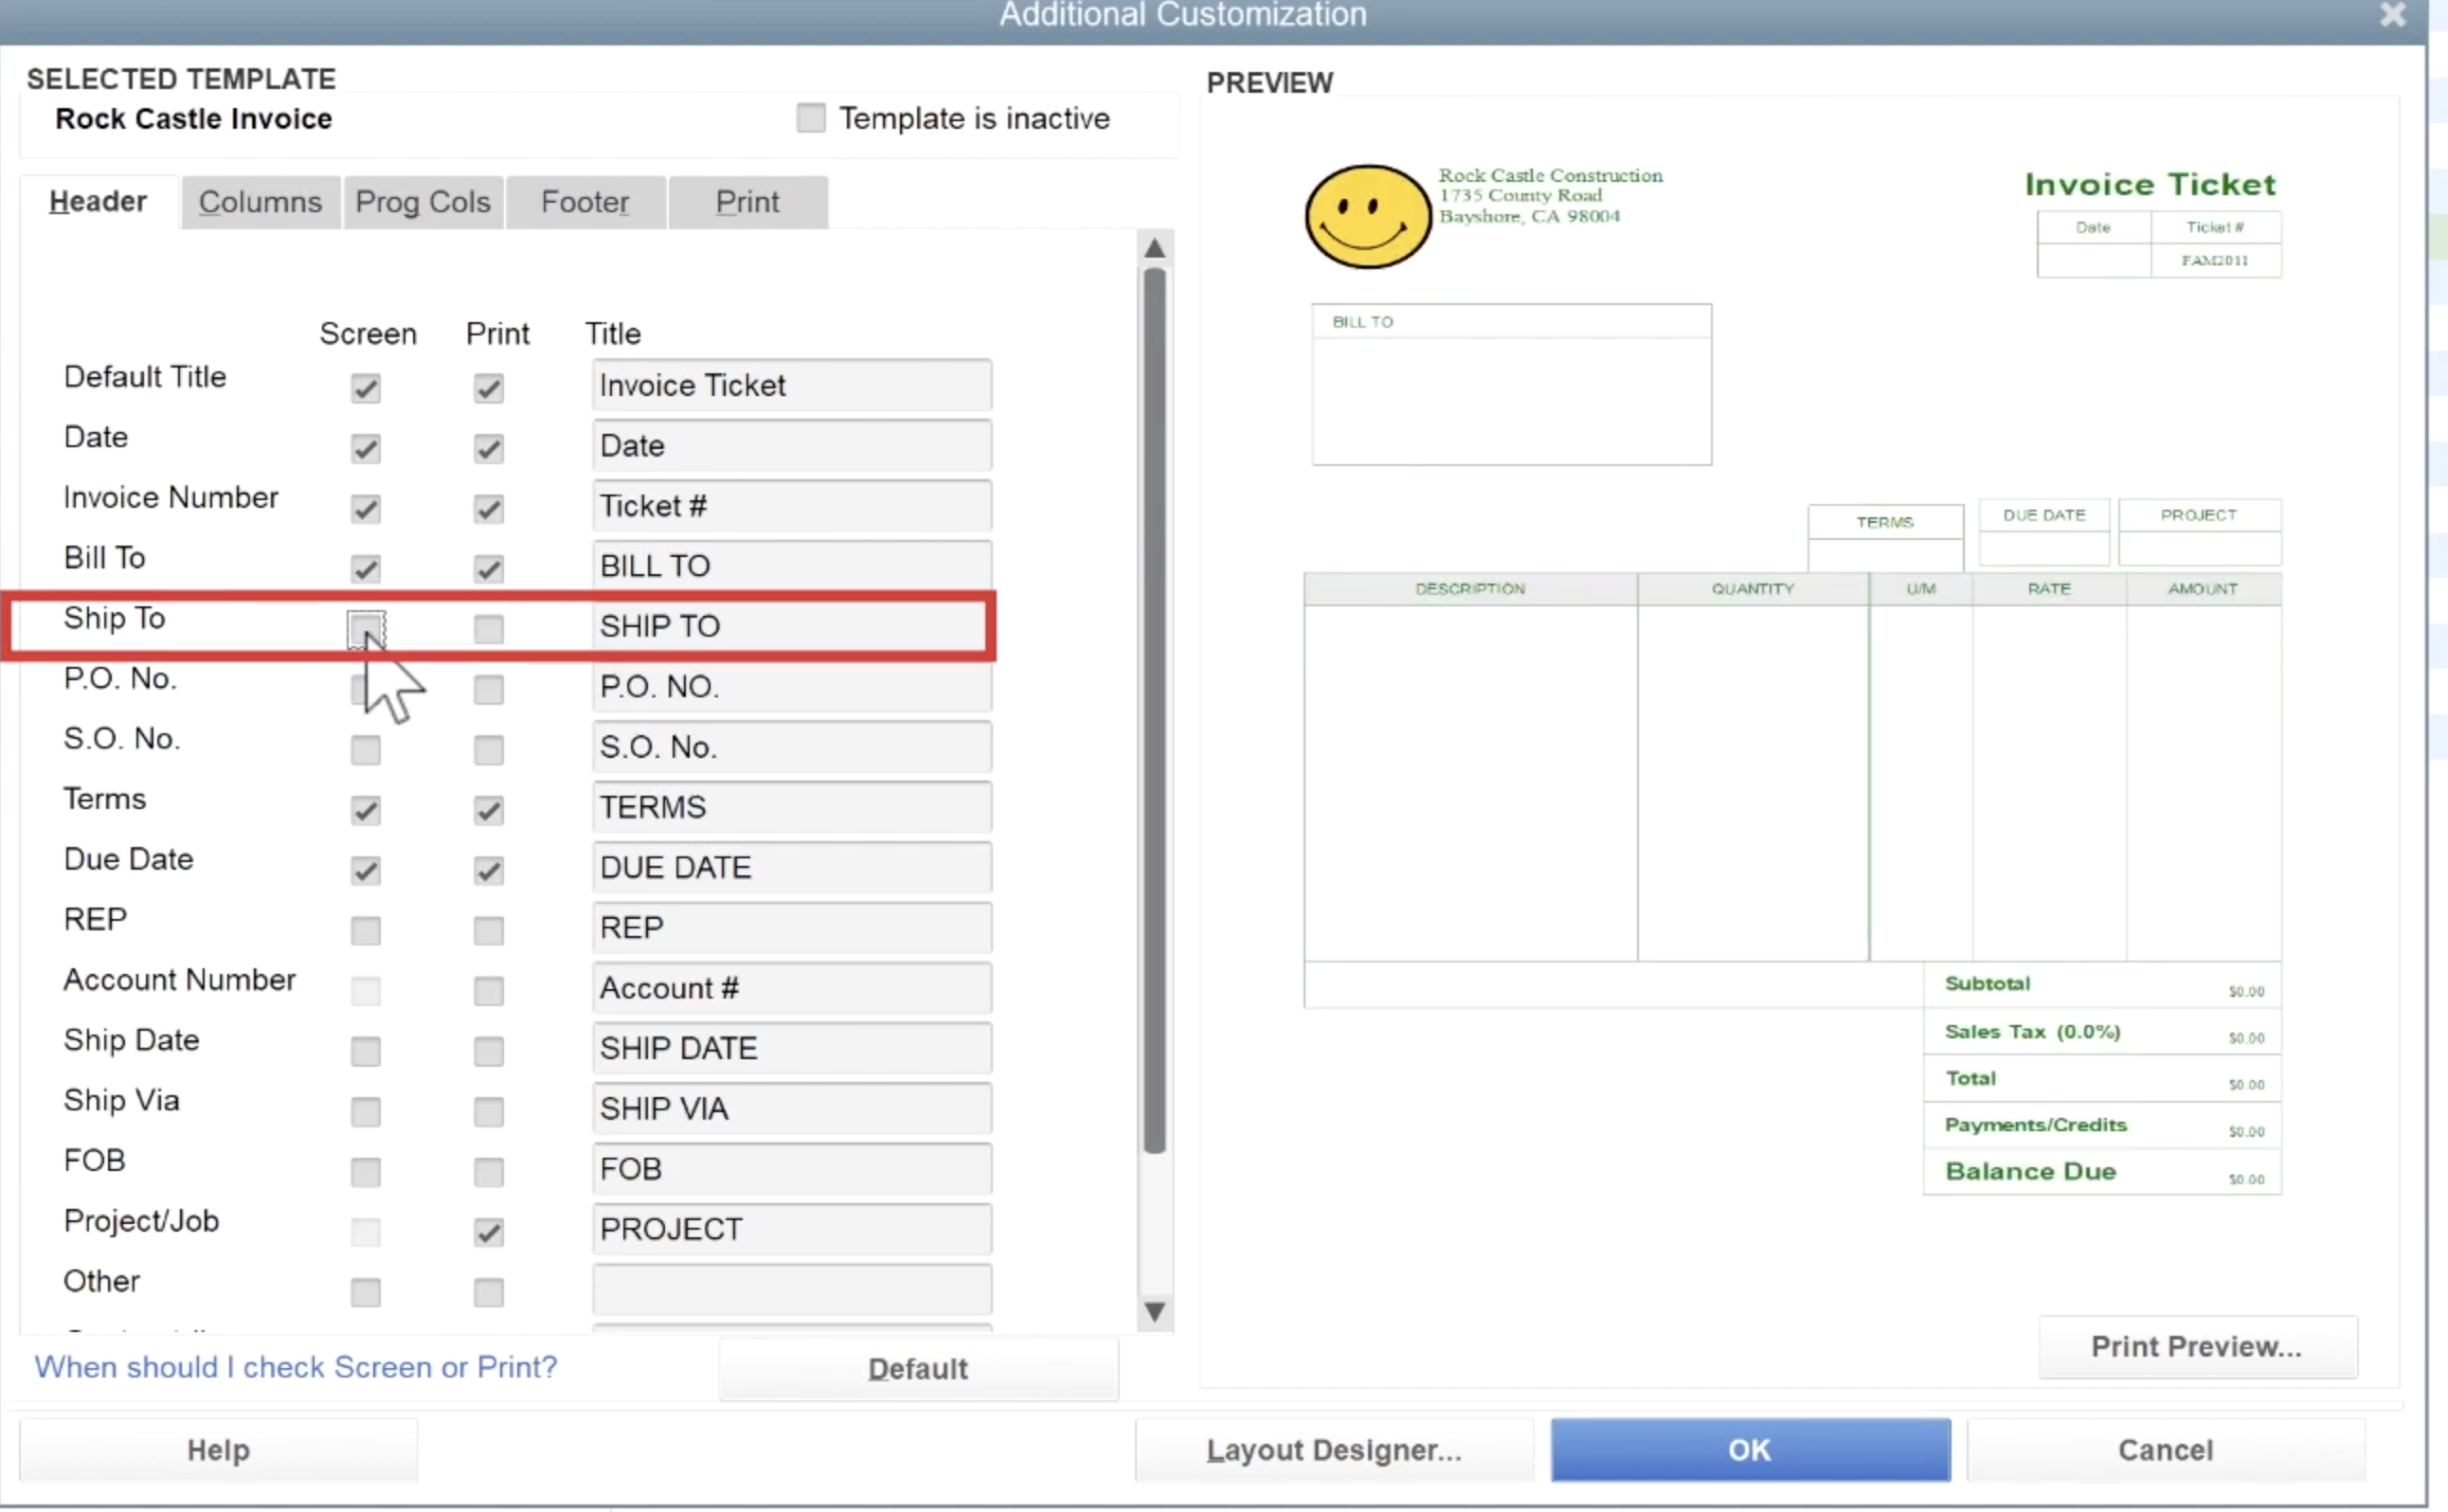
On the Additional customization, we’ll see several rows with corresponding text. The first row is labeled Default Title, and in the title is the user inputted field of Invoice Ticket. If we changed the coded field to something like Customer Invoice, the preview on the right-hand column would update and replace that text. The same goes for each row seen.
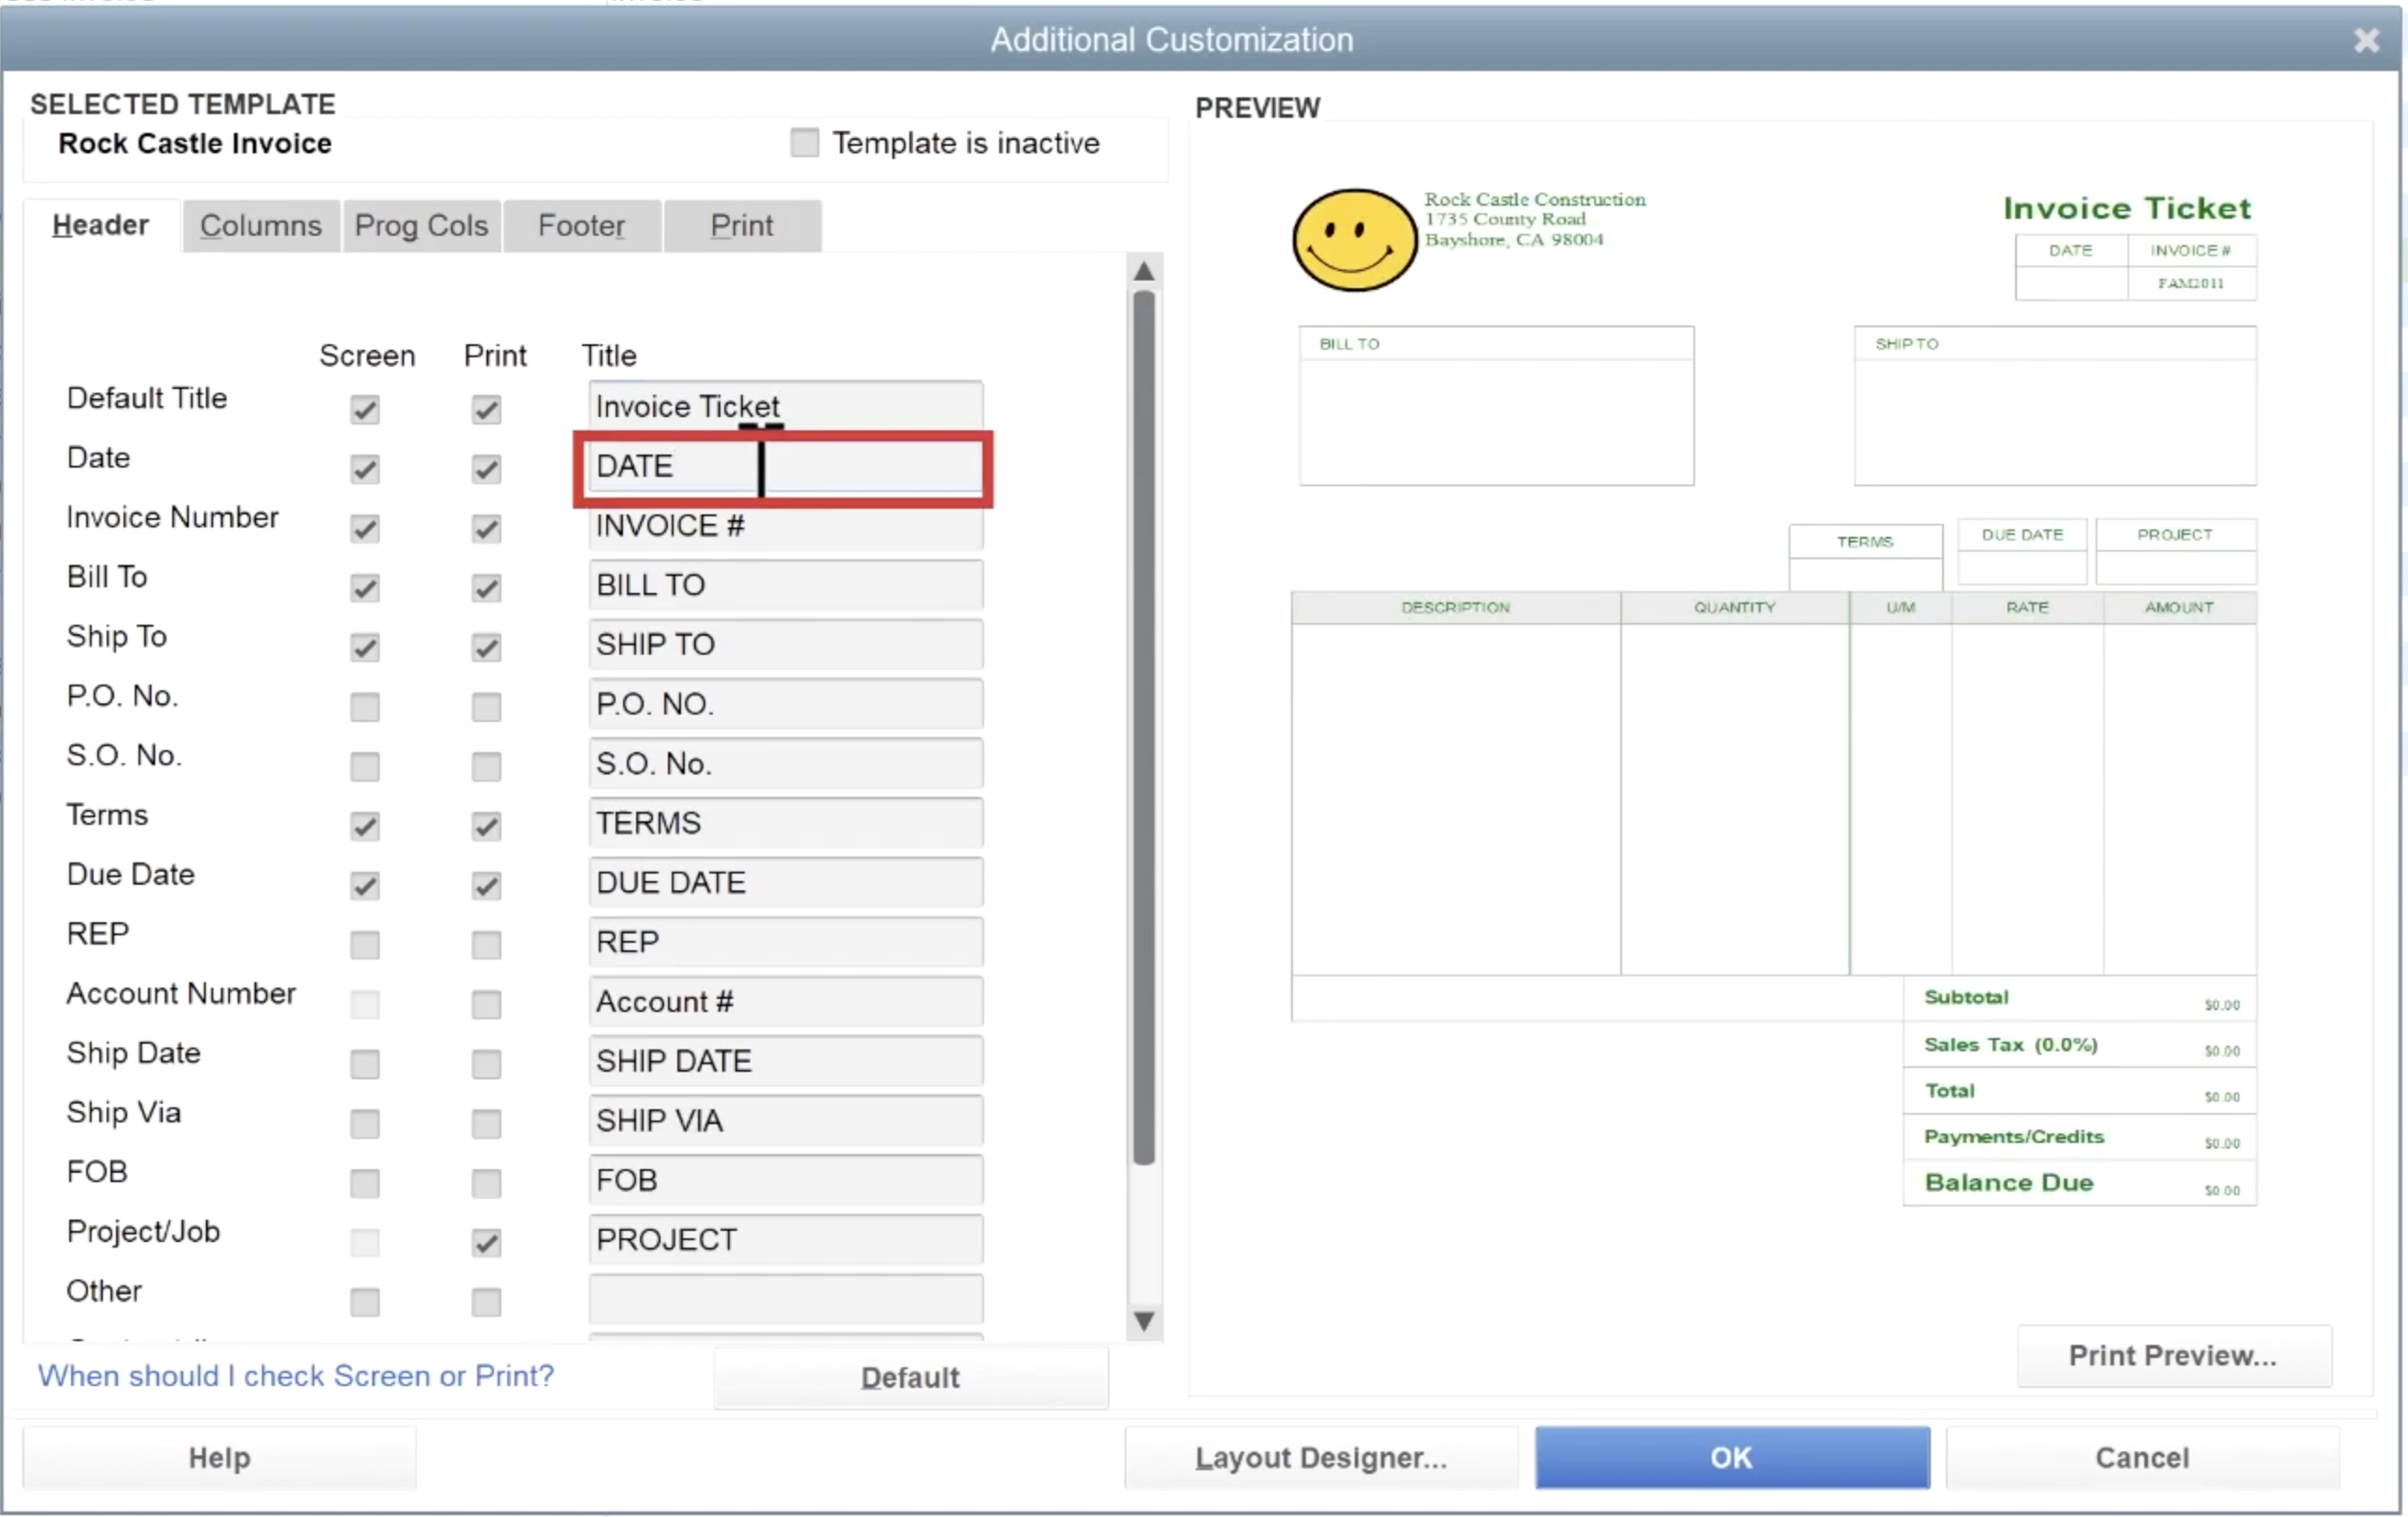
If you wanted to eliminate the item from the invoice altogether, that is simple as well. Just uncheck Screen and Print, and those fields will not be included.
If you’re following along on your computer, you can see that the level of customization is far greater than can be covered in a blog post.
☕ If you found this helpful you can say “thanks” by buying me a coffee…
https://www.buymeacoffee.com/gentlefrog
If you would like to see a video tutorial on how to execute the steps mentioned above, please see the video below.