
The Chart of Accounts is a list of a company’s accounts. It’s used to organize the company’s financial transactions. Each account represents a specific type of asset, liability, equity, revenue, or expense.
In QuickBooks Online, you can easily add, edit, or remove accounts. This allows you to adjust things as your business grows.
There are two ways to add accounts to your chart of accounts. From within the chart of accounts. Or, when you’re categorizing your downloaded bank transactions.
The Chart of Accounts
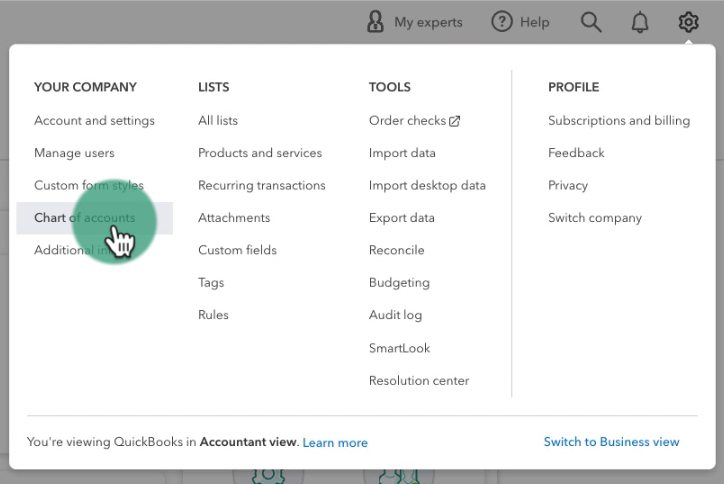
To get to the chart of accounts click the gear in the upper right corner of the screen.
Under YOUR COMPANY click on Chart of accounts.
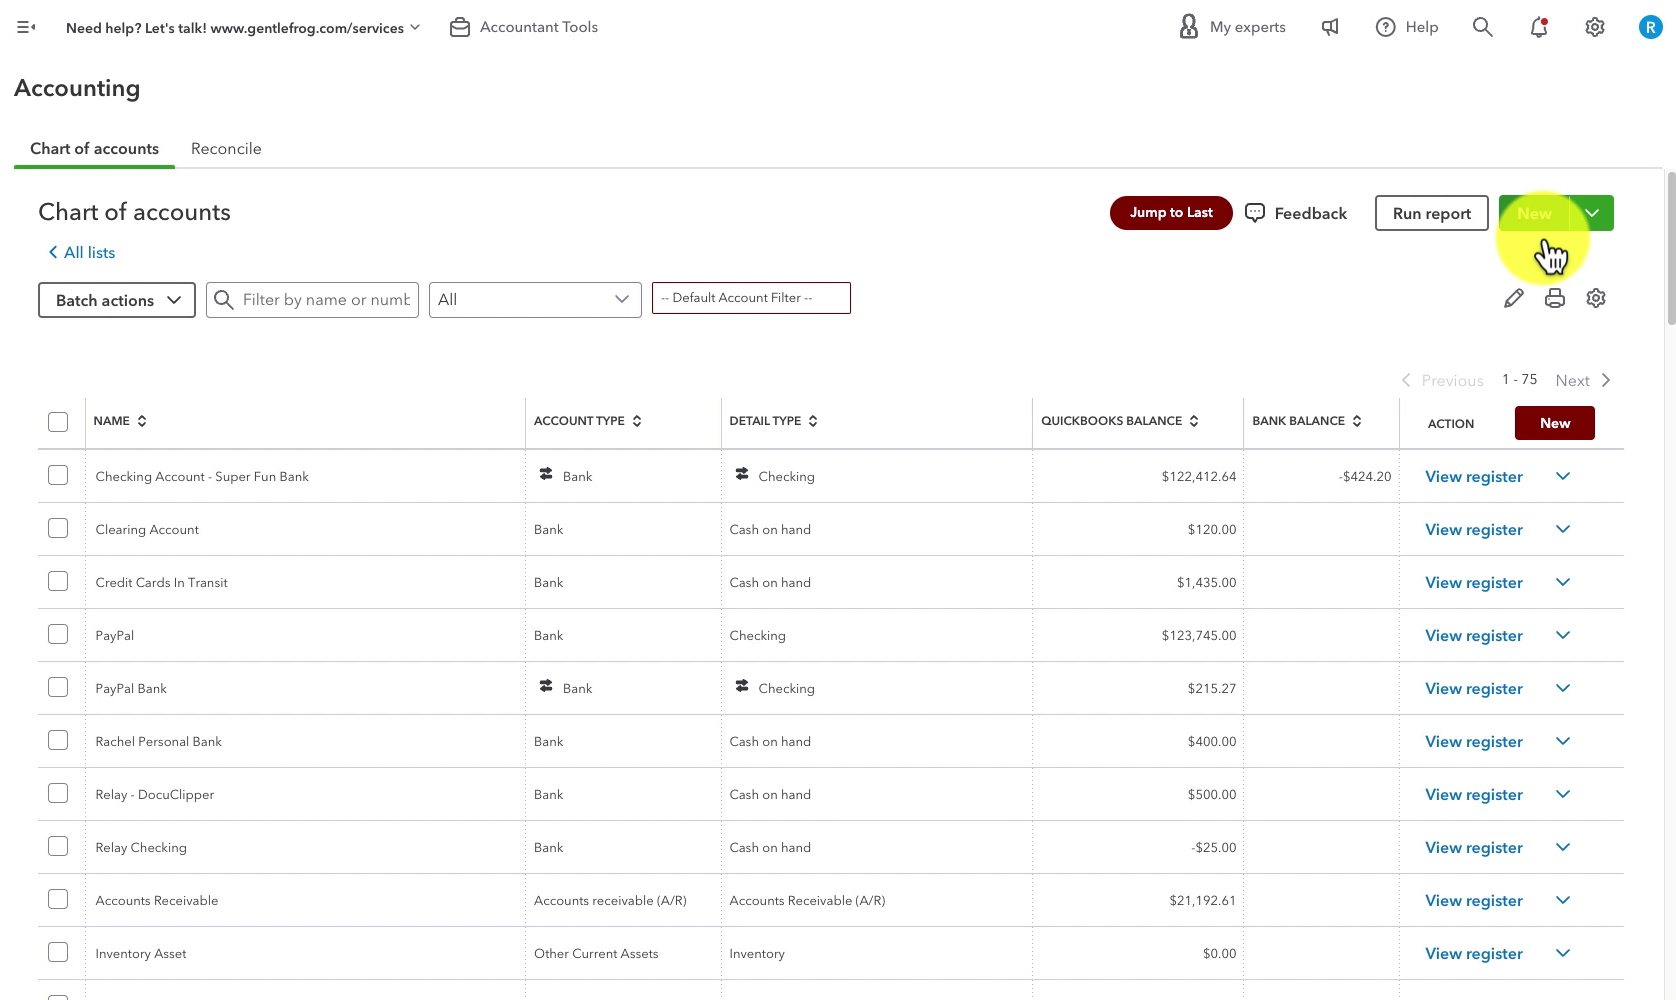
When you open the Chart of accounts you’ll see a list of your accounts.
To add a new account click the green New button to the upper-right.
New Account
Across the top of the New Account screen, you’ll see your options for the types of accounts you can create:
- Income
- Expense
- Banks
- Assets
- Credit cards
- Liabilities
- Equity
Let’s go through each one individually.
*A note on Tax form section. Each account type has a file for Tax form section. The information for this section says “Your accountant can use the tax form line to help you fill out tax forms.”
I strongly recommend you outsource your taxes to a professional. Your tax professional is not going to trust that you picked the correct accounts. I do not spend time trying to find the right tax form selection and always pick the first one on the list. It makes no difference when running reports.
Income
When you select an account type you’ll see a NEW ACCOUNT PREVIEW. This shows you where on the Profit and Loss your new account will appear.
When you begin it will show you all the accounts you currently have for that category. Here you can see all the income accounts for my sample company:
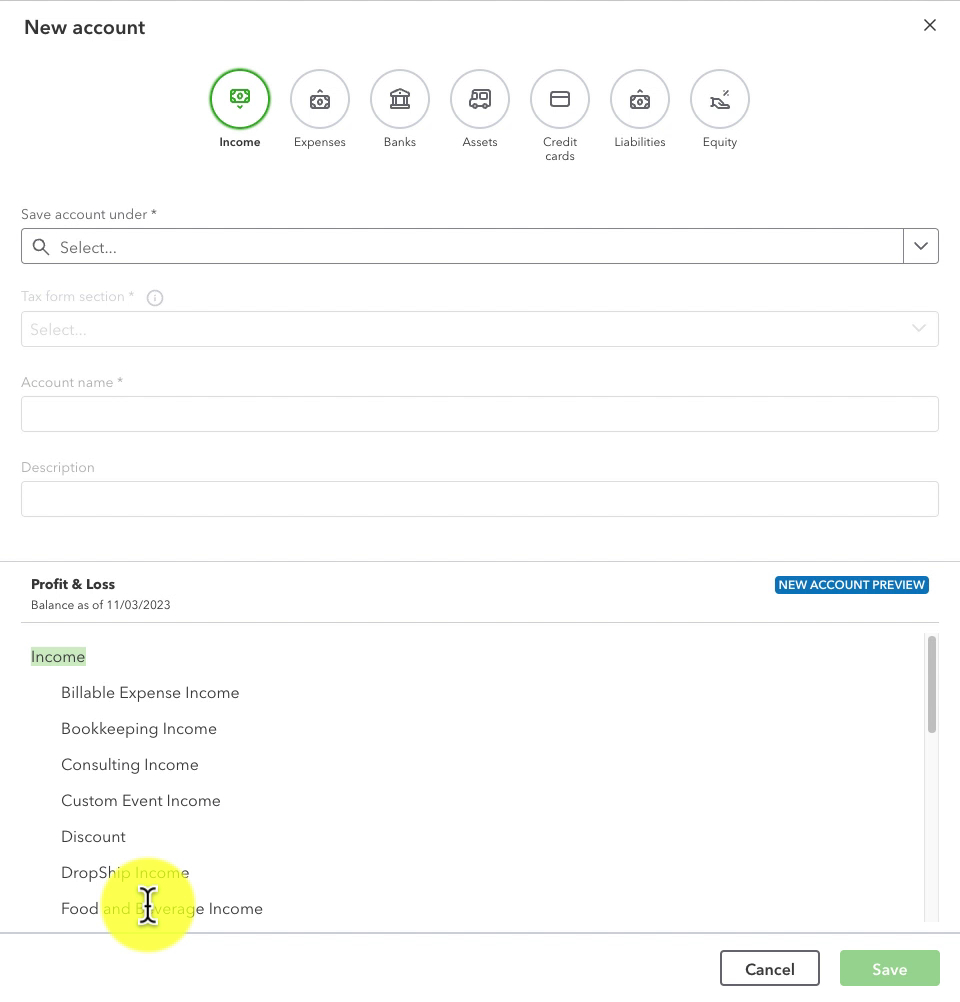
The first field you need to fill in is Save account under.
If you choose Income it will appear alphabetically in your list of income accounts. If you select a different account it will appear underneath that account, as a sub-account.
Here is an example of an account I’ve named Income Demo and saved under Bookkeeping Income:
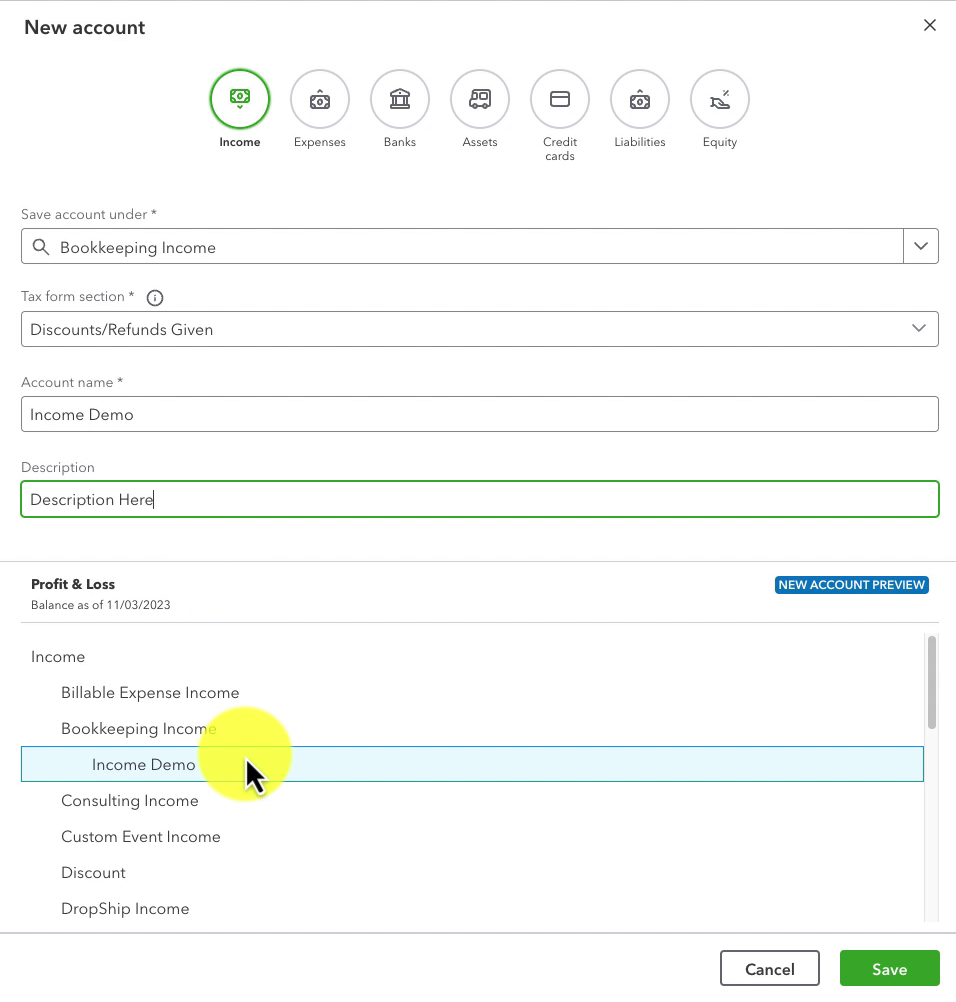
I entered “Description Here” in the Description field and that does not show up in the preview.
The only place you’ll see the account description is right here. When you’re looking at the account setup. I have been training people to use QuickBooks for many years. Only one person wanted a custom report with a description column. In real life, I don’t spend any time adding a description because I never look at it.
When you’ve finished filling out your account information click the green Save button.
Expense
Creating an expense account is almost identical to creating an income account.
However, expenses have three different “top-level” account types:
- Cost of Goods Sold – (COGS) Includes expenses for producing goods/services. These expenses are directly related to the products your business sells.
- Expenses – (OPEX) This is for Operating Expenses covering the day-to-day operations of your business.
- Other Expenses – This is where you put anything that doesn’t fit the other two categories.
If you’d like to understand the differences between COGS and OPEX better I suggest reading the Investopedia article “How Operating Expenses and Cost of Goods Sold Differ?“
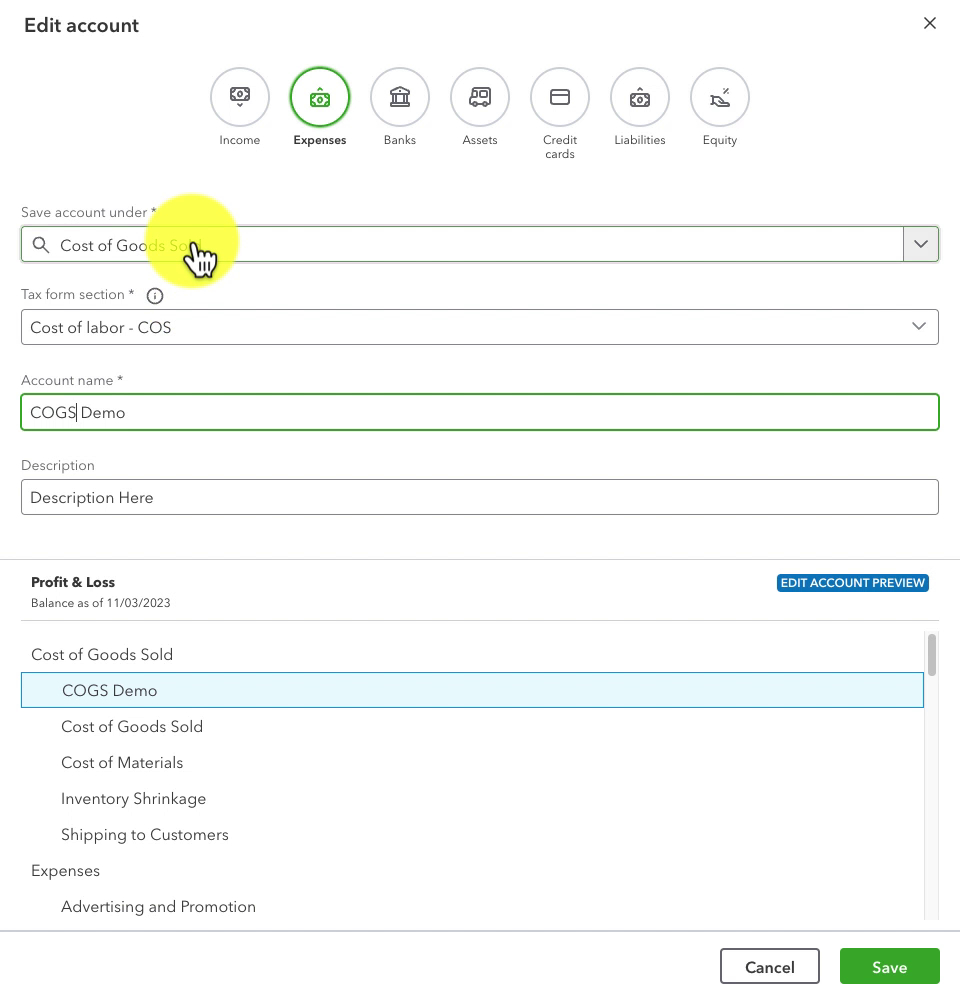
Everything else in the Expense account creation is the same as Income. The preview will update based on your selection in Save account under. It shows where your account will appear in the Profit & Loss.
Here is an example Cost of Goods Sold account called COGS Demo:
Banks
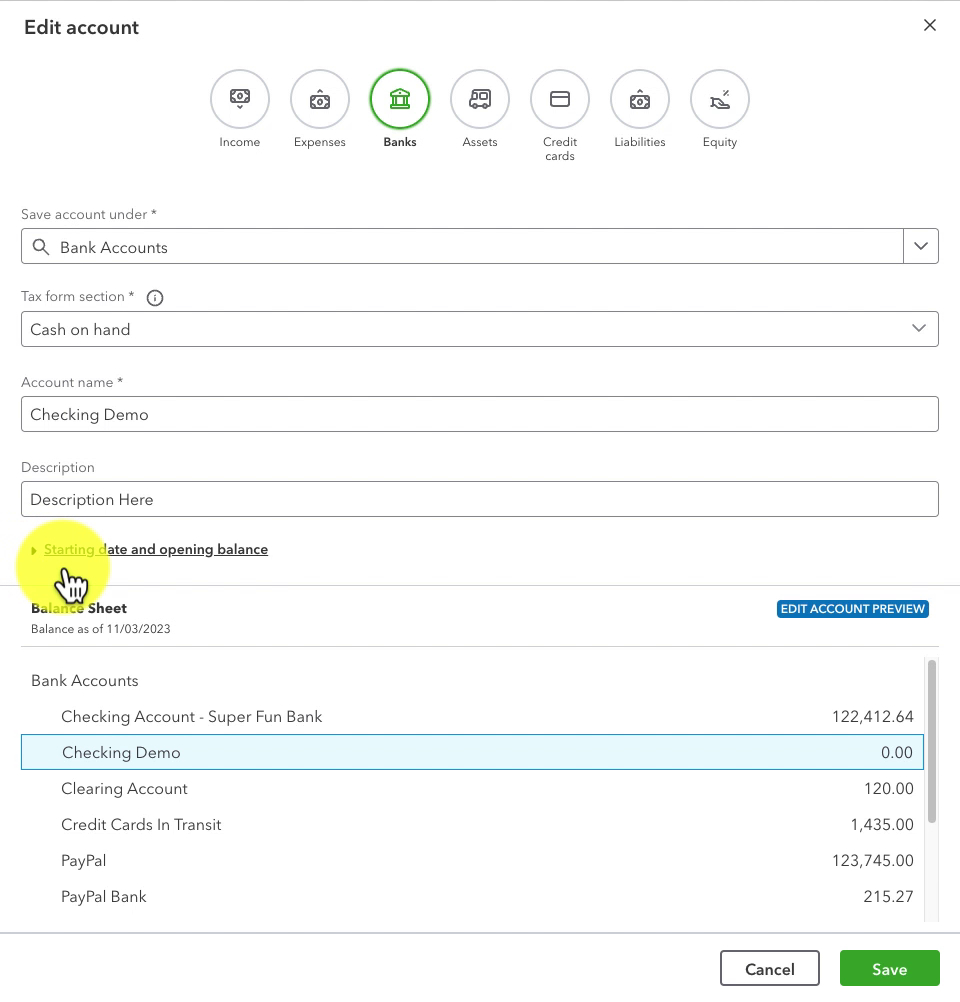
You have the option to Save account under the top-level Bank Accounts or a previously created bank account.
Personally, I never create sub-accounts of bank accounts. I know a lot of people do, I just prefer each bank account as its own separate account.
When adding a Bank I like to include the name of the bank, the type of account (checking, savings, etc.), and the last four digits of the account number.
Here is an example of a Bank Account called Checking Demo:
Assets
Your options for the top-level asset types include:
- Accounts Receivable – Money clients owe the business. I would not add an account to Accounts Receivable. There are very specific use cases for this but it’s rare.
- Other Current Assets – Assets that could be liquidated or expected to be liquidated within a year. For example, inventory.
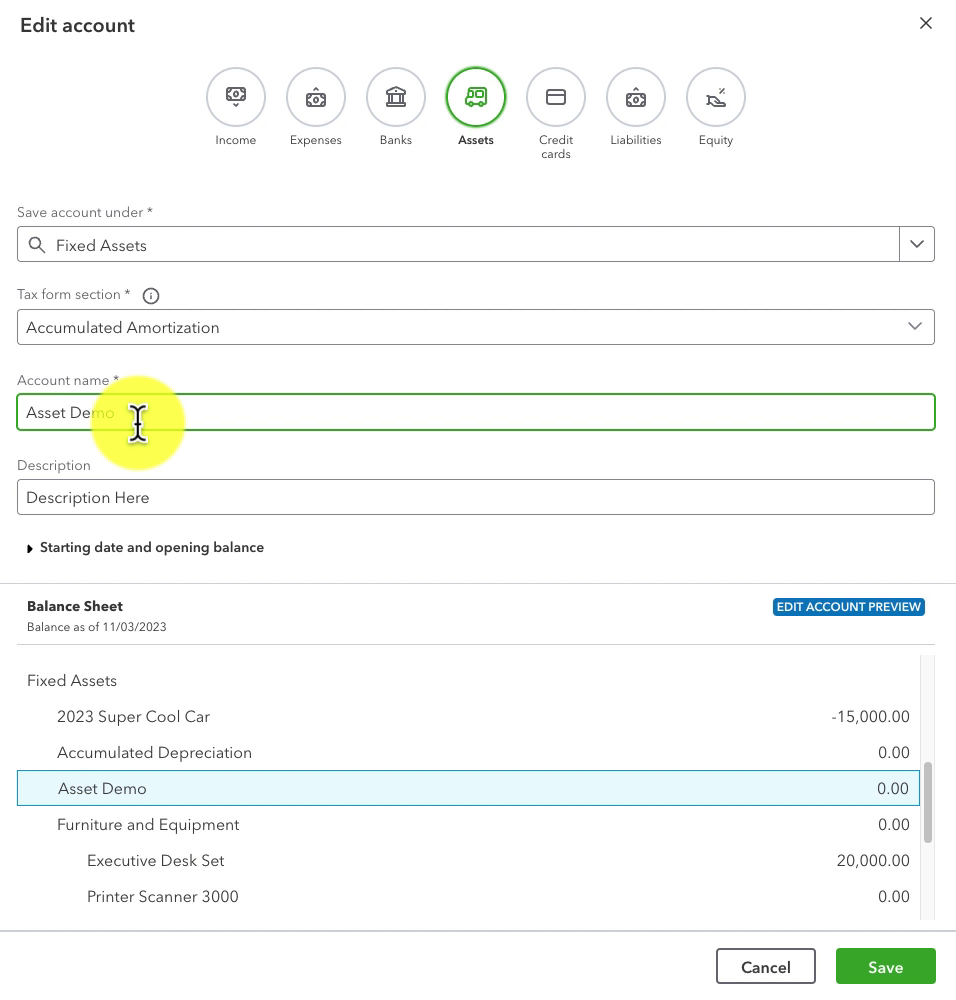
- Fixed Assets – Tangible assets that cost more than $1k-2k. Your tax person will inform you of the threshold. These assets are owned for more than a year For example, vehicles/equipment, computers, office furniture, etc.
- Other Assets – Include patents, copyrights, loans to employees, and more. Any asset that doesn’t fall into the other categories.
When naming assets, use clear names to avoid confusing your tax preparer.
DO NOT name the account for a vehicle Company Car. Instead, include the year, a brief description (make and model are great), and the last 4 digits of the VIN.
This is a time when you may want to use the Description field to add a little more detail. For example, the full make/model/part number for a printer, or piece of equipment.
Everything else for assets is the same as creating an invoice/expense.
Here is an example Fixed Asset account called Asset Demo:
Credit Cards
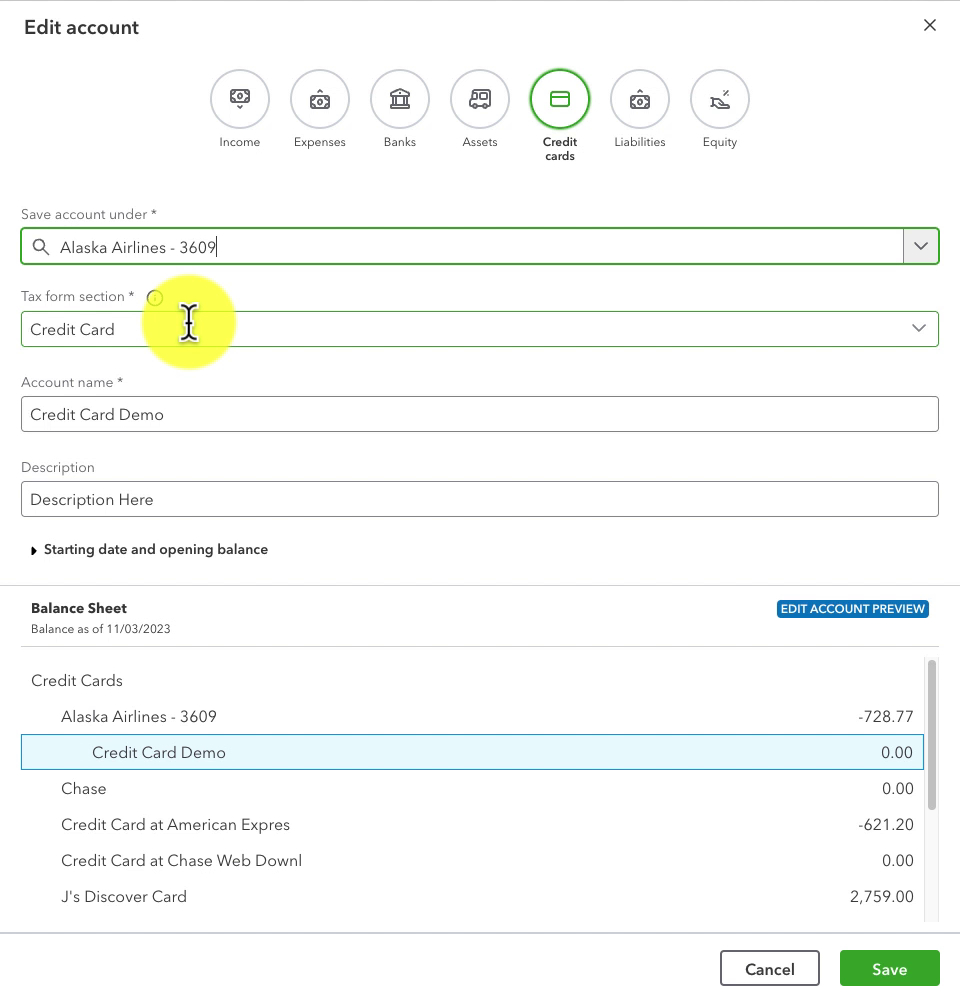
You have the option to create an account under Credit Cards. Or, as a sub-account of an existing credit card.
If your business has a corporate credit card, you can set it up with each cardholder account as a separate main-level account. Or you might have them as sub-accounts of the main card.
I prefer main-level accounts, but some bookkeepers prefer sub-accounts.
For naming convention, I suggest using the bank/company the card is with and the last four digits of the card number.
Quick tip: Your debit card is part of your checking account, it is not a credit card.
Here is an example Credit Card account called Credit Card Demo. It’s a sub-account of Alaska Airlines 2609:
Liabilities
Your options for the top-level liability types include:
- Accounts Payable – Short-term money owed usually to vendors or supplies. Do not put any accounts under Accounts Payable.
- Other Current Liabilities – Money that the business owes that is likely to be paid back in less than a year. This can include taxes due, dividends payable, tips collected, etc.
- Long Term Liabilities – Money that the business owes that is likely to be paid back in more than a year. This includes long-term loans.
Equity
Equity is money owed to shareholders or the business owner. It only has one top-level account type.
These accounts have specific terms, such as Shareholders Contribution or Shareholders Draw. If you’re doing your own bookkeeping don’t sweat it. Use whatever name makes sense to you. You can always update it later if your tax preparer suggests a different name.
Banking
When working with your downloaded banking, you may find transactions that don’t match any of your current accounts in your chart of accounts.
From within the transaction at the top of the Account drop-down you’ll see + Add new account.
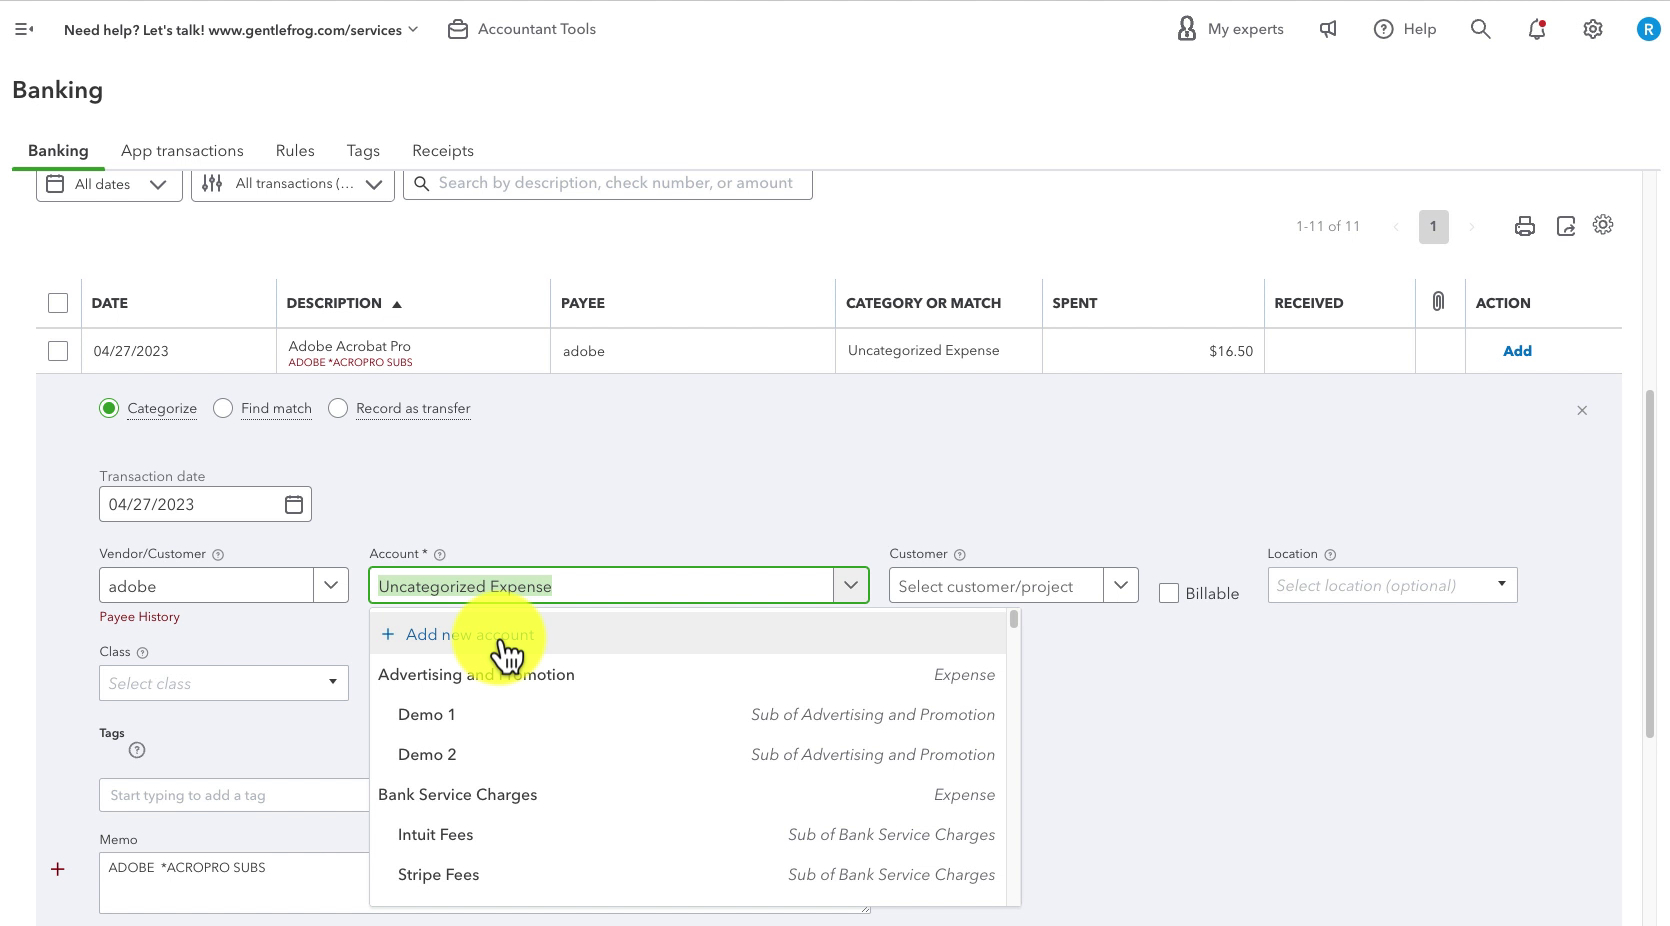
When you click that a pop-up will appear where you can add a new account. It looks completely different from what you see when adding accounts within the chart of accounts.
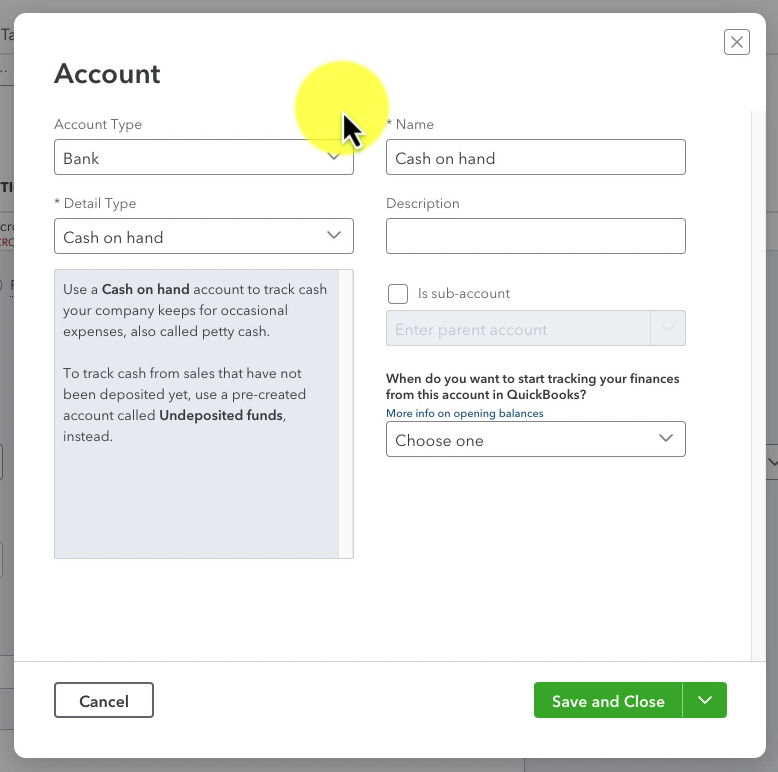
- Account Type – This drop-down is a list of the top-level accounts. We have already reviewed each type.
- Detail Type – The same as the Tax form section. I don’t touch this, I leave it as the default.
- Name – The name you’ll give your new account. Remember to keep it descriptive enough that you know at a glance what the account is for.
- Description – Not necessary, but can be used to add additional information.
- is sub-account – By checking this box, you’ll see a drop-down menu. The menu shows all the sub-accounts under the top-level account you’ve chosen. The account you’re creating will be a sub-account of whichever account you select.
You now know how to add accounts to your chart of accounts in QuickBooks Online, two different ways.
☕ If you found this helpful you can say “thanks” by buying me a coffee… https://www.buymeacoffee.com/gentlefrog
If you have questions about the chart of accounts in QuickBooks Online click the green button below to schedule a free consultation.